To avoid these ads, REGISTER NOW!

My 40x48 “do it all” shop build

jmlcolorado

Well-known member
Joined
Sep 23, 2009
Messages
794
Location
Elbert County, CO
I’ve been in the construction industry for many years. Started as a skilled laborer building log homes. Then onto working forman on a handful of semi-customs. Both of those guys went belly up due to doing (or not doing) things the law requires.
Ended up finding a guy at a local gas station and hooked up with him doing pole barns, fences, finished basements. I learned a ton from him and am still friends with him today.
I then got into Insurance restoration as a “carpenter”, then moved up to assistant project manager. Left that company and went to another restoration company as a senior project manager.
Needlesss to say, I’ve seen a lot of plans. Built off a lot of plans. But have never had any plans of my own.
This building marks that accomplishment. A set of plans with my own name on them.
It’s not a a custom home or naything super fancy, but it’s mine.

This shop will be my place to do whatever I need. I’ve buiot a few motorcycles over the years. A hot rod, and I can’t even remember the last time I paid a shop to do anything on my vehicles. I love to tinker and would like to get into more woodworking. I’d love to get into building industrial style furniture and light fixtures. Things of that nature.
This shop is setup on my property to be close to the house (so the family can chase me down when needed), provide covered parking, and a toasty heated workplace for my to decompress in.

The goal is standard pole building, with reinforced 5” slab with 2 larger “footers” to support a lift. Ceilings will only be 14’ tall but the hope is cutting down on the height as much as possibility to help keep heat load to a minimum.
I will be spray foaming the walls at the very least, and if funds allow, the lid as well. The building will have its own 500 gallon propane tank and hopefully it’s own electric meter.
I want a lift in one bay while leaving the other bay open. A small loft will be built on the back wall to allow for some storage above (even though head room will be about 6’ up there).
I will be having my hvac buddy run a load calc on the building to see what I’ll need for heat. I will be utilizing radiant tube heaters, however long and however many needed to keep it warm in the colorado winters.

I’ve made a video on YouTube showing my initial layout of the tools I currently have, as well as a couple I’d like in the very near future.

The building is currently in plan review with the county and hope to get materials ordered soon.
Since I’m on t budget, it will be a slow build. I’ll get the buildings erected ASAP, and concrete as soon as I can, it the rest will be slow going.
I know the general rule is to not move ANYTHING in until the interior is completed, but I’m not sure I can manage that. I can’t keep trying to work out of the house 2 car garage with the wife’s car occupying that space.
I made a fatal mistake when we moved into this house a couple years ago to let the wife park in the heated garage. Now she can’t live without her 70* toastyness to get into her car on cold mornings :lol:

I think I’ll be adding a similar sized enclosed lean-to on the right elevation to be used as the wood shop. My hopes is this will aid in keeping the main shop a little cleaner.

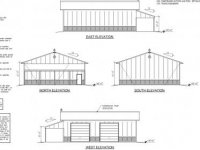
Plan photos attached.

Here’s the initial layout video I made.

I’ll keep the thread up to date as I make progress. I’d like to make a full timelapse cideo of the construction process.
 

Attachments

  • AF8E607E-2686-419A-823D-38AF4A21B0EE.jpg
    AF8E607E-2686-419A-823D-38AF4A21B0EE.jpg
    14.6 KB · Views: 219
  • FDEAE768-DDF2-46A1-B3F8-1D3981B9F28D.jpg
    FDEAE768-DDF2-46A1-B3F8-1D3981B9F28D.jpg
    18.8 KB · Views: 172
To avoid these ads, REGISTER NOW!

slimpickins

Well-known member
Joined
Mar 27, 2011
Messages
2,404
Location
Canada
Hi JM,

To make your pics appear "in line" in the text of your post, you need to use the BBCode link. There's two ways to do this.
1. Click the "Insert Picture" icon, (yellowish square with mountains) and then paste the url for the picture in your album, or on a 3rd party hosting site.

2. If you go to your user control panel and click on "Pictures and Albums" then click on the photo you want to use, there will be two boxes under the picture. One is the url, and the second is the BBCode version. Copy the BBCode version and paste that directly into your post and then preview the post. You should see the pictures.

In regard to your build, that's a nice size building. I look forward to seeing the progress.

Seasons greetings!
 
OP
J

jmlcolorado

Well-known member
Joined
Sep 23, 2009
Messages
794
Location
Elbert County, CO
Hi JM,

To make your pics appear "in line" in the text of your post, you need to use the BBCode link. There's two ways to do this.
1. Click the "Insert Picture" icon, (yellowish square with mountains) and then paste the url for the picture in your album, or on a 3rd party hosting site.

2. If you go to your user control panel and click on "Pictures and Albums" then click on the photo you want to use, there will be two boxes under the picture. One is the url, and the second is the BBCode version. Copy the BBCode version and paste that directly into your post and then preview the post. You should see the pictures.

In regard to your build, that's a nice size building. I look forward to seeing the progress.

Seasons greetings!


I USED to use photobucket, but many many of my threads over the years, including a couple substantial vehicle builds lots all their pictures to Photobucket’s new requirements :(
The pictures attached are a screenshot of the plans but the resolution apparently is horrible. Guess I’ll wait till I get the physical plans back to take a couple real pictures.
 

checkthisout

Well-known member
Joined
Sep 5, 2008
Messages
5,232
I’ve been in the construction industry for many years. Started as a skilled laborer building log homes. Then onto working forman on a handful of semi-customs. Both of those guys went belly up due to doing (or not doing) things the law requires.
Ended up finding a guy at a local gas station and hooked up with him doing pole barns, fences, finished basements. I learned a ton from him and am still friends with him today.
I then got into Insurance restoration as a “carpenter”, then moved up to assistant project manager. Left that company and went to another restoration company as a senior project manager.
Needlesss to say, I’ve seen a lot of plans. Built off a lot of plans. But have never had any plans of my own.
This building marks that accomplishment. A set of plans with my own name on them.
It’s not a a custom home or naything super fancy, but it’s mine.

This shop will be my place to do whatever I need. I’ve buiot a few motorcycles over the years. A hot rod, and I can’t even remember the last time I paid a shop to do anything on my vehicles. I love to tinker and would like to get into more woodworking. I’d love to get into building industrial style furniture and light fixtures. Things of that nature.
This shop is setup on my property to be close to the house (so the family can chase me down when needed), provide covered parking, and a toasty heated workplace for my to decompress in.

The goal is standard pole building, with reinforced 5” slab with 2 larger “footers” to support a lift. Ceilings will only be 14’ tall but the hope is cutting down on the height as much as possibility to help keep heat load to a minimum.
I will be spray foaming the walls at the very least, and if funds allow, the lid as well. The building will have its own 500 gallon propane tank and hopefully it’s own electric meter.
I want a lift in one bay while leaving the other bay open. A small loft will be built on the back wall to allow for some storage above (even though head room will be about 6’ up there).
I will be having my hvac buddy run a load calc on the building to see what I’ll need for heat. I will be utilizing radiant tube heaters, however long and however many needed to keep it warm in the colorado winters.

I’ve made a video on YouTube showing my initial layout of the tools I currently have, as well as a couple I’d like in the very near future.

The building is currently in plan review with the county and hope to get materials ordered soon.
Since I’m on t budget, it will be a slow build. I’ll get the buildings erected ASAP, and concrete as soon as I can, it the rest will be slow going.
I know the general rule is to not move ANYTHING in until the interior is completed, but I’m not sure I can manage that. I can’t keep trying to work out of the house 2 car garage with the wife’s car occupying that space.
I made a fatal mistake when we moved into this house a couple years ago to let the wife park in the heated garage. Now she can’t live without her 70* toastyness to get into her car on cold mornings :lol:

I think I’ll be adding a similar sized enclosed lean-to on the right elevation to be used as the wood shop. My hopes is this will aid in keeping the main shop a little cleaner.

Plan photos attached.

Here’s the initial layout video I made.

I’ll keep the thread up to date as I make progress. I’d like to make a full timelapse cideo of the construction process.

I have 16' ceilings and my larger (Challenger E12) lift barely clears the garage door opener tracks. Go with 16', this way you can have 14' doors and never have an issue with the Class C or old Peterbilt you will own in the future.
 
To avoid these ads, REGISTER NOW!

matt_i

Well-known member
Joined
Mar 14, 2008
Messages
10,808
Location
SE Michigan
Looks good, I am curious about the lean-to...is the concrete continuously flat (same plane) between the inner and outer floors, or is the outdoor a small amount lower to shed water, etc. Just curious about how you handled that detail and the floor-to-exterior wall.
 
OP
J

jmlcolorado

Well-known member
Joined
Sep 23, 2009
Messages
794
Location
Elbert County, CO
Looks good, I am curious about the lean-to...is the concrete continuously flat (same plane) between the inner and outer floors, or is the outdoor a small amount lower to shed water, etc. Just curious about how you handled that detail and the floor-to-exterior wall.

Pole barn construction is slightly different than conventional as the posts are set in the ground first, then steel is installed, then flatwork is done afterwords. So the two slabs will be two seperate pours.
If it were a monolithic slab, yes, that would be the case.

The outer board the steel attaches to is a pressure treated 2x12. Concrete will be poured up to that point.
 
OP
J

jmlcolorado

Well-known member
Joined
Sep 23, 2009
Messages
794
Location
Elbert County, CO
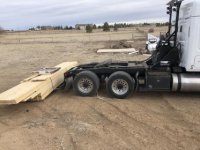
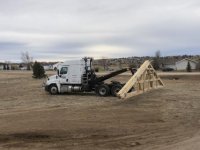
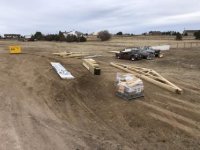
Finally got the Shop delivered this afternoon and couldn’t be more excited!
I’ve been in the construction industry for a long while, but have never seen the contraption they had on the truck to offload.
I made a comment to the driver that even the small lumber yards are nice enough to give their drivers Donkeys to offload material. How was he going to do it?
Turns out his tractor had a lift built into it. Pretty dang slick.
 

Attachments

  • 1887E110-5B07-4335-8CFC-D08B3102426A.jpg
    1887E110-5B07-4335-8CFC-D08B3102426A.jpg
    17.6 KB · Views: 119
  • 66A56EE3-BCD4-46C7-91EF-C1FB82D0A88C.jpg
    66A56EE3-BCD4-46C7-91EF-C1FB82D0A88C.jpg
    20.2 KB · Views: 100
  • D763D64A-AA79-4953-8F76-A312DD2B1480.jpg
    D763D64A-AA79-4953-8F76-A312DD2B1480.jpg
    17 KB · Views: 88
  • 35C490B3-3FE4-4D9E-9E1D-8A19644A019A.jpg
    35C490B3-3FE4-4D9E-9E1D-8A19644A019A.jpg
    15.5 KB · Views: 99
  • D845EC16-C9B4-4283-B13B-CB2603038F98.jpg
    D845EC16-C9B4-4283-B13B-CB2603038F98.jpg
    18.6 KB · Views: 95
OP
J

jmlcolorado

Well-known member
Joined
Sep 23, 2009
Messages
794
Location
Elbert County, CO
I’ve failed pretty miserably at updating this thread, so heres a quick catch up.
Keep in mind that a good crew of Four of five guys could slam this thing out, steel and all in about 5-7 days. I’m literally building it by myself, so “many hours” is quite a literal term in this one :lol_hitti

Day 1: Basiclly a complete failure because the machine I have wouldn’t run the auger. So I had to go rent one. I live in the sticks so I spent the day installing uplift blocks on the bottom of the post.


Day 2: good day of drilling. I ran into one of the retaining wall (railroad tie wall) tiebacks that I fought with for a bit. Also across the front of the shop there used to be a white vinyl fence that had 4x4 posts every eight feet filled to the top with concrete. Of course, I found two of these. Made for a headache digging these posts.


Day 3: going back to take care of those holes with the concrete posts in them and finishing up drilling the holes.
Start setting corner posts.
These posts are 20’ Long, so I had to come up with a way to hold them while I plumbed them up and still be able to move them around fairly easily. Redneck engineering led me to old wheels with tires, a 6’ chunk of 2x4 box tubing, a 3’ steel tube with turnbuckle welded to it. Filled the wheels with concrete for ballast. It works well as I can kick or hit the tires with a sledge to move as needed, but is still strong enough to hold the posts upright.


Day 4:
Pouring the concrete footers where required. The corner posts only required 4” x 10” precast footer. The rest had a specific amount of poured concrete and the precast footers to be installed.

Day 5:
Setting more posts. I hate setting posts.
These holes are 5’2”deep and 24” in diameter so there is a lot of displaced dirt. I’m doing about 3” lifts and compacting. Ugh.
The wind this day was particularly bad.

Day 6:
Most posts setting.
By this time I’m behind over setting posts. I had to change pace a bit so I decided to install some wall girts.
You can also see here I’m taking the opportunity to straighten out posts that weren’t quite plumb. Simply strapping and pulling them to where they need to go does the trick just fine. Making sure the building width (40’) was achieved by the time I get to the top so that we don’t fight the trusses setting into place.

Day 7:
Installing garage door headers. It’s here I found the camera position won’t work. For one because it’s right in line with the front wall so you can’t see anything I’m doing, and second, the roof will be well over the camera height later. I’ll change positions soon.
Installing south wall girts.
Installing post extensions for the gable trusses.
Installing lean-to rafters. The end rafters were single 2x12x14. The center ones are double. And these were damn heavy. Heavier than I expected. I struggled on the first of the 3 center ones, but got a new method.

Day 8 (today):
Setting the last 3 posts. Can you tell how much I hate posts by how long I waited to finish them?:lol_hitti
East wall girts. Finish up garage headers and installing the west wall truss perches in the headers.
Also adding nails in all the purlins. I didn’t have the right gun nails initially so I only had a couple of nails holding each in. Got the right ones this week so shot them all in.
Anoint another hour or so worth of work and I’ll be ready for trusses next weekend.
I’m only working on this Saturday’s and Sunday’s, so it’s taking awhile to get it up. But I feel like I’m making good progress.
 
To avoid these ads, REGISTER NOW!
Top Bottom