To avoid these ads, REGISTER NOW!

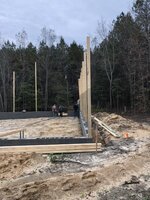
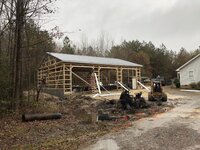
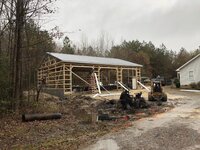
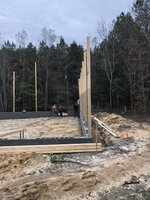
My 40x50x14 I started back in 2018

fastnred8

Active member
Joined
Jan 14, 2019
Messages
26
Location
Virginia
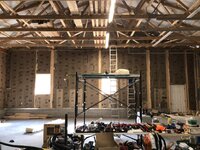
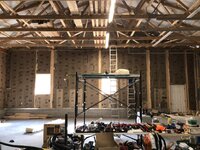
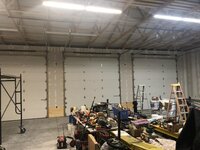
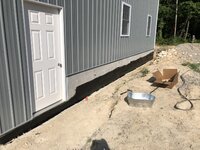
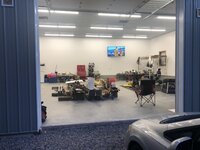
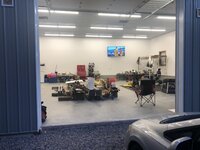
Here’s some pics of the shop I’ve been building. I wanted a place that was nice and comfortable where my me and my family can build, fix or do whatever we need to do. I was hesitant to post them because I don’t want to seem like I’m bragging but then I realized it my be helpful to others that are planning on doing something similar or are already building and are stuck trying to figure out what’s next. When I started this job, I had no experience with building anything before. I could do some carpentry, electrical etc. but pretty much had to learn as I went. It was painfully slow at times, but it’s coming together better than I expected. I still have some big things left like a workbench, building in the back for my compressor, slab in front and some outdoor lights. I had the someone do the foundation, slab and building then myself with some help of friends here and there did the rest. We did the electrical, insulation, drywall, ceiling etc. It’s definitely not a normal pole building setup but it’s what worked for me. It’s a standard pole building that’s anchored to the foundation which is 10” wide blocks back filled with concrete or mortar wherever a post is anchored. The county made me use 10” block instead of 8”. The up side to that is I got to use 2x6 insulation in the walls so it’s insulated extremely well for where I live. The guy that helped me with the footing, foundation and slab thinks I should’ve stick built the building because I framed the inside for drywall. He thought cost wise it would’ve been about the same. He may be right if I knew how to do it myself, which I didn’t. I also hadn’t planned to frame the inside like I did in the beginning, it just happened to work out that way. Anyways, I’ll add pictures of the build with some comments. Hopefully it will help someone make some decisions which is usually harder then the work most times.

4dc571df03af06149a9748b8ca179f7b.jpgf840d3ba09e4bd67ff66dcbeda9f80eb.jpg


Sent from my iPhone using The Garage Journal mobile app
 

Attachments
  • f840d3ba09e4bd67ff66dcbeda9f80eb.jpg
    f840d3ba09e4bd67ff66dcbeda9f80eb.jpg
    167.2 KB · Views: 1
  • 4dc571df03af06149a9748b8ca179f7b.jpg
    4dc571df03af06149a9748b8ca179f7b.jpg
    428.7 KB · Views: 1
Last edited:
To avoid these ads, REGISTER NOW!
OP
F

fastnred8

Active member
Joined
Jan 14, 2019
Messages
26
Location
Virginia
5a09c298e7cdc1b22d1698044d12ab6c.jpgeeda6a52a6684bfd9e31ee687beeb0b8.jpg40eb54df7f8b6d1e7d13cd84de6b19d2.jpg
You can see how the post’s are anchored and the blocks are back filled in these pics. Wherever the blocks are back filled, there’s also rebar sticking up out of the footing for added support.
9bc041fc3e9bf38db8622b83e02852b0.jpge3f60aa7c026be660eb934e996745f55.jpg


Sent from my iPhone using The Garage Journal mobile app
 

Attachments

  • 9bc041fc3e9bf38db8622b83e02852b0.jpg
    9bc041fc3e9bf38db8622b83e02852b0.jpg
    302.7 KB · Views: 1
  • e3f60aa7c026be660eb934e996745f55.jpg
    e3f60aa7c026be660eb934e996745f55.jpg
    402 KB · Views: 1
  • 40eb54df7f8b6d1e7d13cd84de6b19d2.jpg
    40eb54df7f8b6d1e7d13cd84de6b19d2.jpg
    295.1 KB · Views: 0
  • eeda6a52a6684bfd9e31ee687beeb0b8.jpg
    eeda6a52a6684bfd9e31ee687beeb0b8.jpg
    291 KB · Views: 0
  • 5a09c298e7cdc1b22d1698044d12ab6c.jpg
    5a09c298e7cdc1b22d1698044d12ab6c.jpg
    366.7 KB · Views: 1
OP
F

fastnred8

Active member
Joined
Jan 14, 2019
Messages
26
Location
Virginia
3bec5a74406f3e37df13b24f2160b98c.jpg
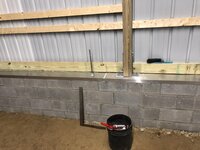
I bent some aluminum to cover the top of the block and just let the rest overhang. I put a sealant behind it to hold it down and keep the bent piece from sticking out off of the block.
e48a4be7302eee59b844be532c5dfdce.jpg7c991eea29c21e83012c1960803b6868.jpg
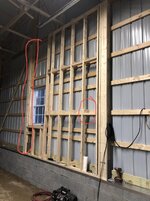
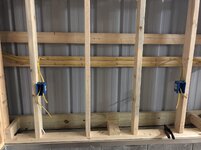
This is where I decided what I was going to do on the inside. I didn’t want the wall set in from the edge of the blocks. Then stuff would fall off shelves and I figured it would look funny. I basically nailed a 2x6 to the main post so I would have a little more to nail the framed sections to.
3ed8dbb0eaba795a699c6cc70e647605.jpg80529b21ba4c06ee02413106d9d699b3.jpg
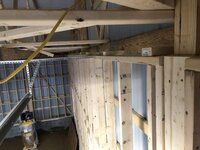
You can see how I put the 2x6 in here and I also put in a break at 4’ high and 8’ high because I didn’t know any better. From the top of my block to the ceiling is 12’ but I had no idea they made 12’ Sheetrock at that time. I thought I needed to run them horizontal. I also braced the heck out of it because I thought I should. Definitely over did it there but it made me comfortable so I did it anyways.


Sent from my iPhone using The Garage Journal mobile app
 

Attachments

  • e48a4be7302eee59b844be532c5dfdce.jpg
    e48a4be7302eee59b844be532c5dfdce.jpg
    153.1 KB · Views: 0
  • 3bec5a74406f3e37df13b24f2160b98c.jpg
    3bec5a74406f3e37df13b24f2160b98c.jpg
    175.7 KB · Views: 0
  • 7c991eea29c21e83012c1960803b6868.jpg
    7c991eea29c21e83012c1960803b6868.jpg
    157.3 KB · Views: 0
  • 80529b21ba4c06ee02413106d9d699b3.jpg
    80529b21ba4c06ee02413106d9d699b3.jpg
    215.6 KB · Views: 0
  • 3ed8dbb0eaba795a699c6cc70e647605.jpg
    3ed8dbb0eaba795a699c6cc70e647605.jpg
    157.3 KB · Views: 0
OP
F

fastnred8

Active member
Joined
Jan 14, 2019
Messages
26
Location
Virginia

Attachments

  • 70240e9c1b53d34e136c7284f99cab1b.jpg
    70240e9c1b53d34e136c7284f99cab1b.jpg
    224.9 KB · Views: 0
  • 6603aa1c3862b49dfaab3221dfcafb79.jpg
    6603aa1c3862b49dfaab3221dfcafb79.jpg
    172.4 KB · Views: 0
  • 0125332fc7ee7496ddd2200456b529ff.jpg
    0125332fc7ee7496ddd2200456b529ff.jpg
    163.8 KB · Views: 0
  • 9ad64d53422d2e169238abf247229840.jpg
    9ad64d53422d2e169238abf247229840.jpg
    230.8 KB · Views: 0
OP
F

fastnred8

Active member
Joined
Jan 14, 2019
Messages
26
Location
Virginia
18bf7623a17a411aa66063839f4d87c5.jpg
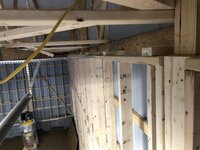
I braced the top of the gable end walls(I think it’s called the gable end) with blocks screwed to the band that runs around the outside.
efef43606d750b95d60e7ed8d027e71b.jpg
On the long back wall I ran the framed sections to the bottom of the laminated beam that supports the trusses.
4008c89eeade1fd8794d64ec017583d7.jpg
The front wall actually goes down to the floor level. We did this so you wouldn’t see any block work on the front of the building. The metal goes to the ground and looks better. In the first pics I posted of the foundation, there were blocks between where the big doors were going. They weren’t supposed to be there so we took them out.
ff3e03333af7d62878370a5e61d2d25a.jpg
I braced the bottom of the wall like the top then shot nails into the bottom board with a hilti gun.


Sent from my iPhone using The Garage Journal mobile app
 

Attachments

  • 18bf7623a17a411aa66063839f4d87c5.jpg
    18bf7623a17a411aa66063839f4d87c5.jpg
    158 KB · Views: 1
  • efef43606d750b95d60e7ed8d027e71b.jpg
    efef43606d750b95d60e7ed8d027e71b.jpg
    226.2 KB · Views: 1
  • ff3e03333af7d62878370a5e61d2d25a.jpg
    ff3e03333af7d62878370a5e61d2d25a.jpg
    159.6 KB · Views: 1
  • 4008c89eeade1fd8794d64ec017583d7.jpg
    4008c89eeade1fd8794d64ec017583d7.jpg
    185.2 KB · Views: 2
OP
F

fastnred8

Active member
Joined
Jan 14, 2019
Messages
26
Location
Virginia
fb8c53f93893c993bf3a2dd9fa1cace3.jpg
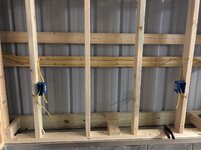
I ran 12/2 wire for everything and I put receptacles every 4’. When I was deciding how I wanted to do everything, I would go to my good friends shop up the street from me and look around and ask questions. One thing I asked was if he could do something different what would it be. He said a lot more receptacles! He had them every 8’ so I went every 4’. Seems like a lot but I can tell you already that it was one of the best ideas.
a9a60cfeccda2e0c1506b496a8e30d89.jpg
If I didn’t fill up a switch box, I ran a spare wire to the ceiling and put it in a j-box so I have plenty of spares.
6b5cda2774adb8442006a939b3c60884.jpg
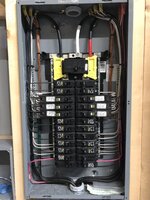
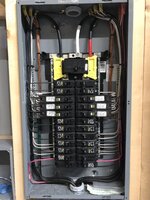
Had a good friend and licensed electrician wire up the panel. He pretty much made sure everything I did was to code so I wouldn’t have any issues. He helped me a lot on everything actually.
c264d5fb7ccb6cdb9da2620499d5efa7.jpg
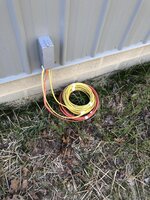
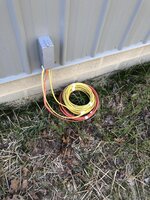
Added a box with a quick connect and pulled a wire to the panel so I could hook up a portable generator in case we lose power. It’s the farthest point from the house to keep noise down.
 

Attachments

  • c264d5fb7ccb6cdb9da2620499d5efa7.jpg
    c264d5fb7ccb6cdb9da2620499d5efa7.jpg
    206.3 KB · Views: 2
  • 6b5cda2774adb8442006a939b3c60884.jpg
    6b5cda2774adb8442006a939b3c60884.jpg
    178.2 KB · Views: 2
  • a9a60cfeccda2e0c1506b496a8e30d89.jpg
    a9a60cfeccda2e0c1506b496a8e30d89.jpg
    176.6 KB · Views: 2
  • fb8c53f93893c993bf3a2dd9fa1cace3.jpg
    fb8c53f93893c993bf3a2dd9fa1cace3.jpg
    171.9 KB · Views: 3
Last edited:
OP
F

fastnred8

Active member
Joined
Jan 14, 2019
Messages
26
Location
Virginia
22ff7f9e4179fb1b989fc00de0033240.jpg
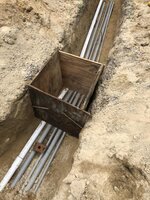
I didn’t know where I was going to put my panel when we started the build so I had to bore holes in the footing to run my conduit through. I didn’t want anything showing on the outside of the building. After I ran everything I formed up the outside ditch and back filled under the footing with concrete. I put in a 1.5” conduit for the main cable, a 1.5” and a 3/4” for spares and a 3/4” for a low voltage spare in case I ever needed it. I also ran a 2” pvc pipe with the idea that if I ever want some water out there, I can pull some 3/4” or 1/2” water pipe through it.
f7ac36ef1c50573cca9586f6057762ac.jpg
It was going to be a while before I could get my rough in inspection and I didn’t want to leave this ditch open that long so I made a inspection hole and took a lot of pictures with the depth measurements. It worked out.
ad239cbfcc5e0f08f94efb8c9041c915.jpg


Sent from my iPhone using The Garage Journal mobile app
 

Attachments

  • 22ff7f9e4179fb1b989fc00de0033240.jpg
    22ff7f9e4179fb1b989fc00de0033240.jpg
    304.4 KB · Views: 1
  • f7ac36ef1c50573cca9586f6057762ac.jpg
    f7ac36ef1c50573cca9586f6057762ac.jpg
    342.8 KB · Views: 1
  • ad239cbfcc5e0f08f94efb8c9041c915.jpg
    ad239cbfcc5e0f08f94efb8c9041c915.jpg
    393.9 KB · Views: 1

Zmann

Well-known member
Joined
Feb 24, 2019
Messages
302
Location
Arizona
Thanks for sharing!!
you braggart


lol Kidding I know what you mean about not trying to look like your bragging but still wanting to share
I finally have the garage I always wanted and i keep it a secret from most people lol
 
OP
F

fastnred8

Active member
Joined
Jan 14, 2019
Messages
26
Location
Virginia
0435f14bca9378dcd968e549fd1e6f38.jpg
Scaffolding on wheels was the best thing ever! I could use the trusses to pull myself along.
fdac5ea0c37bee970f04591904ef547b.jpg3a8c331d2ac96aecad96ea62d5a6c871.jpg
Wires for the building or small connex I’m going to put the compressor in and some storage shelves.
0384ca85d697e9b6d7781ef789345a56.jpg
I put a receptacle up high on the wall in the center of each bay for wall mounted fans. Then in this picture you can see the one I put in for the tv and cable.


Sent from my iPhone using The Garage Journal mobile app
 

Attachments

  • 0384ca85d697e9b6d7781ef789345a56.jpg
    0384ca85d697e9b6d7781ef789345a56.jpg
    116 KB · Views: 1
  • 3a8c331d2ac96aecad96ea62d5a6c871.jpg
    3a8c331d2ac96aecad96ea62d5a6c871.jpg
    326.8 KB · Views: 1
  • fdac5ea0c37bee970f04591904ef547b.jpg
    fdac5ea0c37bee970f04591904ef547b.jpg
    231.7 KB · Views: 1
  • 0435f14bca9378dcd968e549fd1e6f38.jpg
    0435f14bca9378dcd968e549fd1e6f38.jpg
    183.4 KB · Views: 1
OP
F

fastnred8

Active member
Joined
Jan 14, 2019
Messages
26
Location
Virginia
fa80eebb2151cd127331e65e20bad4b0.jpg
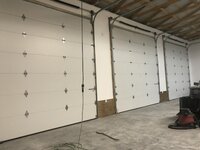
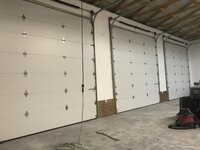
I added receptacles for garage door openers near the top of the wall. I also put plywood at the bottom of the wall because I figured drywall would get messed up too easy right there.
3dcb0c5cf8c68453e5c205d2afb0dd67.jpg
We put this little box in beside the panel so we could pull spares in from the house later on if needed. It’s what the spare 1.5” and 3/4” conduit connect to. There’s also conduit that runs to the attic from that box and the top of the panel for spares if needed. My 3/4” spare I ran for low voltage runs from the house to the garage attic.
d3b2a834f40e5dd4e2194637004b591c.jpg
There’s a walkway down the center of the building then to the corner where the panel is located. The conduit comes up to that walkway for easy access and there’s already line in them to pull spares in. This is the access hole to the walkway.
b7b3df6f60823fb1be536a51898a3973.jpg
I put one of these between the bays in the ceiling. I plan on putting a cord reel on one and air reel on the other. The lift will be in the bay between them.


Sent from my iPhone using The Garage Journal mobile app
 

Attachments

  • b7b3df6f60823fb1be536a51898a3973.jpg
    b7b3df6f60823fb1be536a51898a3973.jpg
    135.4 KB · Views: 1
  • d3b2a834f40e5dd4e2194637004b591c.jpg
    d3b2a834f40e5dd4e2194637004b591c.jpg
    119.7 KB · Views: 1
  • 3dcb0c5cf8c68453e5c205d2afb0dd67.jpg
    3dcb0c5cf8c68453e5c205d2afb0dd67.jpg
    98 KB · Views: 1
  • fa80eebb2151cd127331e65e20bad4b0.jpg
    fa80eebb2151cd127331e65e20bad4b0.jpg
    165.8 KB · Views: 1
OP
F

fastnred8

Active member
Joined
Jan 14, 2019
Messages
26
Location
Virginia
790ffeef361f80f7ee242209330efb77.jpg
Just stained some 1x’s for the window and door trim. This shows how thick the walls are.
4c3556ed4f7827a105b30b3f169bc2e8.jpga797d97f49c695927a41a9f453892869.jpg
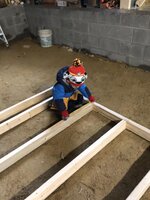
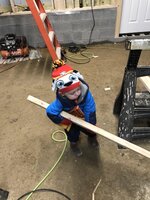
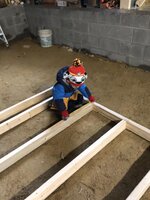
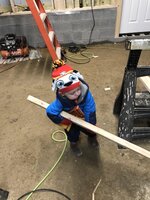
He’s expensive help but good help!


Sent from my iPhone using The Garage Journal mobile app
 

Attachments

  • 790ffeef361f80f7ee242209330efb77.jpg
    790ffeef361f80f7ee242209330efb77.jpg
    102.1 KB · Views: 1
  • 4c3556ed4f7827a105b30b3f169bc2e8.jpg
    4c3556ed4f7827a105b30b3f169bc2e8.jpg
    112.5 KB · Views: 1
  • a797d97f49c695927a41a9f453892869.jpg
    a797d97f49c695927a41a9f453892869.jpg
    111.5 KB · Views: 0
To avoid these ads, REGISTER NOW!
OP
F

fastnred8

Active member
Joined
Jan 14, 2019
Messages
26
Location
Virginia
c905c6573006df4e543de36312197312.jpg353f4ad4853a11da6014d9c892b3d61b.jpg
I watched some videos of Rual Renovators on YouTube that were real helpful with installing the metal ceiling. I have a vapor barrier under the roof panels, a vented ridge and 12” overhangs on all sides of the building so I didn’t feel the need to install a vapor barrier between the ceiling and attic trusses like they did.
22a793983ff7242ddd5daa8ac8605cf8.jpg
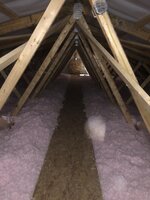
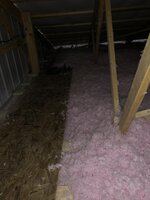
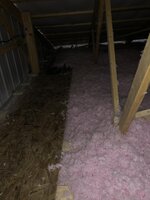
It was hard figuring out how to put some sort of foam like you would normally use in your house between the trusses to keep blown in insulation from filling in the vented soffit. This is what I came up with. I used 4’ long fiberglass batts just on the edges like this. Then I sprayed fiberglass insulation up to the end of these.
e224d5678ee481a8d87e28644a8e43e0.jpg
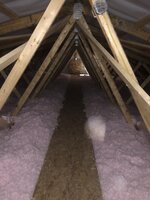
This shows one of the spots where my cord or hose reel is going to go. You can remove a section of plywood in the walkway above these boxes to access the electrical box and bolt the cord reels to the plywood. You can see my walkway in the ceiling directly above that. The reason I ran the 2x4’s flat like that was for 2 reasons. One, that’s how the builders ran those boards up there to connect all the trusses and 2, I ran a lot of my wires in the ceiling down the sides of these 2x4’s to keep them clean and out of the way. This gave me extra boards to run wires on.


Sent from my iPhone using The Garage Journal mobile app
 

Attachments

  • 22a793983ff7242ddd5daa8ac8605cf8.jpg
    22a793983ff7242ddd5daa8ac8605cf8.jpg
    140.4 KB · Views: 0
  • 353f4ad4853a11da6014d9c892b3d61b.jpg
    353f4ad4853a11da6014d9c892b3d61b.jpg
    144.3 KB · Views: 0
  • c905c6573006df4e543de36312197312.jpg
    c905c6573006df4e543de36312197312.jpg
    114.7 KB · Views: 0
  • e224d5678ee481a8d87e28644a8e43e0.jpg
    e224d5678ee481a8d87e28644a8e43e0.jpg
    176.9 KB · Views: 0
OP
F

fastnred8

Active member
Joined
Jan 14, 2019
Messages
26
Location
Virginia
53b708a16638765d9ee654db593b3b40.jpg
Attic access cover.
5762325c2beb5b2c0a4762ff3eacc54f.jpg
You can see the cord/hose reel mounts in this picture.
ab046a4c3b4f3d35694decee06b06d2f.jpg318042c04e85e729ade42611364bdd75.jpg
It’s hard to see but this is where the walkway turns toward the panel and the spare conduits come up.
26f178e2b923efa8ece6ef98962f12ec.jpg


Sent from my iPhone using The Garage Journal mobile app
 

Attachments

  • 53b708a16638765d9ee654db593b3b40.jpg
    53b708a16638765d9ee654db593b3b40.jpg
    122.2 KB · Views: 0
  • 5762325c2beb5b2c0a4762ff3eacc54f.jpg
    5762325c2beb5b2c0a4762ff3eacc54f.jpg
    203.4 KB · Views: 0
  • ab046a4c3b4f3d35694decee06b06d2f.jpg
    ab046a4c3b4f3d35694decee06b06d2f.jpg
    139.4 KB · Views: 0
  • 318042c04e85e729ade42611364bdd75.jpg
    318042c04e85e729ade42611364bdd75.jpg
    137.4 KB · Views: 0
  • 26f178e2b923efa8ece6ef98962f12ec.jpg
    26f178e2b923efa8ece6ef98962f12ec.jpg
    161.5 KB · Views: 0
OP
F

fastnred8

Active member
Joined
Jan 14, 2019
Messages
26
Location
Virginia
8ed5d4fb52c40647262453fae75ec260.jpgde49f1df3e18b4a1cff709cd0b5c9ada.jpg
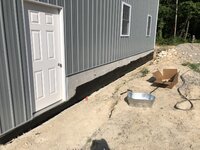
That’s really the bulk of it. A few other things I did was painted tar on the foundation that’s under ground level to keep moisture from seeping through the blocks. I put a drain all the way around the foundation, had gutters installed and connected them to corrugated pipe that is buried and runs to a drainage ditch.


Sent from my iPhone using The Garage Journal mobile app
 

Attachments

  • 8ed5d4fb52c40647262453fae75ec260.jpg
    8ed5d4fb52c40647262453fae75ec260.jpg
    242.7 KB · Views: 0
  • de49f1df3e18b4a1cff709cd0b5c9ada.jpg
    de49f1df3e18b4a1cff709cd0b5c9ada.jpg
    260.5 KB · Views: 0
OP
F

fastnred8

Active member
Joined
Jan 14, 2019
Messages
26
Location
Virginia

Attachments

  • 19c2d749a2b2042d762552a69c058ff3.jpg
    19c2d749a2b2042d762552a69c058ff3.jpg
    71 KB · Views: 0

karoc

Well-known member
Joined
Dec 19, 2017
Messages
2,044
Location
Hemphill Tx
Awesome looking shop, the white ceiling sure helps to light up place and nice finishing touch.
 

Jayman17

Well-known member
Joined
Feb 6, 2017
Messages
3,838
Location
Seattle, Wa
Very nice place, congrats. It seems to be very well thought out and well equipped for future changes/upgrades. I hope you and your little helper get many years of good times in your shop.

Jay
 
To avoid these ads, REGISTER NOW!
Top Bottom