To avoid these ads, REGISTER NOW!

My 8x12 shed build

brass89

Well-known member
Joined
Sep 15, 2014
Messages
240
Hey all, I've asked a number of questions trying to sort out details and have gotten lots of great help. I've been working on my 8x12 shed build for a week or so and thought I'd post some pics of the progress so far.

A few things I've learned along the way for those looking into a shed build, it's difficult to budget. I thought I had things pretty well sorted out as far as materials and cost so I knew what to expect but it easily hit almost double that. A trip to the local hardware stores (lowes and h.d.) took an $1800 chunk. A few things were for other projects but a good $1500-1600 was for the shed.

This isn't a 'luxury' shed but a little more than a basic shed since I plan to use it as a workshop also when needed. The plans are 8'x12' with 8' walls (7' 10 1/2" to allow for 1 1/2" siding overlap at the bottom). A gabled roof with 8/12 pitch, smartside siding and metal roof. Floor and walls will be insulated.

People often ask for a materials cost breakdown.. I don't have exact figures, the 1" minus gravel was around $170 delivered (15 tons, some used for driveway and other areas with around 5-6t used for the pad).

Making a 10'x14' retaining wall out of treated 4x4's with rebar staked every few feet and galvanized 6" spikes, 4" deep (1 4x4) at the high side and 16" deep (4 4x4's) at the low side - 20 4x4's total, along with a few 10ft lengths of 1/2" rebar, 16" 1/2" spade bit and other odds and ends around $150.

Metal roofing from my local farm store, 29ga imperial rib - 5 panels 32" wide by 12' long, gable/rake trim, eave trim with drip edge, ridge cap, closure strips, sealing foam for seams and sheet metal screws ran around $300.

The 2x4's, 2x6's for the roof rafters, pressure treated 2x6's for joists 16" on center, 2x6's for the ramp, 4 4x4x12 skids, 3 sheets 3/4 p.t. plywood for the floor, 7/16" osb for the roof, two rolls of roofing paper (30# for the roof, 15# for the walls) etc was around $1500-1600. This also included extra 1/2" osb (several sheets) for shelving, extra 2x4's, ridgid foam for the floor and walls.

So far the hardware used has been 2lbs of 2" deck screws (torx drive is vastly easier than philips drive, worth the extra $1), 5lbs of galvanized 16d nails (wish I'd gotten 10lbs), working on a 30lb box of 16d green sinker nails.
 
To avoid these ads, REGISTER NOW!
OP
B

brass89

Well-known member
Joined
Sep 15, 2014
Messages
240
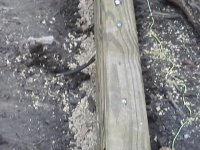
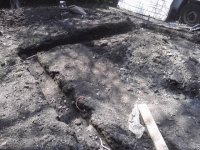
Photos of the footing for the retaining wall, the gravel tamped into the bottom before laying down the 4x4's, the retaining wall with tiebacks in place (probably not needed but was right on the edge of needing them).
 

Attachments

  • P09-26-14_13-17.jpg
    P09-26-14_13-17.jpg
    140 KB · Views: 109
  • P09-28-14_18-10.jpg
    P09-28-14_18-10.jpg
    140.2 KB · Views: 98
  • P09-29-14_12-41[1].jpg
    P09-29-14_12-41[1].jpg
    132.2 KB · Views: 110
OP
B

brass89

Well-known member
Joined
Sep 15, 2014
Messages
240
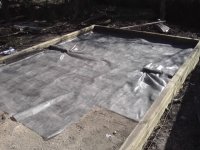
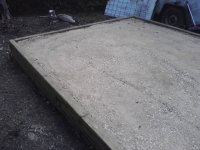
Pics of the dirt backfill, the landscaping cloth to keep out critters and keep the gravel from sinking into the heavy clay soil and backfilled/compacted 6" of gravel for the base. Placed 4 8x16x4" solid concrete cap blocks half buried into the gravel under the skids. For one it helped finish level for the skid placement, for another it lifts the skids just slightly higher than the retaining wall should I need to drag it anywhere.
 

Attachments

  • P09-29-14_14-42.jpg
    P09-29-14_14-42.jpg
    133.6 KB · Views: 100
  • P09-30-14_17-30.jpg
    P09-30-14_17-30.jpg
    129.1 KB · Views: 99
  • P10-24-14_17-57.jpg
    P10-24-14_17-57.jpg
    115 KB · Views: 124
OP
B

brass89

Well-known member
Joined
Sep 15, 2014
Messages
240
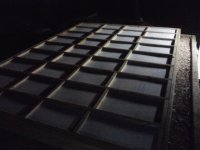
Pics of the ends of the 4x4 skids with a 45 deg cut off to help with moving if need be in the future. 2x6 joists 16" oc and a pic of the solid blocking. The close up of the blocking shows small holes that I drilled between the joists and strung bailing twine (used for hay bales) as a faster method of holding up the foam inserts for the floor. Easier/faster than cutting tons of little wooden blocks and screwing them into the corners - there's 36 squares between joists and blocking.

As far as joist spacing, I thought I had it figured out. Measured out my 16" oc - went to place my 3/4 plywood down and found out I screwed up. Where the two sheets of plywood meet, my joist was entirely under the end of one sheet instead of meeting between them. Measure 3x and cut (or nail) once. Whoops! lol. I pulled the foam back out, added a sister joist to the offending areas and reinstalled the foam.

I've cut foam in the past and outside of an expensive hot knife, one of the easiest tools is a cheapy retractable utility knife with snap off blades. They can be extended out to easily cut through 1 1/2" foam and if using a straight edge like a board, can be bent a little to the side to maintain pressure against the wood fence and create a more vertical cut. Just don't flex too far since they're designed to snap off.
 

Attachments

  • P10-24-14_17-58.jpg
    P10-24-14_17-58.jpg
    142.1 KB · Views: 114
  • P10-25-14_17-39.jpg
    P10-25-14_17-39.jpg
    133.8 KB · Views: 142
  • P10-27-14_16-01.jpg
    P10-27-14_16-01.jpg
    138.7 KB · Views: 125
  • P10-27-14_23-58.jpg
    P10-27-14_23-58.jpg
    98.8 KB · Views: 132
OP
B

brass89

Well-known member
Joined
Sep 15, 2014
Messages
240
Back to work before more rain hits. Have the floor down and two of the walls framed, will have to get pics off my phone and post them a little later. Hopefully I learned from my flub with the floor joists, made sure to set my studs at the center of the 4' and 8' marks for the siding and figure the rest of the 16" centers from those points rather than going from one end to the other. *smh*
 
To avoid these ads, REGISTER NOW!

captain14

Well-known member
Joined
Dec 19, 2012
Messages
7,061
Location
Near College Park Maryland 20740
Looking forward to your post on this build. I have to build a small deck/landing outside my rear man door to my garage before it gets too cold. Planing on using 2x4 sleepers on gravel base and 5/4 board for the deck.
 

b4z

Well-known member
Joined
Dec 31, 2008
Messages
82
Looking forward to following this. Going to build a 8x12 at our vacation home.
 
OP
B

brass89

Well-known member
Joined
Sep 15, 2014
Messages
240
Sorry folks, didn't abandon the project or the build thread. Have had some crappy weather on and off and it's been a bit slow going putting this thing up by myself and hand nailing. (Feeling the appreciation for an air nailer about now). I let it rain on the frame thinking no big since the plywood floor is treated and all, but due to some knot holes in the ply (all the sheets were like that) the standing water was taking forever to dry out. So I began tarping the shed frame and for awhile it was a matter of tarping it every couple days which is a huge time losing procedure.
 
OP
B

brass89

Well-known member
Joined
Sep 15, 2014
Messages
240
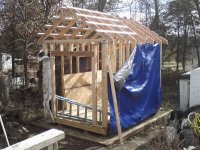
Here are some more pictures. The wall framing is done and up, the roof rafters are up and purlins attached. Almost all the fascia is up and blocking in the overhangs, the walls are tar papered.

The framing is 16" oc 2x4. The header over the door (door is 5' span) is double 2x6 with 1/2" osb in the middle glued with titebond II and nailed. The window headers are the same except 2x4. Even though the windows are on bearing walls they're small (around 30" wide) so I should be ok with the doubled studs and cripples above. I made sure to line up the one cripple stud to fall under the roof rafter above.

A double top plate, cripple and doubled 2x4 window header beneath combined I think should suffice. Especially since it's a home made window and not a prehung where I'd have to worry about deflection on a frame or glass.
 

Attachments

  • P10-29-14_17-55[1].jpg
    P10-29-14_17-55[1].jpg
    144.9 KB · Views: 64
  • P10-31-14_14-38.jpg
    P10-31-14_14-38.jpg
    154.7 KB · Views: 62
  • P11-01-14_14-04[1].jpg
    P11-01-14_14-04[1].jpg
    143.7 KB · Views: 71
OP
B

brass89

Well-known member
Joined
Sep 15, 2014
Messages
240
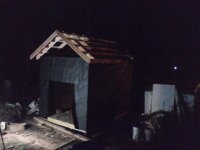
The first tarp job. Redneck ingenuity at it's best lol. Since I didn't have the rafters up yet, to keep water from pooling in the center there's a 9x9 free standing gazebo/canopy (one of those folding ones) resting over the walls to provide a temporary peak.

A picture of some of the tar paper up and the night picture is because I was still out there on the backside of the roof hanging the fascia trying to get it done.

Let me just say, hanging 2x6 fascia is a bear by yourself. Maybe there's a better way but so far the only way I've found to do it is to hold it fairly close, grip tight with one hand and use bar clamps with the other hand. Clamping in a couple places near the edges of the purlins and clamping it to the nearby rafter. Then a sort of dance, holding it so it doesn't fall and carefully loosening the clamps, re-positioning and clamping again until it's lined up before nailing.

This is where I discovered I get mild vertigo on top of the ladder hanging over the top of the roof framing from inside the shed to nail it up. Ideally I'd do it from the outside but my ladder is 8ft and not quite tall enough due to the ground slope on the back side. Leaning the ladder against the wall framing puts me off balance since there's about 10-11" of overhang, I end up nailing slightly behind my body over top of my head. Looking at the nail to line it up before hammering, my peripheral vision picks up the surroundings and things start to spin in my vision. Good times :p
 

Attachments

  • P11-04-14_11-52.jpg
    P11-04-14_11-52.jpg
    135.3 KB · Views: 40
  • P11-08-14_13-08.jpg
    P11-08-14_13-08.jpg
    120 KB · Views: 54
  • P11-10-14_23-12.jpg
    P11-10-14_23-12.jpg
    98.9 KB · Views: 46
OP
B

brass89

Well-known member
Joined
Sep 15, 2014
Messages
240
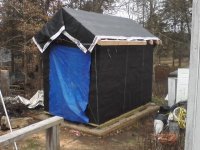
Here's a better shot of the tar paper up during the day. Tarped again due to pending rain. The folding gazebo seen over my sawhorses is the one I used as a temp peak in the previous photos.

Will have to take more pics tomorrow, so far I have one sheet of osb decking on the roof. Got too dark tonight to take any pics. Will have more osb up tomorrow and hopefully tar papered and ready for the metal roof panels. The forecast changed and moved the chance of snow up from tuesday to saturday and I really don't care to be on an 8/12 pitch roof putting up metal panels in the snow.
 

Attachments

  • P11-11-14_09-11.jpg
    P11-11-14_09-11.jpg
    127.1 KB · Views: 36
  • P11-11-14_09-41.jpg
    P11-11-14_09-41.jpg
    137.5 KB · Views: 42
To avoid these ads, REGISTER NOW!
Top Bottom