To avoid these ads, REGISTER NOW!

My Armorpoxy & Garagedeck Floor project (pic heavy)

chrispyny

Well-known member
Joined
Nov 7, 2013
Messages
467
Location
albany, ny
Welcome all to a thread i wanted to put together since the end of September, but have only found time to do so now.

Last summer i wanted to epoxy my garage floor but ran out of warm weather. This summer i promised myself i would do it and again almost ran out of warm weather. I have spent COUNTLESS hundreds of not thousands of hours here at GJ surfing and getting awesome ideas from all of you. When i finally began my project, i HAD to document everthing, and start this thread as a MAJOR THANK YOU to others who have also done the same as me.

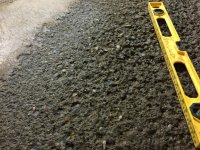
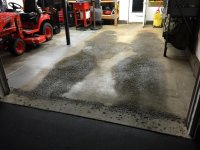
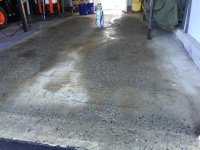
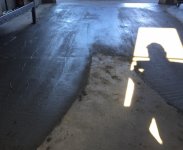
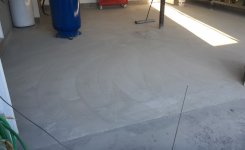
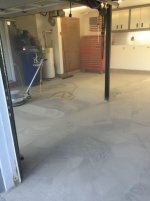
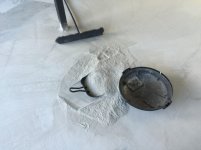
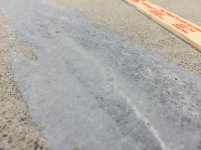
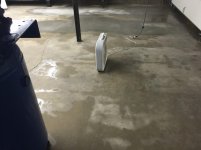
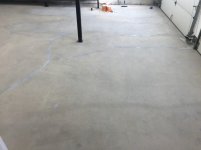
Jumping right in, enclosed are pictures of what i was dealing with. I purchased a 1971 split level with a 2 car garage in March of 2012. It took 4.5 LONG years before i could finally complete this project. The previous owners who built the house painted the left bay with some kind of crappy blue/gray paint, and left the right bay unfinished. And THEN decided to ONLY park their cars in the RIGHT bay! DOH!
Needless to say, the spalling was HORRENDOUS. Please review the enclosed pics as i reply to my own thread and continue to the next step. By the way, this project started in the SECOND week of this September.
 

Attachments

  • Before 1.jpg
    Before 1.jpg
    146.3 KB · Views: 229
  • Before 2.jpg
    Before 2.jpg
    143.7 KB · Views: 239
  • Before 3.jpg
    Before 3.jpg
    157.5 KB · Views: 209
  • Before 4.jpg
    Before 4.jpg
    144.2 KB · Views: 199
Last edited:
To avoid these ads, REGISTER NOW!
OP
C

chrispyny

Well-known member
Joined
Nov 7, 2013
Messages
467
Location
albany, ny
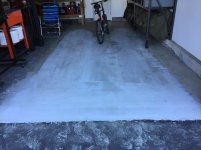
Before i could do anything, the spalling had to be fixed. I chose Quikrete Floor Resurfacer. This was by far the most difficult decision i had to make about this entire project. I spent countless hours wondering which product to use, how to apply it etc. Ultimately I was so fed up with the time spent researching, that i just went to the store and purchased the Floor Resurfacer. It wasn't until my project was complete that i read something about Ardex CD. Oh well.

I called Quikrete to ask how to apply this product onto such a severely spalled floor. The first guy i got said do it in 2 coats, as its not meant to be thrown down in one shot as it can shrink and crack. I called a second time to ask a second quesion and got a complete doofus which lead me to hang up on him. I realized i was on my own.
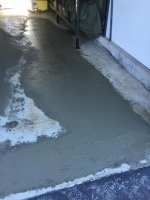
I chose to heavily soak water into the floor prior to the first application of resurfacer to ensure the floor didn't pull water out of the product. This was a great idea as the product sets fast. I applied a rough coat first and then a second coat which was a bit smoother. For those who watch the Quikrete movies on youtube, do NOT expect it to flow like it does in the videos. Instructions claim to use only so much water at most. Well i would need to DOUBLE the water content to make it flow like in the video. And at that point, the structural integrity of the concrete would be ruined. Please view the pics which include the first coat below. Stay tuned for more. My hands are tired from typing!
 

Attachments

  • first coat 5.jpg
    first coat 5.jpg
    143.6 KB · Views: 140
  • first coat 4.jpg
    first coat 4.jpg
    144.7 KB · Views: 129
  • first coat 3.jpg
    first coat 3.jpg
    145.4 KB · Views: 133
  • first coat 2.jpg
    first coat 2.jpg
    102.3 KB · Views: 134
  • first coat.jpg
    first coat.jpg
    145.4 KB · Views: 146
  • wetting floor 2.jpg
    wetting floor 2.jpg
    142.2 KB · Views: 136
  • wetting floor.jpg
    wetting floor.jpg
    145.5 KB · Views: 145
OP
C

chrispyny

Well-known member
Joined
Nov 7, 2013
Messages
467
Location
albany, ny
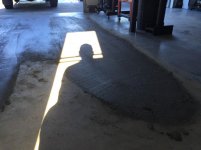
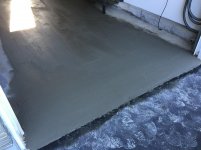
Enclosed are pics of the second coat. I wish i had a 30" magnesium concrete float, but alas, i didn't. The videos show spreading this product with a squeegee. Yeah, ok. I'm VERY mechanically inclined, as well as a handyman at home. I do just about anything and have certainly worked with concrete before. This stuff is NOT easy to work with. The additional pics show a several day process where after a week, the resurfacer turned white. i assumed it was done curing and since i was running out of summer weather, it was time to grind.
 

Attachments

  • drying 3.jpg
    drying 3.jpg
    131.3 KB · Views: 148
  • drying 2.jpg
    drying 2.jpg
    142 KB · Views: 123
  • drying1.jpg
    drying1.jpg
    122.1 KB · Views: 124
  • 2nd coat 4.jpg
    2nd coat 4.jpg
    131.1 KB · Views: 129
  • 2nd coat 2.jpg
    2nd coat 2.jpg
    139.1 KB · Views: 127
  • 2nd coat.jpg
    2nd coat.jpg
    132.4 KB · Views: 122
OP
C

chrispyny

Well-known member
Joined
Nov 7, 2013
Messages
467
Location
albany, ny
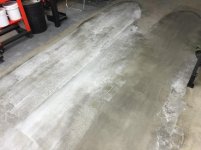
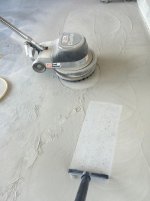
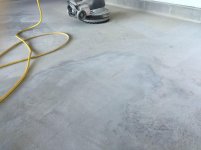
So after reading a lot on here about which tools to use, and mulling it over, the second hardest decision i made was to use the Diamabrush with clark buffer from Home Depot. The rental cost me about 120 bucks i think. It's been a couple months so i forget. I seriously considered renting an Edco single head grinder but i was worried that it would produce a hammering effect and destroy the resurfacer on the spalled concrete i worked so hard to fix. Ultimately it was the right decision but it took a solid 8 hours to grind a 2 bay garage floor.

Initially i purchased a rigid shopvac and some fine filter bags which was a huge mistake. I assumed i could chase the clark buffer and vacuum up the dust as i went along. HAHA. Forget that. I ultimately pitched the shopvac into the shed and continued grinding away. The diamabrush head was the concrete prep tool. Not the other one whos name i forget. The prep tool has like 25 steel teeth which scrap and float across the floor at the same time. It's a very GENTLE scraping. The other tool has maybe 8 steel teeth and i'm sure would have been too aggressive on my resurfaced portion of floor.

The diamabrush tool creates dust so fine that it is finer than flour, and just as messy. The machine DEFINITELY takes practice. Pull up on the machine handle ONE INCH from center to move right, push down on the handle from center ONE INCH to move left. Any more and that friggin thing TAKES OFF!

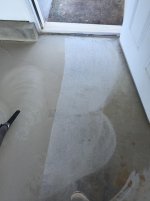
In one pic, you can see untouched floor in front of the door, and then after several swirly passes with the tool. This is what is referred to as opening the concretes pores.
 

Attachments

  • grinding 7.jpg
    grinding 7.jpg
    118.7 KB · Views: 137
  • grinding 6.jpg
    grinding 6.jpg
    91.1 KB · Views: 142
  • grinding 5.jpg
    grinding 5.jpg
    108.3 KB · Views: 141
  • grinding 4.jpg
    grinding 4.jpg
    107 KB · Views: 139
  • grinding 3.jpg
    grinding 3.jpg
    104.6 KB · Views: 140
  • grinding 2.jpg
    grinding 2.jpg
    102.7 KB · Views: 149
  • grinding 1.jpg
    grinding 1.jpg
    86.1 KB · Views: 144
OP
C

chrispyny

Well-known member
Joined
Nov 7, 2013
Messages
467
Location
albany, ny
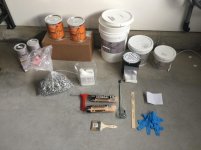
I broomed up all the floury concrete dust and hosed out the garage very well. I then placed an order with Armorpoxy for their Armorclad 3 bay kit. IT took several days for the kit to come, and my floor was good and dry by that time.
The kit most certainly contains enough for a good coat of primer and epoxy for a 3 bay garage. luckily, my garage is 2 car garage, and both my primer and epoxy floor went on VERY thick.
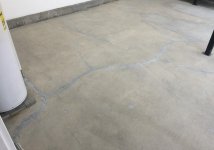
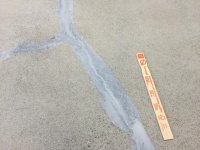
I ordered the crack filler from them in addition to the kit. It works VERY VERY well. However it is NOT cheap, and i only used maybe 2 golf balls worth of it. I still literally have 2 almost full containers of it.
Mix 1 to 1 ratio of A to B quickly, and apply to cracks, forcing inside as much as possible. Work fast as this stuff sets up quick. Folks this is a VERY good product.
 

Attachments

  • epoxy crack filler 5.jpg
    epoxy crack filler 5.jpg
    87.3 KB · Views: 123
  • epoxy crack filler 4.jpg
    epoxy crack filler 4.jpg
    99.5 KB · Views: 127
  • epoxy crack filler 3.jpg
    epoxy crack filler 3.jpg
    79.7 KB · Views: 121
  • epoxy crack filler 2.jpg
    epoxy crack filler 2.jpg
    146.5 KB · Views: 131
  • Epoxy crack filler.jpg
    Epoxy crack filler.jpg
    140.6 KB · Views: 121
  • Armorpoxy KIT.jpg
    Armorpoxy KIT.jpg
    115.2 KB · Views: 111
  • drying.jpg
    drying.jpg
    97.1 KB · Views: 107
OP
C

chrispyny

Well-known member
Joined
Nov 7, 2013
Messages
467
Location
albany, ny
Before priming, i let the doors down and penciled a line at the door line on the floor and taped the line off with masking tape. The epoxy and final urathane coat do not hold up long over time to UV rays so it is suggested to stop the epoxy at the garage doors.
I primed the whole floor in a VERY good and thick coat of primer. It does stink so consider that when applying. It smells because it is not a 100% solids primer. Meaning, it dries by off gassing and evaporating the volatile organic compounds in the primer. Once its finished drying, the smell is basically gone.
The primer took about 12 hours to dry, but i waited 24 before applying the epoxy.

Tools required for this process are a good set of spike shoes which i purchased online. This allows you to walk across the wet floor without painting yourself into a corner.
 

Attachments

  • Primer 2.jpg
    Primer 2.jpg
    135.2 KB · Views: 159
  • Primer 1.jpg
    Primer 1.jpg
    129.4 KB · Views: 160
  • tape off.jpg
    tape off.jpg
    82.5 KB · Views: 137
OP
C

chrispyny

Well-known member
Joined
Nov 7, 2013
Messages
467
Location
albany, ny
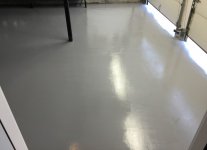
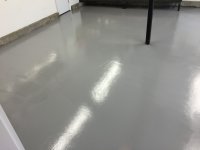
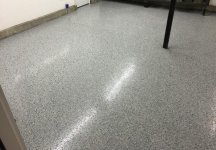
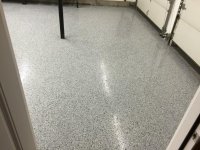
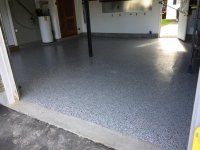
Tada! PHEW! Finished!

So much work for one guy over a period of 2 or so weeks. Goodness it looks SOOO good!

Major hint guys. If you are doing a 2 car garage, divide the epoxy into FOUR containers of part a, and FOUR containers of part B. Then do the garage in FOUR parts.
I did the garage in two parts and towards the very end, i had 25% garage left, and the epoxy started to get REAL REAL thick. It would pour just fine, but once it hit the floor, my roller had a VERY hard time moving it around. The roller would hydroplane across the thick epoxy instead of spreading it. But i moved fast and got it done. I'll be honest, the epoxy is an itsy bit thicker at the rear man door than anywhere else.. HEHE! The kit provides PLENTY for a 2 car garage.
If you do a 3 car garage, it will be fine, just please divide the epoxy into SIX parts. Spread one part around, throw your flakes, then mix and spread another part, then repeat. If you think you can just dump ALL of part A into ALL of part B, and cover the floor fast enough before the epoxy sets, your crazy. Unless you have four guys, each with a roller, each with spike shoes, each read to go and roll, it wont happen.

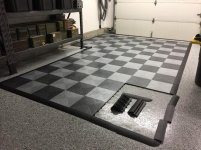
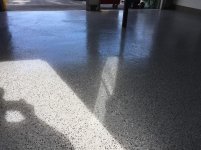
The floor turned out awesome. You can only tell where the spalling is fixed by looking across the sunlight and even then, you really have to look for it. But, since i covered it with Garagedeck, its hidden anyways! I needed something to park my Kubota on and did not want to ruin the epoxy floor with the bucket of my tractor and implements i sometimes have hooked up on the back. The guys at Racedeck/Garagedeck/Snaplock are awesome, but i didn't order enough of the right tiles. A simple call got them in the mail a week later.
That reminds me, i STILL have to get a shipping label mailed to me so i can return left overs and get credit for them. I was supposed to get that in an email but someone over there forgot.
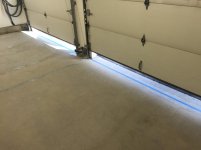
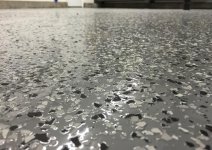
Moving on, the super close up pic of the finished floor was taken PRIOR to the urathane coat with anti slip additive. I did that the following day. That does not make any changes to the look in my opinion. Some say it takes the sheen off the epoxy. As far as i'm concerned, it's worth it.

The Garagedeck is AWESOME. Quite frankly, i could not be happier with that product. It was easy as heck to install. Inside corners need to be mitered on a miter saw. Other than that, the install was PERFECT. My only recommendation is to order extra of EVERYTHING. Yes it may sting the wallet initially, but the people at Bigfloors/Racedeck will email you a return label, and you can return your unused product for a refund. Unfortunately, from the time i placed the order for my remaining pieces i needed, to the time they came to my door was like 1.5 weeks. It SUCKED to wait that long with an incomplete project. People were coming over to see results, friends, family members, and i had to explain ever time, " uh yeah, more tiles and stuff are coming in the mail, i ran out" ... SIGH ..!!!!!
 

Attachments

  • Finished 1.jpg
    Finished 1.jpg
    149.9 KB · Views: 212
  • Finished 2.jpg
    Finished 2.jpg
    149.4 KB · Views: 194
  • Finished 3.jpg
    Finished 3.jpg
    142.1 KB · Views: 225
  • Finished 4.jpg
    Finished 4.jpg
    149.6 KB · Views: 222
  • Finished 5.jpg
    Finished 5.jpg
    145.7 KB · Views: 246
  • Finished 6.jpg
    Finished 6.jpg
    145.8 KB · Views: 197
  • Finished 7.jpg
    Finished 7.jpg
    148.2 KB · Views: 178
Last edited:
OP
C

chrispyny

Well-known member
Joined
Nov 7, 2013
Messages
467
Location
albany, ny
Little story. I came across a Presto hydraulic lift table on craigslist last month. I have been searching for this thing for FOUR years. FINALLY i found one for THREE HUNDRED dollars, 2.5 hours away in western MA.
I brought it home, cleaned it up, and painted the sides of it in orange. Like a COMPLETE ***** i did not cover the floor well enough and got overspray ALL OVER my floor!! DOH !!! I noticed what happened within minutes, and ran for a bottle of brake cleaner, thinking i could wipe it up. NOPE. All it did was melt the urathane coating, spreading the orange paint and melted urathane in between the crevices of the flakes. I almost killed myself as i am HIGHLY detail oriented and was severely disappointed.
Weeks later, i had a brilliant idea. Lets try to scratch off the urathane/paint mix with a wire brush. Well, it worked, unfortunately it will take me til the end of time to scratch off all the overspray by hand.
Maybe someone from Armorpoxy can chime in here and let me know what the best product is to mechanically remove the urathane coating without hurting the underlying flakes and epoxy floor to much. Does HD rent a good attachment for the clark machine which will do a light removal job? I tried a 4.5" wire cup brush on a grinder and that was a bad idea. It moves to fast and cuts to hard and fast into the floor. It got away on me almost immediately and i put that idea to bed.


The offending table. ( looks new now, the pic was before the restoration)
The overspray settled along the tarp under the table. Then i sprayed a second coat with a wider tarp, thinking the larger tarp was enough? Nope. So now i have TWO rings of this pretty Husqvarna orange all over my new friggin floor!
DOH!

d171ed177c9742801c61df1bd5b62739_zpsg0nko6t5.jpg
 
Last edited:
OP
C

chrispyny

Well-known member
Joined
Nov 7, 2013
Messages
467
Location
albany, ny
I will add additional information as i think of it to each of these posts. It's been almost 2 months since the project was finished and i forgot a lot.

IN SUMMATION:

Armorpoxy Armorclad is AWESOME. I LOVE IT. I would NOT have chosen any other product as my results were PERFECT. The crack filler was awesome, the primer was awesome, the epoxy was awesome, the flakes were awesome, but i'm a little reserved about the urathane. It seems to be a simple water based urathane similar to a cheap waterbased urathane i once used not long ago to seal my workbench pictured to the left of the above photo, prior to painting it gray and black.
I'm not sure if its a good thing that i chose the urathane topcoat, or if i should have gone with the military grade epoxy. Either way, its done now. Once i find a way to mechanically remove the overspray/urathane off the one side of the floor, i will have to hit up Armorpoxy for more urathane and antislip additive.

Thats all folks. I hope this thread will help others make good choices in beautifying their garages.
Regrets: None. i would have done it all again.
 
Last edited:
To avoid these ads, REGISTER NOW!

Hatman52

Well-known member
Joined
Mar 11, 2008
Messages
59
Are the lighter color tiles Graphite or Alloy? Also, what were your reasons for choosing the Diamond pattern versus the Coin? Lastly, did you put down anything under the tiles or just lay them directly on the floor?
 
OP
C

chrispyny

Well-known member
Joined
Nov 7, 2013
Messages
467
Location
albany, ny
Are the lighter color tiles Graphite or Alloy? Also, what were your reasons for choosing the Diamond pattern versus the Coin? Lastly, did you put down anything under the tiles or just lay them directly on the floor?

The lighter is alloy.

The tiles are the coin and i placed them right on the floor.
 

JohnK007

Well-known member
Joined
Sep 13, 2007
Messages
807
Location
Downers Grove, IL
Super thread!!! You documented the Hell out of it which will be a great reference when I tackle some spalling and cracks in my floor. Well done!!
 
To avoid these ads, REGISTER NOW!
Top Bottom