To avoid these ads, REGISTER NOW!

My 'Compliance Station'

Jack Olsen

Super Moderator
Staff member
Joined
Mar 22, 2009
Messages
6,678
Location
Los Angeles
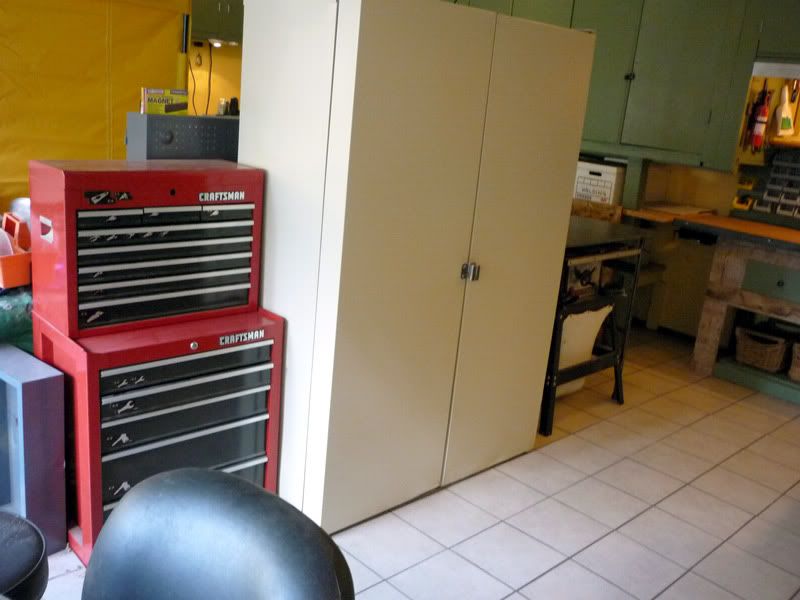
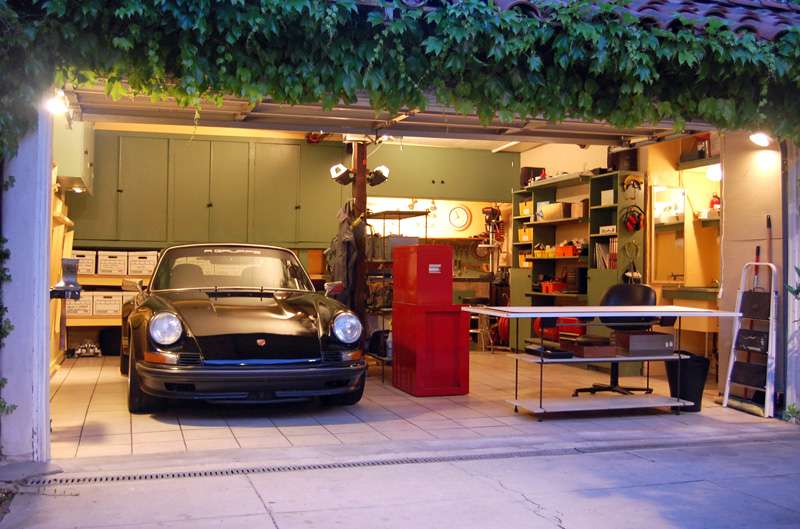
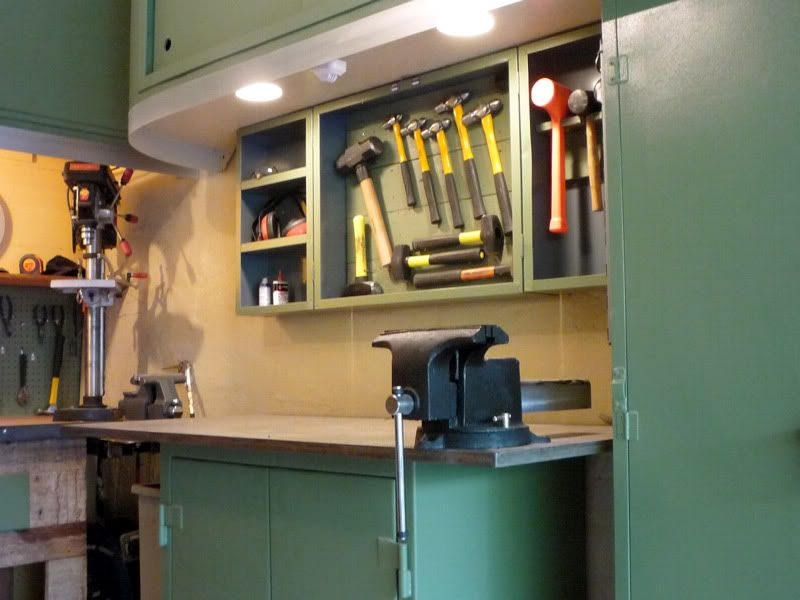
My garage has a lot of work surfaces. I've got a main general purpose work bench, a fold-down wood working bench, a counter by the sink, a drafting-table-style bench, a small portable welding table and a larger fold-down welding table. I've also got a lot of storage, thanks to some big cabinets that were put in when the garage was built in 1925, some shelves and cabinets I've added, and a separate shed I built.

But I finished a long-term work project recently, and started to hear the siren cry that maybe most garage owners hear when they've got a few extra dollars in their pocket -- 'more storage, one more work bench...'

You know the cry.

My garage was originally cleaned up and redone during a strike that kept both my wife and I out of work for 100 days. Understandably, it was done on a pretty modest budget ($500, with another $500 for the floor when I got the idea of ceramic tile in my head). I like it the way it is -- I'm not a shiny diamond plate chrome cabinet guy. But my welding table is only 1/8" thick, which means I can't really go at it with a hammer. So the idea of a heavier work surface held some appeal to me. And steel prices are pretty low right now.

So an idea started to form about building a bench where I could bang on anything to my heart's content. Do I NEED a heavy surface just for that? No. Do I WANT a heavy surface just for that?

I guess I do, since an idea started forming in my head last month and before I knew it I'd picked up a cabinet on ebay that looked to be able to shoulder the weight of the 1" thick 30"x60" plate I was imagining for my bench top without any issue at all. The cabinet is made of heavy gauge steel and is rated for 1,900 pounds per shelf. It's made by a company called Strong Hold and weighs 360 pounds all by itself. Getting it home and out of the Jeep broke one of the 2x4s I was using as a ramp. But I got it.

Ebay+Cabinet+Start1254977487.jpg


A grinding wheel made short work of the legs, which meant it would be 36" tall instead of 42".

Legs+Chopped1254977656.jpg


Next burden for the old Jeep? A 510-pound slab of plate steel. Next burden for the old Jeep owner? Figuring out a way to get the 510-pound piece of steel out of the Jeep and onto the cabinet. I took it slow and easy. I am NOT a guy who can lift 510 pounds. I'm also not a guy who wants to see a 510-pound weight fall onto my foot.

Since the 2x4s had not been fully up to the task of the cabinet, I used some 2"x4"x1/8" rectangular tubing. It's strong stuff.

Ready+to+Slide1254977822.jpg

Still, the steel isn't going to move itself. So I took a cue from the guys who built in the days before steam engines and used steel dowel rods to roll it very slowly over the tubing. This isn't a very good picture, but it's what I was working with.

Rolling1254977952.jpg


It took a long time, since I'm cautious with stuff that can hurt me. But it worked.

Resting1254978435.jpg


Until I saw the bodged corner. I got the steel for a pretty good price, but it had one section that was cosmetically not up to snuff. The only way to move that to the back (and underside) was to rotate the piece and then flip it like a pancake.

Did I mention that it weighed 510 pounds?

You'll see my car jack and some 2x4 blocks in this picture. There's also a line to slow it down if it started to slide. I worked VERY slowly on this part.

Raising1254978187.jpg


That got it up on its side. Then I had to lower it back down. Since the wall I was lowering it against was a stucco surface (originally an exterior), I was able to use a system where I would clamp progressively shorter 2x4 lengths which I would release slowly (first one, then the other) and slowly let it move back down so its good side was up. This part was done even more slowly. I sweated a lot whenever it would slip a little.

Lowering1254978311.jpg


I finally got the steel on top of the cabinet. I used sulfuric acid to clean off the mill scale. I haven't yet secured the steel to the cabinet top. But it's 510 pounds. I can jump on it all day and it's not going anywhere.

Cleaning1254978646.jpg
 
Last edited:
To avoid these ads, REGISTER NOW!
OP
J

Jack Olsen

Super Moderator
Staff member
Joined
Mar 22, 2009
Messages
6,678
Location
Los Angeles
Then I tried it out with a 10" forged steel vise.

00+Vise1254981745.jpg


Paint came after that:

01+Painted1254981796.jpg


To hold hammers, I had a metal shelf that I botched up pretty badly when I tried removing a special-purpose shelf. I covered the messed-up sections with wood, which also meant I could use screws to hold the hammers in place.

09+Hammer+Store1254982435.jpg


There's still a lot of wasted space up above. So I started some more cabinets.

02+Cabinet+Start1254981919.jpg


I wanted to do sliding cabinets instead of hinged ones. So I used the table saw to cut two channels in a set of 2x4s. It was easier than I thought it would be.

03+Channels1254981953.jpg


04+Curve1254982012.jpg


Then I put a skin on it. The reason for the curved section is two-fold. I wanted it to have the feel of a bench from the 1950s and 1960s, and I also wanted to be able to open the cabinet above my main wood bench.

05+Wrap1254982159.jpg


I used a sliced up 2x4 for trim.

06+Trim1254982189.jpg


And more paint:

07+Paint1254982211.jpg


I was able to get two 12' lengths of 3" wide 1/8" aluminum for $12 each. They completed the retro look.

08+Aluminum1254982277.jpg
 
OP
J

Jack Olsen

Super Moderator
Staff member
Joined
Mar 22, 2009
Messages
6,678
Location
Los Angeles
olsengaragealr.jpg


This is what I used to have, which was all right for storage. The new bench is on the right side of this picture.

Closed.jpg


The total budget was in the $900 range. The wardrobe style cabinet on the right is metal, and cost me $30 off of Craigslist. The short one holding up the big new piece of steel is made by Strong Hold, and is thick gauge steel rated for, well, pretty much whatever you want to put on it (you can put in 1,900 pounds per shelf, according to the specs).

I'm also including a big cabinet I picked up on ebay that has doors with shelves in them. It was a little banged up, but I straightened it out enough to work.

Before:

BigCabinetOne1254983021.jpg


BigCabinetTwo1254983032.jpg


After some paint:

Cabinet.jpg


Here's another angle that shows the lights I built into the undersides of the cabinets. They're motion activated, made out of one of those cheap outdoor security lights.

Lighting.jpg
 
Last edited:

walperstyle

Well-known member
Joined
Oct 5, 2009
Messages
48
Very nice. Do a lot of hammering? When I'm done with my garage, i'll be throwing up a socket set and wrenches. Guess I work on cars mostly, but Love what you have done with such a small space.
 

Falcon67

Well-known member
Joined
Jun 11, 2009
Messages
18,371
Location
Merkel, TX
I'd love to have a top on a bench like that - sometimes you just need to whail away on something with a 2 lb hammer and that's perfect. Nice work, good inspiration + documentation.

Sulfuric acid to clean mill scale - interesting, pretty serious cleaner. I've never looked to see where you'd buy that. I can get HCL all day long from pool shops.
 

jkeyser14

Well-known member
Joined
Dec 19, 2008
Messages
1,816
Location
(rural) Maryland
Sulfuric acid to clean mill scale - interesting, pretty serious cleaner. I've never looked to see where you'd buy that. I can get HCL all day long from pool shops.

Go to an auto parts store and buy some battery acid for refilling car or motorcycle batteries. It's sulfuric acid diluted to 50%.
 

bgott

Well-known member
Joined
Oct 31, 2005
Messages
3,512
Location
Houston, TX.
You can find sulphuric acid at a hardware or plumbing supply store, it's used to cut grease in drains.
 
OP
J

Jack Olsen

Super Moderator
Staff member
Joined
Mar 22, 2009
Messages
6,678
Location
Los Angeles
Acid.jpg


Be very careful with the sulfuric acid. Use the right gloves, face shield and other equipment when handling it. Have lots of baking soda and ammonia on hand. Don't breathe the fumes. Remember that it's going to expand in volume when you do neutralize it.

Naval Jelly (phosphoric acid) works fine for most stuff.
 

SSFOS

Member
Joined
Aug 5, 2009
Messages
24
Location
Woodinville, WA
Jack,

I very much enjoyed the fence project, and glad to see that no one was injured in the man handling of that hunk of steel. I do have a quick question for you, I am originally from Southern California, and wondering what is with the plumbing in the ceiling of your garage?

SSFOS
 

Costner

Well-known member
Joined
Jul 24, 2009
Messages
339
I'm sure glad I'm not on your speed dial the next time you have to move. That bench would be a killer.

Nice job.
 
OP
J

Jack Olsen

Super Moderator
Staff member
Joined
Mar 22, 2009
Messages
6,678
Location
Los Angeles
wow very nice:thumbup:, i see you live by one of my sigs
No, I live by both of the lines in your signature.

Actually, hammering is really just the photo-op purpose of this bench. I have a pair of tubing benders that need to be bench mounted, and I needed a solid base for them. I have an idea for a way to do several different mounts with just one set of holes. (Or at least that's the plan -- there might be a 'design change' if that doesn't work.

I am originally from Southern California, and wondering what is with the plumbing in the ceiling of your garage?

Anyone's guess. The wall this is on was originally an exterior wall. There's (4" iron pipe?) venting for a bathroom that's in the adjacent office. There's also an exterior downspout running down the corner where my wood bench is. As haphazard as my construction might be, I've got nothing on the yahoos who worked on this place before me.
 

Dan in Pasadena

Well-known member
Joined
Feb 18, 2009
Messages
13,103
Location
Pasadena, CA
Hi Jack,
I noticed you mention using your table saw but I don't see it in the garage anywhere. Is it a little contractor type saw that can be stored under a work bench or a full size table saw? I ask because I have a full size table saw in my similar-to-yours 80 year old garage
(in age only unfortunately!) and much as I love it when I need it, it eats up all my space.

Also, above your "main wood bench" on the wall adjacent to the new metal bench it looks like there is a small shallow cabinet above the peg board...or is that just a shelf u there? Hard to tell from the pictures. Best, Dan

EDIT: Oops, my bad. I checked more closely and now I see the saw in the middle of the garage behind a cabinet of some type. On my saw, the motor hangs out the back so far it really makes it awkward to store. It will not sit flush against a wall, even with the belt removed and the motor lifted. DOH! Its a good saw, I hate to sell it but I'm thinking of replacing it with a small contractor's type saw for occasional use.
 
Last edited:
To avoid these ads, REGISTER NOW!

Stu.C

Member
Joined
Jan 22, 2007
Messages
20
Location
Lancashire, UK
Excellent stuff as always Jack :thumbup: An inspiration to folks that want to get their place organised one day ... if only the other sixty-eight items above it on the list could get done too ;)
 

wrigh003

Well-known member
Joined
Mar 27, 2006
Messages
783
Location
Birmingham, AL
Does your ceiling slope above the sliding cabinet doors?

Great results. It's amazing what painting stuff all the same color can accomplish.
 

jmh21586

Well-known member
Joined
Aug 8, 2009
Messages
1,895
Location
Pine City, MN
Jack Olsen. Could you tell me the color of green you used?? Is it custom???
I've been looking for that color to possibly paint my exterior garage doors. Could you maybe send me a message about the color and where you found it??
 
OP
J

Jack Olsen

Super Moderator
Staff member
Joined
Mar 22, 2009
Messages
6,678
Location
Los Angeles
Hi Jack,
I noticed you mention using your table saw but I don't see it in the garage anywhere. Is it a little contractor type saw that can be stored under a work bench or a full size table saw?
You can see it behind the big tan cabinet in this picture. It's a regular-sized Skilsaw.

Cabinet.jpg


I cut the diagonal supports off of this little table I made so that I could slide the saw underneath it. The saw also has a HF sawdust-catching bag underneath it.

Table031240775129.jpg


Also, above your "main wood bench" on the wall adjacent to the new metal bench it looks like there is a small shallow cabinet above the peg board...or is that just a shelf u there? Hard to tell from the pictures.

It's just a shelf. It's the top to an old coffee table that I sliced in half.

Does your ceiling slope above the sliding cabinet doors?
Yes. It's a flat roof, made out of unfinished 2x8's or 2x10's on 24" centers. It slopes down to the corner that's above the wood bench. Every cabinet that I have run up to the ceiling has to conform to the slope, which is kind of a pain in the neck. On the plus side, it was easy to cut a hole for a ceiling fan to evacuate fumes through the ceiling.

Jack Olsen. Could you tell me the color of green you used?? Is it custom??? I've been looking for that color to possibly paint my exterior garage doors. Could you maybe send me a message about the color and where you found it??
It's a recently-discontinued Sears Weatherbeater color called Tarragon. Any Sears or Orchard Supply Hardware should be able to look up the name and mix it, though. The downside is that (in my opinion) the Weatherbeater paint is terrible. I have to do two coats of it (even over primer) in order to get reasonably-consistent color -- any my painting standards are not very high.

The green in the picture up above of the little welding table in front of my shed is a different shade than the Tarragon. It's a cooler, blue-er shade than the interior one, which has more red/yellow to it. For the inside of the garage, I use exterior semigloss paint.
 

chrislehr

Well-known member
Joined
Apr 10, 2009
Messages
1,704
Location
Portland, OR
Man - that is a fantastic upgrade to that area for the money invested. Nice finds certainly help. How much was the steel top (you said costly, but I didnt see a price)
 
OP
J

Jack Olsen

Super Moderator
Staff member
Joined
Mar 22, 2009
Messages
6,678
Location
Los Angeles
The 30"x60"x1" steel set me back $310 before we negotiated a credit for the ugly corner. The 12-gauge cabinet was $320 off of ebay, local enough for me to pick up. That makes it a pretty expensive workbench, in my book. I'm sure I could have eventually found a remnant/scrap piece of steel like that for less. And I could have built an undercarriage for a lot less than what I paid for the cabinet. But I like that the cabinet closes up and looks a lot more 'finished' than anything I would have built.

And sometimes you get on a roll and just don't want to wait.
 

Zeke

Well-known member
Joined
Aug 13, 2009
Messages
17,176
Location
Long Beach CA, the sewer by the sea.
Jack, Zeke here. Nice! Now I know what you referred to when you were talking "heavy" in an earlier thread.

I've been messing around in the garage for over 45 years at many homes and sometimes apts. (Even a couple of wives!) I've had a lot of different set ups. One was a 15' x 15' room on the back of a 2-car garage that had pretty much a full wood shop in it. With the use of strategically placed casement windows and a double door, I could manipulate full sheets over the saw and long lengths on the radial arm saw coming in from the yard thru the window. Everything was built to the same height and most tools and tables were on casters to make any configuration of work surface.

But none of my work places were a tenth of what you've done. The only thing I can say is since I'm old enough to be your father, I might have done 10 times the work you've done in my various work shops.

But, I'm sure you'll catch up with that sooner than later. ;)

Oh, BTW, I've always managed a fridge somewhere out there so I didn't have to go into the house dirty. And most times a sink. Where's yours? :)

Oh wait, I think I see the sink.
 

e-tek

Well-known member
Joined
Dec 19, 2007
Messages
10,690
Location
Saskatoon, SK
Jack - you're starting to piss some of us off with all your "1 inch thick - rounded corner storage - color matching motif - self-made-gothic-fence" goings on!!!:bounce::bowdown:

Kidding of course! That welding/banging table should have a nice ring to it. Is the roof in your garage sloped by design?

Looking foward to the next project!:beer:

BTW- did you ever tell us what/who you write for? I may have missed it.
 
OP
J

Jack Olsen

Super Moderator
Staff member
Joined
Mar 22, 2009
Messages
6,678
Location
Los Angeles
Thanks, Milt. I think your age might put you in the ballpark of an older brother, not father -- and I'd bet you've built/engineered/created somewhere in the 100x to 1000x range compared to me -- but I'm slow and steady; I'll try close the gap before too many more decades have passed.

I'd still like to have a better way to deal with cutting 4x8 sheets. I got three second-hand steel tables (with removable legs) that were really useful for making the fence. One of them became my fold-down welding table, but I'd like to find a way to keep one of the remaining two for occasional expansion -- maybe using a hoist to store it up along the ceiling. There's nothing better than having a strong work table you can set up outside. I'll just need a mounting/securing scheme that insures it never falls on my head or my car.

Here's another picture of the new stuff that shows the sink. As soon as the wife gets fed up with my footprints to the kitchen, I'll think about a fridge. But she's been okay with them so far.

Right-Half.jpg


And thanks, E-tek. Yes, the roof is flat (rough-cut 2x8 joists), with a pretty aggressive grade going down to the corner above my wood bench. It makes for some tricky lines along the top of anything I connect to the ceiling.

I've got some new deck and pergola idea simmering in my head for my postage stamp of a back yard. But that won't get rolling until probably the beginning of next year. I write fiction -- screenplays -- and my next rewrite job is going to eat up most of my November and December. But I'm glad I'm keeping you on your toes with my curved, green, Wizard-of-Oz-style woodwork. :)
 

Auzivision

Well-known member
Joined
Oct 6, 2009
Messages
252
Location
Hoosier State
I love this thread… It has totally inspired me to paint all the various cabinets I have in my garage.

Most of them are metal and I was wondering if you could tell us about your painting procedure (i.e. prep, prime, paint type, application technique)?

I was originally thinking I would need to use spray paint ot get a decent finish on metal.

Hoist 2.JPG

Patio Heater 014.jpg
 

Zeke

Well-known member
Joined
Aug 13, 2009
Messages
17,176
Location
Long Beach CA, the sewer by the sea.
ONE MAN AND A 4 X 8 SHEET

One man can handle 4 x 8 sheets pretty well with a rolling table to get the sheet near the saw and an out feed table. The rolling table only needs to be large enough to balance the sheet until it's on the saw table. You're gonna lift up on the sheet and move the rolling table away as you begin the cut.

The out feed table needs to be able to not tip over as the cut pieces come out of the saw. It needs to be wide enough to keep both of the rip cuts supported but only long enough to keep them from tipping up as you finish the cut. The ability to make a minimum of a 4 x 4 table by joining your work tables and maybe even tethering them to the saw will do the trick.

This is why my little 15 x 15' shop had every work surface at the same height, 39 inches. I could move things around and do any operation on a 4 x 8 sheet once up on any table. Pretty handy for assembling cabinets too.

PAINTING METAL CABINETS

Painting metal cabinets can be done with a short nap roller and some thinner to thin out the paint to optimum consistency. The secret to ANY painting on a smooth surface is to get the paint on and spread it out evenly as quickly as possible and then leaving it along to level out. I generally do any "cutting in" with a brush first. Then I roll out the body overlapping any brush work as much as possible. If you can't get the paint on and rolled out in less than 60 seconds, you're going to start seeing the paint ball up in an "orange peel." The hotter the weather, the tougher it is. Too cold can be a problem as well producing runs and curtains before the paint can set up.

An old painter told me once that if the coat of paint is exactly uniform in thickness, it won't run. If there is actually way too much paint applied, the whole surface will slide. Otherwise it's always the thicker area building up and losing surface tension. I've used his theory all my life as a sometimes car painter and once a full time house painter (10 years) and had great results along with my own theory of "get it on there fast and leave it alone."
 

Auzivision

Well-known member
Joined
Oct 6, 2009
Messages
252
Location
Hoosier State
Thanks for the painting tips. I’ll practice this technique on the back of one of the cabinets to see how it turns out.

Is any type of paint better than another for metal? Water vs Oil, Latex or Enamel, etc. What about prepping the surface any tips on this? Also, what about those cheap Wagener sprayers... would they work any better?

On a different note… one thing I did was place all on my metal cabinets of cheap HF moving dollies to I can easily roll them around and keep them from rusting. Almost everything I have is on wheels which should help when it comes time to do the epoxy thing.
 

Zeke

Well-known member
Joined
Aug 13, 2009
Messages
17,176
Location
Long Beach CA, the sewer by the sea.
Thanks for the painting tips. I’ll practice this technique on the back of one of the cabinets to see how it turns out.

Is any type of paint better than another for metal? Water vs Oil, Latex or Enamel, etc. What about prepping the surface any tips on this? Also, what about those cheap Wagener sprayers... would they work any better?

On a different note… one thing I did was place all on my metal cabinets of cheap HF moving dollies to I can easily roll them around and keep them from rusting. Almost everything I have is on wheels which should help when it comes time to do the epoxy thing.
Sorry, I should have mentioned that synthetic enamel would be the best choice. I have a Wagner and I wouldn't hesitate to use it although it won't be 2 times better than hand applied done properly. So, if you don't have one, I wouldn't go out and buy one just for garage cabinets.

As always, prep is everything. Good and clean will produce the best results. Tips? I don't have any special except that a product called POR 15 will cover and stop rust if present and I use a lot of this in dicey conditions. It is available in spray cans if you look the web site over. Click on "this."
 

Eds_tls

Well-known member
Joined
Feb 26, 2009
Messages
389
Location
Rockford, IL
Thats one of the coolest garage spaces I've ever seen.

I love the functionallity and the creativity. Its really tough to combine both and do it well. I'm VERY impressed!

The 911 is just a bonus :)
 

63ChevyII

New member
Joined
Dec 2, 2009
Messages
4
I'm really impressed with what you done - I've been a lurker here for a while, but decided to actually join so that I could ask you some questions.

Then I put a skin on it.
05+Wrap1254982159.jpg

What did you skin it with?


I put steel or aluminum banding around the edge of all the work surfaces in the garage. For the 3/4" plywood tops (this fold-down bench and also the drawing table), my cheap solution was L-shaped painted steel pieces that are used as part of those foam 2'x4' suspended ceiling setups. I think the 12' lengths were under $3, which was a lot cheaper than wood trim or anything else I could find.

How did you attach the banding. Do you have any close up pics showing how it looks?

Thanks.
 

thomask

Well-known member
Joined
May 28, 2009
Messages
354
Location
Sunshine State
JACK, I have enjoyed your pics and projects very much.

You have done a great job and I was wondering what you may have in mind for the future build list?

Thanks for keeping us informed.
 
OP
J

Jack Olsen

Super Moderator
Staff member
Joined
Mar 22, 2009
Messages
6,678
Location
Los Angeles
Thanks.

What did you skin it with?
That's a good question, and I wish I knew the precise answer -- but I don't remember. It was from Home Depot, and it was cheap; it's somewhere between paneling and particle board. It had a wood grain pattern on it, I think, which was just a cosmetic layer. The main reason I picked it out was that it was flexible enough to conform to the curve of the cabinet. For this application, I didn't need it to be especially strong -- I would have done two layers if I needed more strength.


How did you attach the banding. Do you have any close up pics showing how it looks?
The garage is a mess right now, but here are some quick pictures.

This is the banding. Like I said, I think it's a component of those inexpensive suspended ceilings. It's painted white and L-shaped. I miter cut it with tin snips and wrapped it at the corners. Then I used screws to hold it in place. I might have put down a bead of adhesive as well. It's folded over itself along both edges so it isn't sharp. You can see it's taken some abuse already:

Banding+Ext1259821239.jpg


You can see the screws here:

Banding+Attached1259821286.jpg


For my main bench, I bought 1/8"x2" steel and screwed it to the wood.

Steel+Banding1259821269.jpg


The aluminum banding is held with adhesive -- Liquid Nails or the equivalent.

Aluminum+Banding1259821257.jpg


I was wondering what you may have in mind for the future build list?
This last weekend, I chopped a big belt section out of the beige metal cabinet on the left of this picture:

Right-Half.jpg


I put an Ikea butcher block top on it to make a kind of kitchen island -- but for a garage. I wrote it up in this thread.

Island+Painted+Close1259821309.jpg


I'll take some more pictures as soon as I've cleaned up from three different recent shelving projects.
 
To avoid these ads, REGISTER NOW!
Top Bottom