To avoid these ads, REGISTER NOW!

Between 265 & 485 SQ/FT My first house, my second garage - 2-car in CA

Workspaces sized between 265 and 485 squarefeet.
OP
J

JP_CA

Well-known member
Joined
Sep 20, 2015
Messages
203
Location
Bay Area, CA
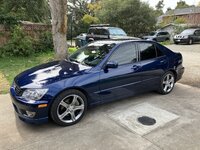
Ok, onto more interesting stuff . . the Lexus (IS300) needed a clutch and rear diff bushings, so at the beginning of January I tore it all apart and finally finished it last weekend.

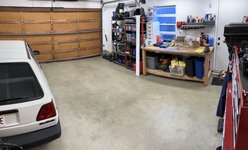
Step 1: clean the garage to prep for the job

IMG_5493.jpeg

Step 2: make a mess

IMG_5495.jpeg

It doesn't take long to get the rear diff or the driveshaft out, thankfully. I replaced the diff when I bought the car and installed a factory Torsen LSD (which is great).

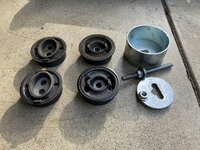
The bushings in the subframe were pretty tired, so I bought new Toyota bushings and a press tool to swap them out. There was some swearing when they didn't want to start pressing in straight, but all's well that ends well.

IMG_5513.jpeg

IMG_5514.jpeg

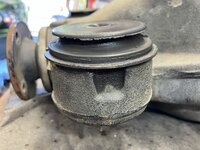
The bushings in the diff housings are a different story. First off, Toyota units cannot be purchased. They just don't exist. I've searched every possible part number and concluded that you can't get them. That leaves only aftermarket options, and at that, only polyurethane. I'm not a fan of poly bushings but I can't have the diff flopping around anymore, so poly it is!

IMG_5496.jpeg

The removal process was, uh, eventful.

IMG_5586.jpeg

Ready for new bushings:

IMG_5587.jpeg

All done and ready to go back in! These came from Figs / SuperPro. Easy install.

IMG_5588.jpeg
 
To avoid these ads, REGISTER NOW!
OP
J

JP_CA

Well-known member
Joined
Sep 20, 2015
Messages
203
Location
Bay Area, CA
The keen-eyed among you would see the clutch hiding on the floor in the last few photos. That's because I am skipping around.

Removing the transmission was . . nearly impossible. Truly terrible. I managed to unbolt everything, remove the transmission mount, remove the shifter, etc. The transmission was completely disconnected - nothing holding it in place other than a transmission jack - and it took me another 3 hours to remove the thing.

The engine wouldn't tilt back enough, so I disconnected the exhaust pipe where it meets the header/downpipe.

Even tilted, the bell housing was pushing hard into the transmission tunnel, so the subframe has to drop a little. Loosened some bolts to let that down more.

With the subframe dropped down, the steering U-joint got tight and I had to remove it. Naturally, I did this in place (without lifting the engine back up) so I boogered the threads and ended up replacing the U-joint later. Thankfully IS300s are currently plentiful at local junkyards.
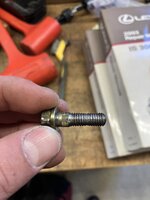
IMG_5650.jpeg

IMG_5651.jpeg

Even with the subframe completely unbolted and resting on a jack, I had to pry and wrestle the transmission out of the tunnel, including turning the whole thing about 90 degrees so the clutch fork faced down. The tunnel is just too small to slide the transmission rearward to clear the clutch assembly with the input shaft.

With the transmission removed, I could replace the rear main seal and the pilot bearing.

Rear main was easy enough - I blunted a screw, carefully drilled through the seal, and used the screw to pull out the seal.
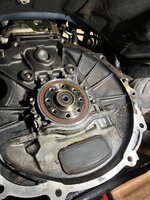
IMG_5554.jpeg

Next came the pilot bearing, and I got to use my favorite trick - BREAD! Some people use grease, but I like bread better. Less messy.

You take a slice of bread, ball it up, and put it into the hole in the pilot bearing. You keep packing and hammering into it until the bread starts pushing the bearing out. It's whimsical and brilliant. Cleanup is easy too.

ezgif-6-87c4caf2ed_r.gif

I cleaned up some of the oil . . which is a problem for another time.

IMG_5555.jpeg

With that all done, I installed the new flywheel, clutch, and pressure plate. This is a Supra single-mass clutch conversion. The dual-mass unit is heavier and notoriously difficult to machine. All Toyota OEM parts here. See this link for details:

IMG_5557.jpeg

When it came to reinstalling the transmission, someone was smiling down on me because it took 15 minutes to get it aligned and install the first few bolts. Go figure. Torquing all of the bolts was another story, especially the starter bolts which are at about 10 o'clock if you're looking forward. I used truly cursed combinations of extensions and universal joints for that, but the torque wrench clicked so I'm happy.

Still a bit grimy but so am I, and who's keeping score?
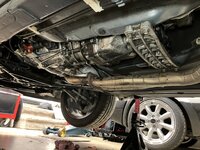
IMG_5668.jpeg

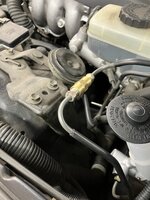
The clutch had been squeaking when actuated, so I shotgunned a new master cylinder, slave cylinder, and soft line into the car while I was at it. I also deleted the Clutch Dampening Device (CDD), which is basically an orifice valve with some convoluted geometry inside.
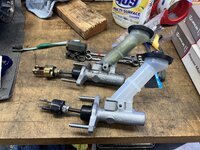
IMG_5652.jpeg

Adjusted length to match:

IMG_5654.jpeg

CDD replaced with a brass union:

IMG_5665.jpeg

Bleeding the clutch was surprisingly easy thanks to a tip from a friend. Keep in mind the system was completely dry. His recommendation was to bleed from the bottom up. I have this kit from back when I still had a classic Mini:

I cut off the end of the hose that used to connect to the Mini's master cylinder reservoir cap and used a section of silicone hose to connect to the bleeder on the slave cylinder. With the little bottle filled with brake fluid and the help of a friend, I connected the tire chuck to a tire that we'd lowered to roughly 20 psi. I opened the bleeder and the system filled from the bottom all the way up into the reservoir!

After a few manual bleed cycles (pump, bleed, lift the pedal) the clutch was bled and no more air was coming out. Easy!

The first few engagements on the new clutch were pretty darn jerky - the thread I linked above has varying comments on clutch chatter, so I was pretty nervous about it. The pedal feels super different, the engine revs faster, the car legitimately feels faster to accelerate even if it's just placebo. I'm getting used to the new clutch feel and the chatter is definitely fading away now, so I hope it subsides completely. Some folks report no chatter at all and some advise to just get used to it. I've never had to break in a clutch before and have replaced my fair share, so maybe this is just an idiosyncrasy of this car.

Regardless, glad to have the car back on the road. Probably time to do rear suspension links next, as the car has a pronounced wheel hop if I'm real heavy on the skinny pedal taking off.
 
OP
J

JP_CA

Well-known member
Joined
Sep 20, 2015
Messages
203
Location
Bay Area, CA
Odds and ends . .

The Land Cruiser sits most of the time but I haven't bothered to run a float charger all the way down the fence, so I bought a solar charger. I wired it to plug into the same Anderson connector that I added for the compressor.

IMG_5683.jpeg

Nothing is really mounted, it's just kinda sitting there for now.

IMG_5684.jpeg

Red light means it's working :)

IMG_5685.jpeg

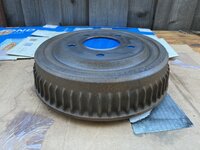
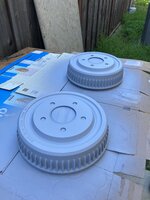
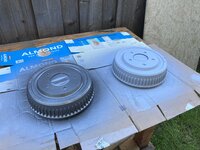
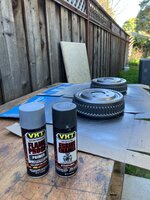
The new brake drums I put on the GMC were already getting crusty and orange (annoying) so decided to paint them.

After some wire wheeling, all the loose stuff was gone:

IMG_5703.jpeg

IMG_5705.jpeg

IMG_5706.jpeg

IMG_5707.jpeg

Here are the specific paints. I've been super satisfied with VHT. These cans gave great coverage even on the first light coat. The finish is great.

IMG_5708.jpeg

Back together and looking tidy.

IMG_5725.jpeg
 
OP
J

JP_CA

Well-known member
Joined
Sep 20, 2015
Messages
203
Location
Bay Area, CA
Boy . . 6 months without an update. Been outside, been working, you know the deal. Still, lots going on.

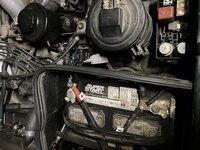
The battery in the Land Cruiser finally gave up the ghost. I've noodled with float charger setups but haven't settled on anything great yet. You can see the little solar panel in an earlier post. I'll probably keep trying that.

Anyway, this is what it looked like when I bought the truck - before the winch or any of the other 12 V accessories.

IMG_6343.jpeg

Eventually I added the winch . .

IMG_2320.jpeg

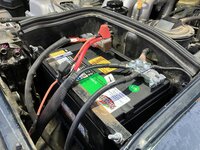
Things weren't looking great, and there were a handful of other things I wanted to add. Battery corrosion too, fun.

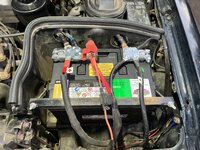
So, I looked around and settled on these battery terminals to clean things up. I wanted multiple posts, still wanted the terminals themselves to be lead, and these fit the bill. There are steel thread inserts for the bolts, which I like. I find these to be quite effective. You can find them listed as "728076" from NAPA and others.

I know this still isn't as clean as it could be, but it's a hell of an improvement. I also added a fuse for the Anderson connector which lives on the front bumper, since that was previously unfused. I have a massive fuse I'd like to add for the winch, but that's hardwired for now.

IMG_5830.jpeg

IMG_5832.jpeg
 
OP
J

JP_CA

Well-known member
Joined
Sep 20, 2015
Messages
203
Location
Bay Area, CA
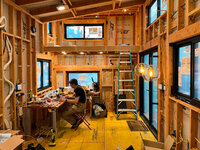
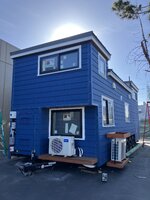
Tiny house update! Spent several more days with my buddy. It's basically done now, but I don't have more recent photos unfortunately.

In January and February, we worked on wiring, lighting, switches. The whole house uses smart switches and you can set "lighting scenes" which is actually really cool.

IMG_5780.jpeg

IMG_5781.jpeg

Stair tread lights - love these. They look awesome with the finishes installed (not shown).

IMG_5782.jpeg

IMG_5783.jpeg

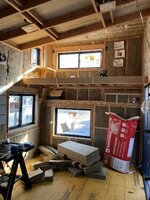
Somehow I escaped the insulation installation process, but this is ROCKWOOL. Neat stuff, go look it up.

I believe during this visit, I was terminating Ethernet.

IMG_6064.jpeg

 .jpeg

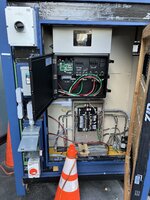
Electrical panel with solar and battery controller . . lots going on here. There's an AC-DC power supply at the bottom of the cabinet pretending to be a solar panel to test it, and power the house in this photo.

IMG_6066.jpeg

Exterior - you can see both heat pumps mocked into place (water heater and A/C). Crazy efficient appliances.

IMG_6067.jpeg

We got the fridge into place and were able to tack in some of the cabinets that he built. You can also see the walls are finished. He used thin plywood instead of drywall because the house is on a trailer and he was nervous about it cracking during the move. So far so good, and it looks great, but it's got a many-hour journey to its final destination, so we'll see!

IMG_6918b.jpeg

The whole project is beautiful, and has been a good excuse for me to practice old skills and learn new ones. It's nearly complete now, which is super exciting.
 
OP
J

JP_CA

Well-known member
Joined
Sep 20, 2015
Messages
203
Location
Bay Area, CA
Well . . . I pulled the trigger and sold the Lexus. I loved this car but was ready for something new. Dealing with people on Marketplace was a nightmare because I listed it high. I was the second owner and had full records, which is rare for IS300s, and I valued that. I got a price I was very happy with - more than twice what I paid for the car - and still lost money!

:withstupi

Farewell sweet car.

IMG_5891.jpeg

IMG_5892.jpeg

IMG_5893.jpeg

IMG_5901.jpeg

Last time I ever saw it:

IMG_6032.jpeg

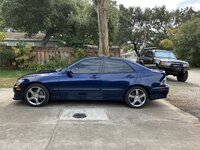
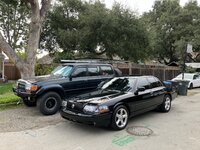
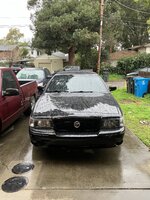
And, what do you know . . bought a Marauder the next day . . . I've always loved these and wanted a big, American, V8 sedan. This one was local, has a salvage title, but was repaired well and it's all clean and straight.

IMG_6030.jpeg

IMG_6039.jpeg

IMG_6041.jpeg

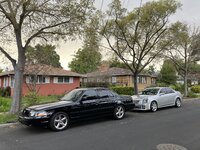
With my friend's V-1 - like peas in a pod (except his is unbelievably fast and mine is not)

IMG_6113.jpeg
 
OP
J

JP_CA

Well-known member
Joined
Sep 20, 2015
Messages
203
Location
Bay Area, CA
More odds and ends.

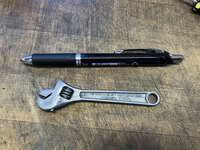
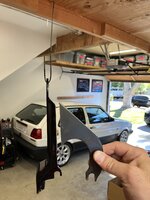
Went to a garage sale and found this tiny adjustable wrench. Anybody else love small things? Or am I weird?

IMG_6045.jpeg

IMG_6046.jpeg

IMG_6047.jpeg

Took some time to readjust the shelves so that I could fit more stuff on the rack. This is one of those things that you put off and never do . . but it's so worthwhile. I gained a ton of space here.

IMG_6133.jpeg

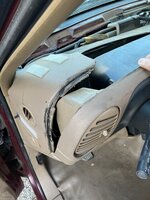
After looking for months, I finally found a decent dash for the pickup. This is somehow a one-year-only color . . go figure. It's in very good shape, not perfect, but a hell of a lot better than what I've got in there now. I use a dashskin AND a dashmat right now, but I don't like it.

IMG_5565.jpeg

IMG_5564 (1).jpeg

Here's the new one! The bad news is that I have to store it until I install it . . . oops

IMG_6308.jpeg

Waxed the truck. Pleased with the results. It's the little things.

IMG_6401b.jpeg

IMG_6402.jpeg

IMG_6403.jpeg
 
OP
J

JP_CA

Well-known member
Joined
Sep 20, 2015
Messages
203
Location
Bay Area, CA
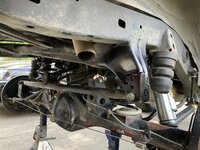
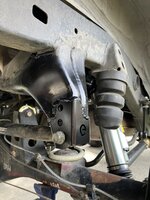
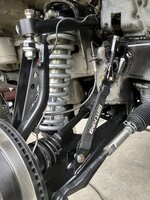
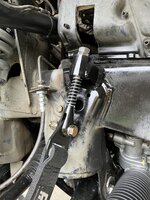
Truck stuff! A friend came over for some welding help on his 4Runner. Panhard rod correction kit, air bumps, and limit straps. He just installed a long-travel front suspension kit and the rig is turning out awesome. Might be for sale soon in the Bay Area . . message me if you're interested.

I'm no fabricator or pro welder. Still learning and practicing. I am confident that these welds will hold, but they're not all beautiful.

IMG_6169.jpeg

This panhard rod correction kit drops the body-side mount and raises the axle-side mount to keep it flatter.

IMG_6171.jpeg

IMG_6170.jpeg

Next, limit straps in the front.

IMG_6173.jpeg

IMG_6174.jpeg

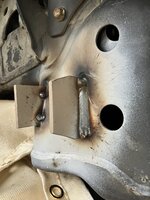
Finally, we mounted plates to hold the air bumps.

IMG_6176.jpeg

Here it is all together!

IMG_6188.JPG
 
OP
J

JP_CA

Well-known member
Joined
Sep 20, 2015
Messages
203
Location
Bay Area, CA
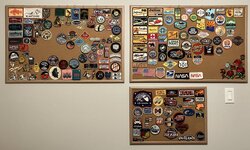
My wife decided we needed a bigger table in our craft room / guest room so we could work side by side. I liked that idea, and the table in there was pretty small. That's where we keep our painting stuff, photography gear, sewing stuff, my patch collection, my wife's many fiber arts . .

IMG_5445.jpeg

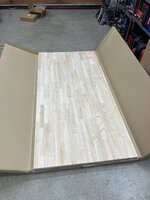
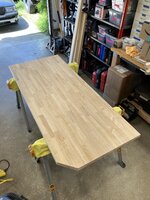
I bought a big piece of Hevea butcher block through a local wholesaler and trimmed it to size. The slab had a pretty decent bow in it, which is a bit disappointing, but I ran with it.

IMG_6350.jpeg

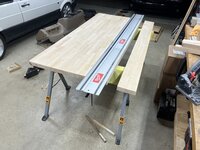
Track saw putting in work:

IMG_6352.jpeg

Lopped off a corner to make it easier to walk by the table. Edges routed, all sanded and prepped for finish:

IMG_6365.jpeg

Finish applied. You can see what I was saying about having a dashboard floating around . . not ideal.

IMG_6366.jpeg

This is what I'm using. Turns out this is a wipe-on poly. Left a nice finish, still feels like wood and not plastic.

IMG_6367.jpeg

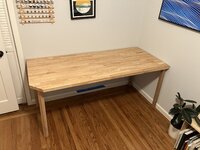
Didn't overthink the leg situation. No joinery here! It'll be tacked to a wall anyway. Here they are before finish:

IMG_6369.jpeg

Legs attached:

IMG_6370.jpeg

And here's the table in place!

IMG_6379.jpeg

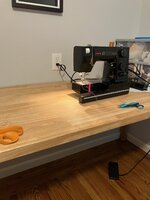
Added an outlet above the table surface too. Very convenient.

IMG_6395.jpeg
 
OP
J

JP_CA

Well-known member
Joined
Sep 20, 2015
Messages
203
Location
Bay Area, CA
Tool updates.

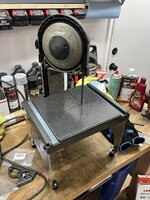
My friend with the tiny house was all done with my vertical bandsaw, so I took it home. I truly have no place to store this thing and very little need for it. It was a gift from a friend, so I sold it and sent him the money. Wonderful Rockwell saw. I did some upgrades on it before it went to the new owner (tires, new blade, scrubbed and blued the table, etc.).

IMG_7053.jpeg

IMG_7060 (1).jpeg

I do, however, need a bandsaw. I still have a little Craftsman one for wood, but I've been coveting a Portaband (and have used one a ton at work) so I found a good deal on this rusty ******* and cleaned it up a little. A quick order to SWAG and I was in business. I bought a foot pedal and some rubber feet separately as the SWAG ones are overpriced.

IMG_6582.jpeg

IMG_6703.jpeg

I have a tubing project coming up and wanted to be able to make straight cuts, so I whipped up a little "cross-cut sled" for it. Now . . the blade does not sit 90 degrees to the guide slots . . so this may not work. But, a good quick fab project anyway.

IMG_6821.jpeg

IMG_6820.jpeg

IMG_6822.jpeg

Now . . one final tool update. I hemmed and hawed over buying this thing, because WOW it's expensive. I thought about making one myself with individual mag-switches, which absolutely would've been cheaper . . . but I slept on it and waited several months before concluding I just was never going to make one myself.

So I bought it. A $450 drill press vise base with 4 mag-switches built in. It's a pretty penny, but this thing is just perfect for what I need. Yes, the switches are close to the table, but totally usable. It also has rubber on the bottom so it doesn't slip around while rough-positioning it. Very happy I bit the bullet and looking forward to drilling straight (and not triangular) holes going forward!!

IMG_7205.jpeg
 
OP
J

JP_CA

Well-known member
Joined
Sep 20, 2015
Messages
203
Location
Bay Area, CA
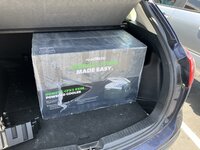
New toys, more stuff I've been wanting for a while. A 4-day, 10-person camping trip pushed me to finally buy a 12 V fridge and battery. I wanted to remain flexible so I didn't opt for anything like a fridge slide or a hard-mounted "house battery" in the Land Cruiser.

Firstly, the fridge - Dometic CFX3 55IM. Fantastic.
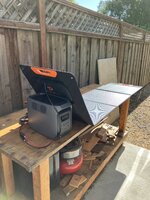
Second, the battery - EcoFlow "Delta 3 1500" which is 1.5 kWh. This is a ******* unit sold through Costco and is an amalgamation of Delta 2 and Delta 3 hardware. I don't care. It has ~50% more capacity and older UI / features. It does what it's supposed to do.
Third, the solar panel - Amazon special, ZOUPW 220 W. Does its job, seems very heavy duty if I'm honest.

IMG_6938.jpeg

Test run showed no issues charging.

IMG_7068.jpeg

IMG_7073.jpeg

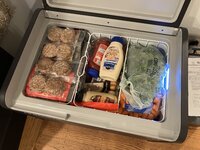
Here's the fridge loaded up and pre-cooling before the trip. I learned that this is TOO full and air can't really circulate. I have a solution for this involving some perforated PVC pipe, so we'll see for next time.

IMG_7230.jpeg

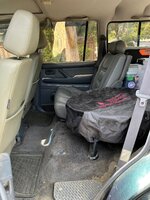
Loaded up . . had to remove a seat to fit the propane firepit and all our gear. Worth it.

IMG_7232 (1).jpeg

The whole setup was flawless except for air circulation within the fridge, which meant the stuff at the top wasn't staying as cold. I don't think the battery went below 80% even with ambient temperature ranging from 50 to 85 degrees and the fridge set to 35 degrees. I chucked the solar panel on the roof when parked and it charged nearly back to 100% most days. Super easy.

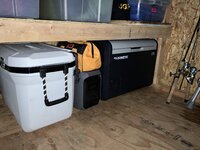
And, miraculously, it fits in the shed where the old 120 L cooler used to live. Goodbye bigass cooler! Won't miss ya!

IMG_7253.jpeg
 

rvieceli

Well-known member
Joined
Nov 3, 2013
Messages
779
Location
Illinois
I’m a big fan of the ecoflow units. Decent range of capacity and good prices. They have an eBay store as well. Supposed to be refurbished but I have always gotten new ones.

Ron
 
OP
J

JP_CA

Well-known member
Joined
Sep 20, 2015
Messages
203
Location
Bay Area, CA
I’m a big fan of the ecoflow units. Decent range of capacity and good prices. They have an eBay store as well. Supposed to be refurbished but I have always gotten new ones.

Ron
Nice, good to know. We used to use Jackery at work for in-vehicle power and the whole company switched to EcoFlow a few years back. They seem robust enough for my limited use. Nice to have around the house as well - my neighborhood has power outages more than I'd like.
 

Bad Mojo

Well-known member
Joined
Sep 2, 2012
Messages
119
I stumbled across this thread yesterday and enjoyed reading my way through it. Nice job, and I really enjoyed your take on the Laura Kampf labeling system, well done.

Looking forward to see what you do with the PVC in the fridge to make it circulate better. And yes I played spot the Land Cruiser in the photos.
 
OP
J

JP_CA

Well-known member
Joined
Sep 20, 2015
Messages
203
Location
Bay Area, CA
I stumbled across this thread yesterday and enjoyed reading my way through it. Nice job, and I really enjoyed your take on the Laura Kampf labeling system, well done.

Looking forward to see what you do with the PVC in the fridge to make it circulate better. And yes I played spot the Land Cruiser in the photos.

Much appreciated. I'm glad you got something out of the thread!

Learning new handwriting was a trip. I find that I can "turn it on" when I want to now, but it's slower and takes more effort. Still, nice to have that up my sleeve.

The PVC I plan to basically scallop the ends and drill holes throughout the pipes, so that air can travel up and down and circulate a little. I don't think I'll ever pack it as full as I did (live and learn) but this should help when it's on the fuller side. I imagine this creating a column where air can flow. I'll throw in a few of them.
 
OP
J

JP_CA

Well-known member
Joined
Sep 20, 2015
Messages
203
Location
Bay Area, CA
Late June, misfortune struck. I was out running errands and got a text from my wife that power went out at home. My neighbors lost power too. My wife turned off the light switches (including the garage lights, since she'd been in there) because she didn't know when power would come back on. Fortunately, it came back on ~30 minutes later.

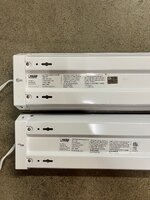
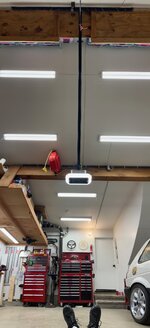
I came home a few hours after that and power was on. I went into the garage, flicked on the lights, and heard a pop. The lights did NOT turn on. I checked the breaker, checked the GFCI outlets, reset everything . . no dice. The outlets were working, had power, but none of the lights worked. The 4 lights on the front side of the garage are daisy-chained and the 2 rear lights are individually plugged into an outlet. Feit allows 4 to be strung together, so I was good.

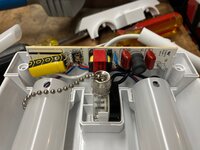
I individually tested each of the 6 lights with an extension cord and none of them turned on. Lovely! I took one down and checked inside, hoping to find a fuse. No such luck. Here's what they all looked like:

IMG_7078.jpeg

IMG_7214.jpeg

IMG_7213.jpeg

The culprit is this little LED controller:

IMG_7178.jpeg

I talked to my electrician about what happened and he basically confirmed my theory. There was a short or transient overvoltage condition on the utility side, and it charged the capacitor on the board of each light, then power was shut off. When I turned the lights back on later, I think that cap discharged and that's why I heard all the LED controllers pop. If that's not exactly what happened, it's something similar.


In October 2023, in my infinite wisdom, I used sticky CordMate conduit to put these lights up and organize the cords. You can see that post here:

Lucky me . . time to take all that down. Did I mention that the conduit was sticky? Turns out, it'll pull the paint right off the wall!

The next few weeks was hell. Undoing all my work, patching the ceiling, redoing all the wire routing . . and the best part? I did all of this work with NO SHOP LIGHTS! Super ideal. I was very frustrated and didn't want to be spending my time redoing work.

IMG_7181.jpeg

IMG_7183.jpeg

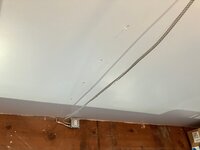
Cleaned up the leftovers from when the new garage door opener was installed and the old support was cut off "flush to the ceiling" but definitely not flush. Also looked like it was cut with a spoon. Anyway, had to do a big patch for that.

IMG_7215.jpeg

IMG_7216.jpeg

I submitted a claim to PG&E to recover my expenses (and charge them for a time) - figured it was worth a shot. They of course rejected my claim because the outage was caused by a "third party metallic balloon." Go figure.
 
OP
J

JP_CA

Well-known member
Joined
Sep 20, 2015
Messages
203
Location
Bay Area, CA
I was hoping to roll paint over the new patched areas so I thought I bought the correct rollers at Home Depot. Clearly not. Tried brushing after that. Not good.

The whole garage was professionally (spray) painted, so that's what I got to do to match the finish! Surprise - time to mask everything :|

IMG_7281.jpeg

Basically painting by candlelight!

IMG_7282.jpeg

IMG_7283 (1).jpeg

I've only used this sprayer for stain in the past, which works well. Turns out, it works great with paint too . . until I had to clean it! Not as fun.

IMG_7284.jpeg

I bought another set of the same lights. Feit 4 foot shop lights, 4000 K, 4500 lumens. Same same. I like those lights. I knew I needed a surge protection solution, so I figured that out later.

So - great! Everything is patched and painted, ready to reinstall lights . . got the first one up and the mounting screws didn't seem to be lining up. Weird, they're the same . . but they don't reach?

They don't reach because they're 2 inches shorter. ????????????

IMG_7267.jpeg

They shortened the lights by 2 inches, 2 years later. Why? WHY?

IMG_7268.jpeg

Anyway, that meant patching and painting 6 more holes, and re-drilling and mounting the screws. Not difficult, just annoying.
 
OP
J

JP_CA

Well-known member
Joined
Sep 20, 2015
Messages
203
Location
Bay Area, CA
Obviously I wasn't going to use sticky conduit again, so I used wire clips and screws everywhere once the lights were back in place. Tedious but I'm happy with the result.

IMG_7285.jpeg

IMG_7286.jpeg

IMG_7287.jpeg

IMG_7288.jpeg

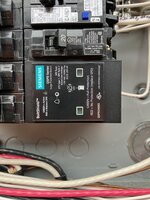
Now, to make sure it doesn't happen again. I don't know much about surge protection, and people online seem to get very angry about their opinions on surge protection. Whatever.

IMG_7396.jpeg

IMG_7394.jpeg

IMG_7393.jpeg

Finally, and maybe most satisfyingly, I labeled the panel directly (next to the breakers). I know this seems basic, but the white label in the upper right corner had me counting down from the top every time I had to flip a circuit off, so this is a huge improvement.

There are a handful of spare circuits (and could be more if I went to slimmer breakers and/or rearranged), but all of the slots are filled. I don't love that, but there's not much I expect to add . . .

IMG_7395 (1).jpeg
 

Bad Mojo

Well-known member
Joined
Sep 2, 2012
Messages
119
@JP_CA thats super lame about the lights and a bit of salt in the wound with the paint and the lights being 2" shorter.

An unsolicited thought if you want it, I noticed your in the Milwaukee cordless lineup and I would recommend looking at getting one of the rocket lights. I have one and it has been super clutch in these situations and I use it way more than I expect. Somehow we only do electrical repair work at night with power cut to the whole house or I am wrapping up something late in the driveway, and it so nice to pop a battery in and be able to see how I normally do. Also have used it a done during our remodel.
 
To avoid these ads, REGISTER NOW!
OP
J

JP_CA

Well-known member
Joined
Sep 20, 2015
Messages
203
Location
Bay Area, CA
@JP_CA thats super lame about the lights and a bit of salt in the wound with the paint and the lights being 2" shorter.

An unsolicited thought if you want it, I noticed your in the Milwaukee cordless lineup and I would recommend looking at getting one of the rocket lights. I have one and it has been super clutch in these situations and I use it way more than I expect. Somehow we only do electrical repair work at night with power cut to the whole house or I am wrapping up something late in the driveway, and it so nice to pop a battery in and be able to see how I normally do. Also have used it a done during our remodel.

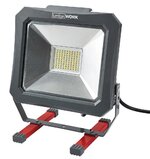
Good to know, thank you! Space is at a premium at the moment but that does look like a handy setup, and it's nice that it can be powered with 110 V as well. I have a small flat LED utility light panel which gets some use in situations like this, but it is not battery-powered. Looks like this:

Screenshot 2025-08-10 at 5.41.25 PM.jpg

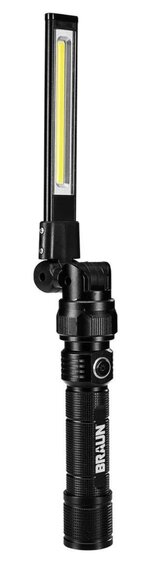
My battery lights are limited to a few of these Braun (HF) lights and a "light bar" headlamp.

Screenshot 2025-08-10 at 5.37.36 PM.jpg
 
OP
J

JP_CA

Well-known member
Joined
Sep 20, 2015
Messages
203
Location
Bay Area, CA
I've been wanting to do exhaust on the pickup for a while. The existing system was a single Magnaflow after the cat, then a straight pipe and a turndown in front of the axle. It sounded ok, not great, and was pretty loud in the cab. I was never thrilled with it, and the smog shop always struggled to get the sniffer in because it was in front of the axle.

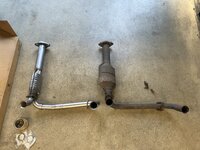
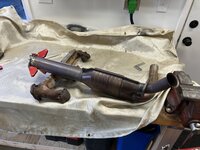
I finally got the nudge to do it after the truck failed smog and I concluded the original cat was cooked. I ordered a new cat, with Y-pipe, and sprung for stainless / mandrel bent. No issue, threw it in, passed smog.

IMG_6697.jpeg

"While I'm in there" . . . you know the deal . . I ordered headers. Pretty nice smog-legal units from JBA / Doug's. Just shorties, so not expecting anything drastic in terms of performance.

IMG_6584.jpeg

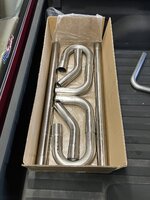
Decided to do 3" all the way back, so I bought a tube kit on eBay. This tubing as pretty nice. Decent fit, not super thin. Amazing what you can find online these days.

IMG_6603.jpeg

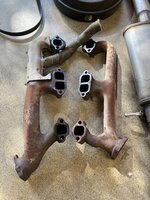
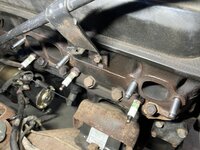
Stripped the truck down after it passed smog. I was amazed at how easy it was to get the manifolds off. Texas/California truck, so very little rust. No stripped or broken fasteners. Amazing.

I was also reminded that these engines (305 / SBC) ran no exhaust manifold gaskets. Iron to iron. If it's flat, I guess it seals!

IMG_7400.jpeg

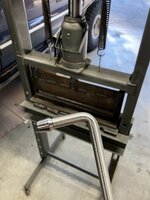
Go ahead and laugh . . I even bought stainless hangers. I used a friend's press to bend them to 90. Nice and neat . . close enough for me, anyway.

IMG_7470.jpeg

IMG_7471.jpeg

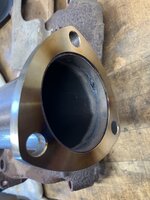
The first step in making the cat-back system was to weld a different flange onto the cat itself. The factory exhaust has a 2-bolt flange which I don't really like.

I bought a flange kit and went to town. Note - I have stainless wire, but I'm welding with C25 gas. Not ideal, I know, but I decided it'd be good enough for exhaust work. This is not a show truck.

IMG_7443.jpeg

The tube was magnetic but the flange wasn't, so I just used the magnets as endstops.

IMG_7444.jpeg

The weld turned out pretty ugly, but penetration seemed good. I am a novice welder!

IMG_7446.jpeg

IMG_7448.jpeg
 
OP
J

JP_CA

Well-known member
Joined
Sep 20, 2015
Messages
203
Location
Bay Area, CA
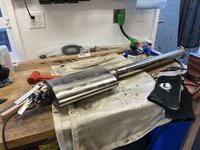
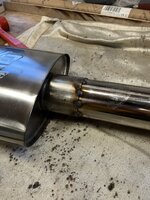
Next was the first section of tubing for the cat-back. Add the flange, weld the muffler (Borla ProXS).

Again, a bit ugly and oversized on the ol' weld bead . .

IMG_7473.jpeg

Had to dress the welds back to get the nut/bolt to sit flat, so this is how it ended up:

IMG_7487.jpeg

Continued with the muffler:

IMG_7492.jpeg

Started with tacks:

IMG_7491.jpeg

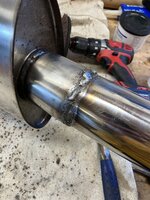
Then everything went to hell when I tried to run beads. I had trouble really seeing the weld pool through my hood and fiddled around with settings, but ended up making a dog's breakfast out of it. Lots of spatter due to incorrect gas, unfortunately. For this joint, I tried using anti-spatter on the tubing, which helped, but made a real mess.

IMG_7494.jpeg

Didn't love the way that looked, so I dressed this one too. This is the last weld to get dressed on the whole system . .

IMG_7511.jpeg
 
OP
J

JP_CA

Well-known member
Joined
Sep 20, 2015
Messages
203
Location
Bay Area, CA
To get fitment right, I had to install the headers and cat.

First, ARP studs went in. I had to chase a few of these, but had no issues.

IMG_7407.jpeg

Modified the alternator support bracket per header instructions. One factory stud is retained for this, with a spacer to simulate the thickness of the cast manifold.

IMG_7403.jpeg

IMG_7411.jpeg

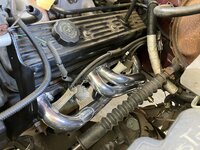
And, like magic, the headers went in! They fit great. No issues at all.

IMG_7415.jpeg

I had this stuff lying around, and because I didn't retain the original spark plug wire head shields, I figured it would help.

IMG_7413.jpeg
 
OP
J

JP_CA

Well-known member
Joined
Sep 20, 2015
Messages
203
Location
Bay Area, CA
Now - torquing the headers . . . it's never fun, you can never get a socket on the nuts, etc. I wanted to make a separate post for this, because I think it's worth calling out separately.

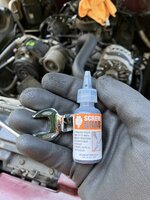
I used a crow's foot wrench for this, but it kept slipping off. I used every combination of extensions to try to position the torque wrench so that it would apply force in the right direction, but still really struggled to reach torque.
Eventually, I had an intelligent thought and figured I would try Screw Grab. If you've never used this stuff before, look it up. It's a high-friction paste, with grit embedded in a sort of gel. It's used for stripped fasteners (think Phillips-head screws that someone's gone Gorilla Mode on) and adds a ton of friction between the tool and the fasteners.

I've never used Screw Grab for anything like this, but it was absolutely brilliant. I put it on the flats of the wrench and it completely eliminated the slipping. I was able to torque all the fasteners easily. It marred the chrome finish very slightly but not enough to notice or care.

This is not a sponsored post . . just a great product when you need it.

IMG_7412.jpeg
 
OP
J

JP_CA

Well-known member
Joined
Sep 20, 2015
Messages
203
Location
Bay Area, CA
I didn't take many photos of the fitting/cutting process, but the bend kit had everything I needed to make this system fit really well under the truck. Not a super difficult system to make, probably one of the easiest, but it's still my first time making an exhaust system.

Mocked:

IMG_7512.jpeg

IMG_7513.jpeg

All slipped together:

IMG_7524.jpeg

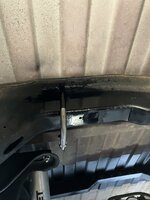
Got a mount on the muffler. I think I ended up moving this one to be straighter.

IMG_7515.jpeg

IMG_7564.jpeg

IMG_7526.jpeg

Tacked:

IMG_7528.jpeg

And welded (this time just tack tack tack):

IMG_7563.jpeg

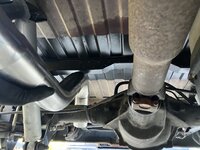
This is everything I could weld outside the vehicle, then I had to doodle around to get it welded to the muffler outlet. I nudged around the hangers a little bit to get the fit right. There's JUST enough clearance between the top of the hump and the frame, and I think the bumpstop will keep the axle from every hitting it, but if it hits, it hits.

I'm happy with the way it fits and the welds are whatever. Not terrible, not great.

Here's the first startup. I like the way it sounds - super throaty, quiet at idle. The truck feels way more free-revving in the top half of the rev range, and it truly feels faster. It used to struggle above 3,000 RPM and it will pull beyond that now, pretty happily. It does have a little drone and is louder than I want, so I have a resonator that'll go behind the cat, before the muffler (because that's where it fits).


All in all, pretty proud of how this went overall. It wasn't rocket science, but for my first time doing exhaust, I am very satisfied.
 
OP
J

JP_CA

Well-known member
Joined
Sep 20, 2015
Messages
203
Location
Bay Area, CA
I’m enjoying the thread. What year OBS?
Thank you!

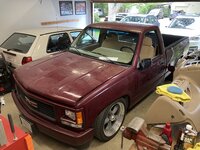
It's a 1995 GMC Sierra, 305, 5-speed. As I recall, when I looked up the RPO (option) codes, it came up as the lightest GVW of that year, which I think makes it even more of a "street truck."

It's come a ways . . but always more to do :) Look how high it was when I bought it!

IMG_9932.jpeg

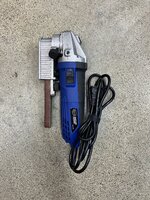
I've had this Eastwood bandfile / finger sander for a while now and have always hated it, mostly because it's loud as hell. I had to use it to clean off the frame for exhaust hangers recently and decided that was it. Gave it to a friend and got the M12 1/2" tool. I'm sure it'll go to good use. I got another 6 Ah M12 battery at the local swap meet for $40 as I've been expanding my M12 lineup.

IMG_7578.jpeg

IMG_7579.jpeg

IMG_7577.jpeg

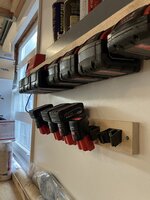
Speaking of M12 . . finally got around to putting up the battery mounts.

IMG_7597.jpeg

IMG_7611.jpeg

IMG_7612.jpeg

And, finally, since I was doing a fair amount of die grinder work, I labeled the wrenches. I should put one pair in a bag so only one pair is floating, but even having the colors is a nice visual indicator. I know some folks paint them. I could drill speed holes. Lots of options.

IMG_7586.jpeg
 
OP
J

JP_CA

Well-known member
Joined
Sep 20, 2015
Messages
203
Location
Bay Area, CA
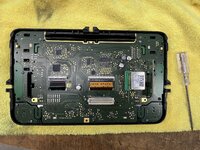
A friend with a 2017 Jetta told me she was having trouble with the media unit in her car and that she'd gotten a super expensive quote to fix it. I did some googling and found threads and part numbers. You can swap the touch sensor for under $20, so I ordered one. She came over after work and we busted it out! Easy money!

Radio out:

IMG_7620.jpeg

About to remove the board from the display:

IMG_7619.jpeg

Back in and working in less than an hour. Love it.

IMG_7621.jpeg

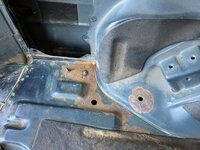
There's been a little rust spot in the trunk of the Land Cruiser that I don't like, and there were some bolts under the trunk mat that made it wavy. I finally took everything out and quickly addressed it. This isn't concours-level work, but this is a wheeling rig and it doesn't need to be beautiful if it's functional.

After scraping and wire-wheeling:

IMG_7588.jpeg

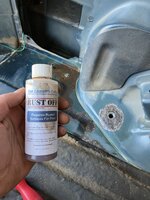
I've had this bottle for years, but this stuff really works:

IMG_7589.jpeg

A quick lick of paint as a "topcoat:"

IMG_7590.jpeg

All dry:

IMG_7626.jpeg

And here's the center section. This got the same treatment, and butyl (Dynamat) patches where I removed fasteners.

IMG_7591.jpeg

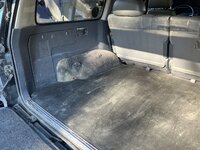
Third row seat delete complete! Removed the seatbelts too. I have the seats, but they're not going in anytime soon, and the belts just get in the way when I load the trunk.

IMG_7627.jpeg
 
OP
J

JP_CA

Well-known member
Joined
Sep 20, 2015
Messages
203
Location
Bay Area, CA
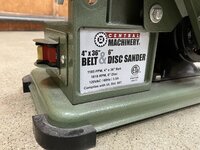
I've made a mistake. I bought another belt and disc sander that I hate. I've once again violated "buy once, cry once."

I've had a cheapo Harbor Freight unit for a year or two, which I got from a friend. It works, but it stalls if you look at it too hard. The form factor is ok, and I like that I can fold it down to put on a shelf. The tool rest is below the platen, which ***** (and I think maybe is incorrectly mounted). Either way, overall, I don't love it.

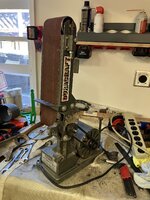
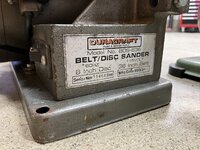
So I bought another one! This is what $40 gets you:

IMG_7537.jpeg

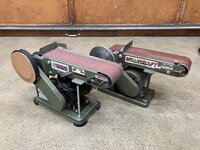
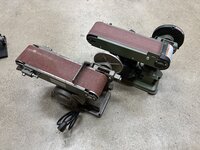
Here they are together:

IMG_7858.jpg

IMG_7859.jpg

IMG_7860.jpg

IMG_7861.jpg

The Duracraft unit is much more heavily built and pulls almost twice the current, which makes me think it's a little more powerful and less likely to stall. However, we're still in the 1/3-1/2 hp range with both of these.

Naturally, it needed some love - the motor was mounted at a terrible angle and the mount plate was super warped. A little hammer work and a new plug were the bare minimum, even if I'm not keeping it for long.

Before:

IMG_7601.jpeg

IMG_7602.jpeg

After:

IMG_7603.jpeg

As good as it's gonna get . .

IMG_7604.jpeg

IMG_7600.jpeg

So, what's next? Not this thing, I know that much. Super heavy, no easy tracking adjustment (or belt change), and it's got a vibration that I don't feel like fixing (I think a shaft is bent). It runs, it'll do some work, but ultimately it's not what I want.
 
OP
J

JP_CA

Well-known member
Joined
Sep 20, 2015
Messages
203
Location
Bay Area, CA
Let's talk belt grinders. Ultimately, what I want is something that'll eat some steel when I'm doing basic fabrication work. Every so often, it's nice to be able to put wood on it, but this mostly a metalworking tool for me. I'm not in a rush and would be curious for input.

The rough requirement list looks something like:
  • 2-3" belt width (4" is more than I need)
  • 1 hp min, preferably 1.5-2 hp
  • 3000+ RPM
  • Flat platen
  • Tool/part rest
  • Vertical
  • 120 or 240 V doesn't matter, although 120 is more convenient
My good friend has a super beefy one in his garage, and I've love to have something similar. Here's his truck with some front end work in progress - maybe I've mentioned it before:

IMG_6849.jpeg

Zoom! Enhance!

IMG_6849 copy.jpeg

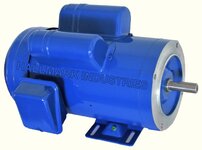
His unit is a Kalamazoo 2 x something with a 2hp eBay motor on it.

AC MOTOR, 2HP, 3450 RPM, 1PH, 115V/208-230V, 56C/TEFC, With base

Screenshot 2025-08-24 at 8.29.40 AM.jpg

I've done some looking around and have been monitoring Marketplace and Craigslist without a ton of luck.

So far, these are the leading options.

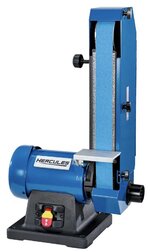
Harbor Freight - HERCULES 2 in. x 48 in. Belt Grinder
  • $300
  • 1 hp (claimed)
  • 120 / 240 V
  • 4,500 FPM
  • Compact, straightforward unit

Screenshot 2025-08-24 at 8.19.29 AM.jpg


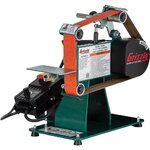
Grizzly T32459Z 2" x 42" Knife-Making Belt Sander/Grinder
  • $439
  • 1 hp
  • 120 V
  • 131–4,974 FPM
  • Variable speed (not needed, but maybe nice to have)
  • Slack belt area (not needed, but again maybe nice to have)
  • Larger footprint
t32459z-78f4af812afd2c535c9a85be59cbb765.jpg


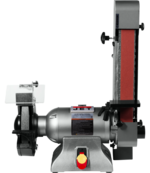
Jet IBGB-248 8" Industrial Grinder and 2 x 48" Belt Sander (578248)
  • $637
  • 1 hp
  • 120 / 240 V
  • 4,712 FPM
  • Added benefit of grinding wheel (maybe I can replace my existing bench grinder)
  • Relatively compact, straightforward unit
4fd23fcd94baa36e537409e4511b0b99df6c83ad_578248_main__88378.png


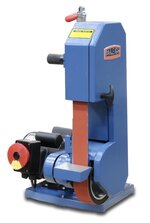
BAILEIGH TWO WHEEL BELT GRINDER - BG-248-2
  • $1000
  • 1.5 hp
  • 120 V
  • 8,000 FPM (holy ****)
  • 120 lbs (holy ****)
  • Probably not a good option but WOW it's a beast
Screenshot 2025-08-24 at 8.20.20 AM.jpg
 
OP
J

JP_CA

Well-known member
Joined
Sep 20, 2015
Messages
203
Location
Bay Area, CA
Surprising! No input on the ol' belt grinder topic! I'll probably just get the Hercules one from Harbor Freight.
 
OP
J

JP_CA

Well-known member
Joined
Sep 20, 2015
Messages
203
Location
Bay Area, CA
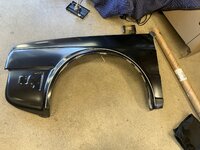
So . . years back, a friend backed into my Golf and bungled the fender and some other parts. I eventually tracked down new fenders, but haven't done anything about it until recently.

Here's my poor baby with its bruise:

043E5A05-9818-4EAD-8051-C2A091A09804.jpg

Time to begin! I'll explain the steel rod in the next post.

IMG_7827.jpeg

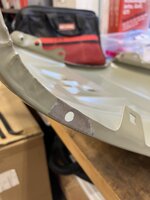
First, remove unnecessary tabs. The fender liners are trimmed and no longer use some of these mounting points.

IMG_7888.jpeg

Next, get rid of these holes. I decided to drill these out rather than filing the paint off the square holes, to get a clean weld.

IMG_7890.jpeg

IMG_7891.jpeg

Got a chunk of copper to weld against. Didn't come out perfect, but it'll do the job.

IMG_7894.jpeg

IMG_7899.jpeg

IMG_7900.jpeg

Came out a little better on the other side:

IMG_7908 (1).jpeg
 
OP
J

JP_CA

Well-known member
Joined
Sep 20, 2015
Messages
203
Location
Bay Area, CA
The fenders on the car were rolled with a fender roller, but because they had those square holes, there were always kinks in the A-surface.

IMG_6035.JPG

IMG_6034.JPG

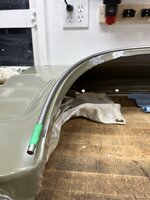
Now that I'm doing new fenders, I want to get this right. My strategy is to fill those holes, trim the lip, and weld in a 1/4" steel rod both to reinforce the fender and to act as a friendly rolled edge that won't get caught on the tire if I rub.

The first thing I did was built a simple 3-point bending jig for my vise to get the rod roughly shaped.

IMG_7958.jpeg

IMG_7959.jpeg

Here's the rod with a single planar arch bent into it, roughly matching the fender but not the 3D curves. You can see that it's pretty approximate at this point.

IMG_7961.jpeg

IMG_7960.jpeg

The next bit took MUCH longer - getting the steel rod to match the exact curvature of the fender. Those 3D curves are much more nuanced than meets the eye. This was fun, but not easy.

IMG_7971.jpeg

IMG_7972.jpeg

IMG_7973.jpeg

IMG_7974.jpeg
 
OP
J

JP_CA

Well-known member
Joined
Sep 20, 2015
Messages
203
Location
Bay Area, CA
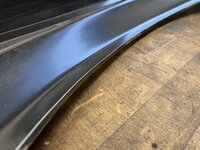
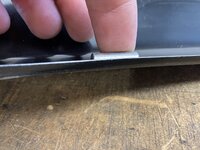
With the holes filled and the rods shaped, time to cut the fender lips to shape.

IMG_8250.jpeg

IMG_8252.jpeg

IMG_8292.jpeg

IMG_8296.jpeg

Here's how the rod will sit on the backside of the fender:

IMG_8293.jpeg

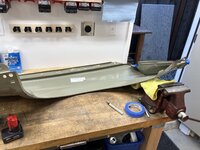
There are a few other things to check, so for the first time ever, I pulled the fender off. No big surprises underneath! California cars . . .
IMG_8299.jpeg

Naturally, I couldn't help but hang the new one for a second. I'll do more fitting later, after the welding work is complete.

IMG_8298.jpeg
 
OP
J

JP_CA

Well-known member
Joined
Sep 20, 2015
Messages
203
Location
Bay Area, CA
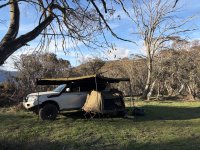
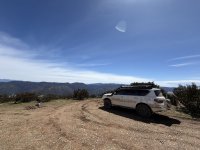
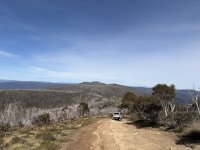
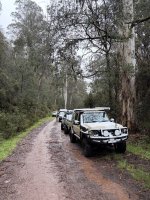
Took a break to go on a 3-week honeymoon in Australia. Rented/borrowed a Y62 Patrol and did 5 days in the Victorian High Country with a group of 10 other rigs. Not hard wheeling, but totally gorgeous and fun. Stunning country out there. Highly recommend! Feeling thankful!

WhatsApp Image 2025-11-12 at 20.01.10.jpeg

IMG_8669.jpeg

IMG_8736.jpeg

IMG_8731.jpeg

IMG_8741.jpeg

IMG_8687.jpeg

IMG_8648.jpeg
 
OP
J

JP_CA

Well-known member
Joined
Sep 20, 2015
Messages
203
Location
Bay Area, CA
While I was there, I was battling to get a package delivered . . I ordered from VW Classic Parts, which is a German company that only delivers to the UK. Go figure. Had to find a private party that would accept the shipment and turn it around to me. Paid UK duties and then also paid US duties. Not cheap, but it all worked out.

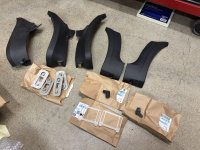
Body plastics for the Golf:

IMG_8995.jpeg

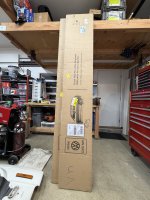
And, in the big boxes . . .

IMG_8996.jpeg

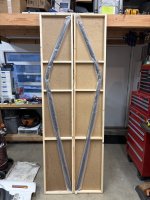
Rain gutters! Brand new! These are the molded rubber/plastic drip rails that go along the sides of the Golf's roof. Regardless of what I paid to get them here, it is a miracle that they arrived safe and sound. You cannot get these things easily. Mine are in ~OK shape generally, but have started leeching the black dye out, so every time you wipe them with a cloth, you get a nice black streak on whatever you touch next (e.g. the paint on the roof).

IMG_8997.jpeg

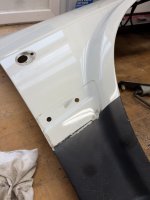
Fender stuff continues. Copy these holes:

IMG_9006.jpeg

Over to both fenders:

IMG_9008.jpeg

IMG_9013.jpeg

Next is welding the 1/4" rod in. I've decided to have a friend help with that and TIG weld them.

Finally, some old tools went away.

Goodbye crappy bandsaw! My JB Weld repair failed at some point . .

IMG_8998.jpeg

IMG_9001.jpeg

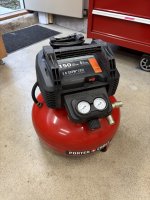
Goodbye crappy compressor. I hated you the whole time!!!!! Bought a little Senco to replace it. I rarely need air and when I do, I want it to be really quiet.

IMG_9004.jpeg

Naturally . . . old tools go . . and new tools come. Bought this little thing after a friend highly recommended it. Thank you eBay!

Did I need it? Don't ask me attacking questions like that!

IMG_8473.jpeg
 
OP
J

JP_CA

Well-known member
Joined
Sep 20, 2015
Messages
203
Location
Bay Area, CA
Couple of sewing projects:

CX-5 seat cover fix -

IMG_9133.jpeg


And some patchwork pants for my wife.

IMG_9170.jpeg

 
OP
J

JP_CA

Well-known member
Joined
Sep 20, 2015
Messages
203
Location
Bay Area, CA
Let's talk belt grinders. Ultimately, what I want is something that'll eat some steel when I'm doing basic fabrication work. Every so often, it's nice to be able to put wood on it, but this mostly a metalworking tool for me. I'm not in a rush and would be curious for input.

The rough requirement list looks something like:
  • 2-3" belt width (4" is more than I need)
  • 1 hp min, preferably 1.5-2 hp
  • 3000+ RPM
  • Flat platen
  • Tool/part rest
  • Vertical
  • 120 or 240 V doesn't matter, although 120 is more convenient

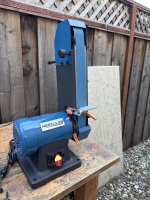
Well, I've settled for ye olde Harbor Freight unit. This thing is heavier than hell, let me tell you. Not the quietest machine either, but I'll be wearing ear pro no matter what anyway.

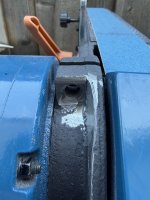
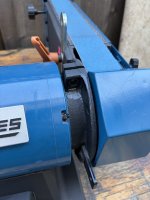
It came with M8x1.25 allen-head cap screws to hold the tool rests and to secure the swivel function, which wasn't going to work for me, so I bought some machine handles. Having them for the tool rest is maybe unnecessary, but the quick adjustment they offer is pretty nice.

First order of business was actually flattening the area where the fastener seats. This was a horiffic sloped section where only the corner of the bolt would actually touch . . nothing a die grinder and bandfile can't fix.

IMG_9183.jpeg

After cold blue and oil, you can't even tell!

IMG_9184.jpeg

Ready to rock and roll!

IMG_9185.jpeg

IMG_9186.jpeg
 
To avoid these ads, REGISTER NOW!
Top Bottom