To avoid these ads, REGISTER NOW!

My first shop/garage

floridasailor

Active member
Joined
Dec 17, 2008
Messages
25
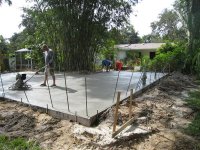
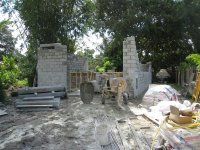
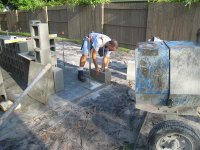
After 2 years of frustration our shop is now under construction.

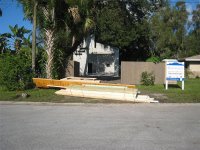
A very brief outline has us purchasing a new to us house with an agreement with the person next door to purchase 32 feet of her double size lot to build the shop on. After buying our house the person next door goes into foreclosure and we were unable to complete the transfer of the land. In the end we had to buy the house from the bank and it is now up for sale after the land transfer.

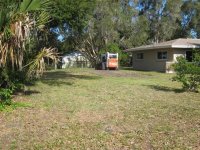
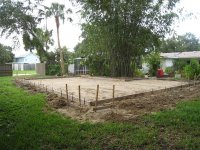
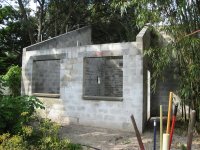
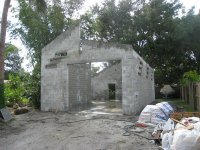
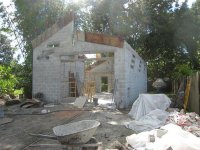
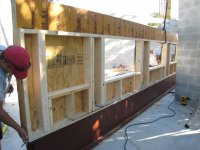
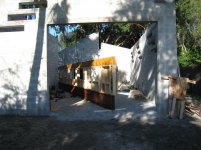
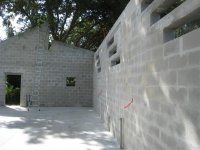
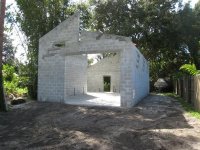
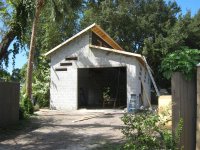
The new shop has been planned to have the least visual impact while still achieving the 12'W x 10"H door requirement. The main approach was wrapping it around the grove of bamboo we had in place. Natural light and maximum ventilation will keep the power and AC bills lower.

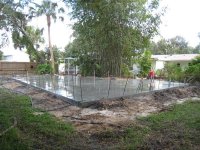
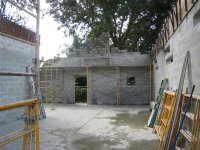
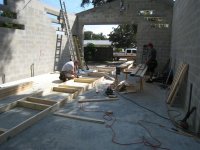
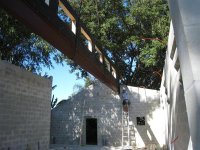
The dimensions are 40 x 20 with an additional 16 x 10 to create the L shape. Minimum 12' ceiling and clerestory windows supported by a 40 foot long 21"x50#/foot W Beam.

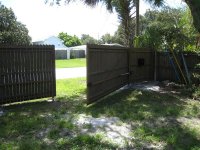
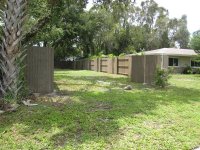
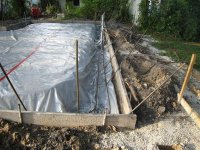
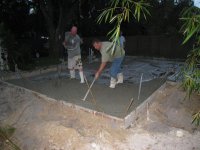
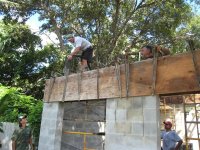
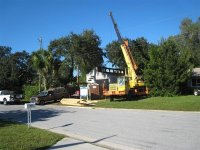
Here are 2 photos of where we are today and the following photos will show how we have gotten this far.
 

Attachments

  • Shop 10-09-2009 View from street.JPG
    Shop 10-09-2009 View from street.JPG
    127.1 KB · Views: 102
  • Shop 10-09-2009 View from house.JPG
    Shop 10-09-2009 View from house.JPG
    124.5 KB · Views: 78
To avoid these ads, REGISTER NOW!
OP
F

floridasailor

Active member
Joined
Dec 17, 2008
Messages
25
picture set 1
 

Attachments

  • 14 Shop Groundbreaking 08-27-2009.JPG
    14 Shop Groundbreaking 08-27-2009.JPG
    130.8 KB · Views: 41
  • 12 Shop Small Gate Retaining Pin and Solenoid Lock.jpg
    12 Shop Small Gate Retaining Pin and Solenoid Lock.jpg
    78.1 KB · Views: 71
  • 10 Shop Gate Opener in Place.jpg
    10 Shop Gate Opener in Place.jpg
    108.4 KB · Views: 40
  • 08 Shop Fence and Gates Open.jpg
    08 Shop Fence and Gates Open.jpg
    142.3 KB · Views: 42
  • 06 Shop Fence and Gates 07-31-2009.jpg
    06 Shop Fence and Gates 07-31-2009.jpg
    128.9 KB · Views: 33
  • 04 Groundbreaking looking out.jpg
    04 Groundbreaking looking out.jpg
    100.7 KB · Views: 35
  • 02 Groundbreaking for New Fence 05-17-2009.jpg
    02 Groundbreaking for New Fence 05-17-2009.jpg
    97.5 KB · Views: 41
OP
F

floridasailor

Active member
Joined
Dec 17, 2008
Messages
25
picture set 2
 

Attachments

  • 32 Finishing the slab.JPG
    32 Finishing the slab.JPG
    135.8 KB · Views: 33
  • 30 Footers and re-bar in ready to pour.JPG
    30 Footers and re-bar in ready to pour.JPG
    125.1 KB · Views: 31
  • 28 Starting to pour slab 7-30 AM.JPG
    28 Starting to pour slab 7-30 AM.JPG
    118.5 KB · Views: 30
  • 22 Conduits trenched in for wiring.JPG
    22 Conduits trenched in for wiring.JPG
    108.4 KB · Views: 30
  • 20 Forms in place.JPG
    20 Forms in place.JPG
    128.4 KB · Views: 25
  • 18 Compacted fill.JPG
    18 Compacted fill.JPG
    132.4 KB · Views: 25
  • 16 Clearing old stumps.JPG
    16 Clearing old stumps.JPG
    131.9 KB · Views: 26
OP
F

floridasailor

Active member
Joined
Dec 17, 2008
Messages
25
picture set 3
 

Attachments

  • 46 End of fourth day.  Ready for first beam pour.JPG
    46 End of fourth day. Ready for first beam pour.JPG
    113 KB · Views: 39
  • 44 End of third block day.JPG
    44 End of third block day.JPG
    118.6 KB · Views: 35
  • 42 End of second block day.JPG
    42 End of second block day.JPG
    126.9 KB · Views: 37
  • 40 End of first block day.JPG
    40 End of first block day.JPG
    125.3 KB · Views: 32
  • 38 First Block.JPG
    38 First Block.JPG
    105.8 KB · Views: 35
  • 36 Block and Mason's have arrived.JPG
    36 Block and Mason's have arrived.JPG
    134.7 KB · Views: 34
  • 34 Keeping it wet for 6 days.JPG
    34 Keeping it wet for 6 days.JPG
    128.1 KB · Views: 34
OP
F

floridasailor

Active member
Joined
Dec 17, 2008
Messages
25
picture set 4
 

Attachments

  • 60 Pocket for 40 foot 21 inch x 50#  I Beam.JPG
    60 Pocket for 40 foot 21 inch x 50# I Beam.JPG
    126.3 KB · Views: 55
  • 58 Office  Corner.JPG
    58 Office Corner.JPG
    118.4 KB · Views: 39
  • 56 Rear Corner with shade from oak tree.JPG
    56 Rear Corner with shade from oak tree.JPG
    95.8 KB · Views: 39
  • 54 Final pour and forms stripped.JPG
    54 Final pour and forms stripped.JPG
    112.2 KB · Views: 40
  • 52 End walls formed ready for second rake beam pour.JPG
    52 End walls formed ready for second rake beam pour.JPG
    102.3 KB · Views: 42
  • 50 Finishing end walls.JPG
    50 Finishing end walls.JPG
    100 KB · Views: 38
  • 48 First beam pour.JPG
    48 First beam pour.JPG
    133.3 KB · Views: 36
OP
F

floridasailor

Active member
Joined
Dec 17, 2008
Messages
25
picture set 5
 

Attachments

  • 74 Bolting knee wall to beam.JPG
    74 Bolting knee wall to beam.JPG
    103 KB · Views: 43
  • 72 Setting knee wall on beam.jpg
    72 Setting knee wall on beam.jpg
    142.5 KB · Views: 39
  • 70 Crane, I Beam and Welder arrive.JPG
    70 Crane, I Beam and Welder arrive.JPG
    94.8 KB · Views: 36
  • 68 Building clerestory knee wall.JPG
    68 Building clerestory knee wall.JPG
    116 KB · Views: 32
  • 66 GluLam beams and roof lumber arriving.JPG
    66 GluLam beams and roof lumber arriving.JPG
    109.1 KB · Views: 32
  • 64 Air line tubing inside the walls.JPG
    64 Air line tubing inside the walls.JPG
    110.7 KB · Views: 31
  • 62 Cleaned up and ready for I Beam, knee wal and roof.JPG
    62 Cleaned up and ready for I Beam, knee wal and roof.JPG
    111 KB · Views: 41
To avoid these ads, REGISTER NOW!
OP
F

floridasailor

Active member
Joined
Dec 17, 2008
Messages
25
picture set 6
 

Attachments

  • 76 Beam and knee wall in place.JPG
    76 Beam and knee wall in place.JPG
    102.7 KB · Views: 72
  • 78 View from the street.JPG
    78 View from the street.JPG
    94.8 KB · Views: 52
  • Shop 10-09-2009 View from house.JPG
    Shop 10-09-2009 View from house.JPG
    124.5 KB · Views: 45
  • Shop 10-09-2009 View from street.JPG
    Shop 10-09-2009 View from street.JPG
    127.1 KB · Views: 73
OP
F

floridasailor

Active member
Joined
Dec 17, 2008
Messages
25
Sarasota, FL

As the earlier post described it as overbuilt but a lot of the features are for hurricane standards but most are a combination of an **nl engineer (me) and my wife a master gardener who would like to both hide it and make it as energy efficient as practical.
 
To avoid these ads, REGISTER NOW!
Top Bottom