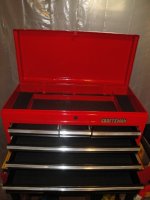
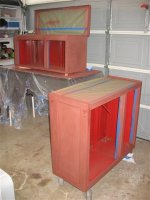
STRIPPED
Tonight, I pulled all the drawers and all the slides. I still need to get the side handles out, remove the aluminum from the drawer pulls, and pop out the lid rods. I'm not as experienced in the garage as some of y'all, so I lost motivation about 9pm and the 3rd beer.
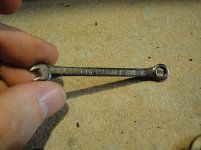
I found the cutest little baby wrench I've ever seen. It was lost in the bottom under the bottom drawer. Craftsman 5/32, 3/16:
I also found a gasket. 5 Man-Points (tm) to whoever can identify it.
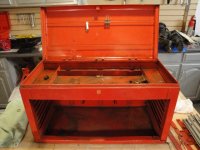
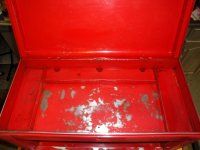
Here's the box stripped. Most of the brackets for the slides are straight. The rust is 100% surface rust except for in the back right corner. That area goes a little deeper but should be no problem with some rust neutralizer followed by good primer and paint.
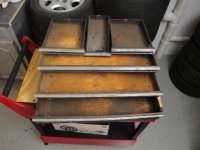
Slides and lock bars that came out.
Lockbars: Just bang out the hinge pins. Slides: Took a bit more effort. Small flat-blade screw driver or punch jammed into the oval hole will bend the stop out of the way of the catch.
Anybody know what the long bar with the tapered end and hole is? It looks like a lock bar but I couldn't find a place it seemed to go.
Yes, those are friction slides instead of ball bearings. I'm investigating putting ball bearing slides in, but the budget I've set for the restoration is $30, and I assume most of that is going to be taken by replacing the lock and the "Craftsman" emblem. You can get a ball-bearing slide box brand new from Craftsman today, on sale, for $110 (model 62020 reg $170). The "Quiet Glide" eg, friction slide, is $95 (model 13600 reg $140). So I guess the savings is there... but a $90 converted & restored ball-bearing box will move the project from "money saver" to "why bother?"
Drawers have tons of surface rust. I still need to slide off the aluminum pulls. Also need to buy some sort of buffing wheel to bring them back up to snuff.
Questions
1) How do I get the side handles out? I poked at them a little, I notice the bottoms bend. I tried bending the bottoms up, then wacking the back to try to pop them out. No dice. Maybe I wasn't violent enough.
2) How do I / Should I remove the lid? There appears to be a single 26" long hinge pin. I used an improvised punch and a hammer to attempt to bang it out, but it didn't seem to go anywhere and I didn't want to mushroom the end. My initial feeling is that I don't want to paint it in place because I won't get full coverage on the paint.
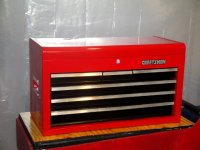
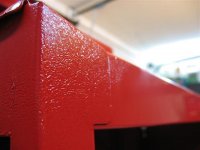
3) Color Choice! The drawers will be black, but should the box be red, orange, or yellow?
Answers
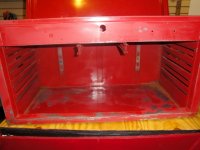
Rocket - You can see from today's photos the box is pretty beat up.
Ironheadtom - NO!
Everybody else - Thanks!