To avoid these ads, REGISTER NOW!

My floor cleaning and epoxy. Devoe 224HS. Many pics, notes & questions

OP
A

azone

Active member
Joined
Nov 13, 2009
Messages
43
Four days and still not dry. I taped off the borders and layed out the work area today. Here's a couple full view pics from outside the garage. I also made a separate post about the efflorescence I'm getting on the apron areas.

garage3.jpg


garage4.jpg


[edit] You've got to be kidding me. It's supposed to rain in Los Angles tomorrow, right on the 5th day when my cement finishes drying. It's probably rained twice all year. I'm trying to finally complete this over my long holiday weekend, looks like it might not happen.
 
Last edited:
To avoid these ads, REGISTER NOW!
OP
A

azone

Active member
Joined
Nov 13, 2009
Messages
43
ok, I woke up late this morning and this is what I saw:

sky1.jpg


It was perfect, sunny, 75 degrees. I got the primer coat down. You can't see too much detail in this pic.

primer_coat1.jpg


Before mixing the epoxy I vacuumed the floor again. I used my wet/dry to pick up the loose stuff. I've been vacuuming it pretty much every day for the past five days so there was very little to get. Another thing I did was I took my nice indoor upright and vacuum'd again with the brush set for the lowest setting. This worked really well to sweep up any loose dust.
I started mixing the epoxy at about noon. I mixed 1.25g of Part A in one 2g bucket and 1.25g of Part B in another 2g bucket. Part B is pretty solid, if you tip the can upside down nothing comes out. You have to scrape it out. After I mixed them both in their own buckets I mixed them together in a 5g bucket. I added 800ml of T-10 thinner (about 8% of total volume). If you are using the Devoe stuff I would definitely thin out the primer coat. Otherwise it's pretty thick to apply and you might not get a nice thin primer coat. I am very glad I bought the T-10. I used my 18V cordless drill and two mixing attatchments to mix everything. It was barely enough to do the job. I would not use anything less than an 18V cordless with two batteries ready to go. I actually had to quickly charge one of the batteries again. Ideally a corded drill would be best. It also helps to have a bunch of small and large paint sticks around.
I started at the rear by painting the apron with a 2" brush and a 4" roller. I tried to keep the coating nice and thin but as full coverage as possible. It's hard with the brush. The concrete is so porous and coarse it was not possible to seal every hole and pore with the primer coat. For the rest of the floor I used an 18" roller with a 3/8" nap. I bought the pads at ICI, they are self-branded and are like the wooster ones for use with coatings & epoxies.
When I was finished I had a couple quarts left over. I probably could have used 1g of each part plus the thinner and just made it. My garage is 420 sq ft plus an additional 25 sq ft for the apron.
Hopefully tomorrow will be nice wheather and can get down a thick color coat.
 
Last edited:
OP
A

azone

Active member
Joined
Nov 13, 2009
Messages
43
The weather was great and I got down the 2nd coat today. I used all of the remaining 224HS. It was about 3.5g total. I did not thin and I put it on thick. I'm working by myself so I'm glad I had the extra time with the solvent-based stuff so that I could get it all coated and flaked. It took about 2 1/2 hours. The day wasn't without problems. For some reason I divided the flakes into 6 containers but divided the garage floor into 9 sections! I didn't notice this until I already threw down 10lbs out of 16lbs of flakes. Mistake. Coverage is not even. It's not too bad but it's certaintly not how I planned it. The other issue that made it even harder is that it is virtually impossible to get the flakes on the vertical surfaces of the apron. I had to jam tons of flakes in these areas and reverted to actually touching the surfaces to place it on. This worked pretty well actually, except I used even more of the flakes. I didn't even flake about 2/3rd's of the apron. I'm hoping I can do it again during the clear coating since I have plenty of clear coat. I'm going to post a separate message to ask about this. I also want to scatter some more flakes to even out some of the thin areas.

flake1.jpg


flake2.jpg


flake3.jpg


flake4.jpg
 
Last edited:

Ch3No2

Well-known member
Joined
Nov 27, 2009
Messages
356
Looks great...that's what's cool about the sprinkles...they hide many imperfections, even their own. Don't know how you put them on but when I did I went to a Goodwill store and bought a $10 pair of golf shoes with the steel pointed cleats. The wet paint laid right back down.
 
OP
A

azone

Active member
Joined
Nov 13, 2009
Messages
43
Tonight I swept up a bunch of the flakes, about 3lbs out of 16lbs.
I'm looking to get a fairly smooth finish so tomorrow I'm going to scrape off the uneven flakes with a plastic scraper. I may follow that up with a sanding with a pole sander and 100 grit paper to smooth it out even more before the clear coats.

I'm still not sure what I'm going to do with the un-flaked apron. I'm either going to do another color coat and flake it again (in which case I have to buy more Devoe 224HS) or I'm going to try to apply it during the first clear coat. Any suggestions are welcome!

The floor looks good. I still think with a heavy broadcast there are too many black flakes that make it contrast too much - brings too much attention to the floor. I bought my flakes from originalcolorhips.com and the marble mix that I bought appears to have even amounts of black, gray, and white flakes. I noticed some of the other brands (quikrete for example) actually put in less black flakes compared to the other colors. I think this would have been better with the heavy broadcast. I still looks very good though, I will just have to change some of the other colors I'm planning to use to complement it better.
I was very happy with how the taped edges turned out. I used duct tape like many people suggested and it worked very good. You can see blue painters tape in my pics but that is actually only the second layer of tape. All edges where epoxy meets were done with duct tape. I removed the tape tonight from the garage door and back door openings. I will tape them again before the clear coat. Here's the edge at the garage door:

color_coat3.jpg


I'm actually not sure what to do with this exposed edge. Do you leave it like that or do you put some kind of transition piece there?

Here's a couple pics trying to show some of the flaws in the floor. The first one has light reflecting to show how rough my floor really is. The second one shows the spotty broadcast of flakes

color_coat2.jpg


color_coat1.jpg


...and here's a closeup of the flakes

flake_closeup.jpg
 
Last edited:

z28snksknr

Well-known member
Joined
Jul 8, 2009
Messages
1,827
Location
Turnersville, NJ
So I have to ask:

After all that prep work, cleaning, rinsing, waiting, and the actual work to put down the epoxy, are you satisfied with the end result? As I stated earlier, I have a similar garage floor and was considering the epoxy route. After reading this, however, it seems to be a tremendous amount of work and the end result still does not cover the concrete imperfections from when the floor was poured. What are your thoughts now that you have the new floor? Worth it? Would you spend the extra money on Racedeck (or other tiles)?
 
OP
A

azone

Active member
Joined
Nov 13, 2009
Messages
43
After all that prep work, cleaning, rinsing, waiting, and the actual work to put down the epoxy, are you satisfied with the end result?
I don't know the answer to that question yet! I still have to do the clear coats and see what it looks like. I will say like everyone it's a lot of work. My wife would probably tell you no it wasn't worth it ;) it's taken a couple weekends and the solvent-based epoxy fumes just waffed up to the whole house so there was pretty strong lacquer thinner/acetone type smell for a couple days. As far as the imperfections in the floor they are not nearly as obvious as in the picture, and it's not really a big deal at all. Also, if I rented a good 7" hand grinder with the correct attachments I could have improved the imperfections for sure. It does take effort though.
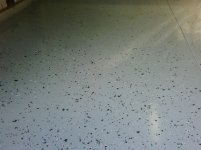
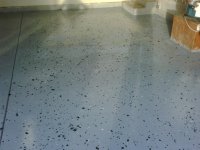
As for garage tiles I never really considered them because I dont generally like the way they look. Purely aesthetic thing and silly personal opinion. However at the end of the day I probably spent almost just as much on the epoxy. It ended up being about $2 per sq ft by the time I added up all the supplies, tools, tool rentals., etc..
 
Last edited:

Motofixxer

Well-known member
Joined
Oct 10, 2009
Messages
681
You can put the epoxy down thicker, and that will fill more of the imperfections. But yes after you put the clear coat down it will really even out and smooth the surface.
 
OP
A

azone

Active member
Joined
Nov 13, 2009
Messages
43
Last night I took about 90 minutes to scrape and sweep the whole floor. Tonight I plan to sand it a bit to get it smoother. This weekend I will be finishing the flakes and putting down a couple clear coats.
 

rickey1013

Well-known member
Joined
Oct 29, 2009
Messages
103
Location
Hayward, CA
I like the color choice, I feel your pain on the amount of time it takes I was very concerned after all the the articles I read on this stuff peeling and leaving tire marks so I cleaned it a lot more then the directions said to figured it couldn't hurt. The fumes were very strong. Once the clear coat went on it and I let it cure for the 7 days it is great. I feel I had a better starting project than you have, concrete not as old so you have a little more work on yours but I like the transformation to my garage and spills clean right up with ease.
 

Attachments

  • IMG00121-20090827-1855.jpg
    IMG00121-20090827-1855.jpg
    132.7 KB · Views: 176
  • IMG00122-20090827-1855.jpg
    IMG00122-20090827-1855.jpg
    133 KB · Views: 203
OP
A

azone

Active member
Joined
Nov 13, 2009
Messages
43
nice job rickey.
yes it's been a ton of work, but like a lot of us I'm also overkill as well. I probably do twice the work for a 5% improvement at the end of the day (if that makes sense).
as far as the epoxy I am 100% confident there is a good bond between the epoxy and concrete. The only way this floor won't last 5 years or more is if indeed I have more moisture coming through than I think.
 
To avoid these ads, REGISTER NOW!

prae

Member
Joined
Sep 29, 2009
Messages
9
wow that was a lot of work! I love the end result though. Nicely done.
 
OP
A

azone

Active member
Joined
Nov 13, 2009
Messages
43
ok, so I ended up sanding the whole floor with 100grit sand paper and a pole sander. I used about 30 sheets of paper! The reason I sanded the floor was to smooth out the flakes and to level out some of the ridges. These curved ridges are tool markes from when they layed the cement. They were difficult to get out with the angle grinder. When these raised areas were sanded down they left bare areas were there are no flakes. The color coat I did was very thick so I never came close to sanding through to the cement, just some of the color and the flakes. You can see the sanded floor and all the residue in this pic from before cleaning:

floor3.jpg


Here you cn see some of the high spots & ridges (no flakes) that were sanded out.

floor4.jpg


After I finished I vacuumed the whole floor with my wet/dry vac. After that I used my regular upright vacuum at the lowest setting. Finally, I used a damp towel and went over the whole thing again.

Today I did the first clear coat. I have enough material to do 3 coats so I felt like I could play it and see what I could do for evening out the flakes and filling in the sanded areas. I ended up dropping another 8lbs of flakes. It worked very well. I reused some of the loose flakes from before together with an additional 5lbs I bought this week. I split the garage into 3rds and rolled on the 379H. Then I went over and sprinkled flakes. I wore the spikes the whole time. I found out very quickly that it is perfectly do-able to flake over the 379H, as long as you have enough material for another coat it's no problem. After flaking I went over again with the roller gently to sort of seat them in. At the end of the day I ended up with a heavy broadcast of flakes. It looks excellent. I used 1.25g total of the 379H and I would guess I got a pretty good 3mil or so coat.

I decided to leave the apron and finish it later, after the rest of the floor is complete. I have two kits of 379H left so it should be enough for another two coats and the apron.

floor1.jpg

floor2.jpg
 
Last edited:
OP
A

azone

Active member
Joined
Nov 13, 2009
Messages
43
just a quick update I have finished three clear coats. I still have one more touch up to do as I noticed the low spots get a thinner coating and are more dull than rest of the floor.
The fumes from this stuff are crazy. Each coat uses about 1g of material. The smell is very strong. It was so strong I was afraid my house was going to blow up so I turned off the furnace.

One other problem I ran into was that one end of the roller pad actually broke during the final coat. Figures. It was definitely defective or something. It's a good idea to buy a couple extras and return them later if you don't need them. I bought one extra thinking I was only going to do two clear coats but I ended up doing three, and when the roller pad broke I was screwed, I had to use a regular 9" I had around. It worked ok but it figures it would happen during the only coat that matters, the last one.
 

Vinko

Well-known member
Joined
Jul 7, 2008
Messages
5,829
Location
Los Angeles
I just found this thread, and I think it's a really good DYI.

Wondering aloud how the epoxy and/or Rustoleum to fill the cracks solution would hold up to heavy equipment trucks and pallets of steel....
 

MilhouseW

Member
Joined
Mar 10, 2009
Messages
8
Looks great! I'm looking into doing something similar in the next few months and I'm currently in the planning/budgeting stage. Just a couple of questions I had for you...

What was the approximate cost for just the cleaning supplies, and then the epoxy/clear itself?

How long did the project take from start to finish?
 

TheBanker

Well-known member
Joined
Feb 22, 2010
Messages
428
Location
Franklin, Tn
It doesn't look like azone has posted here since December. I really enjoyed reading his posts and looking at the pics. A current pic would be nice showing it after a couple of months.
 
OP
A

azone

Active member
Joined
Nov 13, 2009
Messages
43
...I'm updated this post from December 2009. I really should have added more pictures (I will) because it came out beautiful once all the dry-walling and painting and stuff was done. In fact, for the last 18 months I blocked off the garage door (properly, was big job) and used the garage for my business. Now that we're remodeling the basement I'll be able to move back into the house and get the cars back in there.

I will say that after close to 3 years the floor is 100% exactly the same condition as the day I put it down. No peeling, no discoloration, nothing. I think it was all in the prep work. I don't even know if the Devoe stuff is even available anymore (VOC's) but it worked out very nice, definitely miles beyond what would have happened if I had used a two-part system from Home Depot or whatever.
 

webbula

New member
Joined
Jul 28, 2011
Messages
2
It is still available. Just found it after a google search. I'll have to do more research now.
 
OP
A

azone

Active member
Joined
Nov 13, 2009
Messages
43
This is the unprecedented 4-year update ;)

As I mentioned a few years back I had used the garage for my business. For the past 6 months it's back to a garage. A nice garage... but a garage nonetheless. In case these products are still popular I wanted to update on the condition of the epoxy floor. It still looks literally brand new, no signs of the epoxy wanting to lift at all. In fact there were a few areas I needed to remove it and it was extremely difficult. Again I think it was all in the prep work. However it's not all roses.. when I first finished it I noticed the cars would leave brown tires marks on the epoxy. I thought maybe it was because it was new and not cured, but that was not the case. Now that I have both cars in there daily the brown spots have become annoying. It is 'in' the clear coat so I can't just clean it off when mopping. I have to scrape or sand into the clear coating to polish it out.

garage_devoe_2013_1md.jpg


garage_devoe_2013_2md.jpg


garage_devoe_2013_3md.jpg
 

chiplee

Well-known member
Joined
Aug 17, 2014
Messages
54
This is the unprecedented 4-year update ;)

As I mentioned a few years back I had used the garage for my business. For the past 6 months it's back to a garage. A nice garage... but a garage nonetheless. In case these products are still popular I wanted to update on the condition of the epoxy floor. It still looks literally brand new, no signs of the epoxy wanting to lift at all. In fact there were a few areas I needed to remove it and it was extremely difficult. Again I think it was all in the prep work. However it's not all roses.. when I first finished it I noticed the cars would leave brown tires marks on the epoxy. I thought maybe it was because it was new and not cured, but that was not the case. Now that I have both cars in there daily the brown spots have become annoying. It is 'in' the clear coat so I can't just clean it off when mopping. I have to scrape or sand into the clear coating to polish it out.

Hate to dig up an 8 month (5yr) old thread but I had to say thanks to the OP for following up. I was searching through old threads here trying to figure out how much of this etching residue I need to get up before I apply epoxy and your pics really helped. As I was reading through the thread from the beginning I just kept wishing the OP would have posted a followup so we could all know how it held up. Then low and behold you did, so thanks. I think I have a good bit less residue remaining than you did when you put your epoxy down so I'm done with this nightmare 2 week etching process.
 
To avoid these ads, REGISTER NOW!
Top Bottom