To avoid these ads, REGISTER NOW!

My Garage Build Thread

pistol58

Member
Joined
Feb 21, 2018
Messages
15
LONG time lurker here. I have learned a ton along the way to get me to the point I am at now. This site has been super valuable in a lot of my decision making.

I have been wanting to build this shop for several years now, and finally made the decision. So far it has been a relatively low stress build. Only a few water lines and internet cable hit!

Below are a few phases so far. I am at the point where I am thinking through the interior finish step. I will probably need some advice along the way from the braintrust here.


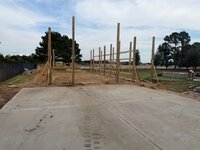
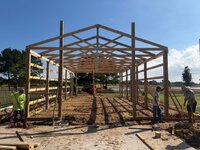
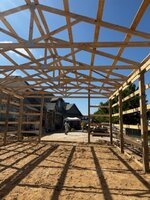
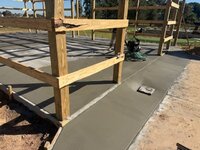
Phase 1: Dirt work and start of framing
 

Attachments

  • 1.jpg
    1.jpg
    138.2 KB · Views: 38
  • 2.jpg
    2.jpg
    102.2 KB · Views: 29
  • 3.jpg
    3.jpg
    111.5 KB · Views: 30
  • 4.jpg
    4.jpg
    79.8 KB · Views: 30
  • 5.jpg
    5.jpg
    108.5 KB · Views: 31
  • 6.jpg
    6.jpg
    87.1 KB · Views: 31
  • 8.jpg
    8.jpg
    130.5 KB · Views: 30
  • 7.jpg
    7.jpg
    126 KB · Views: 30
To avoid these ads, REGISTER NOW!
OP
P

pistol58

Member
Joined
Feb 21, 2018
Messages
15
Forgot to mention in the beginning.

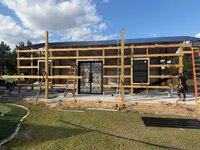
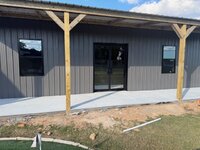
This is a 25x40 with 12' side walls, a 7 lean down the long side and a 5' overhang off the back

12x10 rollup in the front, and 8x8 in the back. 2 3x5 windows and a 72" steel walk through door.
 
OP
P

pistol58

Member
Joined
Feb 21, 2018
Messages
15
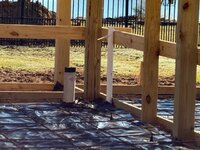
Phase 2:

Concrete pour!

Installed a 12x12 catch basin in the concrete and daylighted to the pond. The existing driveway extension sloped to a V at the end, so water always seemed to pool there. This should catch it and take it out of site.
 

Attachments

  • 1.jpg
    1.jpg
    128.9 KB · Views: 28
  • 2.jpg
    2.jpg
    126 KB · Views: 28
  • 3.jpg
    3.jpg
    116.8 KB · Views: 28
  • 4.jpg
    4.jpg
    118.5 KB · Views: 27
  • 8.jpg
    8.jpg
    112.8 KB · Views: 26
  • 7.jpg
    7.jpg
    105.3 KB · Views: 26
  • 6.jpg
    6.jpg
    129.9 KB · Views: 24
  • 5.jpg
    5.jpg
    144 KB · Views: 27
OP
P

pistol58

Member
Joined
Feb 21, 2018
Messages
15
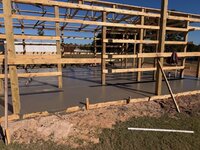
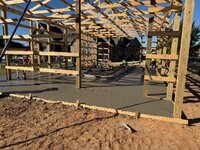
Phase 3:

This is where it sits today. They finished yesterday.

Electrician is coming out this weekend to wire and install all light fixtures.

Plumber is coming to rough in the 1/2 bath next week.

I will then schedule spray foam. Then Epoxy the flooring.
 

Attachments

  • 1.jpg
    1.jpg
    117.2 KB · Views: 26
  • 2.jpg
    2.jpg
    93.1 KB · Views: 25
  • 3.jpg
    3.jpg
    111.7 KB · Views: 26
  • 7.jpg
    7.jpg
    86 KB · Views: 27
  • 6.jpg
    6.jpg
    93.9 KB · Views: 29
  • 5.jpg
    5.jpg
    93.1 KB · Views: 29
  • 4.jpg
    4.jpg
    93.5 KB · Views: 28
  • 8.jpg
    8.jpg
    112.4 KB · Views: 35
OP
P

pistol58

Member
Joined
Feb 21, 2018
Messages
15
My next phase will be finishing the walls.

I am 99% sure I am going to go with 2x6 horizontal strapping, running just like the exterior, and nail OSB from floor to ceiling. I am then going to paint it white to brighten things up, and a 3' wainscot of black R panel on the bottom just for looks.

This is where I will probably have some questions as I get closer to this step.
 
OP
P

pistol58

Member
Joined
Feb 21, 2018
Messages
15
Here is my first question for the group.

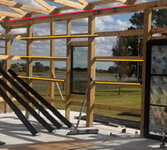
If i run 2x6 horizontally on the interior, the plywood should **** all the way up to the rafters. With 2" of spray foam on the metal, there will still be an open cavity in the wall.

Is this an issue? Should I cover the top of the opening with something above the header? Can I leave it open?
 
OP
P

pistol58

Member
Joined
Feb 21, 2018
Messages
15
Meant to include this as a visual. Yellow line represent 2x6 interior boards, red line at the top is where the plywood should **** up over the face of the existing 2x6 header board
 

Attachments

  • 2025-11-14_8-01-44.jpg
    2025-11-14_8-01-44.jpg
    74.6 KB · Views: 38
To avoid these ads, REGISTER NOW!
OP
P

pistol58

Member
Joined
Feb 21, 2018
Messages
15
If you run that top 2x as a "bookshelf" then you close it and still have a nailer for your OSB, using the same materials.
To make sure I understand, bookshelf it above, or below the top header? If below, there will still be a "hole" at the very top of the wall at least 5.5" down.

The top 2x6 header is already both on the inside and outside of the posts, so below interior 2x6 girts will be new.
 
OP
P

pistol58

Member
Joined
Feb 21, 2018
Messages
15
To make sure I understand, bookshelf it above, or below the top header? If below, there will still be a "hole" at the very top of the wall at least 5.5" down.

The top 2x6 header is already both on the inside and outside of the posts, so below interior 2x6 girts will be new.
Well, I guess it couldnt go above, since the truss sits on that top header..
 
OP
P

pistol58

Member
Joined
Feb 21, 2018
Messages
15
Yeah I commented before you posted that last picture.
So you are asking about between the two header boards?

Is the shop going to have a ceiling?
No ceiling, at least not planning on it. The idea is to paint the spray foam ceiling black.

Correct, between the two top headers boards, and then all the way down the hollow wall once OSB is up. Is that going to be an issue having it open up top? I cant really think of any, but just wasnt sure if I should "cap" it
 
To avoid these ads, REGISTER NOW!
Top Bottom