To avoid these ads, REGISTER NOW!

My garage build thread

LSVLance

Well-known member
Joined
Jul 17, 2010
Messages
298
Location
Peoria, AZ
I figured it was time to properly introduce my garage to all of you. It's been a long term project that I started back in 2001. It's gone through many transformations over the years and is finally starting to become the "shop" that I've always wanted to have. But lets go back and start from the beginning.

The building sits about 100' from our house basically on top of a hill. We built it basically like a typically house would be built in this area. For the foundation we dug a 36" deep 12" wide trench around the 36x50 foot exterior and then formed a 12" tall stem wall above the trench so the foundation and stem wall were all poured at one time. After plumbing a 12' floor drain down the middle of the floor and stubbing for an eventual bathroom over in the corner, we then poured the floor with a slight slope from all of the walls towards the drain in the center. Sorry, I can not find any pictures of the foundation, not sure why.

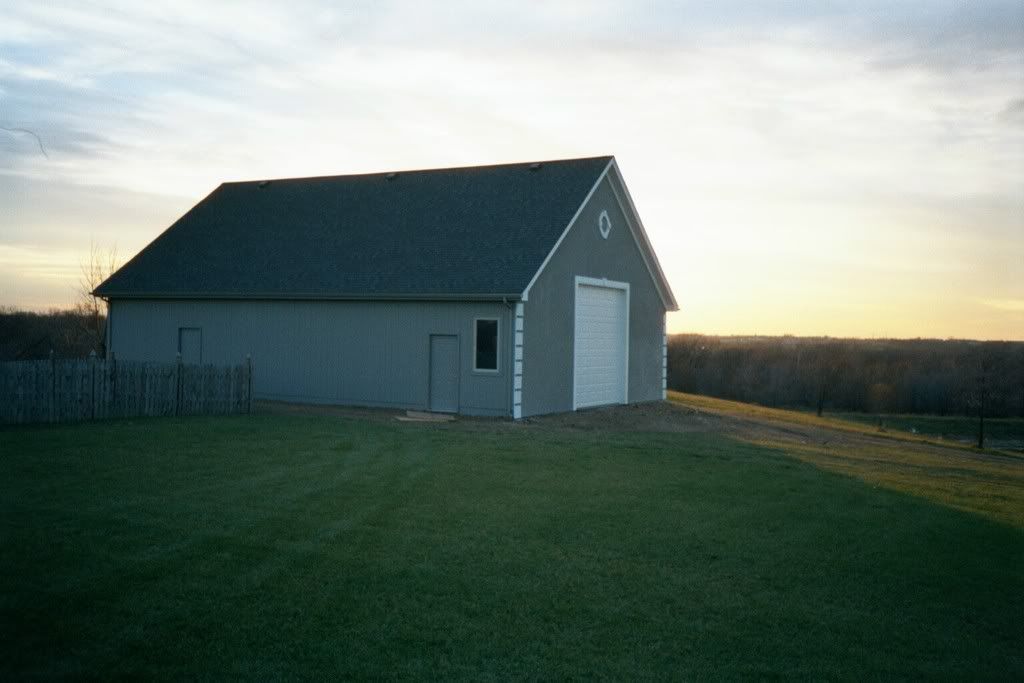
I designed the framing of the building to match the architecture of the house. The 36' wide front elevation mimics the front elevation of the 3 car garage on the house. The 9' framed walls and the 9\12 pitch of the roof also match the house. We did a lot of driving around and looking at outbuildings before beginning on ours and one of the things we wanted to do was to make the outbuilding compliment the look of our house.

Once the trusses were ready, we ordered the rest of the lumber and it was delivered on a Thursday in early November. This pictures was taken the following Monday morning. Sorry about the fog.

Outbuildingphotos0001-1.jpg


4 guys built the 4 walls and stood them up on Saturday, then on Sunday 3 guys and a loader with a ram set the trusses and were done by about noon. It took another couple of days for the roof to get sheeted but there were people that drove home on Friday afternoon and just saw a pile of lumber on the hill and when they drove back by on the way to work Monday morning, there was a building standing there.

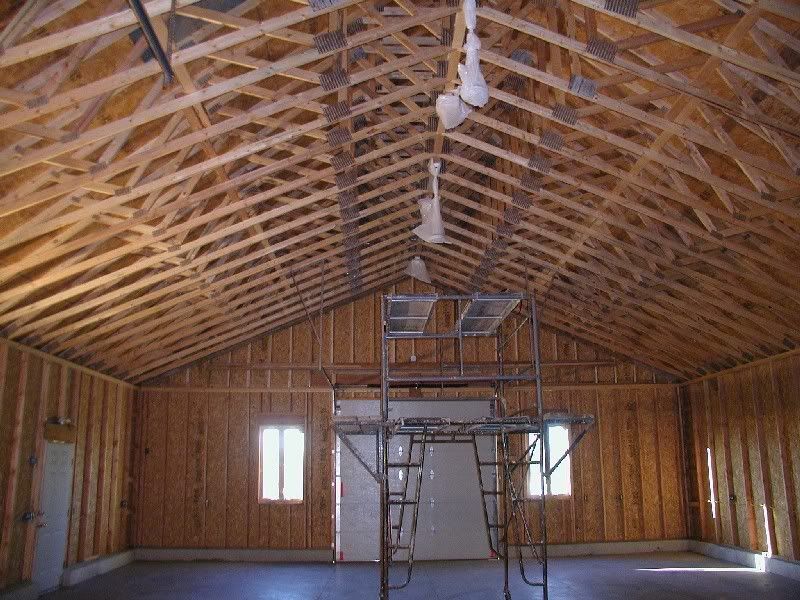
It was designed with 9' tall 2x4 walls on 24" centers with the trusses on 24" centers as well. The trusses have a peak in the center on the inside which along with the now 8" tall stem wall they sit on allowed a 12' x 12' door to be put on the front. Here's a few more pictures taken as the framing was finishing up.

Outbuildingphotos0005-1.jpg


Outbuildingphotos0006-1.jpg


I put a 10'x10' garage door on the back side. Hind sight, I wouldn't have done this as it hardly ever gets used.

Outbuildingphotos0007-1.jpg


Outbuildingphotos0009-1.jpg


Here is after the dryvit on the front and the doors up.

Outbuildingphotos0011-1.jpg


Outbuildingphotos0012-1.jpg


And one from the road to show the outbuilding alongside the house.

Outbuildingphotos0013-1.jpg


The building sat like that for a while as I rebuilt the bank account.
 
To avoid these ads, REGISTER NOW!
OP
L

LSVLance

Well-known member
Joined
Jul 17, 2010
Messages
298
Location
Peoria, AZ
My house has a 400 amp panel on it with two sub panels, one feeding the downstairs where all of the heavy lifting is down (heat pump, water heater and such). The upstairs panel basically fed lights and the kitchen so I had an electrician pull off of that panel and ran 200 amp service to the outbuilding. My brother and I ran all of the electrical inside the building. Nothing too extreme, plugins every 8 feet, a 220 circuit in the back corner for the compressor and a 30 amp circuit to where the heat pump would eventually be. I then decided to have spray in foam insulation sprayed to insulate the building. These pictures were taken right before they sprayed.

Here you can see the 10x10 door on the back side

Outbuildingbeforefoama-1.jpg


and here you can see how we framed in the 12x12 door on the front wall that technically was only 9' tall

Outbuildingbeforefoam3a-1.jpg


Outbuildingbeforefoam2-1.jpg


This is the best picture I have of after the foam was sprayed in.

garagemahal5.jpg


You can also see the heat pump air handler and duct work hanging from the ceiling. The insulation guys recommended against putting any gas furnace inside as the the building is so air tight, so I went with a heat pump (plus it also gave me air conditioning for the summer times.)
 
OP
L

LSVLance

Well-known member
Joined
Jul 17, 2010
Messages
298
Location
Peoria, AZ
Those boats you see stored in there for the winter...were trapped in there way too long in the spring by a dirt (read "muddy") driveway so that necessitated my next project.

I laid down a Geo-textile material and then topped it with 8" of crusher run gravel and smoothed it out.

Geotextilematerialondrive1.jpg


Geotextilematerialondrive2.jpg


This is the best picture I have "after gravel". You can also see the sidewalk we poured that runs over to the house here.

garagemahal1.jpg


No more trapped boats....
 
OP
L

LSVLance

Well-known member
Joined
Jul 17, 2010
Messages
298
Location
Peoria, AZ
A year or so after that...I finally saved up enough money to put concrete over the gravel. I think that was in about 2005 or so. I also extended the fence over to the outbuilding. This picture shows the pretty much finished exterior as it lays on the land beside the house.

FlagPole1a-1.jpg
 
OP
L

LSVLance

Well-known member
Joined
Jul 17, 2010
Messages
298
Location
Peoria, AZ
In the years after that, I worked on the inside. It has seen MANY multiple configurations and layouts. I sheeted the walls with OSB and put a 12 x 10 full bath with some take out kitchen cabinets in the back corner. My work bench area has literally been in every corner of the building at one time or another. We dog sat dogs as a side business for several years and had kennels lining one whole side of the building for several years. We seem to have a lot of lawn care equipment which is always taking up room, but it's nice to be able to keep that stuff inside and nice.

I've also added cable out there and the wireless signal from my router in the house reaches out there as well. So I can have the race or a football game on the TV hanging on the wall while wrenching away or pull up a website for some technical help on my laptop out there without having to come back into the house.

And now the building is morphing it's way back into a shop area for me to work on my projects. My latest addition is a two post lift.

In this picture you can see the bathroom complete with full sized tub and shower in the back left corner, along with all of the other **** that accumulates when you have space available along the right hand side. We had two different friends get divorces this year and ended up storing some of each of their stuff while they were in transition to their new living quarters...hopefully I'll get that right corner back available for my "machining and dirty work area" soon.

IMG00063-20101116-1921.jpg


My work bench area is finally going to land just to the left of the left post of the lift. I've got my tool box there now with a nice bench, I've just got to get some overhead lighting in that area.

I'll try to get some better interior pictures once I get it cleared out a bit better and get my two work areas set up.

Thanks for reading all of this if you've made it this far. It's been fun for me reliving the past 9 years or so and I can't wait to finally finish up the inside using all of the knowledge I'm gaining by hanging out here reading about all of your garages.

Lance
 
OP
L

LSVLance

Well-known member
Joined
Jul 17, 2010
Messages
298
Location
Peoria, AZ
I run a couple of different businesses but none of them are bobcat related. We picked up the bobcat for a great deal just to have it around. I use it to clear snow from the parking lot at work during the winter and to do odd landscape type duties at home during the summer. Some day when I retire, I'd like to use it to do add dirt work jobs for people just to keep me busy.
 
To avoid these ads, REGISTER NOW!
OP
L

LSVLance

Well-known member
Joined
Jul 17, 2010
Messages
298
Location
Peoria, AZ
Thanks, it's a lot of work keeping it up, but the solitude and lack of neighbors makes it very nice. We've been out here for just over 10 years now, and plan to stay another 10 years at least, if not longer.
 

Motown 454

Well-known member
Joined
Sep 25, 2008
Messages
1,359
Awesome shop. That foam must keep it nice and comfy in the all year long. You have a beautiful property.
 
OP
L

LSVLance

Well-known member
Joined
Jul 17, 2010
Messages
298
Location
Peoria, AZ
The foam is unbelievable...probably the best feature of the garage. The wind can be howling outside and you can't even hear a whisper of it while inside. They made a mess of it though which I wasn't pleased with.

The flat work guys did a fantastic job of troweling the floor smooth (almost to a polished finish) and I didn't seal it as I planned on putting an epoxy coating down. Then the foam guys came along and while they moved drop clothes around as they sprayed, there are still many areas that got over spray on the floor and I'm don't know if any of you have ever been around that foam, but once it's on something....it's NOT coming off. :tantrum2: 
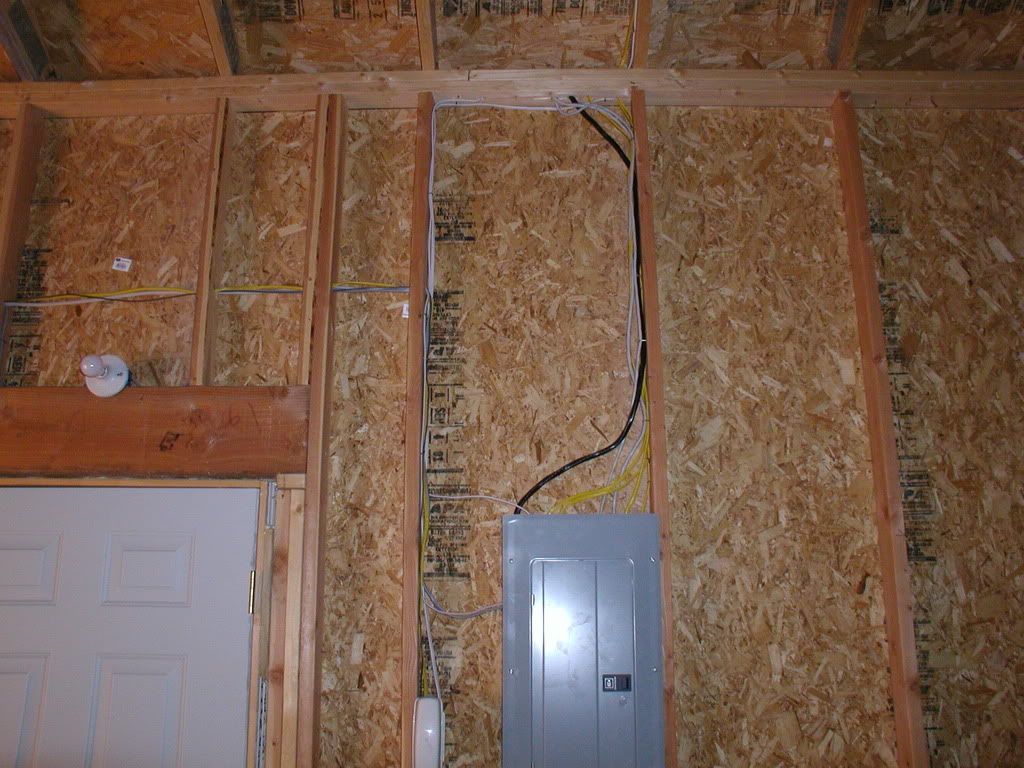
They also got quite a bit of over spray inside my electrical panel that i wasn't pleased with either. Nothing I can do about it now though.

Steviec, yes we are up North of the river. Are you from the KC area?
 
OP
L

LSVLance

Well-known member
Joined
Jul 17, 2010
Messages
298
Location
Peoria, AZ
So my divorced friends finally moved their stuff out of my outbuilding and I took the loader back to work to use for snow clearing down there...so that cleared up some floor space which let me rearrange things a bit more. Here's 4 shots of the inside of the shop to show how it's currently laid out.

Back right...that corner is going to become my dirty work, machine work corner. I'd also like to build a little enclosure around the Air compressor to suppress some noise someday.

utf-8BSU1HMDAxNDYtMjAxMDEyMTktMTMwNi5qcGc.jpg


Back Left...the bathroom is inside that room, and the workbench area to the left of that.

utf-8BSU1HMDAxNDUtMjAxMDEyMTktMTMwNi5qcGc.jpg


This is the storage corner...man it seems like I have a lot of wheeled items that I'm constantly moving around in the shop. Those are Sam's Club Gorilla racks lining the wall packed full....of stuff...

utf-8BSU1HMDAxNDMtMjAxMDEyMTktMTMwNS5qcGc.jpg


The front corner...I'll probably move the TV and stereo you see on the wall back to the workbench area eventually. Those are our dog kennels against the right wall.

utf-8BSU1HMDAxNDQtMjAxMDEyMTktMTMwNS5qcGc.jpg


I was a bit worried that putting the lift in a permanent spot would limit what I could do in there, but I'mm beginning to like how it's shaping up. Now I need to work on rerouting my air lines and relocating my hose reel then upgrading the lighting over my work areas.

I can also see that I need to start taking pictures with my real camera again and leave the cell phone for communications purposes only...
 
To avoid these ads, REGISTER NOW!
Top Bottom