To avoid these ads, REGISTER NOW!

My Garage Makeover Thread

mrramsey

Well-known member
Joined
Sep 23, 2016
Messages
261
Location
North East Ohio
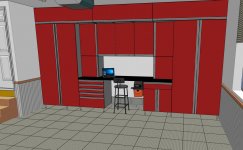
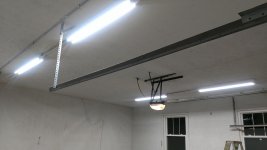
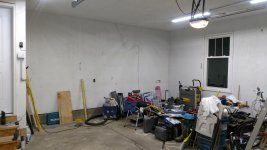
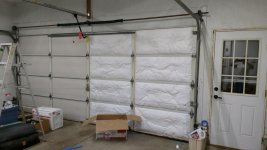
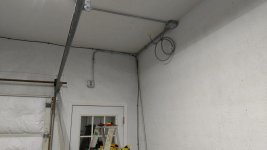
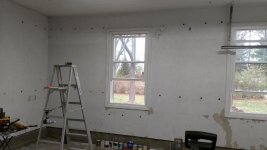
Well I got the bug to redo the garage. Looking at adding heat, additional lighting, new sub panel, new tile floor, new cabinets. Still working out the cabinet details. I was looking at NewAge among others, as a premade option but the problem is I lose storage because of the lack of a custom fit.

Decided to build them instead. I am still designing the uppers but planning on 3/4" Cab grade ply boxes , 1/2" cab grade for the drawer boxes, 1/4" backs and drawer bottoms. Full extension 100# drawer slides. 3/4" MDF for the doors and drawer fronts. I will fit my small hotdog compressor in the base of the right cabinet under the bench.My Dewalt TS will wheel into the tall cabinet on the left. Plan to ditch all of my plastic power tool cases so I can fit on the cabinets better. Cabinets are 24" deep except the lower uppers that will be 14" deep. I will also have a custom 8" deep wall cabinet on the left wall roughly 8' tall and 6' wide that will have hooks and such for hoses, extension cords long tools like levels etc. Garden tools, mowers, snowblower are all moved out to the shed.

Thought and suggestions welcome.
 

Attachments

  • Garage.jpg
    Garage.jpg
    141.2 KB · Views: 165
To avoid these ads, REGISTER NOW!

kbs2244

Well-known member
Joined
Nov 11, 2006
Messages
14,065
Beef up the drawer bottoms.
Shop drawers carry heavy loads.
Think about using slides for the same reason.
 
OP
M

mrramsey

Well-known member
Joined
Sep 23, 2016
Messages
261
Location
North East Ohio
Final Design

I have the final design on the storage cabinets done. Installing a unit heater in the next week or so. Had a quote for custom cabinets similar to what I have drawn but they ball parked $12-14k installed. I will have these done for less than $2k.
 

Attachments

  • final.jpg
    final.jpg
    145.7 KB · Views: 110
OP
M

mrramsey

Well-known member
Joined
Sep 23, 2016
Messages
261
Location
North East Ohio
I like the renderings, looking forward to seeing the construction of them.

Thanks! You and me both.

Things are moving along. I signed a contract to have the floor raised. He gave me a 99% certainty of getting it back to level to correct my standing water issue along the foundation wall. They are doing a urethane lift a little more expensive but I think it is the right product for what I need to do.

Just waiting for the HVAC guy to call me back with an install date. Planning to do demo work this weekend then electrical.
 
OP
M

mrramsey

Well-known member
Joined
Sep 23, 2016
Messages
261
Location
North East Ohio
Installed a new sub panel in the garage today. It's just 30 amps but more than enough for what I do. I will post pics later.
 

jblnut

ALLIANCE MEMBER
Joined
Jan 17, 2015
Messages
6,981
Location
In the Middle of MN
Plan to ditch all of my plastic power tool cases so I can fit on the cabinets better. Thought and suggestions welcome.
This is on my winter projects list. I have so many batteries and tools laying around and bouncing off every surface that something has to be done. This should be cheap and quick.
38188984961_a3bc686094_z.jpg


Beef up the drawer bottoms.
Shop drawers carry heavy loads.
Think about using slides for the same reason.
When we built the drawers in dads shop workbench we used 3/4" ply with a 1/4" layer of the cheapest stuff we could find on top of the 3/4" that is cut to size but not affixed to the bottom. I don't remember why we did it that way but it's been nice to be able to pull that 1/4" layer out when it gets dirty and beat up to replace it if needed. On the large bottom drawers we repurposed garage door track and 3" rollers for drawer slides. Figured they'd never break and they've been great so far ... plus they were free :rocker:

Ok now for some much needed content. Here is the time lapse video from yesterday's work.
You sure do move fast :bounce:
 
OP
M

mrramsey

Well-known member
Joined
Sep 23, 2016
Messages
261
Location
North East Ohio
Ok so I made some minor progress. I managed to haul off all of the debris from deconstruction. I added new lighting, installed a new insulated storm door and I am halfway done insulating the overhead door. Tomorrow I will finish the door insulation and move all of the stuff into the storage unit (gomini). Heat install is next Tuesday. I received half of my garage floor samples from Garage Flooring LLC today. I am trying to decide between the Norsk and TrueLock PVC tiles. I will do a grey on grey checkerboard design.

I am also thinking of adding a liftmaster 8500 opener but not sure I can get it to fit at the door.
 

Attachments

  • IMG_20171114_195533411.jpg
    IMG_20171114_195533411.jpg
    142.1 KB · Views: 82
  • IMG_20171114_195509726.jpg
    IMG_20171114_195509726.jpg
    139.5 KB · Views: 89
  • IMG_20171114_195504669.jpg
    IMG_20171114_195504669.jpg
    141.6 KB · Views: 94
  • IMG_20171114_195454951.jpg
    IMG_20171114_195454951.jpg
    141.9 KB · Views: 110
  • IMG_20171114_165431176.jpg
    IMG_20171114_165431176.jpg
    142.9 KB · Views: 92
OP
M

mrramsey

Well-known member
Joined
Sep 23, 2016
Messages
261
Location
North East Ohio
Well I am rethinking the overhead door situation. With the additional cost to raise the tracks and rework things I am leaning towards replacing the 25+ year old door with a new one with a hi lift option. well burned a few bucks on the insulation but lesson learned.
 

Bessy

Well-known member
Joined
Dec 18, 2012
Messages
992
Location
Ontario, Canada
This is on my winter projects list. I have so many batteries and tools laying around and bouncing off every surface that something has to be done. This should be cheap and quick.
38188984961_a3bc686094_z.jpg

I built something similar to hang my drill/driver/impacts using some 4" ABS. I believe each piece was cut to 8" or so, half way (so 4") I used a hole saw to cut a round hole that is about 1-3/4 (whichever hole saw was handy that would fit the tool) then used a dremel with a cutting wheel to make two cut to take out a section of the pipe to one end.

I screwed it upward to a piece of plywood with some self-tapping screws that were about 3/4" long at the 1" and 3 -1/2" marks (so that I could go in straight rather than at an angle) and now when I need a tool I walk up, extend my arm, grab the tool I want and voila.
 
To avoid these ads, REGISTER NOW!
OP
M

mrramsey

Well-known member
Joined
Sep 23, 2016
Messages
261
Location
North East Ohio
Since I have made the decision to commit to a new high lift door I went ahead and added the electric for the LiftMaster Jackshaft opener. Still have to get rid of that old coax cable. The flue for the heater goes to the right of the electric box which gets installed tomorrow.

Once the heat is in I can start on drywall repairs, re-texturing some of the walls and priming the walls. I took care of a few small tasks yesterday as well. I added new trim to the door. I also re-worked the window trim and caulked everything. Scrapped off loose texture so I can repair. Just waiting for my door guy to get me the final quote.

Plan to make a final decision on the floor tiles this week. I am really leaning heavy towards Tuff Seal tiles. I just really am paranoid about trapping moisture under the tiles. I looked long and hard at vented tiles but due to the current issues with my garage and location I don't thin k they are a good fit.

1. North East Ohio Snow Belt
2. Currently slab slopes toward foundation side wall that already has water/ salt damage.
3. I am correcting the slope and repairing the wall but this will leave the floor at a level state.
4. I do carpentry and wood working. damp floors and sawdust just clogs things up and needs to be cleaned out.

Tuff Seal pros:
Pretty Much water tight
Keeping a mop and bucket handy for winter clean up
easy to sweep
No visible tab design

Cons:
Highrer Price

Other PVC tiles:
I have samples and poured water on the seam and waited several minutes to see how much seeped through. Then waited to see how long to dry. I have samples of the NORSK tiles. They were nice looking but the 'Air Dry' channels under them i am not convinced would really work well. And while they claim a .25" thick tile, that's actually the overall dimension. That leaves the actual tile surface at a much thinner 1/8" or less.
 

Attachments

  • IMG_20171119_173656513.jpg
    IMG_20171119_173656513.jpg
    143.1 KB · Views: 45
OP
M

mrramsey

Well-known member
Joined
Sep 23, 2016
Messages
261
Location
North East Ohio
Over the Thanksgiving weekend I decided to insulate the two exterior walls with blown in cellulose insulation. Here is a quick video of the process. It was really pretty simple and only took a couple of hours. -

Heat install was delayed until next Friday because the contractor ordered the wrong parts.

I also added framing where the heater vent penetrates the wall. There is only cellotex on the exterior wall and they will be installing a vinyl siding block to the exterior. I wanted them to have a solid point to attach to. I ripped down 2x4s to 3" and added 1/2" plywood to the exterior side. Installed from the inside.
 

Attachments

  • IMG_20171125_111943533.jpg
    IMG_20171125_111943533.jpg
    143 KB · Views: 42
  • IMG_20171125_080718568.jpg
    IMG_20171125_080718568.jpg
    140.2 KB · Views: 45
Last edited:
OP
M

mrramsey

Well-known member
Joined
Sep 23, 2016
Messages
261
Location
North East Ohio
OP
M

mrramsey

Well-known member
Joined
Sep 23, 2016
Messages
261
Location
North East Ohio
Well I have been very lax getting any updates posted. Took some time off work this past week to get some stuff done.

Added some verticals on the large cabinets to eliminate sag in the shelves.
13d404f20fb0e96b74e9c1cd58d67c44.jpg


Rails ant stiles are 1x4 poplar. Glued and screwed with pocket screws.
3b916306ff28cfd9ca292deb1d2a2f83.jpg


1/2” rabbit in the back for the 1/4” plywood panels.
3b641835c7fc77ab7f22f703d0b77335.jpg


Full overlay hinges.
849247d171e52c37f460a74df7dd8d26.jpg


1x poplar for the drawer fronts. The bottom drawer is 14” tall. Did a glue up of 1x4 with pocket screws.
2163fc925901df80ee982464b3114626.jpg


This is where I stand as of this evening. Everything is sanded and ready for primer and paint.
96d6b1356d53374663a6673f63561252.jpg


Sent from my iPhone using Tapatalk
 
OP
M

mrramsey

Well-known member
Joined
Sep 23, 2016
Messages
261
Location
North East Ohio
Started putting some color on...

0433765d52a56cd065d3d963cb491a45.jpg


Then an old injury flared up...

87067fc2c8cd8ac82c777bdb1cfb8441.jpg


Got a painter coming out Tuesday for an estimate to finish.


Sent from my iPhone using Tapatalk
 

bj383ss

Well-known member
Joined
Sep 29, 2011
Messages
3,166
Location
TX
That looks great. I love the look of natural wood but that Red is awesome.

Bret
 
To avoid these ads, REGISTER NOW!
Top Bottom