SPaikmos
Active member
I recently finished grinding concrete for two different garages and thought I'd start a thread to share my learnings with others. I had a doozy of a time so hopefully this will help someone.
DISCLAIMER: I know nothing about concrete prep. This is a writeup of what I experienced in the past month. YMMV. This writeup is worth what you paid for it.") I'm a total newb, so if I've written something wrong, please correct me and I'll edit it.
I'm a total newb, so if I've written something wrong, please correct me and I'll edit it.
I have two garages that I'm doing the flooring on:
1) My workshop is 40x36, and is a brand new slab on grade. The footings and perimeter wall were poured in February, and the main slab was poured in March. The main slab is roughly 6" thick, 4000psi concrete and had fibers mixed into it for extra strength, on top of the rebar structure. AIUI, this is overkill, but it's what I wanted.
When they poured the slab, the concrete guy recommended to remove the vapor barrier. That's a whole different topic that I won't go into here. Needless to say, there's a lot of controversy around this.
2) The house garage is 32x32, built in 2000. The garage has serious moisture issues, visible condensation with plastic test. There was some sort of epoxy / paint on there before, and most of it has peeled off. It looks like ****.
Concrete Variables
There are a ton of variables related to the condition of concrete. I haven't explored all of these; I only have experience with two thus far. I can tell you that my slabs were very different, so you need to understand that not all advice will work for all conditions.
In my cases, the new slab was super hard and tough, and the older slab was much softer and easier to grind. I suspect this has to do with the formulation of the mixtures - the additives used, conditions on the day of the pour, how it aged, etc.
CSP Prepration Scale
Because I've got moisture issues, I chose to use a topical moisture barrier coating on my concrete. The manufacturer specifies CSP-3 preparation. What I find is that there's lots of different opinions on what that means, and how it is achieved. This is a great article on the 10 Grades of Surface Roughness.
The TL;DR I get from the web is:
Acid Etch achieves CSP-1 or CSP-2
Grinding is generally CSP-2
Shot blasting is CSP-3+
Every single person I spoke with regarding concrete had NO IDEA what CSP is. The people at the equipment rental stores, shot blast media salespeople, contractors on the phone, etc. NOBODY KNEW WHAT I WAS TALKING ABOUT when I ask for a CSP-3 preparation.
Depending on what you are doing, you need more or less rough preparation. I would guess that most folks will be fine with CSP-2 (grinding / etching)
Goals of Surface Preparation
AFAICT, these are the key things you care about for concrete prep:
1) Clean. You want to get rid of any old coatings, oil stains, etc. If you have a new slab, you don't have anything to worry about. If you have an old slab, you need to get past whatever is on there.
2) Porous. You want the concrete to be porous so a new coating will soak in and bind to it properly. When you grind concrete, you will start to see a "salt and pepper" look to it and you get the sense that it'll absorb liquid easily.
3) Texture. This is related to porosity, but not quite the same. The concrete could be porous but very smooth. I think you want some texture for the coating to bind to, but I imagine this will vary with the coating. In my case, CSP-3 is a rough texture so I imagine I'd want a sandpaper-y texture.
4) Strength. The top most layer of concrete (laitance) is weak and brittle. You want to grind past this to get to stronger material on which your coating will bind to.
The whole idea with prep is to get the strongest bond between the coating and concrete. The above are some of the variables to consider when choosing a preparation method.
Silicosis
I'd like to raise the issue of silicosis. If you, like me, don't know what this is, please read about it. It is an incurable disease that is caused by inhaling fine silica dust, like what you get from grinding concrete.
In preparation for applying a coating, I purchased two 3M organic respirators. Stupid me thought that these respirators, being expensive, would protect me from silicosis. Unfortunately, organic respirators use activated charcoal and do NOT FILTER FINE PARTICULATE DUST. You need to use a N95 (or better) mask when grinding concrete.
I did not know this. I grinded concrete for 4 days using an organic respirator, and I have been coughing uncontrollably for the last two weeks because of it. It's bad enough that we're dealing with COVID-19, but silicosis is just the icing on the lung disease cake!
Preparation Techniques
I tried two major techniques for surface preparation - grinding and shot blasting. You will find countless articles that compare these methods, along with acid etching.
Grinding
I used two grinders in my prep. I started with a 10" EDCO single disc grinder from Home Depot, and then I used a EDCO Dual Head grinder from United Rentals.
The HD grinder includes the grinding disc in the price of the rental. Make sure and ask when it was last changed, so you get a new-ish one, as quality can vary. I used this grinder first and spent 4 hours on my 1440sf workshop. It etched the concrete but didn't do a good job. In hindsight, i was moving way too quickly as you can see in the photos.
The United Rentals grinder uses EDCOs Magnatrap "pucks". You have to buy these new and install them on the grinder. There are a variety of bits available, some are good for grinding away existing epoxy, and some are better for grinding bare concrete. The ones that United sold me were the M501MC meant for generic grinding, CSP-1 to CSP-2. IME, it was like using 200 grit sandpaper when I wanted a surface closer to 40 grit (CSP-3). Totally the wrong tool for the job. I spent 30+ hours with this grinder, working on both slabs.
What I found was that using new blades / bits is a problem because my machine wasn't well leveled and the bits need to be "bedded in". I don't know if EDCO publishes a procedure for new bits, but I'm sure there must be one. Each head uses three bits, and I could tell that only one disc was grinding, and most likely, only one bit. It was very slow going, and after a while, I think the 2nd bit started to bite, then finally all 3 on the same head. I did my entire workshop using the dual head grinder in "single head mode" because the second head simply wasn't making contact. It was only after I got about 1/2 done with my other garage (roughly 2000sf total!) that both heads were finally grinding, and then things went much faster.
However, remember that the 2nd garage had existing epoxy, and these bits are NOT designed to remove epoxy. I believe you need PCD blades, and those cost a small fortune. They also require you to buy different blades for each head (CW and CCW). United Rentals doesn't carry them so you need to buy them ahead of time. Anyway, the blades would get clogged with epoxy material so I had to stop every minute and use a screwdriver to scrape off the epoxy and continue. It was extremely inefficient.
United Rentals has a "weekend deal" where you can rent the machine on Friday afternoon, return it Monday morning, and be charged for only 1 day of rental. This is a great deal, so I used the machine as much as possible to grind both garages. I was up until 4am on Sunday morning trying to grind the last of my garage and finally threw in the towel because I had to scrape the blades every minute or so... it was awful.
Grinding creates a lot of dust. Buy yourself a Dust Deputy + a HEPA shop vac to keep the dust down. I found that a long hose makes it easier to maneuver the vacuum system, otherwise you'll be dragging the dust collector around and it ***** (pun intended).
There are plenty of YT videos that give you grinding advice. My takeaways is that you don't use it like a lawnmower; you need to move side-to-side as you walk forward. I found I had the best success when creeping forward. Literally need to walk slower than a snail, especially when only 1 out of 6 bits is grinding.
The other issue I had with grinding was that it's difficult to see what's happening. It creates so much dust that I'd have to grind, then sweep it up to see exactly what the texture looks like. This makes it difficult to adjust your grinding speed and technique.
One more consideration is controlling the grinder. I found that the single head grinder was easy to control, and the dual head needed more "man handling". There is some technique to be applied, you can control the side to side motion by pushing up/down on the handle. Still, both machines put a lot of stress on your hands, and I could feel the tendons in my palms screaming out in pain as the day wore on. I didn't know I had said tendons until they hurt!
Shot Blasting
At first, I wanted to use a shot blaster but couldn't find one to rent. After unsuccessfully preparing my concrete with the dual head grinder, I searched some more and found that Sunbelt Rentals offers a 8" Shotblaster. This thing is AMAZING! It makes the concrete look wet when you use it. They also offer a massive HEPA vacuum, which is required when using the shot blaster. This setup provides a relatively dustless solution. I would still wear a mask, but it's much better for you than the grinder.
When using the shotblaster, you have some choices of shot media. I did not know this, and called Kleen Blast and they recommended me to use S-280. Of course, these guys had no idea that I wanted a more textured surface.
S-280 is specified at 250k pellets per pound! This stuff is tiny, and it gets EVERYWHERE. Make sure you rent a sweeper magnet from Sunbelt as well, otherwise you are SOL. S-280 is perfect IMO for CSP-2, but I would have preferred more texture. In hindsight, I would have selected S-390 media for my use case.
The shot comes in 50lb bags. Nobody can predict how much shot you will need. It is a function of how much you lose as you're using it, and how good you are at sweeping up the loose shot. I bought 4 bags (200lbs) of shot. For my 2500sf, I used the shot blaster about 25 hours and went through roughly 3/4 of a bag. I didn't even need that much, I threw away some shot simply because I didn't want to pick it up at the end.
Surprisingly, the shotblaster doesn't provide a uniform blast pattern. Some YT videos talk about this; it tends to be stronger on the left side than the right side. You can try to mitigate this by making two passes over the same area in opposite directions. I did this for a while, but it's a PITA and eventually I decided to go in a single direction, but just overlap a little more. It's nominally an 8" pattern, but if I overlap 2-3" on each pass, you get about 5-6" each pass. If you look at some of my pics (link at bottom) you will see the striping where one side is darker than the other. This isn't overlap; this is because the shot is stronger on one side.
Variables you can control with the shot blaster are:
1) Shot size as discussed above
2) Shot rate. The harder you pull the level, the more shot per unit time you use.
3) Walking speed. The slower you walk, the longer you abrade the surface and the more material you remove.
Because the shot blaster is kind of bulky, it doesn't get the walls / corners very well. You'll still have about 2-3" that you need to hand grind around the perimeter.
As with the grinder, I found that I had to walk super slow to get proper grinding action. I'm talking 5ft/min or so. It would literally take me 5-10min to make a single pass of 40' in my shop. At 5-6" per pass, that's 5-6 hours to do the floor.
Note that the shot blaster operates at 20A, and can produce a current surge in excess of 30A when starting up. This tripped the circuit breaker a few times as I was working, so be aware of that.
Using the shot blaster requires you to pull a lever (similar to a bicycle hand brake) to activate the shop. Holding this for 10+ hours each day, my hand got really sore. If you have arthritis, this is not for you!
Hand Grinding
I used a hand grinder for the hard to reach places. I used this DeWalt DW4774 Grinding Wheel. This thing is THE BOMB! I used it in both garages, and a couple of tile jobs I did prior, and I have barely broken it in. It also removes material SUPER FAST so be careful. This thing literally grinds concrete like you're wiping a dry-erase marker board with a tissue.
If I had known I would be spending 60+ hours grinding and shotblasting 2500sf, I may have just opted to do it all by hand instead. Seriously.
When grinding, make sure you get a proper dust shroud and use the dust deputy and HEPA vac + dust mask.
Other Methods
Two other methods I had considered but didn't use are Acid Etching and Scabbling / Scarifier.
My research on acid etching was mixed. It seems that some people think this became popular because it's cheap and easy. However, I found some reference that talks about opening up pores in concrete via a chemical reaction with the calcium and so on. This idea is appealing to me, if true, because it would suggest you can get good adhesion by etching pores into the concrete. Many people suggest it for new slabs, but due to the laitance issue, I would recommend grinding.
As for technique, everyone has different suggestions for dilution, formulation, neutralization, etc. I didn't research this carefully, it seems very arbitrary what people do. Ideally someone would say "use such and such pH" or something more scientific, but I never found a good source like that. The obvious thing is to test it at different concentrations on your slab, but I ain't got time for that. So if I were going to do it, I would probably buy a bottle of muriatic acid and pick some arbitrary dilution (maybe 2:1 or 3:1 water:acid) and use that. That's pure speculation on my part, so don't blame me if it's wrong.
I considered using a Scabbler or Scarifier, because some CSP estimates show that this would produce a solid CSP-3. After watching some videos of how it works, I decided this was too violent and likely to cause serious damage. These devices look like they're used to break apart slabs or remove large chunks of concrete, and IMHO it's equivalent to using a sledge hammer to drive in roofing nails. A bad idea!
Grinding Pattern
I'm not sure if there's a good pattern for grinding. I did a zig-zag pattern, overlapping with each pass. I did this twice, once east-west, and then north-south, to produce a cross-hatch pattern. This means that ideally, each spot should have been hit roughly 4 times.
I found this to be somewhat overkill for the shot blasting. For my garage, because I have garage doors on the SOUTH side, I did the E-W pattern (zig zag) and then I did just South --> North. this way, I could start at the edge of the slab (my body is outside with the machine at the start of the slab) and then go to the north wall. Otherwise, if I start on the north wall, I'd have about 3' in from the wall because of my body and the shot blaster handle sticking out.
Transportation
I don't have a proper trailer for hauling rental equipment, and these grinders are HEAVY. I purchased a Wheelchair and Mobility Scooter Carrier from Harbor Freight. This thing was genius! When I pulled into United Rentals, the dude said, "I've never seen anything like that. Most people tell me to load the grinder in the back of their SUV and I say it's gonna cause a mess. They say they're ok with it, but when it damages something the look on their face says it's NOT ok...."
I highly recommend this setup. It is perfect for these tools, and I imagine I'll get plenty of use out of it.
Cleaning
After prepping, you need to clean the concrete. I read many tips for this. Some people power wash the concrete which is nice, but you then need to dry it out. This can take a few days, and you can speed it along with fans or a dehumidifier.
Another option would be to use a solvent like alcohol to wipe the concrete and de-dust it. I decided not to do this because it sounded like a lot of work and could require a lot of solvent too.
One method I saw which made a lot of sense is to use a microfiber towel and dry wipe the concrete to get most of the dust off. This sounds like a great idea, and I would consider doing it.
For my shop, I decided to sweep out as much dust as possible, vacuum, and then run a leaf blower a few times. I still had some surface dust on the concrete that came off when I rub my hand on there, but I decided that was acceptable. My reasoning is:
1) It's going to be tough to get every iota of dust out. Again, I needed to think about what is necessary or "good enough" and I figure this is fine.
2) Applying the flooring is a three day process for me. There will inevitably be some contaminants (bugs, dust, etc) that float onto the flooring. Hence, I figure dust is ok.
3) I'm adding anti-slip powder, which is essentially sand. If that's ok, then itty bitty powdery dust isn't going to be a problem IMO.
The "Perfect" Grind
I had many hours of solitude to think while grinding at a snail's pace. While grinding, I kept thinking, what would the perfect grind look like? Would I ever be able to get a purely uniformly perfectly ground slab?
I imagine people can do this, but I could not. No matter what grinding pattern I used, or how I adjusted my walking speed, I could not get everything to be perfect and uniform. Eventually, I had to figure out what "good enough" would look like, and shoot for that.
Pictures don't do it justice, it's hard to tell the quality of the grind from pictures alone (at least for me!). Maybe some experts here can share what they look for in a grind, so others can get theirs perfect.
Conclusions:
I hope this gives you an idea of my thought process on grinding, and gives you a starting point on what to look for.
My preference would be to use the shot blaster because it produces less dust, it's much easier to use, and relatively fast. The only downside is that shot media gets EVERYWHERE and it doesn't vacuum easily. It's easy to clean with a strong magnet, but that doesn't work as well in a steel building.
Regardless what you use, please, PLEASE use a proper mask. Seriously. Do not mess with silicosis, it will ruin your lungs!!!
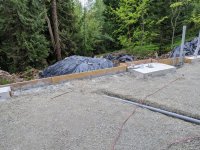
Here are pics of my flooring process.
Please discuss!
I'll edit / update this post if others find it useful.
DISCLAIMER: I know nothing about concrete prep. This is a writeup of what I experienced in the past month. YMMV. This writeup is worth what you paid for it.
I'm a total newb, so if I've written something wrong, please correct me and I'll edit it.I have two garages that I'm doing the flooring on:
1) My workshop is 40x36, and is a brand new slab on grade. The footings and perimeter wall were poured in February, and the main slab was poured in March. The main slab is roughly 6" thick, 4000psi concrete and had fibers mixed into it for extra strength, on top of the rebar structure. AIUI, this is overkill, but it's what I wanted.
When they poured the slab, the concrete guy recommended to remove the vapor barrier. That's a whole different topic that I won't go into here. Needless to say, there's a lot of controversy around this.
2) The house garage is 32x32, built in 2000. The garage has serious moisture issues, visible condensation with plastic test. There was some sort of epoxy / paint on there before, and most of it has peeled off. It looks like ****.
Concrete Variables
There are a ton of variables related to the condition of concrete. I haven't explored all of these; I only have experience with two thus far. I can tell you that my slabs were very different, so you need to understand that not all advice will work for all conditions.
In my cases, the new slab was super hard and tough, and the older slab was much softer and easier to grind. I suspect this has to do with the formulation of the mixtures - the additives used, conditions on the day of the pour, how it aged, etc.
CSP Prepration Scale
Because I've got moisture issues, I chose to use a topical moisture barrier coating on my concrete. The manufacturer specifies CSP-3 preparation. What I find is that there's lots of different opinions on what that means, and how it is achieved. This is a great article on the 10 Grades of Surface Roughness.
The TL;DR I get from the web is:
Acid Etch achieves CSP-1 or CSP-2
Grinding is generally CSP-2
Shot blasting is CSP-3+
Every single person I spoke with regarding concrete had NO IDEA what CSP is. The people at the equipment rental stores, shot blast media salespeople, contractors on the phone, etc. NOBODY KNEW WHAT I WAS TALKING ABOUT when I ask for a CSP-3 preparation.
Depending on what you are doing, you need more or less rough preparation. I would guess that most folks will be fine with CSP-2 (grinding / etching)
Goals of Surface Preparation
AFAICT, these are the key things you care about for concrete prep:
1) Clean. You want to get rid of any old coatings, oil stains, etc. If you have a new slab, you don't have anything to worry about. If you have an old slab, you need to get past whatever is on there.
2) Porous. You want the concrete to be porous so a new coating will soak in and bind to it properly. When you grind concrete, you will start to see a "salt and pepper" look to it and you get the sense that it'll absorb liquid easily.
3) Texture. This is related to porosity, but not quite the same. The concrete could be porous but very smooth. I think you want some texture for the coating to bind to, but I imagine this will vary with the coating. In my case, CSP-3 is a rough texture so I imagine I'd want a sandpaper-y texture.
4) Strength. The top most layer of concrete (laitance) is weak and brittle. You want to grind past this to get to stronger material on which your coating will bind to.
The whole idea with prep is to get the strongest bond between the coating and concrete. The above are some of the variables to consider when choosing a preparation method.
Silicosis
I'd like to raise the issue of silicosis. If you, like me, don't know what this is, please read about it. It is an incurable disease that is caused by inhaling fine silica dust, like what you get from grinding concrete.
In preparation for applying a coating, I purchased two 3M organic respirators. Stupid me thought that these respirators, being expensive, would protect me from silicosis. Unfortunately, organic respirators use activated charcoal and do NOT FILTER FINE PARTICULATE DUST. You need to use a N95 (or better) mask when grinding concrete.
I did not know this. I grinded concrete for 4 days using an organic respirator, and I have been coughing uncontrollably for the last two weeks because of it. It's bad enough that we're dealing with COVID-19, but silicosis is just the icing on the lung disease cake!
Preparation Techniques
I tried two major techniques for surface preparation - grinding and shot blasting. You will find countless articles that compare these methods, along with acid etching.
Grinding
I used two grinders in my prep. I started with a 10" EDCO single disc grinder from Home Depot, and then I used a EDCO Dual Head grinder from United Rentals.
The HD grinder includes the grinding disc in the price of the rental. Make sure and ask when it was last changed, so you get a new-ish one, as quality can vary. I used this grinder first and spent 4 hours on my 1440sf workshop. It etched the concrete but didn't do a good job. In hindsight, i was moving way too quickly as you can see in the photos.
The United Rentals grinder uses EDCOs Magnatrap "pucks". You have to buy these new and install them on the grinder. There are a variety of bits available, some are good for grinding away existing epoxy, and some are better for grinding bare concrete. The ones that United sold me were the M501MC meant for generic grinding, CSP-1 to CSP-2. IME, it was like using 200 grit sandpaper when I wanted a surface closer to 40 grit (CSP-3). Totally the wrong tool for the job. I spent 30+ hours with this grinder, working on both slabs.
What I found was that using new blades / bits is a problem because my machine wasn't well leveled and the bits need to be "bedded in". I don't know if EDCO publishes a procedure for new bits, but I'm sure there must be one. Each head uses three bits, and I could tell that only one disc was grinding, and most likely, only one bit. It was very slow going, and after a while, I think the 2nd bit started to bite, then finally all 3 on the same head. I did my entire workshop using the dual head grinder in "single head mode" because the second head simply wasn't making contact. It was only after I got about 1/2 done with my other garage (roughly 2000sf total!) that both heads were finally grinding, and then things went much faster.
However, remember that the 2nd garage had existing epoxy, and these bits are NOT designed to remove epoxy. I believe you need PCD blades, and those cost a small fortune. They also require you to buy different blades for each head (CW and CCW). United Rentals doesn't carry them so you need to buy them ahead of time. Anyway, the blades would get clogged with epoxy material so I had to stop every minute and use a screwdriver to scrape off the epoxy and continue. It was extremely inefficient.
United Rentals has a "weekend deal" where you can rent the machine on Friday afternoon, return it Monday morning, and be charged for only 1 day of rental. This is a great deal, so I used the machine as much as possible to grind both garages. I was up until 4am on Sunday morning trying to grind the last of my garage and finally threw in the towel because I had to scrape the blades every minute or so... it was awful.
Grinding creates a lot of dust. Buy yourself a Dust Deputy + a HEPA shop vac to keep the dust down. I found that a long hose makes it easier to maneuver the vacuum system, otherwise you'll be dragging the dust collector around and it ***** (pun intended).
There are plenty of YT videos that give you grinding advice. My takeaways is that you don't use it like a lawnmower; you need to move side-to-side as you walk forward. I found I had the best success when creeping forward. Literally need to walk slower than a snail, especially when only 1 out of 6 bits is grinding.
The other issue I had with grinding was that it's difficult to see what's happening. It creates so much dust that I'd have to grind, then sweep it up to see exactly what the texture looks like. This makes it difficult to adjust your grinding speed and technique.
One more consideration is controlling the grinder. I found that the single head grinder was easy to control, and the dual head needed more "man handling". There is some technique to be applied, you can control the side to side motion by pushing up/down on the handle. Still, both machines put a lot of stress on your hands, and I could feel the tendons in my palms screaming out in pain as the day wore on. I didn't know I had said tendons until they hurt!
Shot Blasting
At first, I wanted to use a shot blaster but couldn't find one to rent. After unsuccessfully preparing my concrete with the dual head grinder, I searched some more and found that Sunbelt Rentals offers a 8" Shotblaster. This thing is AMAZING! It makes the concrete look wet when you use it. They also offer a massive HEPA vacuum, which is required when using the shot blaster. This setup provides a relatively dustless solution. I would still wear a mask, but it's much better for you than the grinder.
When using the shotblaster, you have some choices of shot media. I did not know this, and called Kleen Blast and they recommended me to use S-280. Of course, these guys had no idea that I wanted a more textured surface.
S-280 is specified at 250k pellets per pound! This stuff is tiny, and it gets EVERYWHERE. Make sure you rent a sweeper magnet from Sunbelt as well, otherwise you are SOL. S-280 is perfect IMO for CSP-2, but I would have preferred more texture. In hindsight, I would have selected S-390 media for my use case.
The shot comes in 50lb bags. Nobody can predict how much shot you will need. It is a function of how much you lose as you're using it, and how good you are at sweeping up the loose shot. I bought 4 bags (200lbs) of shot. For my 2500sf, I used the shot blaster about 25 hours and went through roughly 3/4 of a bag. I didn't even need that much, I threw away some shot simply because I didn't want to pick it up at the end.
Surprisingly, the shotblaster doesn't provide a uniform blast pattern. Some YT videos talk about this; it tends to be stronger on the left side than the right side. You can try to mitigate this by making two passes over the same area in opposite directions. I did this for a while, but it's a PITA and eventually I decided to go in a single direction, but just overlap a little more. It's nominally an 8" pattern, but if I overlap 2-3" on each pass, you get about 5-6" each pass. If you look at some of my pics (link at bottom) you will see the striping where one side is darker than the other. This isn't overlap; this is because the shot is stronger on one side.
Variables you can control with the shot blaster are:
1) Shot size as discussed above
2) Shot rate. The harder you pull the level, the more shot per unit time you use.
3) Walking speed. The slower you walk, the longer you abrade the surface and the more material you remove.
Because the shot blaster is kind of bulky, it doesn't get the walls / corners very well. You'll still have about 2-3" that you need to hand grind around the perimeter.
As with the grinder, I found that I had to walk super slow to get proper grinding action. I'm talking 5ft/min or so. It would literally take me 5-10min to make a single pass of 40' in my shop. At 5-6" per pass, that's 5-6 hours to do the floor.
Note that the shot blaster operates at 20A, and can produce a current surge in excess of 30A when starting up. This tripped the circuit breaker a few times as I was working, so be aware of that.
Using the shot blaster requires you to pull a lever (similar to a bicycle hand brake) to activate the shop. Holding this for 10+ hours each day, my hand got really sore. If you have arthritis, this is not for you!
Hand Grinding
I used a hand grinder for the hard to reach places. I used this DeWalt DW4774 Grinding Wheel. This thing is THE BOMB! I used it in both garages, and a couple of tile jobs I did prior, and I have barely broken it in. It also removes material SUPER FAST so be careful. This thing literally grinds concrete like you're wiping a dry-erase marker board with a tissue.
If I had known I would be spending 60+ hours grinding and shotblasting 2500sf, I may have just opted to do it all by hand instead. Seriously.
When grinding, make sure you get a proper dust shroud and use the dust deputy and HEPA vac + dust mask.
Other Methods
Two other methods I had considered but didn't use are Acid Etching and Scabbling / Scarifier.
My research on acid etching was mixed. It seems that some people think this became popular because it's cheap and easy. However, I found some reference that talks about opening up pores in concrete via a chemical reaction with the calcium and so on. This idea is appealing to me, if true, because it would suggest you can get good adhesion by etching pores into the concrete. Many people suggest it for new slabs, but due to the laitance issue, I would recommend grinding.
As for technique, everyone has different suggestions for dilution, formulation, neutralization, etc. I didn't research this carefully, it seems very arbitrary what people do. Ideally someone would say "use such and such pH" or something more scientific, but I never found a good source like that. The obvious thing is to test it at different concentrations on your slab, but I ain't got time for that. So if I were going to do it, I would probably buy a bottle of muriatic acid and pick some arbitrary dilution (maybe 2:1 or 3:1 water:acid) and use that. That's pure speculation on my part, so don't blame me if it's wrong.
I considered using a Scabbler or Scarifier, because some CSP estimates show that this would produce a solid CSP-3. After watching some videos of how it works, I decided this was too violent and likely to cause serious damage. These devices look like they're used to break apart slabs or remove large chunks of concrete, and IMHO it's equivalent to using a sledge hammer to drive in roofing nails. A bad idea!
Grinding Pattern
I'm not sure if there's a good pattern for grinding. I did a zig-zag pattern, overlapping with each pass. I did this twice, once east-west, and then north-south, to produce a cross-hatch pattern. This means that ideally, each spot should have been hit roughly 4 times.
I found this to be somewhat overkill for the shot blasting. For my garage, because I have garage doors on the SOUTH side, I did the E-W pattern (zig zag) and then I did just South --> North. this way, I could start at the edge of the slab (my body is outside with the machine at the start of the slab) and then go to the north wall. Otherwise, if I start on the north wall, I'd have about 3' in from the wall because of my body and the shot blaster handle sticking out.
Transportation
I don't have a proper trailer for hauling rental equipment, and these grinders are HEAVY. I purchased a Wheelchair and Mobility Scooter Carrier from Harbor Freight. This thing was genius! When I pulled into United Rentals, the dude said, "I've never seen anything like that. Most people tell me to load the grinder in the back of their SUV and I say it's gonna cause a mess. They say they're ok with it, but when it damages something the look on their face says it's NOT ok...."
I highly recommend this setup. It is perfect for these tools, and I imagine I'll get plenty of use out of it.
Cleaning
After prepping, you need to clean the concrete. I read many tips for this. Some people power wash the concrete which is nice, but you then need to dry it out. This can take a few days, and you can speed it along with fans or a dehumidifier.
Another option would be to use a solvent like alcohol to wipe the concrete and de-dust it. I decided not to do this because it sounded like a lot of work and could require a lot of solvent too.
One method I saw which made a lot of sense is to use a microfiber towel and dry wipe the concrete to get most of the dust off. This sounds like a great idea, and I would consider doing it.
For my shop, I decided to sweep out as much dust as possible, vacuum, and then run a leaf blower a few times. I still had some surface dust on the concrete that came off when I rub my hand on there, but I decided that was acceptable. My reasoning is:
1) It's going to be tough to get every iota of dust out. Again, I needed to think about what is necessary or "good enough" and I figure this is fine.
2) Applying the flooring is a three day process for me. There will inevitably be some contaminants (bugs, dust, etc) that float onto the flooring. Hence, I figure dust is ok.
3) I'm adding anti-slip powder, which is essentially sand. If that's ok, then itty bitty powdery dust isn't going to be a problem IMO.
The "Perfect" Grind
I had many hours of solitude to think while grinding at a snail's pace. While grinding, I kept thinking, what would the perfect grind look like? Would I ever be able to get a purely uniformly perfectly ground slab?
I imagine people can do this, but I could not. No matter what grinding pattern I used, or how I adjusted my walking speed, I could not get everything to be perfect and uniform. Eventually, I had to figure out what "good enough" would look like, and shoot for that.
Pictures don't do it justice, it's hard to tell the quality of the grind from pictures alone (at least for me!). Maybe some experts here can share what they look for in a grind, so others can get theirs perfect.
Conclusions:
I hope this gives you an idea of my thought process on grinding, and gives you a starting point on what to look for.
My preference would be to use the shot blaster because it produces less dust, it's much easier to use, and relatively fast. The only downside is that shot media gets EVERYWHERE and it doesn't vacuum easily. It's easy to clean with a strong magnet, but that doesn't work as well in a steel building.
Regardless what you use, please, PLEASE use a proper mask. Seriously. Do not mess with silicosis, it will ruin your lungs!!!
Here are pics of my flooring process.
Please discuss!
I'll edit / update this post if others find it useful.
Last edited: