To avoid these ads, REGISTER NOW!

Between 705 & 1200 SQ/FT My Mini Garagemahal

Workspaces between 705 and 1200 squarefeet.
OP
F

fouckhest

Well-known member
Joined
Jul 24, 2013
Messages
1,851
Location
Greer, SC
Not much for great progress on my projects, did get over to my buddies to machine some parts to make a steering wheel/shaft adapter....its great having a good friend with a lathe a mile down the road :)
53312716924_96f5ca1516_b.jpgUntitled by fouckhest, on Flickr

Wife and I went to USC (SC) football game Saturday afternoon, her daughter is a senior this year, so figured we needed to do that sooner than later lol. Had a good time and had really good seats
53313723898_a2345324bb_b.jpgUntitled by fouckhest, on Flickr

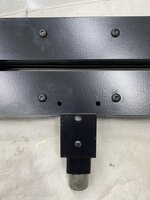
Found a little garage time yesterday, worked on the steering system for the project car....its amazing how fast time goes and how long it takes to make something relatively simple looking in the end
53312594338_4dcf330a22_b.jpgUntitled by fouckhest, on Flickr
53312352651_c02c0efa8c_b.jpgUntitled by fouckhest, on Flickr

Dash back in the car for some perspective, now i need to start cutting down the DD shaft and getting the joints fitted
53311483887_50ff6ee97b_b.jpgUntitled by fouckhest, on Flickr


In paundry room progress, ceiling is up/in, lights in....four lights will be on one switch, then the center will be on its own switch....
53312622422_403b37c8df_b.jpgUntitled by fouckhest, on Flickr

Siding started going up Friday, they are back on it today....got the external spigot installed (thanks @jbrentd for the link)
53313844249_7a8199566d_b.jpgUntitled by fouckhest, on Flickr

Builder is back working today, supposed to have inside/insulation inspection tomorrow, then I'll get the drywall guy lined up and we should be getting close to calling this a close
 
To avoid these ads, REGISTER NOW!
OP
F

fouckhest

Well-known member
Joined
Jul 24, 2013
Messages
1,851
Location
Greer, SC
I feel like at this point, after this many projects that I should know that it seems thinks "come together" quickly, but this weeks really seemed like that week, I guess the surprise feeling is a good thing!

Builder has been knocking it out on trim, soffit and all the facia metal, this was essentially where they left off yesterday...there is a weird spot on the back of the house, but unfortunately that is due to 1957 construction vs modern day...but I'll leave that "surprise" for the end to see if it really sticks out....

53322561748_09cbc90abc_b.jpgUntitled by fouckhest, on Flickr

In parallel yesterday, the drywall guy I hired had his guys show up yesterday, I think this is the turning point in my life where I realize that there is no reason to try and take on drywall, other than a patch....

The guy that hung drywall showed up at 9am, one guy, was done before noon
53321458802_fa5ab8642d_b.jpgUntitled by fouckhest, on Flickr
53322331206_3853587037_b.jpgUntitled by fouckhest, on Flickr
53321458792_c6def361cb_b.jpgUntitled by fouckhest, on Flickr

Then my guy that does finishing showed up, maybe 3pm ish, first coat, second coat and was out by 530pm, coming back Monday to finish up....

Super excited how well this came out
53322331216_c6def361cb_b.jpgUntitled by fouckhest, on Flickr
53322331231_3b2f98d76a_b.jpgUntitled by fouckhest, on Flickr
53322790790_6c98262d71_b.jpgUntitled by fouckhest, on Flickr


Should be able to get final inspection next week and it will be on us to put the flooring down, paint walls and start on all the finish work
 
OP
F

fouckhest

Well-known member
Joined
Jul 24, 2013
Messages
1,851
Location
Greer, SC
In other news, been chipping away when time permits on my project car....steering is proving to be a "challenging" learning experience, but after last night I am starting to feel like i can see a light at the end of the tunnel....two very expensive u-joints just might make it happen

53322789760_9dc5bdf4a6_b.jpgUntitled by fouckhest, on Flickr
53322789770_b6b33270a8_b.jpgUntitled by fouckhest, on Flickr
 
OP
F

fouckhest

Well-known member
Joined
Jul 24, 2013
Messages
1,851
Location
Greer, SC
Had a fun weekend, not much for house or car projects, but sometimes a break is nice. We had a "friendsgiving" up at a buddies place that has a bunch of land, so it ends up being a big day of riding dirt bikes, shooting guns, general hanging out and catching up with friends...then a nice pre-thanksgiving

A buddy that lives down the road picked me up, we loaded up my mini-bike that used to be my dads from the 60's (has a newer engine)...wives were coming up together later....
53331940524_5443675abc_b.jpgUntitled by fouckhest, on Flickr

All unloaded and in good company with another buddies old dirt bikes (sorry I dont know the specifics) but these are his "take out and get dirty" units, he has I think around 20 bikes in general and rides all of them
53330726262_3fe85f3f28_b.jpgUntitled by fouckhest, on Flickr

Took a break from mini-moto madness to spread some freedom!
53331602756_2a5987b3f6_b.jpgUntitled by fouckhest, on Flickr

Proud to say I my wife fired a weapon for the first time this weekend, she shot my old youth model 20ga 870, my springfield xd 0.40cal, and a buddies new sub-compact glock 9mm

Was a big day filled with fun, friends and good food, cant go wrong!
 
Last edited:
OP
F

fouckhest

Well-known member
Joined
Jul 24, 2013
Messages
1,851
Location
Greer, SC
Sunday was a relaxing day getting some errands run in the morning and then wife watch foot ball while I played in the garage....happy to report, I very much simplified my steering linkage....I had ordered this straight adapter which I thought would allow me to achieve an angle that a single u-joint would tolerate, then allowing a double u-joint to take up the more extreme angle at the top....my theory worked!

3/4"-48 spline to 3/4" round adapter with a couple inches of 3/4" DD stock to move the u-joint out past the engine
53328342647_bdc182e560_b.jpgUntitled by fouckhest, on Flickr

Hard to see, but the routing is much simpler now...
53329216171_118728dc88_b.jpgUntitled by fouckhest, on Flickr

Backed up a little further
53328342657_3676041c85_b.jpgUntitled by fouckhest, on Flickr

The interesting thing is the steering shaft doesn't penetrate the "firewall" much further back from the OEM location, this provides me some hope that if i can get the exhaust to drop down fast enough, I may be able to avoid moving the pedal box back too far....lots of TBD in that statement, but, if I can avoid moving the pedals back I can potentially avoid having to move my main hoop for the cage back due to the seat needing to move back...
 

Trapps

ALLIANCE MEMBER
Joined
Feb 10, 2017
Messages
2,002
Location
The Detroit Zoo
Had a fun weekend, not much for house or car projects, but sometimes a break is nice. We had a "friendsgiving" up at a buddies place that has a bunch of land, so it ends up being a big day of riding dirt bikes, shooting guys, general hanging out and catching up with friends...then a nice pre-thanksgiving

A buddy that lives down the road picked me up, we loaded up my mini-bike that used to be my dads from the 60's (has a newer engine)...wives were coming up together later....
53331940524_5443675abc_b.jpgUntitled by fouckhest, on Flickr

All unloaded and in good company with another buddies old dirt bikes (sorry I dont know the specifics) but these are his "take out and get dirty" units, he has I think around 20 bikes in general and rides all of them
53330726262_3fe85f3f28_b.jpgUntitled by fouckhest, on Flickr

Took a break from mini-moto madness to spread some freedom!
53331602756_2a5987b3f6_b.jpgUntitled by fouckhest, on Flickr

Proud to say I my wife fired a weapon for the first time this weekend, she shot my old youth model 20ga 870, my springfield xd 0.40cal, and a buddies new sub-compact glock 9mm

Was a big day filled with fun, friends and good food, cant go wrong!
Tell us more about "shooting guys"
 
OP
F

fouckhest

Well-known member
Joined
Jul 24, 2013
Messages
1,851
Location
Greer, SC
I assume the front differential must be left in as an input shaft for the rest of the trans guts?

Correct - I dont think went as far back when I started the thread on GRM, but the center diff is "welded-up" with 1/4" steel plate, just like an el cheapo locker, but doing that for the center diff simply stops any shifting from front axles to rear and fully engages the rear all the time; my expectation would be if you did this on an AWD car, it would be true full time AWD.

My hope is to be able to pull those stubs out, chuck them in a lathe or mill with rotary table and cut them down to eliminate that rotating mass in the tunnel.

As always, if you are still up this way occasionally, look me up and you can come check out my little bit of ridiculousness!
 
OP
F

fouckhest

Well-known member
Joined
Jul 24, 2013
Messages
1,851
Location
Greer, SC
Hope everyone had a good Thanksgiving, my social coordinator kept the schedule rather full, so not a lot in the ways of house/addition/garage projects...but did manage to find a little time here/there....

Started out "black friday" with my annual tradition of getting up/out early to head to the mountains for a drive while my driving buddy is in town seeing his family....always fun to go burn some fuel/rubber on an early morning....was chilly but hard to beat cold air and clear skys

53359944838_bbf30c1c3f_b.jpgUntitled by fouckhest, on Flickr

The wife likes to get her (now our) x-mas tree the day after thanksgiving, so after returning from the mountains, we loaded up in the truck and set out to get a tree and brave lowes for some supplies....my old house did not have any electrical outlets on the exterior, she has been asking for one on the front porch for a while, I promised her one for her b-day, so figured now was a good time to follow through on that deal since we are upon xmas decorating season....pulled power from an outlet that was on the interior wall....couple crude measurements, masonry cutoff wheel and a couple chisels...unfortunately didnt take very many photos

Interior outlet

53359954304_91a02a6b56_b.jpgUntitled by fouckhest, on Flickr

Fishing the wire through
53359629576_8796a3ac44_b.jpgUntitled by fouckhest, on Flickr

All buttoned up, put the true outdoor cover on for added safety even though it is a covered porch
53359846828_c1632f805d_b.jpgUntitled by fouckhest, on Flickr

Oh and in fun tool news....capitalized on black Friday sales, Eastwood was running a promo on the motor attachment for their bead roller kits (~$175 off)....so bit the bullet and ordered that tool to add to the arsenal....

27" throat unit, picked up the stand, couple extra rounded dies and a flange die set, all in all it saved my over $200, so more or less a 20%+ discount and I know I'll be needing that tool sooner than later with the car project to make firewall and tunnel
p21327-21111.jpg
 
OP
F

fouckhest

Well-known member
Joined
Jul 24, 2013
Messages
1,851
Location
Greer, SC
In garage news, I did plan some time yesterday to help a buddy of mine install a trailer hitch on his jetta tdi wagon. He is going to be hauling a dirt bike up to NH at x-mas for his nephews, planning to use one of those platform things, but wanted to have a 2" receiver to be able to tow his utility trailer in the future...he had found someone on FB that had done this, show me the photos, last weekend we pulled the bumper for a closer look and some measuring, he found a free old hitch we cleaned up and to repurpose, I picked up some 2", 1/4" wall angle and we were off to the races

little mock up to measure for width
53358820677_d4621bab6e_b.jpgUntitled by fouckhest, on Flickr

Angle brackets drilled for rivnuts, one hole had to be offset on the exhaust side due to the hanger, not that they needed to be mirrors, but I always try to do things to look pretty lol
53359630766_cf77319343_b.jpgUntitled by fouckhest, on Flickr

rivnuts installed, unfortunately due to the 1/4" wall, I had to counter sink the back of the angle to get them to flare properly, still didnt love that so put a couple tack welds on them to ensure no future headaches during removal
53359918108_a8aa8b9767_b.jpgUntitled by fouckhest, on Flickr

Angle installed and fine tuning the width of the bar
53359918178_3100f65669_b.jpgUntitled by fouckhest, on Flickr

Tacked it, then burned it in...my poor floor doesnt like weld splatter from the MIG, I need a welding blanket
53360157410_9f024fe1d6_b.jpgUntitled by fouckhest, on Flickr

Then we trimmed the bumper for the receiver....next we need to figure out safety chains so the bumper doesn't get completely butchered....worst case it would just need the lower valance to be removed to get the bumper off...but for his hitch mounted motorcycle platform it will work till he needs to tow a trailer....also TBD on leaving it that length or shortening it..

53358750627_c7607c0e7b_b.jpgUntitled by fouckhest, on Flickr
53360157450_f05a8c1532_b.jpgUntitled by fouckhest, on Flickr
 

jbrentd

Well-known member
Joined
Jul 8, 2015
Messages
1,039
Location
Northeast Oklahoma
Nice work. Making it shorter would be better for his shins, lol. Can you weld tabs to receiver? Or should they be welded to the cross beam?

With regards to the floors, we sometimes spend way too much time/money/effort in the build phase making them to look nice...but then we actually use our shops and it's hard to keep them in that state.
 
OP
F

fouckhest

Well-known member
Joined
Jul 24, 2013
Messages
1,851
Location
Greer, SC
Nice work. Making it shorter would be better for his shins, lol. Can you weld tabs to receiver? Or should they be welded to the cross beam?

Right now he said he is going to just leave it that way....his call, happy to help revise if needed. I think they can be welded directly to the receiver, a lot have the little "loop" welded right below.....I've been doing to "googling" and I think something like these, welded on either side, would be a good solution
1701112239174.png

With regards to the floors, we sometimes spend way too much time/money/effort in the build phase making them to look nice...but then we actually use our shops and it's hard to keep them in that state.

That is what I keep telling myself, I have to find a compromise
 
To avoid these ads, REGISTER NOW!
OP
F

fouckhest

Well-known member
Joined
Jul 24, 2013
Messages
1,851
Location
Greer, SC
Very anti-climatic day in the garagemahal....my new toy/tool showed up today, well the second set of boxes. Bead Roller and Dies showed up Tuesday, then the stand and drive motor showed up yesterday, like any adult child, I promptly started putting the stand together, only to hit the womp womp point when finding out the mount for the stand is not the same as how the bead roller is drilled.

all that being said, everything looks like really nice quality, so now I am testing Eastwoods customer service, lol

Roller & Stand
53366392344_fbce8ecaea_b.jpgUntitled by fouckhest, on Flickr

Drive motor (one of the reasons I went this route not DYI is the ability to easily adjust speed)
53366277513_ca720ed825_b.jpgUntitled by fouckhest, on Flickr

(Mismatch in mounting provisions.....guessing either I have a new stand/old roller or vice versa....I know I can fix this, but I dont need it and I paid for things that should work together...)
**EDIT** - Was just going back to check to see if I missed something, and I did, this was clearly in the Description for the stand:
  • "Drilling of the stand and bead roller is required to attach the Eastwood Elite 27" bead roller"
That is on me, but, not a big deal, I'll be cleaning up the back of said roller with a flap wheel and welding that bracket on there!

53365184362_b02eceaa72_c.jpgUntitled by fouckhest, on Flickr
 

Attachments

  • 53365184362_b02eceaa72_b.jpg
    53365184362_b02eceaa72_b.jpg
    234.1 KB · Views: 3
Last edited:
OP
F

fouckhest

Well-known member
Joined
Jul 24, 2013
Messages
1,851
Location
Greer, SC
That should be a fun new toyl.
Finally got around to getting the new toy assembled, now I need too make a run to the metal store and get some sheet to play with!
53382976662_12d06b5580_c.jpgUntitled by fouckhest, on Flickr


In very annoying and ironic house news, just about the time we were seeing the light at the end of the tunnel with the new laundry room, the existing washing machine drain (which is a gray water drain into the side yard, thank you 1957 construction) had been backing up....tried snaking, buddy I a plumber and had this attachment for garden house that shoots pressure down the tube, tried some industrial strength draino stuff, that actually made things close to good, but the pipe would still back up.....SO, in my infinite wisdom, I used one of my back purge plugs as a pressure cap, filled the pipe with water, stuck the plug in and the pipe with some compressed air hoping to force the clog out....well, I found the weak link in the system....under the stoop on outside the basement door, someone coupled two sections of PVC pipe with a rubber coupler....air pressure must have really found the clog and the pressure gave way under that slab, walked out to find splatter in between the crack...started digging and this is todays project....womp womp

diagonal line is the washing machine drain line, coupler is up under there....didnt get a photo the other night was too annoyed...
53384074793_8b94f2103c_c.jpgUntitled by fouckhest, on Flickr


In some fun news, got over to my buddies last night and got one side of my rear axles machined!

Solid bar turned down, hollow bar, cut to length and faced
53383156926_b26250141e_c.jpgUntitled by fouckhest, on Flickr

Isnt quite the interference/press fit I wanted, but once I get holes for the rosette welds drilled I'll decide if I want to take it back over and tack it on the late with one end in a live center (probably will, depending on lathe owners permission)
53382232592_3ab137f2df_c.jpg by fouckhest, on Flickr

Mocked up, measured and we are close enough to 22" target that the slop in the inner CV will more than work, fingers crossed
53382232742_0534766731_c.jpg by fouckhest, on Flickr
 
OP
F

fouckhest

Well-known member
Joined
Jul 24, 2013
Messages
1,851
Location
Greer, SC
Small update on my washing machine drain saga....good news, found a substantial amount of blockage....bad news, not sure how I will stop this from ever coming back.

Here is the coupler that let go on the underside of the door landing
53390731928_8e19d983a5_b.jpgUntitled by fouckhest, on Flickr

he was in rough shape, and pretty short IMO
53389624972_bf1013e5af_b.jpgUntitled by fouckhest, on Flickr


Ended up cutting the pipe so that i could snake it, forgot to get a photo of the pipe cut, but nothing crazy, what was crazy is how much I pulled out of the pipe!

Enter exibit A
53390981300_f247484b28_b.jpgUntitled by fouckhest, on Flickr

Went back to buy another longer snake just to be sure, this one was ~40ft vs the other was 25ft, caught nothing with the 40ft'er so called it a day, patched things up and started running the washing machine....we are now 3 days in, ~10 loads of laundry and no issues...going to monitor for a few more days then fill the hole back in....right or wrong, going to leave the couplers on here in case I ever need to access/snake it again, at leads I'll know there is an approximate half way point between the drain and the washing machine

53389625747_02d61b7eab_b.jpgUntitled by fouckhest, on Flickr
 
OP
F

fouckhest

Well-known member
Joined
Jul 24, 2013
Messages
1,851
Location
Greer, SC
After a strugglefest of maintenance on the wives car I managed to knock out a short little side project on my 337 car, been wanting to do a nice quick access port for a trickle charger...had picked up this port a while back, shortened it up, found a spot in the core support and wired it up....I think it makes for a nice OEM+ look

Port
53389624957_07273f1885_b.jpgUntitled by fouckhest, on Flickr

mocked up
53390853254_f1610f58cf_b.jpgUntitled by fouckhest, on Flickr

Project complete...as much as I hate to admit it, in my old age I've come to like the look of the OEM battery cover on these cars, but it makes it a PITA to get the trickle charger on the car, that was the basis for this whole project, all in all, I think it came out pretty okay

53389714692_5c9f324b11_b.jpgUntitled by fouckhest, on Flickr
 

Xti04

Well-known member
Joined
Nov 11, 2016
Messages
2,323
After a strugglefest of maintenance on the wives car I managed to knock out a short little side project on my 337 car, been wanting to do a nice quick access port for a trickle charger...had picked up this port a while back, shortened it up, found a spot in the core support and wired it up....I think it makes for a nice OEM+ look

Port
53389624957_07273f1885_b.jpgUntitled by fouckhest, on Flickr

mocked up
53390853254_f1610f58cf_b.jpgUntitled by fouckhest, on Flickr

Project complete...as much as I hate to admit it, in my old age I've come to like the look of the OEM battery cover on these cars, but it makes it a PITA to get the trickle charger on the car, that was the basis for this whole project, all in all, I think it came out pretty okay

53389714692_5c9f324b11_b.jpgUntitled by fouckhest, on Flickr
Those battery covers were a ***** back in my dealer days. People would come in and bring some janky battery that the cover didnt fit smoothly over and it always looked like **** if it wasnt right. Most of those covers seemed to get tossed along with the small fuse panel cover on top of the battery. Seen a few guys lay a wrench or ratchet across one of those open fuses and make a spark show.
 
OP
F

fouckhest

Well-known member
Joined
Jul 24, 2013
Messages
1,851
Location
Greer, SC
Those battery covers were a ***** back in my dealer days. People would come in and bring some janky battery that the cover didnt fit smoothly over and it always looked like **** if it wasnt right. Most of those covers seemed to get tossed along with the small fuse panel cover on top of the battery. Seen a few guys lay a wrench or ratchet across one of those open fuses and make a spark show.

Oh yeah, its crazy how much of those parts get tossed and then become impossible to find, I actually have a brand new one sitting in my storage room. Now the fuse panels, those area a disaster, but for right now, it has to stay, but I keep an eye on it regularly, those things have destroyed many an mk4!

This was my solution in my R32 to get rid of that fuse panel
51322631950_d9bfda15dc_c.jpgUntitled by fouckhest, on Flickr

51321635561_c9b819419c_c.jpgUntitled by fouckhest, on Flickr
 
OP
F

fouckhest

Well-known member
Joined
Jul 24, 2013
Messages
1,851
Location
Greer, SC
Snuck out to the shop last night to make some progress on my v8 swap project....started getting the rear subframe mount tubes welded up so I can get the engine back out and start on the portion of the project

parts cleaned up
53395490197_ddd7370028_b.jpgUntitled by fouckhest, on Flickr

tacked up
53396855755_d02fd21e6a_b.jpgUntitled by fouckhest, on Flickr

welded out...might sneak out today during work and fully weld out the tubes...kinda slow, so might as well capitalize on the WFH thing :cool:
53395490167_96431c1151_b.jpgUntitled by fouckhest, on Flickr
 
OP
F

fouckhest

Well-known member
Joined
Jul 24, 2013
Messages
1,851
Location
Greer, SC
Got some shop time in yesterday on my day off, super excited about that....pulled the engine back out, then finish welded my rear subframe tubes/captive nuts and got started on building the permanent mounts and reinforcing the frame rails

tubes welded out
53401999123_12c09e8cfa_b.jpgUntitled by fouckhest, on Flickr

rail trimmed and test fit
53401807421_39376d6a33_b.jpgUntitled by fouckhest, on Flickr

CAD for the reinforcing plate
53402131279_ca120da1a1_b.jpgUntitled by fouckhest, on Flickr

I was quite happy with the fitment
53400879122_62d9505afc_b.jpgUntitled by fouckhest, on Flickr

53402236835_b26286324b_b.jpgUntitled by fouckhest, on Flickr

53401811226_97e12286f4_b.jpgUntitled by fouckhest, on Flickr


tacked it up
53401999158_0981537715_b.jpgUntitled by fouckhest, on Flickr


Drivers side was rinse and repeat....also took the opportunity to trim the firewall more

53402131294_fd35d5ca25_b.jpgUntitled by fouckhest, on Flickr


fit
53402127559_b1e702ac12_b.jpgUntitled by fouckhest, on Flickr

plated and tacked up
53401995403_4986fb6687_b.jpgUntitled by fouckhest, on Flickr
 
OP
F

fouckhest

Well-known member
Joined
Jul 24, 2013
Messages
1,851
Location
Greer, SC
I spent a little time Sunday afternoon planning a layout to test my new bead roller.....ended up on this for a design

53409490105_609b73d53d_b.jpgUntitled by fouckhest, on Flickr


Found some time last night after work/before dinner to sneak out to the garage to test out the new tool....here are the results....definitely a learning curve on consistent corners and meeting back to your start/stop point
53409228823_b149afd34b_b.jpgUntitled by fouckhest, on Flickr

you can see where I missed in a couple spots here
53409049991_ed86160148_b.jpgUntitled by fouckhest, on Flickr


Then Then, my buddy with the lathe hit me up at dinner time to say he was going to head to the garage to work after the kid went to bed, so headed over there for a couple hours and got the other axle machined....rant out of time to plunge the holes for the rosette welds, but those should be easy next time I get the bat call
53410419224_828be5a38d_b.jpgUntitled by fouckhest, on Flickr


Both lined up, very happy to see how close they are in length, call it good enough for gov't work!
53410529825_8f6c164dbd_b.jpgUntitled by fouckhest, on Flickr

53410419154_69bbee5a61_b.jpgUntitled by fouckhest, on Flickr


....going to try and spend some time over the next few days finishing up little projects like the oil pan and steering shaft, that will make me feel better about starting on the headers when parts arrive. Found out today that the wifey is traveling for work the week of Jan 8th, so that should allow me a fair amount of garage time!
 
OP
F

fouckhest

Well-known member
Joined
Jul 24, 2013
Messages
1,851
Location
Greer, SC
Happy New Year all!

Shop time was scarce and honestly, a little slow and frustrating at times...but did make a little forward progress.


I'll start with some positive progress, I've been chipping away at my oil pan, made the little "pocket" that was needed for steering rack clearance, have it all burned in, used the MIG in most spots to try and keep head down by moving around a bunch, but that has led to a lot of chasing out small pin holes and such, but now that it is fully welded the TIG is nice for smoothing out little spots and not adding a ton of material

here is the pan welded up
53440745913_80d3e79275_b.jpgUntitled by fouckhest, on Flickr

decided i might as well go ahead and add the drain while I've got the pan off, still needs a couple spots finished up, probably try and do that tonight
53441021340_8474a27dc8_b.jpgUntitled by fouckhest, on Flickr

More fun/good things, my exhaust header flanges showed up, quality looks great, and they fit as expected...
53415059299_e5a9039a79_b.jpgUntitled by fouckhest, on Flickr
53414734231_7307b978f0_b.jpgUntitled by fouckhest, on Flickr

A few days later, what I will expect to be the first shipment of tubing for headers showed up....quality is really nice (JMD Tubes), really excited for this project to kick off
  • 6x 1.75" OD / 2" CLR
  • 2x 1.75" OD / 3" CLR
  • 2x 1.75" to 2.5" Slip-fit Merge
  • 2.5" x 4ft straight
  • 2.5" Merge/X-pipe (pained me to not make one, but I can make one as nice for the $$$
  • 2x 2.5" v-band
53426015102_86c04d9a22_b.jpgUntitled by fouckhest, on Flickr


Now to the frustrating part....long/short, when I was measuring for my steering rack spacers I wrote down one dimension wrong, luckily it was favoring being too long, but nonetheless frustrating to receive some custom machined parts from a good friend, only to realize they are ~1/2 too long per side :(

Always fun when a fellow VW enthusiast makes parts for you!
53426015117_cc20a05991_b.jpgUntitled by fouckhest, on Flickr


That brings me up to date with car things.....In house things, I finally bit the bullet over the holiday to knock out some work on the laundry room addition....measured and put down another 1/2" of subfloor to bring the laundry level with the house, then bit the bullet and went to get flooring, which shockingly went down much easier than I expected (flooring cutter my builder let me borrow was a life saver).

Flooring before trim....
53438688489_f13c70fecc_b.jpgUntitled by fouckhest, on Flickr
53438506138_13e1efdec8_b.jpgUntitled by fouckhest, on Flickr

I knocked out the flooring Friday, it was done with enough time to make a run to buy trim, so did that, got it all cut/fit, then setup the garage for some painting Friday night, installed it all Saturday morning and traded a favor with a buddy to move the appliances. Saturday afternoon the misses was doing her first load of laundry.....now to take a breathe and figure out what we are going to do for cabinets and countertops

New washer/dryer
53437446612_b225ecc527_b.jpgUntitled by fouckhest, on Flickr

New deep freeze, time to buy a portion of a cow!
53437446637_d6bd9657f0_b.jpgUntitled by fouckhest, on Flickr
 

MrPink

Well-known member
Joined
Feb 16, 2021
Messages
1,178
Location
Bridgeport,MI
After a strugglefest of maintenance on the wives car I managed to knock out a short little side project on my 337 car, been wanting to do a nice quick access port for a trickle charger...had picked up this port a while back, shortened it up, found a spot in the core support and wired it up....I think it makes for a nice OEM+ look

Port
53389624957_07273f1885_b.jpgUntitled by fouckhest, on Flickr

mocked up
53390853254_f1610f58cf_b.jpgUntitled by fouckhest, on Flickr

Project complete...as much as I hate to admit it, in my old age I've come to like the look of the OEM battery cover on these cars, but it makes it a PITA to get the trickle charger on the car, that was the basis for this whole project, all in all, I think it came out pretty okay

53389714692_5c9f324b11_b.jpgUntitled by fouckhest, on Flickr
What brand of trickle charger did you go with? I am looking for one for my mk4 Jetta. I currently use my big *** battery charger as my trickle charger. while it works i would rather have the hood closed still.


20230821_184747.jpg
Pic of my mk4 lol, nowhere near as clean as either of yours.

And i had to catch up since I haven't been on here in a long time, all the projects look awesome, congrats on getting married. And i look forward to seeing what else you do.
 
OP
F

fouckhest

Well-known member
Joined
Jul 24, 2013
Messages
1,851
Location
Greer, SC
What brand of trickle charger did you go with? I am looking for one for my mk4 Jetta. I currently use my big *** battery charger as my trickle charger. while it works i would rather have the hood closed still.

Pic of my mk4 lol, nowhere near as clean as either of yours.

And i had to catch up since I haven't been on here in a long time, all the projects look awesome, congrats on getting married. And i look forward to seeing what else you do.

Hey, thanks for stopping by, catching up and the kind words! Always good to have another VW person here!

This is the charger I use, it is really optimized for AGM batteries, but will certainly work on regular lead-acids as well.
 
OP
F

fouckhest

Well-known member
Joined
Jul 24, 2013
Messages
1,851
Location
Greer, SC
Been a busy couple weeks, wife was out of town last week, then we had some ridiculous rain, that ended up consuming 2+ days of dealing with water in my basement and shop....so all the work I had planned to get done while she was away didn't hit priority....BUT...she came home a day early to escape snow in the mid-west, then this weekend I was "given the blessing" to go work in the shop as reward for tending to dogs, cleaning house, etc., while she was gone...

SO, finally got started on my header(s)....

v-bands tacked on to the merges and some 2.5" tube I had laying around to simulate the start of the exhaust...and it gave me a place to mount a tab that would hold the merges in position
53462584884_3c2a10323d_b.jpgUntitled by fouckhest, on Flickr
53462686490_692b532b7e_b.jpgUntitled by fouckhest, on Flickr

Driver side will be a challenge b/c of the steering shaft....knowing that I started on the passenger side...photo for reference
53462273586_510ed83248_b.jpgUntitled by fouckhest, on Flickr

This was my first full runner done...
53465821959_513320dc2d_b.jpgUntitled by fouckhest, on Flickr

After working on a couple other runners Sunday, I got to a point yesterday that made me decide to pull the engine and work on it on the cart, I dont have much for space constraints that would make it worth the in car struggle....so did that and landed her by end of the day yesterday, at which point I told my self I needed to walk away and come back with a clear mind

53467968046_442025d4f9_b.jpgUntitled by fouckhest, on Flickr
53467968061_1102e99d05_b.jpgUntitled by fouckhest, on Flickr
 
OP
F

fouckhest

Well-known member
Joined
Jul 24, 2013
Messages
1,851
Location
Greer, SC
Spent a couple evenings this week working on the header, the more it kept taking shape I just really didnt like #4, and it was going to be much longer than #1, combined that with all the bends, that twill one exaggerate the effective lenght/flow....so took advantage of a slow WFH Friday and tore it apart....here is where I landed....#2 will mimic #4...lengths with be close'ish, and "equal length" really isnt that critical for a stock'ish engine, but it will help with sound and aesthetically, it will be much better

53474635771_215dddd2c9_b.jpgUntitled by fouckhest, on Flickr
53474776368_f9391434a9_b.jpgUntitled by fouckhest, on Flickr
53474776353_dd046534ec_b.jpgUntitled by fouckhest, on Flickr
 
To avoid these ads, REGISTER NOW!
Top Bottom