To avoid these ads, REGISTER NOW!

My New Garage 35x45

A4 Mike

Member
Joined
Apr 19, 2008
Messages
19
Location
Elizabeth, CO
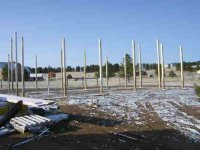
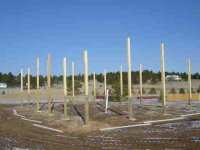
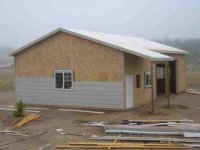
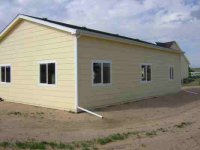
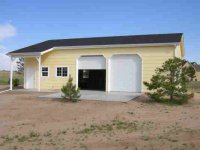
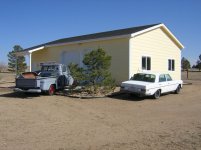
I am finally getting a garage/workshop built after four years of delay because of job changes and twenty years of dreaming, it will be 30 x 45 with 12 foot side walls to allow for a hoist. It is pole barn construction with rough-ins for a bathroom. I will be doing the electrical and I am in the process figuring out the right lighting plan. It used for restoring my 59 Chevy pickup, my late father-in-laws 70 Mercedes, preparing a car for autocross with my son and woodworking.
 

Attachments

  • Garage0001.jpg
    Garage0001.jpg
    43.6 KB · Views: 353
  • Garage0002.jpg
    Garage0002.jpg
    37 KB · Views: 357
Last edited:
To avoid these ads, REGISTER NOW!

e-tek

Well-known member
Joined
Dec 19, 2007
Messages
10,690
Location
Saskatoon, SK
Now that's different! I've never seen the posts set in the ground first - what happens next?
Looking forward to see it - looks tall!!
 

jonny01blaze

Well-known member
Joined
Nov 23, 2007
Messages
156
Location
Pittsburgh, PA
It's a pole building, they all start this way, alittle different than standard stick construction. Looks great it will hopefully take shap soon.
 

mtwaterguy

Well-known member
Joined
Nov 16, 2007
Messages
3,518
Don't know if you're to far along for this, but, how are you attaching the girts? The horizontals that you attach the outside material to. I placed mine in between the posts at two foot intervals running up and down. This is a plus for at least two reasons. First it helps prevent racking which helps construct a stronger building. Second, it frames both the inside and outside walls at the same time, saving both materials and time. Maybe too late, but at least something to consider.:headscrat
 
Last edited:

Kevin54

MEMBER EMERITUS
Joined
Jan 12, 2005
Messages
29,341
Location
Urbana, Ohio
Now that's different! I've never seen the posts set in the ground first - what happens next?
Looking forward to see it - looks tall!!

Typical pole barn construction around here. Set the post, run some wood stringers around. Metal fastens to them on the outside. The top header that goes around supports the trusses. It has become big business for Amish around my neck of the woods. The lady across the road had probably an 80' x 100' pole barn built to keep her tractor and ccombine in. Three days start to finish. The crew was about 6 Amish guys. One would only take lunch at a time and when he was done eating, another would stop to eat, etc. The first day was poles, stringers, trusses, second day was metal side walls and roof, third day was finishing up with hanging of doors. 8:00 in the morning until 5:00 in the evening non stop. I did a search...check this site and it shows details as to how a basic pole barn is built. http://www.bi-ritebuildings.com/details.php although various builders build their barns a little differently. Some have just the post set into the ground, this one actually anchors it down. Some will use 6 x 6 post and others use three 2x6's with the center 2x6 shorter to set the truss into so it is cradled. The belief is that a 2x6 plank is treated all of the way through and a 6x6 can only be penetrated a small amount (when it is pressure treated)
 
Last edited:

tdkkart

Well-known member
Joined
Jun 17, 2006
Messages
6,887
Location
Eastern Iowa
Some will use 6 x 6 post and others use three 2x6's with the center 2x6 shorter to set the truss into so it is cradled. The belief is that a 2x6 plank is treated all of the way through and a 6x6 can only be penetrated a small amount (when it is pressure treated)


Morton buildings uses the 2x6 laminated posts. The quality of 2x6 lumber is easier/better/more controlled, and the resulting posts are far less likely to warp and bow than 6x6 posts. Plus the ease of making a drop-in support at the top for the trusses.
Morton also uses the 2x6 method to produce a sectional post that starts as a short 8'ish stub post. Four ft in the ground, 4ft out, which makes them much easier to install square and plumb than than a 16 or 20ft post.
The resulting above ground 4' stub has the inner or outer 2x6 piece shorter, and then the needed lenghth of upper post is set into it and nailed together.
It doesn't sound quite right till you see it, but it works, and Morton offers a lifetime wind damage warranty on their buildings, as long as the doors are closed when the storm happens.

Not a commercial for Morton, just that they used to build the majority of the pole buildings in my Dad's area. They aren't the cheapest, but are very good quality when done.
 
OP
A

A4 Mike

Member
Joined
Apr 19, 2008
Messages
19
Location
Elizabeth, CO
Thanks for everyone’s interest.
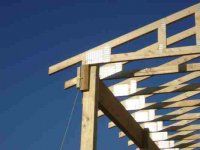
My pole barn/workshop is being built in Elizabeth, Colorado we are actually almost 1000 feet higher than Denver so the holes were drilled 4 feet deep to get below the freeze line and because the high winds we get here. The 6x6 posts, 2x6s nailed together as someone described earlier, with the bottom 2x6s treated, were leveled and dry concrete poured in the holes and hosed with some water and then the contractor waited a few days for the concrete to set.

The next step is mounting gluelam beams length wise at the tops of the posts. The contractor will notch the posts for the beam. He was going to do that Saturday but it was too windy to get up on the posts with a ladder safely. Then girts and then trusses.

I will post pictures as it progresses.

Any recommendations for a good lighting plan for the interior?
 
OP
A

A4 Mike

Member
Joined
Apr 19, 2008
Messages
19
Location
Elizabeth, CO
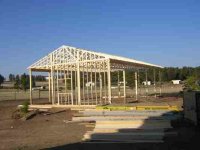
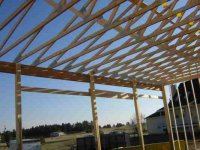
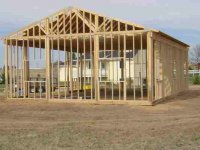
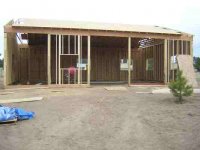
Sorry about the delay in getting updates posted our modem was down and needed to be replaced. There has been a lot of progress since my last post.:bounce: Check out the new pictures.
 

Attachments

  • image0004.jpg
    image0004.jpg
    36.6 KB · Views: 305
  • image0001.jpg
    image0001.jpg
    52.8 KB · Views: 244
  • image0009.jpg
    image0009.jpg
    35.7 KB · Views: 283
  • image0008.jpg
    image0008.jpg
    41.8 KB · Views: 351
  • image0006.jpg
    image0006.jpg
    33.4 KB · Views: 311

scofo

Well-known member
Joined
Mar 5, 2008
Messages
1,071
Location
Northshore of Lake Travis. Marble Falls, Texas.
Hello Mike, building is looking good. What are you gonna use it for?
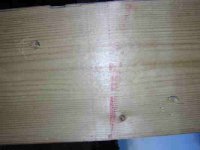
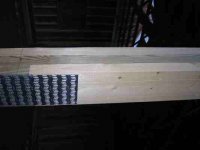
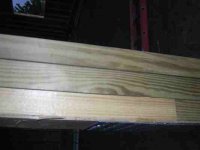
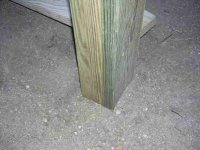
I'd love to see a close up picture or two of the "posts" at the ground and at the junction of the treated to non-treated. Also how did the crew laminate the 2x6's? Nails or bolts? Glue? Thanks in advance and Good luck.
 
OP
A

A4 Mike

Member
Joined
Apr 19, 2008
Messages
19
Location
Elizabeth, CO
Here are the pictures you asked for. My contractor did not make them himself but he ordered them from a lumber yard. Looking at the post face on there are nail holes, so I suspect they are nailed together, I saw no signs of glue.
 

Attachments

  • image0016.jpg
    image0016.jpg
    25.9 KB · Views: 135
  • image0015.jpg
    image0015.jpg
    25.9 KB · Views: 174
  • image0014.jpg
    image0014.jpg
    25 KB · Views: 162
  • image0013.jpg
    image0013.jpg
    38.6 KB · Views: 201

scofo

Well-known member
Joined
Mar 5, 2008
Messages
1,071
Location
Northshore of Lake Travis. Marble Falls, Texas.
Thanks Mike, it looks like the junction is stair step, not tongue in groove like I imagined. What would you estimate the overlap at? Also in your opinion do you think these posts would be easy to duplicate on site? Sorry about the ???'s just never seen this done around here. Sure makes sense though.
So what's the hobby or is it strictly AG? Thanks again.
 
OP
A

A4 Mike

Member
Joined
Apr 19, 2008
Messages
19
Location
Elizabeth, CO
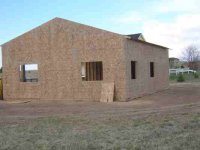
They finished the OBS sheeting and framing Tuesday. We had heavy rains today so no work was done.
 

Attachments

  • image0017.jpg
    image0017.jpg
    33.1 KB · Views: 138
OP
A

A4 Mike

Member
Joined
Apr 19, 2008
Messages
19
Location
Elizabeth, CO
Hey Scofo,
Are you in the Austin area? Your location on Lake Travis makes me think that, pretty area. The posts are overlapped with one side being 48" down from the center joint and the other side being 24" down from the center joint. So the joints are staggered every 24". I would think you could put them together on site but I don't know where you would get the plates that you saw in my picture. I think I would use ring shank nails so they would not work out with flexing. The building is for my car and wood working hobbies.
 
Last edited:

scofo

Well-known member
Joined
Mar 5, 2008
Messages
1,071
Location
Northshore of Lake Travis. Marble Falls, Texas.
Yes I do, Marble Falls. Did you live in Centex or visit? Thanks for the info on the post details. Not to be critical but your building is unique to me, in that, it is a hybrid post and stick type construction. Why did you go that route? Why not pour slab and go stick type or are you not going with a concrete floor? Just curious. Do you have to walk around with an oxygen tank at that altitude?:lol_hitti
 
To avoid these ads, REGISTER NOW!
OP
A

A4 Mike

Member
Joined
Apr 19, 2008
Messages
19
Location
Elizabeth, CO
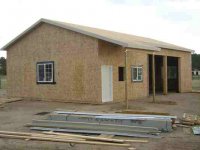
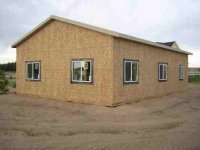
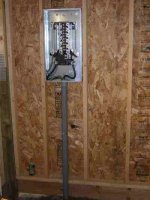
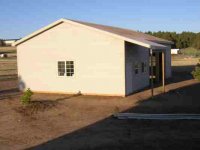
They added the porch cover this week and installed the windows and door. I installed the electrical service panel Saturday. The power had been trenched in several years ago, then I got laid off doing the dotcom bubble burst. The plans are to install the roof this week, put the siding on and I will start roughing in the plumbing and floor electrical this coming weekend.
 

Attachments

  • image0020.jpg
    image0020.jpg
    32.1 KB · Views: 71
  • image0018.jpg
    image0018.jpg
    33.6 KB · Views: 100
  • image0019.jpg
    image0019.jpg
    30.3 KB · Views: 57
  • image0021.jpg
    image0021.jpg
    29.6 KB · Views: 145
OP
A

A4 Mike

Member
Joined
Apr 19, 2008
Messages
19
Location
Elizabeth, CO
Scofo,
I was in Austin several times last year when I worked for Agilent Techologies/Verigy. The training/technical center for the IC test systems is there and I was either taking or giving classes there. I would sometimes be there over a weekend and I looked the area over in case I got transferred there. My wife and I liked the area and the cost of housing.

Pole barn construction is very common here for utility buildings and barns. Normally there would not be 16" on center framing, which is not needed for a metal sided building but my wife wanted lap siding on the workshop to match the house so the contractor framed it that way. Also most metal sided barns do not generally have all the windows that my workshop has. I suspect pole barn construction is not as common where you live because of the rocky soil.

We had our contractor give us several proposals and pole barn construction gave us most bang for the buck.
 
OP
A

A4 Mike

Member
Joined
Apr 19, 2008
Messages
19
Location
Elizabeth, CO
By the way. I screwed up on the original post, the garage is 30x45.

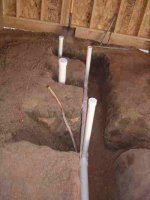
The siding is on and caulked & will be painted tomorrow or the following day, roofing is going on Wednesday. I roughed in the plumbing this weekend and will get an inspection Wednesday. I have started to locate my electrical boxes and have brought in the phone lines from the house.
 

Attachments

  • image0024.jpg
    image0024.jpg
    39.5 KB · Views: 88
  • image0023.jpg
    image0023.jpg
    25 KB · Views: 88
  • image0022.jpg
    image0022.jpg
    33.6 KB · Views: 121
  • image0027.jpg
    image0027.jpg
    29.9 KB · Views: 100
  • image0025.jpg
    image0025.jpg
    29.2 KB · Views: 113
  • image0026.jpg
    image0026.jpg
    29.1 KB · Views: 103
OP
A

A4 Mike

Member
Joined
Apr 19, 2008
Messages
19
Location
Elizabeth, CO
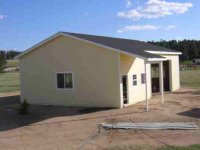
Roofing and paint are done. Plumbing inspection Tuesday and concrete sometime in the next two weeks. Meanwhile I am slowly getting the electrical done.
 

Attachments

  • image0028.jpg
    image0028.jpg
    36.8 KB · Views: 174
  • image0029.jpg
    image0029.jpg
    30.3 KB · Views: 137
OP
A

A4 Mike

Member
Joined
Apr 19, 2008
Messages
19
Location
Elizabeth, CO
I passed the plumbing inspection last Tuesday. Concrete was poured Friday and gutters went on today. I had to start over on some of the electrical because the inspector wants conduit up to seven feet.
 

Attachments

  • image0033.jpg
    image0033.jpg
    32.4 KB · Views: 164
  • image0032.jpg
    image0032.jpg
    29.7 KB · Views: 133
  • image0031.jpg
    image0031.jpg
    34.4 KB · Views: 136
  • image0030.jpg
    image0030.jpg
    29.1 KB · Views: 172
OP
A

A4 Mike

Member
Joined
Apr 19, 2008
Messages
19
Location
Elizabeth, CO
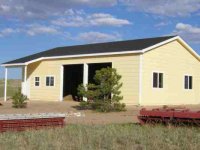
I had the rough in electrical inspection and have to change the grounding arrangment. I can not get the final building inspection until I get the final electrical inspection. The final trim is done and the concrete has been curing for two weeks now and the garage doors were installed last week. I am going to post a few more pictures.
 

Attachments

  • image0039.jpg
    image0039.jpg
    35.1 KB · Views: 198
  • image0037.jpg
    image0037.jpg
    32.3 KB · Views: 128
  • image0036.jpg
    image0036.jpg
    29.9 KB · Views: 96
  • image0035.jpg
    image0035.jpg
    32.8 KB · Views: 168

JeffD

Member
Joined
Apr 30, 2008
Messages
17
How tall is the ceiling in the garage? I am getting ready to build a new house and the garage is 30x46 with 11' high ceilings. Just wondering, and the demensions give me a idea how big it is going to be.

Thanks.

Jeff
 
OP
A

A4 Mike

Member
Joined
Apr 19, 2008
Messages
19
Location
Elizabeth, CO
JeffD
My ceilings are 12 feet 3 inched high. I did that because almost all of the standard car/pickup truck lifts will fit in a 12 foot ceiling. Sorry about taking so long to respond.
A4 Mike
 
OP
A

A4 Mike

Member
Joined
Apr 19, 2008
Messages
19
Location
Elizabeth, CO
Hello
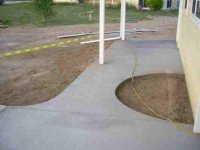
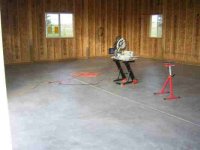
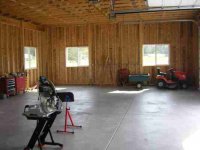
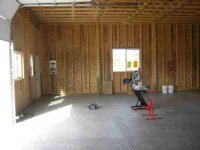
I owe the forum an update that is way past due. I got the final inspection back in July. Since then I have been organizing & using my new garage. I have primarily used it for woodworking & then auto work with my son. I still plan to add a lift sometime in the future; it would be so nice for brake jobs, oil changes & just plain getting access under the car. My wife was worried that I wouldn’t use it enough now she complains that I spend too much time out there. It is so nice to be able to start a project & be able to stop & not worry about it taking up the garage where we park our cars. Or worry about tracking sawdust & dirt into the house.
Enjoy the pictures. Sorry about not posting the end results sooner.
 

Attachments

  • DSCN1012.jpg
    DSCN1012.jpg
    138.9 KB · Views: 119
  • DSCN1013.jpg
    DSCN1013.jpg
    141.1 KB · Views: 151
  • DSCN1014.jpg
    DSCN1014.jpg
    141.2 KB · Views: 135
  • DSCN1015.jpg
    DSCN1015.jpg
    140.3 KB · Views: 120
  • DSCN1016.jpg
    DSCN1016.jpg
    140.9 KB · Views: 130
  • DSCN1017.jpg
    DSCN1017.jpg
    142.2 KB · Views: 118
Last edited:

Old61

Well-known member
Joined
Nov 12, 2008
Messages
157
Nice shop! Looks like you are putting it to good use. I don't see a heat source?
 
OP
A

A4 Mike

Member
Joined
Apr 19, 2008
Messages
19
Location
Elizabeth, CO
Hello Old 61

It is well insulated both walls & ceilings. I also have 4 big South facing dual glazed windows, 2 East facing, 3 West facing windows & only 1 North facing window. We get a lot of sunshine here in Colorado & even on the coldest days this winter I have only needed a sweatshirt & that usally cames off after a little while working. On cludy days towards evening sometimes I will get cold & call it quits.

Mike
 
To avoid these ads, REGISTER NOW!
Top Bottom