To avoid these ads, REGISTER NOW!

Above 1200 Sq/FT My new garage build! 30x50 !

Wokspaces above 1200 squarefeet.
OP
X

Xti04

Well-known member
Joined
Nov 11, 2016
Messages
2,491
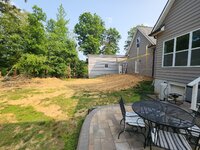
Goodbye to the pod! Finally getting the yard cleaned up and cleared out so I can finish it and get it back in shape. Put down a good bit of preemergent in the grassy areas and seeded the tracks where I had ran the trees into my back yard. 20230408_095739.jpg
First real project inside the garage now that its built. Getting our boat ready for the summer! Today involved setting up and summerizing the boat. 20230409_161804.jpg
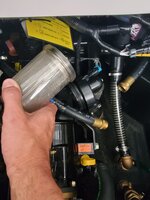
This Moomba uses an Indmar Raptor 6.2L Ford engine. The engine has these blue plugs which are quick drains for the heat exchanger, the v drive, and the impeller housing. I also had to reconnect the sea strainer and this hose which ties the exhaust manifolds together. 20230409_162013.jpg
We just upgraded to this boat from our 2016 Moomba in January, so I have been ordering parts to get this boat setup for the summer. I also installed a taller pedestal for my wife since she likes to look over the windshield. 20230409_160855.jpg20230409_161454.jpg
Making sure my wofe is comfortable and confident driving the boat is essential otherwise I dont get to play. This is one of her essential mods. I also installed new ballast bags, which are filled with with water to make a bigger surf wave. The stock bags are about 750 or 800 lbs each and the new ones are 1200 each. They extend way up under the seats. This will make storage tight but my wife is a master organizer so I expect her to have a solution to this.
 
To avoid these ads, REGISTER NOW!
OP
X

Xti04

Well-known member
Joined
Nov 11, 2016
Messages
2,491
Last mod for now is adding a heater to the boat, the engine is a closed cooling loop and has coolant in it. Raw water cools the cats and manifolds. I have a spot selected for the heater, plan is to get it setup and secured in place, the boat comes prewired for all options including a heater, which means I only have to run wiring from the actual heater unit up to the prewired switch/ relay panel. The raptor engine also has a loop on it for heater system that is connected with a length of hoseso removing that will provide a circuit for the coolant. The last addition will be adding a circulation pump. Heatercraft makes one that they sell for over 200 dollars, my plan is to use an electric water pump for a VW/Audi. The bosch pump is quiet and smaller and will be aneasy addition as well. Hoping to get as much of this knocked out tomorrow as I really want to do a shakedown run this week and see how she does.
 
OP
X

Xti04

Well-known member
Joined
Nov 11, 2016
Messages
2,491
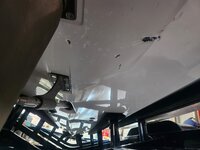
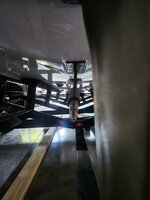
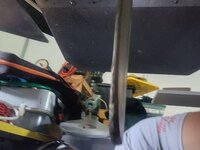
Got heater installed yesterday, had to cut some massive 4 inch holes thru my boat which is sketchy and not much fun. Taped off the whole area, marked out my locations and drilled pilot holes first. Then I got out the Milwaukee hole saw and the nice new arbor which prevents the holes saw from getting torqued on so tight you cant remove it and made my holes. The heater tubes slide out thru the hole from a larger plastic tube inside that secures with screws and a flange. I got my wiring ran to the helm and the acc switch the boat comes with, when you flip the plate it is labeled for heater on the other side. Hoses ran to the back without much difficulty as well. Biggest issue with the hoses was the fact that I needed a 90 degree barb fitting and I had to leave to go get one. 20230410_124123.jpg20230410_130155.jpg20230410_130158.jpg20230410_151129.jpg
 
OP
X

Xti04

Well-known member
Joined
Nov 11, 2016
Messages
2,491
Heater holes drilled and tubes installed, coolant finally found after goingnro 3 different parts stores. Propylene glycol is a lot harder to get ahold of than ethylene for some reason but Oreillys had it in stock. Made a second home depot run to get a new plug for my air compressor. Swapped the plugs so I could run air compressor off my generator since there isnt power in shop yet. Used the air to power my extractor unit. This came from Amazon by a company called Vevor. My poor old mityvac had bitten the dust again and I was tired of purchasing and replacing the hand pump on it. This one will fill or extract and came with lots of adapters for filling transmissions. 20230412_093432.jpg
Sucked out the v drive and trans oil before setting up and sucking out all the oil from the engine. I let my 7 year old exchange the cartridge filter the other day, and as soon as all the fluids were extracted and topped up it was off to the lake! Startup went well at the dock and oil pressure and coolant temp were good. Took some time to bleed all the air out of the 30 ft of coolant hose I added but heater worked great! I held out on adding the aux water pump and may not even add it. Heat output was great even at idle. Final shots are of the lady getting her first drive in the new ride. Shes got 3 pages of notes of how she wants to organize it all. 20230412_130812.jpg
Felt so good to get out on the water and give it a good shakedown. I am going to build a box to enclose the heater so the ballast bag isnt pushing against it and I am building a pelican box to hold all my tools so I can tackle anything that pops up on the water.
 
OP
X

Xti04

Well-known member
Joined
Nov 11, 2016
Messages
2,491
Got part of my box built this morning, the top will have to wait until after work next few days. The divider panel I built required extensive CAD work20230413_122158.jpg
After designing this piece I found a local source for HDPE sheets which are quite pricey but still cheaper than ordering tiny pieces online and paying shipping. Grabbed a 4x8 sheet and traced out my design 20230413_122227.jpg
Here was the rough cut piece and after some fitting and hitting the edges with a roundover bit here was the fi al piece. 20230413_125320.jpg
And finally here was the placement where it blocks the heater box from the ballast bag. 20230413_132736.jpg
20230413_132751.jpg
Top will have to be 2 pieces to get it to slide in thru the top. Unfortunately I also broke 2 screws off in my fiberglass mounting the heater tubes from the outside so I have to drill those out. Need to open these holes up slightly for the number 8 screws.
 
OP
X

Xti04

Well-known member
Joined
Nov 11, 2016
Messages
2,491
Here is the tool I used to help with extracting the screws. This tool cuts a nice centered divot so you can drill straight. Chucked it in my straight die grinder and gave each screw a quick hit until they were nicely dished in.20230413_134211.jpg

Now I can drill a cenetered hole, extract the screws, countersink the holes again to prevent gel cracks and insert new screws.
 
OP
X

Xti04

Well-known member
Joined
Nov 11, 2016
Messages
2,491
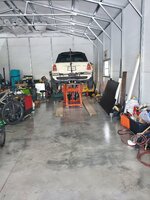
First bit of automotive work in my shop! Finally went to my lovely neighbors house and fired up my Mini and brought it over. Had to shuffle some stuff around to get it in but its in and on the lift!20230413_183638.jpg20230414_090022.jpg

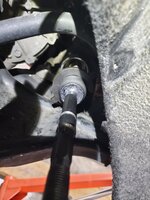
Pulled the wheel off and began with the process of fixing my poor snow driving skills, slid my poor lil go kart into a curb at full lock in the only snow that was any count this year. Car bent the inner tie rod end pretty good so I ordered new inners and outers to get it back on the road. Poor car has been neglected for a bit, but is also just a around town beater so I dont have to drive my diesel truck everywhere I go. Its been lived out of since purchase in 2021 as it was my work car and I traveled all over east TN in it. Looking forward to a serious cleaning, tune up and getting it back on 4 wheels. Here you can see what happens when you smack a curb 20230414_090139.jpg

Need to dig out my inner tie rod tool and pop this out but had to stop to go to work . To be continued...
 
OP
X

Xti04

Well-known member
Joined
Nov 11, 2016
Messages
2,491
Totally unrelated to the garage but yesterday I get a message from my sons teacher that he has shut off the water to the boys bathroom. He is 7 and apparently has a future in plumbing? He is my youngest son and loves to be out in the shop with me and learning things. I try to give him tasks that let him accomplish something, so he can feel good about what he is doing and why he is doing it. He has been helping me lately with organizing and separating electrical connectors into the generic HF storage boxes. Wont clean his room but will clean my garage all day.
 
OP
X

Xti04

Well-known member
Joined
Nov 11, 2016
Messages
2,491
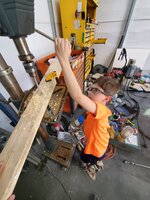
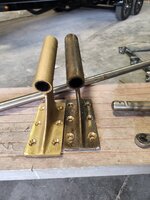
So today I worked my second job which is just a few hours in the morning. When my kids got off the bus, I knew I needed a project to keep the "plumber" busy. We ran to home depot and grabbed some closet shelf hangers with a holder for a clothing rack bar and a few 1 inch dowels. When we got home we commenced to marking out and drilling some holes on a 15 degree angle for a board rack for the shop to get all my surf and wake boards off the floor. My boy setup and drilled all the holes and then sanded the 2x4 boards noce and smooth before I mounted them to the wall. I never took any measurements and we all k ow where this is headed. The board racks were too wide for most of my boards. My plan is to stub off of them with another section of 2x4 and add more dowels to be able to mount up and get all my short boards up there as well. All in all he seemed to enjoy the work and we work well together. I glued in the dowels and got it mounted while he ate dinner and got ready for bed. Think he will like the end result when he sees it. Lifejacket drying rack and wakesurf board rack20230418_175915.jpg20230418_175914.jpg20230418_182146.jpg20230418_205936.jpg
 
OP
X

Xti04

Well-known member
Joined
Nov 11, 2016
Messages
2,491
The MINI finally got completed yesterday! Had to cut the outer tie rod end off as it would not budge on the inner. After cutting it off I removed the boot and attempted to use my inner tie rod end replacement tool to break the inner free. Turns out MINI uses a size that I didnt have a collar for. So I broke out my big knipex pliers, spune the wheel to the right and got ahold of the flats and broke it free. 20230418_134504.jpg I was able to use my tool for reassembly which made torquing it down a breeze.
Dabbed some 3m silicone paste into the boot to make reassembly easier and buttoned it all back up. Went ahead and changed the oil and filter while it was on the rack. Poor car has been neglected which is not like me but with the garage and salon buildouts it has been really difficult to get any maintenance completed. MINI finished and test driven, alignment isnt too bad off, just need to swing it by my old shop and get it on the alignment rack. Wifes car is next on the rack for a 60k maintenance.
 
OP
X

Xti04

Well-known member
Joined
Nov 11, 2016
Messages
2,491
Headed out as soon as the kids were on the bus to get the MINI aligned. Poor thing was WAAAYYY out of alignment especially in the rear opposite of the impact side. Got the camber dialed in reasonably close to specs, and toe dead nuts. Car is now driving much better, so after that little adventure it was time to get the wifes glk on the rack for a quick lube job. Mercedes and their cartridge filter location on the 3.5 V6 leaves something to be desired. Even with shop towels jammed in around the housing it still pours out onto the serpentine belt which drives me crazy. Cleaned it all up with some brake clean, new oil and filter installed and after some serious cleaning and wiping its all back together and ready to come off the lift. That just leaves my truck to get a oil changed, but thats an ordeal with 3.5 gallons of oil. Need to empty some bottles first. Lots of cleaning today and a quick build from some scrap wood that was out side netted me a 30"x96" table frame that needs some plywood attached to the top. Didnt have enough scrap plywood, so gonna have to be on the hunt for some more 3/4 ply. Only plan for it currently is to store some stuff on top of it and add another layer to my mediocre storage setup I have so far. Got mtn bike back together after losing my seat clamp hardware. Tuned up my rear derailleur, set the dropper post pressure and took it for a quick spin. Got most of the area in frpnt of my tool box cleaned up and some random stuff into the HF knockoff packouts I got last weekend. Rivets, vacuum tees, clamps and electrical connections all have a place to live outside my toolbox now. Things are slowly coming together, need to get on it with building my breezeway so I can get these inspections done. No idea why I am avoiding it other than I need help and have none. Eventually I will pissed off enough to do it on my own. But until then I keep hoping for help.
 
OP
X

Xti04

Well-known member
Joined
Nov 11, 2016
Messages
2,491
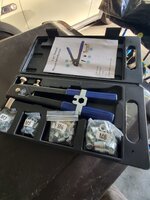
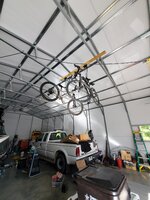
Been busy trying to get rid of as many of these totes of tools, chemicals, and miscellaneous things I had in storage from my old garage. My bikes are all over the place with no dedicated area for them yet. Lets fix that. In my old garage I used a kayak hoist to store my bikes up and out of the way. As far as securing it to the metal frames, I decided to use rivnuts to secure the setup to the framing. My dads friend has an Amazon returns store and I had bought a rivnut tool there for a dollar! Sweet deal until I got home and realized that the arbors that screw into the tool for each size rivnut were all missing!
20230424_190004.jpg20230424_190009.jpg20230424_190024.jpg
This was the setup I came up with to set my rivnuts. Using my 3/8 impact I set the rivnuts,then screwed the 2x4 that holds the hoist up to the metal building frame. With bikes out of the way, I had a lot more floor space!
 
OP
X

Xti04

Well-known member
Joined
Nov 11, 2016
Messages
2,491
Now the bikes were up and away, 20230425_174358.jpg
my next project has been the hunt for a cabinet for my cleaning chemicals and oils. I had found one on Amazon that had big rolling casters but wouldnt be available to ship until June, so I have been looking for scratch and dent stuff at home depot and Lowes. One day a week I do home health about 30 miles from where I live. Ran into the lowes this morning and saw a Craftsman 6 ft tall cabinet in the box for 279. More than I was willing to pay but the box said dented sell as is. Felt around inside the box and it felt like something I could fix so I got it for half price. Of course I had driven the MINI so like my boy @XJSuperman I loaded the 6 ft long box into the MINI bought a tarp strap to secure the hatch and away I went. 20230425_134703.jpg
Got home and unboxed the cabinet and got to work assembling it. Cant say I am super impressed with the thickness of the sheetmetal, but I was able to take a wood block and a hammer and beat it back to shape where it could be assembled. All in all its just a cabinet to hold stuff and not a show piece so it locks and and has shelves and thats all I need. Got it put together and wheeled it onto place on the boat cave side of the shop. Son helped me load it up with all my supplies and for now it cleared out two big totes worth of stuff. Gaining more floor space everyday and getting closer to a flowing functional shop. 20230425_180706.jpg
 
OP
X

Xti04

Well-known member
Joined
Nov 11, 2016
Messages
2,491
This mornings project and a quick update on last nights work. Wife came out to inspect my cabinet and she is an organizing pro. She said hang on, ran inside and came back with several things amd in minutes I had things arranged in crates with these little platforms to take advantage of the vertical space in the cabinet. Things will be arranged by catagory IE waxes, degreasers, interior etc. She even had a lazy susan to put on top of the cabinet so I can grab boat cleaners I use most frequently right from the boat with out having to get into the cabinet! Shes a good one when it comes to organizing which is not one of my strengths.
With that out of the way for now I turned my attention to my generator. It is the current power source for my compressor until I get power for the garage and it started running rough again last time I used it. The last time it did this the intake valve tappet had spun in and then wasnt making contact with the valve. I pulled the intake manifold and carb out of the way and found the same situation again. This time I am going to add some loctite to the threads of the tappet and see if that helps. 20230426_080337.jpg20230426_081537.jpg20230426_081552.jpg
Last thing I have to do is figure out where that washer in the bottom came from. Need to find a breakdown diagram and make sure it gets back where it needs to go.
 

Dr Klaun

Well-known member
Joined
Mar 28, 2010
Messages
59
Location
Tumalo
Looks great! Can I ask your process for the fill and compaction under your shop? Did you need special inspections with compaction data or did you just have the dump truck guys proof roll it?
 
OP
X

Xti04

Well-known member
Joined
Nov 11, 2016
Messages
2,491
Looks great! Can I ask your process for the fill and compaction under your shop? Did you need special inspections with compaction data or did you just have the dump truck guys proof roll it?
So its on solid ground, the stem wall has a footer that had to pass an inspection before being poured. As far as the gravel fill, I packed it in lifts in between dump trucks bringing it in with a vibratory compactorWhen the concrete guys rolled in, all my compaction got jacked because of the sheer weight of the trucks. Thats how I ended up with a 6 inch thick driveway! It has been a huge blessing to have this space and working slowly towards getting it completed. A lot of the bigger projects will wait until the fall just because I have worked 7 days a week since October between my two jobs and working on my wife's salon. Summer is time to enjoy the family and the boat!
 
OP
X

Xti04

Well-known member
Joined
Nov 11, 2016
Messages
2,491
Todays super important job got slid in right before going in to work today. My beloved spyderco knife clip has come loose yet again so I opted to pull it apart and add a bit of loctite to the screws. 20230428_101224.jpg
As my favorite knife, this thing rides shotgun in my pocket everywhere I go. Got to have it up to snuff and the deep ride titanium pocket clip while nice always seems to loosen up. Lets hope a bit of blue loctite keeps it in place
 
OP
X

Xti04

Well-known member
Joined
Nov 11, 2016
Messages
2,491
Well folks after weeks of being ghosted, the stone guys showed up and knocked out the front of the garage! Finally can cross this off the list make the wife happy and keep her from asking when they are coming. 20230429_081841.jpg
20230430_180329.jpg
Big ticket items coming up include buildingnthe breezeway and starting electrical along with bringing home my 04 Wrangler Rubicon project I need to get going on. Not much else going on out here other than redoing the racks my son and I built to make the dowels closer together.
 
OP
X

Xti04

Well-known member
Joined
Nov 11, 2016
Messages
2,491
My son and I had to redo our handiwork for our board racks as the originals were just a bit too far apart. We added 2 2x6s and drilled them the same as the 2x4s and then used the kreg jig to pocket hole the boards to screw them to the 2x4s. All in all this turned out much better and fit all my boards except my foil board which needs its own special rack. 20230501_213152.jpg
 
To avoid these ads, REGISTER NOW!
OP
X

Xti04

Well-known member
Joined
Nov 11, 2016
Messages
2,491
Thank you! Just got a call from my inspector that my permit ran out. He gave me 30 days to get my breezeway done before I have to pay another 100 dollar extension fee. I have to get on it and get this knocked out. Going to grab wood first thing next week and get after it, but I also have several side project vehicles scheduled so its gonna be a busy week. Gotta make it happen, cant move on to electrical until building gets a final.
 
OP
X

Xti04

Well-known member
Joined
Nov 11, 2016
Messages
2,491
Been pretty hard to get anything done here lately after injuring my back last week to the point I am having trouble walking. Had to cut a titanium ring off a guy's finger at work using a ring cutter which is like a sad little dremel tool with no power. I was bent over forever cutting it off and when I tried to stand up my back was jacked and I could barely walk. Pain has been awful, but still pressing onward. Last week was brakes and a hub assembly on a Nissan Quest, and this week's project was rear wheel bearings on a Jeep Patriot for a girl I work with. I was hurting so bad while doing the bearings I didn't bother taking pics of the process but other than a couple of rear tires she needs to get replaced all the awful noise she was experiencing is gone. Breezeway is on hold, but have a guy who offered to install it in trade for some labor on his 4 runner. I have been selling off all kinds of extra stuff around the shop to make some extra cash. I have repaired my trailer finally so I can get some mulch when my back heals up and hopefully have a buddy coming Friday with a bobcat so I can get the backyard leveled out. Lots going on but nothing exciting.
 
OP
X

Xti04

Well-known member
Joined
Nov 11, 2016
Messages
2,491
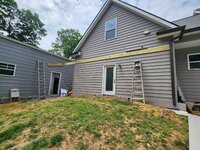
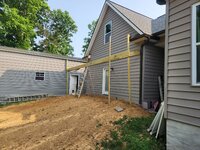
So with my 30 day deadline for building permit fast approaching and having done nothing I jumped to it this morning. I had a friend who was supposed to come grade out my yard and the area where my breezeway will be, and another buddy who offered to come help me with the breezeway because he wants to get out on the boat and there is no boat time until I get this thing done. Well both no showed me so I went after it by myself. Pulled the siding off and ran some screws into the stud to hold a 16 ft 2x10 up so I didn't have to hold it all by myself. 20230522_101551.jpg
Next up was trying to wrestle that huge board up there by myself. I got it up there and temporarily secured it so I could attach the end piece. I hung it on a clamp attached to an extension ladder and screwed it together. Then I slid the whole thing over against the shop and secured the 2x10 to the house. 20230522_121919.jpg
I then got the second 2x10 installed and got all the flashing installed as well. Installed new channel for the cut down siding and then cut the last piece too short. Luckily I still have the siding I removed from the front of the old garage so I have an extra piece to remake the screw up cut. Got as far as I could without a second set of hands. Gonna grab a concrete tube and some sakrete to get the bases for the outer support posts. Looks like I will be using the wheel barrow and shovel to get this level instead of the bobcat. Not looking forward to that but it is what it is. 20230522_204401.jpg
 
OP
X

Xti04

Well-known member
Joined
Nov 11, 2016
Messages
2,491
Finally was able to score some stuff from the hospital that I could actually use at home. I am a pretty personable guy and I like to be in good standing with everybody I interact with because you never know when you might need something from them. A couple of weeks ago I met our nighttime maintenance guy and we hit it off. He was onto the garage build and he said there were some cabinets that I could probably have to use in the shop. The first one is a rolling car that was probably a med cart from one of the floors. It has a lock that is numerically coded but no longer works. Loaded with tools nuts bolts screws etc. Managed to snag it and get it into the truck by myself last night. 20230525_073830.jpg20230525_073837.jpgso it's tucked up against the wall for now, hopefully I can address it sometime soon. Need to empty out the stuff I don't want and get it situated and working for me. The second item was a large file cabinet that also had some tools and useful items in it. Found an engraver in there. This one I'm not sure where to put it yet but it has a lot of room in it so I should be able to make good use of it. 20230525_075232.jpg
 
OP
X

Xti04

Well-known member
Joined
Nov 11, 2016
Messages
2,491
So after getting off work this morning and unloading the new storage solutions, I had a guy stop by who self diagnosed his Buickas needing a coil pack and spark plug. I offered to trade labor for labor and fix him up in exchange for him helping me with the outer frame of the breezeway. After installing the plug and coil and clearing codes I fired up his car and still had a misfire on cylinder 2. Great. Now his car is going sideways so I pulled connector off coil and verified spark and grabbed my compression tester and got 110 lbs on that cylinder. Checked a front cylinder to get a comparison and it wasn't much better at 130 lbs. After some quick Google searching it seems the 3.6 v6 is prone to all kinds of issues beyond the stretchy timing chains @zmotorsports recently documented his repair of. This car has 200k on it is poorly maintained at best and I told the guy I would keep digging if he wanted me to but that my quick assessment was that he was gonna spend more than the car was worth really quickly. With his car at a standstill we went out back and got my boards tacked up and temporarily in place. I used some 2x4s as temp bracing until I get a chance to dig the concrete footings for the 4x4 posts. Also had my buddy swing by yesterday while I was gone and level the area and backdrag some of the rougher parts of my yard from all the activity over the winter and the building. So it's getting better out back and if I could get some grass growing my wife would be a happy camper. 16850516615812183118480576101073.jpg20230525_174114.jpg16850516931705758801923399608846.jpg
 
OP
X

Xti04

Well-known member
Joined
Nov 11, 2016
Messages
2,491
Today as I took off to grab nails for nail gun to try and complete my breezeway project, wife called and said we have no hot water. Well great. One more project to interrupt my projects. Turned around and came back home. Gas meter not moving and heat felt cool since Temps dropped last night. Cranked up furnace to verify gas works. All good there. Water heater has flow thru it, it's tankless so I grabbed the manual and began trouble shooting. I cleaned the inlet and recirculation filters, and from there reset the water heater. No luck with any of those, so I checked the website. They charge for tech support calls and will only do a limited amount with homeowner. They want a Navien certified tech to troubleshoot the system. Reading through the faqs I saw a question about no hot water but ample flow could be caused by a faulty or stopped up flow sensor. It suggested opening the prv and seeing if that cleaned out the sensor. So I did that and after turning the heater back on it began running and had the flame icon on the screen again indicating it was heating water. Info screen verified water temp on outlet at 131 °F and it burnt my hand like always so It should be almost hot enough for my wife. With that disaster out of the way I can now head to home depot for nails some more screws and maybe a trip by harbor freight for some shop goodies.
 
OP
X

Xti04

Well-known member
Joined
Nov 11, 2016
Messages
2,491
Finally got the rafters and framing done. Waiting for tonight when its not as bright to use my laser and paint a line for where the posts will land. My father in law came by and as usual was a huge help in getting the end pieces lined up. 20230529_150045.jpg20230529_185431.jpg
Now that the hardest part for me is over I need to get the siding situated above the far end, call in for a sheet of black sheet metal for roofing and add some blocking in lieu of purlins for the areas where the metal lands and doesn't hit a stud. Hoping I can knock the rest of this out tomorrow and get it inspected before I head out of town on a canoe trip this weekend. I dug the footers for my shop the week before my canoe trip last year so I want to see this come to a close asap!
 
OP
X

Xti04

Well-known member
Joined
Nov 11, 2016
Messages
2,491
Well folks, once again I didn't finish and missed out. Opted to go camping with my buddies and had an great canoe trip down the Tellico River. We have been doing this trip since 2009 and only time I have missed was when we had our second kid 2 weeks before the trip. Breezeway is completed other than sheetmetal which I have to stop and order today after work. In between pouring concrete and waiting for it to harden enough to set my posts I went and did a good bit of yard cleanup. Got everything mowed, picked up a wheelbarrow load of branches, got some holly tone on my trees, and attempted to get a sprinkler setup so I could get some water on my new trees. Took a count yesterday and 20 of the 33 I bought are alive and doing OK. All the hollies died and a couple of the magnolias died too. I am waiting on my buddy to bring his walk behind skid steer over so I can trench for gutter drains. This will be the third time I redo them, going to use sewer and drain pipe this time. The corrugated drain pipe seems to get crushed so easily. While I have his machine I can backfill around the upper side of the garage and try and get some backfill along the driveway. With weather this nice it really hard to not go to the lake everytime it's pretty and the wife and I are off work. Took the kids out Sunday and had a blast. IMG_4507.jpg
 
OP
X

Xti04

Well-known member
Joined
Nov 11, 2016
Messages
2,491
So new week and new failures. Had an inspection last week that didn't go well but the inspector canceled it and didn't charge me so that was nice. He wants me to add 1 more 4x4 to my breezeway, I also have to add a railing to prevent falls off the edge of my driveway since it's over 30 inches. I went with a black aluminum railing and it looks really nice. It was definitely not cheap and wasn't much fun to install. I believe I managed to break off a tapcon in at least every post. So frustrating I tried driving them by hand and seemed to break more that way than by using my drill to install. Can't really even say that I was being to hard on them as I was using a 1/4in ratchet to install them. With the railing out of the way and a babysitter the wife and I went out to enjoy a lake day with some friends. Well late in the afternoon as we left from tying off with another buddy there was some drama on board, I got distracted and ran my prop and rudder right thru some rocky mud. Had it idle all the way back to the dock and the first glimpses of the damage were not reassuring
My prop was toast, there was some gel coat damage and my pride was hurt. I keep a prop puller and spare prop in the truck so I swapped it out so the wife could have a Lil sunset cruise. After laying around Sunday too afraid to look at the damage we had a hail storm hit the house. Of course the garage is torn apart for inspection and all my cars were outside. By the time I got the wife's car inside the hail had stopped. Since she knew I was in a mood yesterday she offered to clean the boat if I would pull it out for her.20230612_141423.jpg20230612_141505.jpg
She did a great job of getting it cleaned up and mademoiselle mood somewhat better. After closer inspection underneath the prop shaft strut and rudder all have damage too so it's going to be an insurance claim. Luckily I have a friend who does warranty repair for fiberglass boats and has his own shop. He will do the gel coat repairs and I will handle the rest. In the process of sorting out prices and estimates with him now. Today's projects will be to replace plugs on a Subaru crosstrek, brakes on an altima and hopefully getting sheet metal on this breezeway roof.
 
OP
X

Xti04

Well-known member
Joined
Nov 11, 2016
Messages
2,491
Few more pics of the carnage underneath. Not as bad as it could have been but still it's a 5k parts and labor job before glass work.so that strut should be in lone with the rudder which it most definitely is not. I would think the shaft would have some spring to it but I guess they bend and that's it. I ordered a set of v blocks to check the runout. I'm sure I can find a spec and get it back within a couple thou of spec it would be OK as a backup. 20230613_162941.jpg
 

Attachments

  • 20230613_162935.jpg
    20230613_162935.jpg
    441.5 KB · Views: 88
  • 20230613_162956.jpg
    20230613_162956.jpg
    752.5 KB · Views: 77
OP
X

Xti04

Well-known member
Joined
Nov 11, 2016
Messages
2,491
After a long night at work I got home.this morning and got to bed knowing I had an inspection this afternoon at 230 for my building final. I had everything ready and was excited to be getting my final done and moving on past this stage. At 11 the inspector shows up early catches me totally off guard because I am asleep and wants to waltz in and check stuff out. I was finally able to open the garage and let him see it all. He passed the building final and my framing final for the breeze way which means after 1 year and three weeks I am done and free. My building is now out from under the claws of my local jurisdiction and I can proceed with important things like lights and power! I was so relieved to get it done and over with but now I haven't been able to go back to bed and have to go to work in a bit. The good thing is if I have another night like I did last night I should be able to come up with a basic electrical plan and figure out how to get my space setup!
 
OP
X

Xti04

Well-known member
Joined
Nov 11, 2016
Messages
2,491
Been a crazy busy past couple weeks between work and life. I finally got insurance approval and got to tearing my boat apart. Final estimate came to 7500 dollars. Pulled it over to my buddies shop and got after it. We thought we had to pull the tank but ended up not. That added about 30 minutes to our repair time. 20230621_115048.jpg20230621_125743.jpg
Pulling the floor was easy the tank would have been should as it was over 3/4 full. Next up we moved under the boat and with the help of a homemade puller which uses 2 10lb dumbbell weights we removed the prop shaft. After popping it out we dropped the shaft strut off the bottom. 20230621_125828.jpg20230621_125820.jpg
With those pieces removed we dropped the rudder box and he was able to begin grinding out the cracks for repair. After having to wait a few more days for gelcoat to arrive he got it sprayed sanded and buffed and I swung by to reinstall it all on Thursday. First up was the strut, after applying some 3m 5200 to it I crawled under the boat and got it bolted in. He had the hard part of the job which is reaching under the engine and fitting a nut and washer to each bolt. 20230629_134246.jpg
After getting the strut fit up we lubed up the new prop shaft with dish soap and slid it in place. It has to clear a dripless seal and go thru the v drive and then the drive shaft flange gets keyed and bolted to the end of the shaft. Once it's installed you can push the flanges together and measure your clearances to make sure you are aligned and don't have any vibrations from misalignment. After bolting it all together I installed my spare prop and then glued the rudder box in place. We had to lift the boat up off the trailer to get the rudder slid into place in the rudder box. With the boat back together all that was left was a water test. 20230629_154457.jpg
Thanks to Canadian fires it was super smoky here in East TN and a bit overcast. Lake is currently over full pool after a week of rain and there were all kinds of debris to look out for. Boat worked just as good as previously and ran well. Took it back to dock and loaded it up and got it tucked into shop next to its new roommate which showed up on Wednesday. To be continued.
 
OP
X

Xti04

Well-known member
Joined
Nov 11, 2016
Messages
2,491
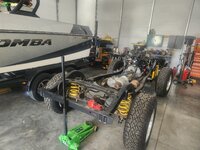
So with boat in my buddies shop for the last week I got to cleaning and moving stuff around to make room for my long awaited first garage project. Even though I need electrical and have all kinds of other stuff to deal with I am so excited to be starting on this project I couldn't wait any longer to get it over here. A friend of mine got this Jeep in trade for installing a paver patio a couple years ago. Jeep is am 04 Wrangler Rubicon with all kinds of mods to it. Has 68k on it and was a very nice Jeep. The original owner was hit in the side pulling out and the Jeep was totaled. Owner had it towed home and it sat until my buddy got it. He brought it home and pulled the cab and got to work on it. He found a deal on a powdercoated frame and commenced to swapping the frame. There was some damaged wiring and a couple odd things like the fuel pump module being damaged that will need addressed. He also bought a pretty clean tub that had been stripped to nothing which gives me a perfect base to finish the Jeep how I want. 20230630_150522.jpg20230630_150533.jpg20230630_150540.jpg20230630_150546.jpg
Jeep has front and rear lockers with ARB diff covers, Old Man Emu lift kit, Tom Woods driveshafts that are still in boxes to be installed and a swaylock front bar which is a pretty sweet setup and disconnects itself at the flip of a switch. Plan is to repair all the damaged wiring, replace fuel pump and get everything buttoned up on the Jeep so I can have it ready to rock once I get Tub done. I plan to do the interior in beeline and then install the aftermarket cage from the original tub. Once I get it all built inside dash swapped etc I am going to clean and prep the outside and do a vinyl wrap. This will be my first wrap job but I believe I can do it since most of the Jeep panels are flat. I am looking forward to getting this build underway and working on the shop at the same time. I have lights that should be here Monday and my electrician is coming by Monday as well to see about how we power out there.
 
OP
X

Xti04

Well-known member
Joined
Nov 11, 2016
Messages
2,491
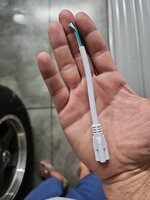
We have lights! Well we kinda have lights. Ordered the 10 pack of Barrinas from Amazon but when they delivered them Monday there were 20 lights! Score for me because that's how many I need to turn my shop into a surgical center. Pulled one out of the box and I can now see why my cousin decided to just wire in an outlet to plug them into instead of direct wiring them. The supplied direct wire plug is super shortIMG_20230704_221627_01.jpg
Getting this from a junction box to the light would be tight. I waited till it got dark and shined the laser down the beam to make sure all my light hangers were in line( which was a bit of overkill honestly) and got the first light installed with a cable to connect it to the next light. I then installed the next light with a plug in end and after connecting them together had my wife plug in the extension cord that is powering my temporary light setup. 20230704_212558.jpg
Boom! Almost as loud as the fireworks outside I have light and can actually see all my junk ! 20230704_212600.jpg20230704_220911.jpg
The glow from the building was so bright I saw what looked like my neighbors house lit up from inside at one of their windows. I thought that's strange I have never seen that room lit up from here. It was the reflection of my lights making their house appear lit up. Crazy difference. I went ahead and hung one more light but not the corresponding one to power it as I don't want to be drilling and dropping metal shavings into my boat. Once I get caught up with mowing and such tomorrow I will pull boat out and install a few more rows of lights. Can't wait to see the whole thing lit up. I was also pretty impressed that each unit only draws .6 amps so all 20 is only 12 amps. 9500 lumens per unit and cheap enough that I won't feel too screwed over if one goes bad.
 
OP
X

Xti04

Well-known member
Joined
Nov 11, 2016
Messages
2,491
So no posts for quite some time but honestly not much has been happening outside in the shop until this week. I got power into the shop finally which meant I could get started on electrical. The very first circuit I ran was one to make my wife happy. It is a dedicated line for a fridge/freezer plug. She does not like my beer fridge sitting in her formal dining room that she doesnt use. And she doesnt like the standup freezer being in the fancy study area she also doesnt use but I digress. Plug installed and circuit working as designed. Fridge moved and freezer moved as well. Less space for me out there but complaints about my beer fridge have dropped to zero.
 
OP
X

Xti04

Well-known member
Joined
Nov 11, 2016
Messages
2,491
So much time has passed and finally there is news and progress. After much back and forth and scheduling conflicts I was finally able to get my electrician out here and get power into the shop! I went with a Seimens panel since I have had good results with the 2 in my house. Power comes from the house panel and via the magic of conduit comes right up into the shop and powered up my panel with no issues. The very first circuit was the dedicated fridge freezer circuit to get those 2 items out of the house. As soon as that was completed, I grabbed the appliance dolly and moved both outside and loaded them back up with their contents. Making that a priority made the wife happy enough that she even helped bu organizing the freezer and showing me how she could fit over 2 cases of beer in my mini fridge, a task I have been unable to duplicate. With that done I began the repetitive process of finishing up the installation of the lights. The temp difference in August between floor temp and 12 ft up in the rafters is astounding. I was melting up there as I installed light clips. After finishing the light installs I started slowly adding circuits and getting the "essentials" handled first. Since the lights were running just fine off of an extension cord I went ahead and wired the air compressor plug and garage door circuits along with outdoor lights for the front of the shop to make the wife happy. With those handled, I began the slow goimg task of wiring in each outlet and working my way down the wall. Time was extremely limited the last 2 months due to studying for a new job opportunity that idnt materialize, but I tried to get at least one outlet a day done in between studying and working my awful night shift schedule. Slow and steady finally paid off, I reached the end of the first wall and was able to power it up and verify all my outlets were good! With that handled I was able to get back up on the ladder and get my light circuits close to complete. I have a fan that needs to be installed and that will be all thata needed for the interior shop lighting circuits. Trying to find something similar to the big *** fans that you see in warehouses. With the shop finally off the extension cord and the new job interview pulled out from under me the day before it was supposed to happen I suddenly had a bit more free time and used that to take on a few nice and profitable jobs for the shop. Knocked out a wheel bearing on an Audi A 3, timing belt, oil pump reseal valve adjustment and complete brake job on a ridgeline and replaced a crank pulley that blew apart on the mini cooper. Always something here.
 
OP
X

Xti04

Well-known member
Joined
Nov 11, 2016
Messages
2,491
Agreed! I had never heard of a frost line until I started researching house plans when we built our house in 2016. We had our first night below 30 last weekend while I was working on the Honda and it was cold in there. I have a couple of sheets of the exterior metal left and plan to use them on the inside walls with bats or rockwool sandwiched between them. Plan is to roughly start in my corner where the lift is and work out from there. Heat is provided by a tiny single burner on a 100lb propane tank and is more for warming up my hand than warming the area in general.as long as it stays above freezing in there its ok with me.
 
To avoid these ads, REGISTER NOW!
Top Bottom