

- 400 Sq Ft Garage
- 1 box Rust-Oleum EPOXYShield Concrete Patch
- 2 Gallons Rust Bullet Base Coat (2 coats)
- 1 Gallon Rust Bullet Clear Shot (1 coat)
- 1 Gallon Sherwin Williams ArmorSeal Rexthane I (2 coats)
- 10 lbs 1/8th inch BX270 Blend Chips Unlimited Chips
- 17 lbs ¼ inch blend purchased off ebay
First, let me say from experience, don’t start this project in the winter in Florida!! LOL The weather really screwed my timeline up and wasted some of my time taken off work for the project due to either freezing temps, high winds, etc. – the weather went from 80 to freezing in the same week!
Prep:
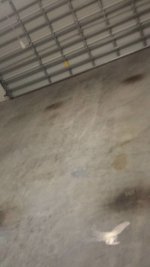
I pressure washed, then scrubbed with simple green, then pressure washed again, then scrubbed with ZEP Driveway, Concrete and Masonry Cleaner (I happened to have it on hand from another project) but I still had tire marks as seen in the photo below. In reading some other forums, what I finally got the tire marks up with was “The Works” Toilet bowl cleaning and some scrubbing! Then one final pressure washing and I was ready for crack patching!

Crack Patching:
First, I used some FlexSeal for a small crack that ran the perimeter of the garage where the walls met the floor. Then I used Rust-Oleum EpoxyShield Concrete Patch to patch the cracks in the floor. I actually patched multiple times because it seemed like every time I looked I found new cracks I missed the day before – in the end, I decided there was not going to be a “perfect” crack free surface!
I couldn’t believe how hard the patch dries which makes sanding fun!

First Coat Rust Bullet
Put down the first coat of rust bullet. You can definitely see roller marks and also see the underlying patch marks through the initial coat – but no worries as it won’t be noticeable when done. The smell is terrible – I used a mask to put Rust Bullet down but even though I have 2 doors and I had towels at the bottom of both doors, I could smell it in the middle of the night. (I can imagine my dog was gagging!) I had no issues with the process of the first coat.

Second Coat and Broadcast
Since I was doing this by myself, I used an 18 inch roller so I could get the flake down fast. I wanted to get more of a “granite’ effect, instead of an even spread of the flake, so I used a combination of flake sizes. I had ¼ in flake that I purchased off ebay in lighter colors and 1/8th inch in darker colors that I purchased from Chips unlimited. I pretty much did a full broadcast – first I put down the larger chips and then followed up with the smaller chips. My biggest issue was getting the vertical surface to hang on to the chips. I had to go back the next day and use some top coat and place the chips on the vertical surface rather than tossing it on. In the end, I am really pleased with the effect. I had a LOT of chips left over, but that allowed me to go back to the vertical surface as well as any spots that looked bare and touch them up. The picture is just after the broadcast so it’s before removing the excess chip (someone I showed the picture to at work before I was done, asked why I put carpet in my garage! LOL)

Topcoat
Here is where things got a bit messed up. I don’t know why I was under the impression that 1 gallon (1 coat) of the Clear Shot would be enough?? Anyhow, I put down the Clear Shot and it was supposed to dry within 6 hours – well we had freezing temps that night and of course it didn’t dry. After 2 days it was finally dry, but I really wanted more top coat but my budget would not allow for more Clear Shot and I didn’t want to wait for shipping either, so I researched and decided on Sherwin Williams ArmorSeal Rexthane I. Since it had been a couple days between waiting for the Clear Shot to dry and the weather to warm up, I lightly sanded the entire floor with 180 grit sandpaper and put down the ArmorSeal. This was a lot easier to work with – mainly because I used 1/4 nap roller where when I put on the Clear Shot, I was using the recommended 3/8 nap roller which felt like it held on to a lot of the product rather than putting it on the floor. In addition, the ArmorSeal was thinner so it was easier to work with - I also had enough to do an additional coat and still have some left over.
Final
My final step was installing some PVC Crown molding and baseboard – and I’m finally done! - It just took a little longer than I anticipated.
And of course - anyone from Florida knows we have lots of Gekos, so of course I had to paint one on the wall!
I am very happy with my final results – not too bad for a 50 something female that has never done this before!


- 1 box Rust-Oleum EPOXYShield Concrete Patch
- 2 Gallons Rust Bullet Base Coat (2 coats)
- 1 Gallon Rust Bullet Clear Shot (1 coat)
- 1 Gallon Sherwin Williams ArmorSeal Rexthane I (2 coats)
- 10 lbs 1/8th inch BX270 Blend Chips Unlimited Chips
- 17 lbs ¼ inch blend purchased off ebay
First, let me say from experience, don’t start this project in the winter in Florida!! LOL The weather really screwed my timeline up and wasted some of my time taken off work for the project due to either freezing temps, high winds, etc. – the weather went from 80 to freezing in the same week!
Prep:
I pressure washed, then scrubbed with simple green, then pressure washed again, then scrubbed with ZEP Driveway, Concrete and Masonry Cleaner (I happened to have it on hand from another project) but I still had tire marks as seen in the photo below. In reading some other forums, what I finally got the tire marks up with was “The Works” Toilet bowl cleaning and some scrubbing! Then one final pressure washing and I was ready for crack patching!
Crack Patching:
First, I used some FlexSeal for a small crack that ran the perimeter of the garage where the walls met the floor. Then I used Rust-Oleum EpoxyShield Concrete Patch to patch the cracks in the floor. I actually patched multiple times because it seemed like every time I looked I found new cracks I missed the day before – in the end, I decided there was not going to be a “perfect” crack free surface!
I couldn’t believe how hard the patch dries which makes sanding fun!
First Coat Rust Bullet
Put down the first coat of rust bullet. You can definitely see roller marks and also see the underlying patch marks through the initial coat – but no worries as it won’t be noticeable when done. The smell is terrible – I used a mask to put Rust Bullet down but even though I have 2 doors and I had towels at the bottom of both doors, I could smell it in the middle of the night. (I can imagine my dog was gagging!) I had no issues with the process of the first coat.
Second Coat and Broadcast
Since I was doing this by myself, I used an 18 inch roller so I could get the flake down fast. I wanted to get more of a “granite’ effect, instead of an even spread of the flake, so I used a combination of flake sizes. I had ¼ in flake that I purchased off ebay in lighter colors and 1/8th inch in darker colors that I purchased from Chips unlimited. I pretty much did a full broadcast – first I put down the larger chips and then followed up with the smaller chips. My biggest issue was getting the vertical surface to hang on to the chips. I had to go back the next day and use some top coat and place the chips on the vertical surface rather than tossing it on. In the end, I am really pleased with the effect. I had a LOT of chips left over, but that allowed me to go back to the vertical surface as well as any spots that looked bare and touch them up. The picture is just after the broadcast so it’s before removing the excess chip (someone I showed the picture to at work before I was done, asked why I put carpet in my garage! LOL)
Topcoat
Here is where things got a bit messed up. I don’t know why I was under the impression that 1 gallon (1 coat) of the Clear Shot would be enough?? Anyhow, I put down the Clear Shot and it was supposed to dry within 6 hours – well we had freezing temps that night and of course it didn’t dry. After 2 days it was finally dry, but I really wanted more top coat but my budget would not allow for more Clear Shot and I didn’t want to wait for shipping either, so I researched and decided on Sherwin Williams ArmorSeal Rexthane I. Since it had been a couple days between waiting for the Clear Shot to dry and the weather to warm up, I lightly sanded the entire floor with 180 grit sandpaper and put down the ArmorSeal. This was a lot easier to work with – mainly because I used 1/4 nap roller where when I put on the Clear Shot, I was using the recommended 3/8 nap roller which felt like it held on to a lot of the product rather than putting it on the floor. In addition, the ArmorSeal was thinner so it was easier to work with - I also had enough to do an additional coat and still have some left over.
Final
My final step was installing some PVC Crown molding and baseboard – and I’m finally done! - It just took a little longer than I anticipated.
And of course - anyone from Florida knows we have lots of Gekos, so of course I had to paint one on the wall!
I am very happy with my final results – not too bad for a 50 something female that has never done this before!