To avoid these ads, REGISTER NOW!

"Nate's Fab"

LinuxMercedes

Active member
Joined
Jul 18, 2014
Messages
27
Location
Missouri
I've been reading various threads on here for a while now, so I figured it was probably about time for me to start my own shop thread.

A bit of history, first: senior year of my undergraduate, my wife and I finally rented our own place that came with a sizeable 1-car garage. And so, I present Shop 1.0:

dEs50D2.jpg

wJAZv1P.jpg


My father in law built the bench with me one weekend. The air compressor setup is cobbled together from a few craigslist deals, and if you look closely you can see a small welder.

Most of what I did in this shop was work on our two cars. The MR2 was my first car. This picture is old; it's in a little rougher shape now...
mr2.jpg


And my wife's car, Roxy:
GLXBevx.jpg
 
Last edited:
To avoid these ads, REGISTER NOW!
OP
L

LinuxMercedes

Active member
Joined
Jul 18, 2014
Messages
27
Location
Missouri
About a year after I moved into that apartment, I graduated. I decided that having no money or free time was fun and so I decided to go to grad school. So, I moved again, this time to a place with a 1600 sqft basement with a garage door...

So, shop 2.0 panorama:

bNwSX9z.jpg

2jhyAcA.jpg

iwl5fuU.jpg


Dumpster dove some fluorescent lights from the university so I could see my cars when working on them. These are the best; every garage I've worked in before this has been poorly lit.
k5Eic4N.jpg


Added a few more tables, and a table saw:
08HrW2j.jpg

pYfVzKj.jpg


I really need to organize this part better. So far I've been able to get away with a haphazard arrangement of tools, shelves, and work tables, but the space is starting to fill up the way I'm using it now.

I also set up a real electronics bench. At some point, this will get a top shelf for holding power supplies and whatnot.
ecx083A.jpg


My $65 air compressor seized up one day, so rather than paying $150+ for rebuild parts, I picked up a $75 craigslist compressor that was missing a few parts. Pieced the two together, and ended up with a pretty decent air setup:
gmDtVqo.jpg
 

mysta2

Well-known member
Joined
May 9, 2007
Messages
115
Drive in basement. That's the dream.

And nice cars, my first car was a mk2 MR2
 
OP
L

LinuxMercedes

Active member
Joined
Jul 18, 2014
Messages
27
Location
Missouri
Thanks! The MR2 is easily one of my favorites; can't wait to get her back on the road.

Latest acquisition: 14x6 Hendey lathe from the 1910s. Bought it off a guy who bought it off an 81 year old who was selling it because he bought a new lathe!

Seller had a buddy with a wrecker, so loading it was pretty easy:
IMG_20151123_133119.jpg
The 4x4s creaked a little but seemed to hold up alright.

Strapped it down and it didn't budge an inch the whole 200 miles home:
IMG_20151123_141321.jpg

(The truck is missing a rear bumper thanks to a mishap when some fool tried to back up an empty trailer towed on the step bumper. Expect to see a post about that later on when I get around to fixing it...)

Got home, managed to sucessfully back the trailer around a muddy U turn in the dark to get it into the basement with a lot of help from the wife. Then, since I don't have a wrecker sitting around, we moved it like the Egyptians did: rollers and an engine crane. Here it is, with the retrofit motor/gearbox next to it:
u3MWoH7.jpg

When I went to go put the gearbox on, I ran out of ceiling and couldn't get it to lift over the lathe. Pulled the lathe out and fit it on that way...that motor mount must be upwards of 200 lbs.
IMG_20151125_172541.jpg

Tried to move it back with the engine crane and things got spooky:
IMG_20151125_173948.jpg

Slid it one end at a time, which went far better.
IMG_20151125_175757.jpg

Of course, now that I sit down and think about it, I realize that motor moved the center of gravity the *other* direction, so I can probably still move it around with the engine crane so long as I do it right.

Here she sits, now:
IMG_20151125_180954.jpg

I'll run a 240V line over to her sometime soon and start cleaning her up some. I also need to come up with some storage for the other chucks, steady rests, and tooling. Maybe I'll build a cabinet of some sort?
 

Bib Overalls

Well-known member
Joined
Dec 4, 2006
Messages
3,318
Location
Jonesboro, Arkansas
I'm 72 and just bought a new lathe. Only problem is that I am in Arkansas and the lathe is in Michigan. Around here good used lathes, mills, etc. are hard to find. I have a Colchester Student and a Craftsman/Atlas that I will part out unless a buyer(s) comes forward. You can do some incredible work with an old lathe if is in good shape.

The used lathe market is interesting. Big old lathes actually sell for less than small old lathes. This reflects the influence of the hobbyist in the market. We want compact machines for our shops. That said, you can get a real steal of a deal if your shop can accommodate big.
 
OP
L

LinuxMercedes

Active member
Joined
Jul 18, 2014
Messages
27
Location
Missouri
Hopefully when I'm 72 I'll still be chasing down new machinery too!

Arkansas isn't too far from me, but my machine budget is gone for the year. I am keeping an eye open for a steal on a milling machine, though.

Put in an order with Enco today for various oils and some tool bits, so I'll be able to make chips soon!
 
To avoid these ads, REGISTER NOW!

Richard Cranium

Well-known member
Joined
Apr 22, 2011
Messages
18,552
Location
central Washington
Thanks for sharing your basement garage with us. You are so right on the lighting. You have to have good lighting. I need to add some more to my garage. thanks again Richie
 
OP
L

LinuxMercedes

Active member
Joined
Jul 18, 2014
Messages
27
Location
Missouri
Well, I have survived the holidays and managed to pick up a few things on the way.

Started a thread over on Practical Machinist about
my Hendey lathe. It runs and makes chips, but needs a few things here and there before I can really get some use out of it.

My dad saved me this Craftsman 10" table saw from the curb.

IMG_20151229_210927.jpg

I think I'm going to clean it up and sell it, even though my Yates-American saw is an 8" saw. The YA is a lot heavier and seems better built, and I don't have the room for two table saws.

I also nabbed this drill press off Craigslist for $50. It's a Craftsman model 113.24590. Apparently the owner saved it from the scrapyard and straightened the quill. It has no wiggle or visible runout, although I haven't put a dial indicator on it yet.

IMG_20151229_210548.jpg

It is missing the motor pulley, so I am going to have to decide how I want to do speed control on it. I could turn a pulley on the lathe or pick up one of those motor speed controls you can get for routers; the motor only pulls 8A so one of those should work. No luck finding a replacement pulley on eBay so far.

I've been working on a christmas/wedding gift for my brother in law and his wife; I'll post about it when I'm done, but here's a teaser:

IMG_20151222_222410.jpg
 
OP
L

LinuxMercedes

Active member
Joined
Jul 18, 2014
Messages
27
Location
Missouri
Thanks for sharing your basement garage with us. You are so right on the lighting. You have to have good lighting. I need to add some more to my garage. thanks again Richie

Glad you like it, Richie! I picked up a couple more lights to add; seems I can never have enough.
 
OP
L

LinuxMercedes

Active member
Joined
Jul 18, 2014
Messages
27
Location
Missouri
As I expected for a very cheap lathe, getting my Hendey up and running is turning into something of a project. Not that I'm complaining!

One problem it has is the pulley on the transmission output shaft is concave, so the belt wants to run off the pulley when I run the lathe clockwise. It's also too small, so the speeds I can get on the lathe are too slow. With the current 4-speed gearbox and output shaft pulley, I have speeds 71-108-142-178 RPM!

Now, I probably should have made this out of hardwood, but I have never turned anything in a lathe before and I didn't really expect this to come out that well, so I made it out of some glued up 2x4 scraps I had laying around. Made a roughly 4.5" square chunk, then used my table saw to cut the corners off at 45* to reduce the amount of turning I'd have to do.

Chucked it up in the 4-jaw and got it sort of centered. At first I tried holding the chisel in my hand braced against a tool holder, but that did not work well at all, so I used a tool bit to shim it into a big tool holder.

IMG_20160101_164255.jpg

Roughed one side in pretty well, then turned it around in the chuck to do the other side. Centered it up by spinning it at a low speed and holding a pencil braced against the carriage to mark the high spots.

IMG_20160101_181934.jpg

Rough faced with the chisel held flat:

IMG_20160101_184025.jpg

Then turned the chisel 90 degrees and smooth faced it. This is the second side I did...the first side did not turn out so well, so it is going on the gearbox side so you can't see it very well.

IMG_20160101_184652.jpg

Took me two shims to hold the chisel sideways. The only thing I have to say about this approach for holding chisels in a tool holder is that it works:

IMG_20160101_200825.jpg

Center bored with a 1" spade bit. Should give a hammer fit on the output shaft.

IMG_20160101_190455.jpg
 
Last edited:
OP
L

LinuxMercedes

Active member
Joined
Jul 18, 2014
Messages
27
Location
Missouri
Since I figured pine wouldn't take kindly to me trying to broach a keyway in it, I drilled and countersunk two holes for some blunted wood screws that will sit in the keyway on the output shaft. Hopefully that'll hold it pretty well in combination with the friction fit.

IMG_20160101_192622.jpg

IMG_20160101_192638.jpg

Fit it onto the output shaft, then turned the motor on and sanded it in place to put a slight crown on the pulley and clean up the rough faces. Took me a few test runs, but I eventually got the belt to track right both clockwise and counterclockwise.

IMG_20160101_200008.jpg

The new pulley gives me a 2:1 reduction, so my new speeds are 108-162-216-270 RPM. Not exactly where I want them to be, but better than before for sure. I am going to have to figure out some way to change the gearbox ratios because they are way too close right now. The bigger pulley also eliminates a weird idler pulley that a previous owner grafted on at some point.
 
OP
L

LinuxMercedes

Active member
Joined
Jul 18, 2014
Messages
27
Location
Missouri
When I bought my truck, it had a step bumper with a trailer hitch ball on it.
A while back, I managed to jacknife a trailer into the bumper while trying to back out of my driveway and bent the bumper up pretty badly.
I pulled the bumper off, put on a trailer hitch, ziptied the license plate to the truck, and went about towing things around with impunity.

However, lo and behold I received a notification that my truck's registration was due for renewal and that I needed to pass a safety inspection.
Turns out for whatever reason you need a bumper to pass safety, something about "it's supposed to be there" and "car accidents"???

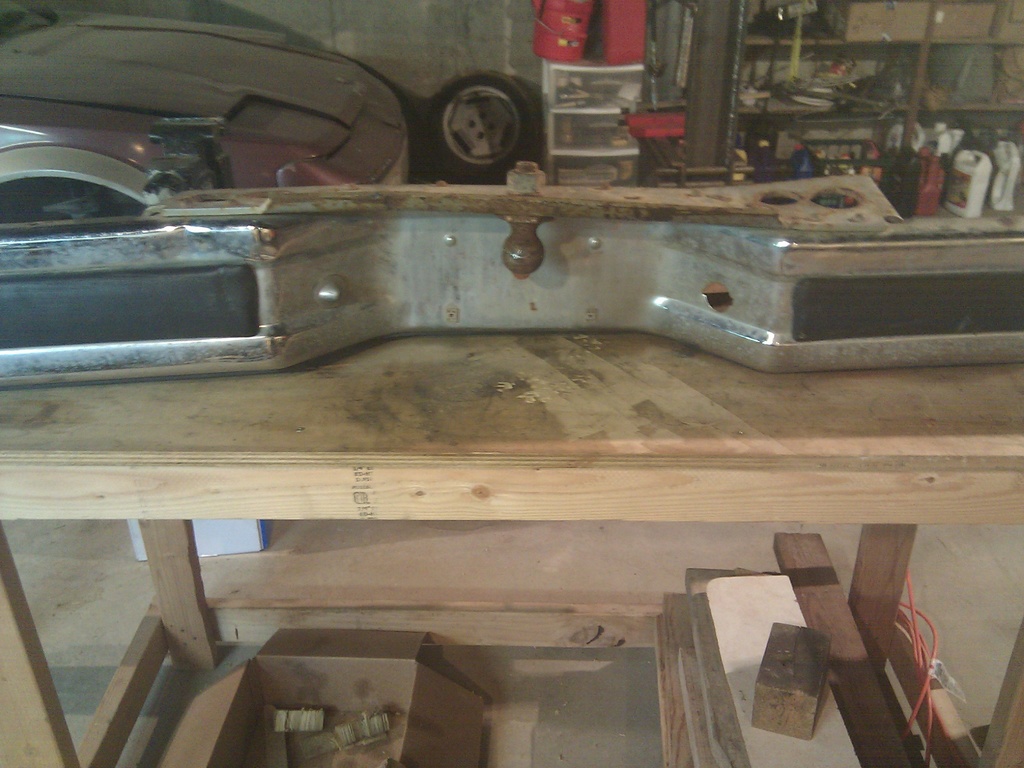
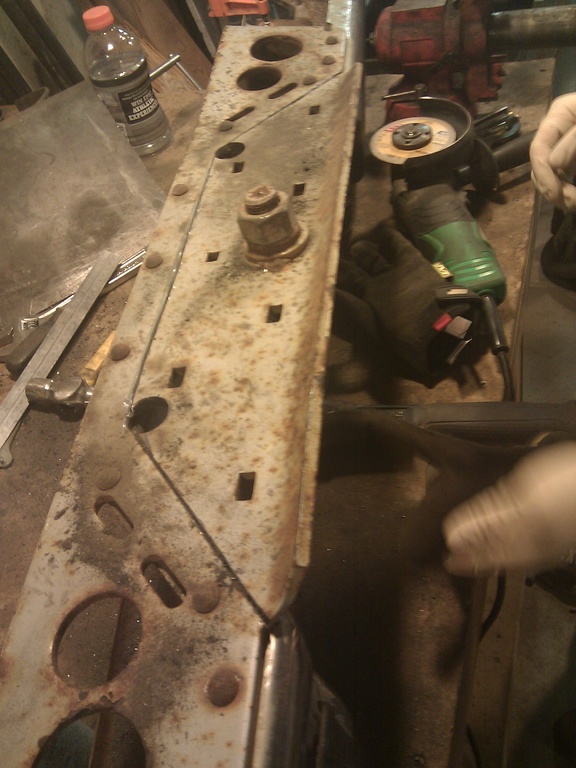
The bumper is made with a pretty hefty chrome skin and a 3/8" thick piece of plate steel bent into a U that forms the hitch part of the bumper.
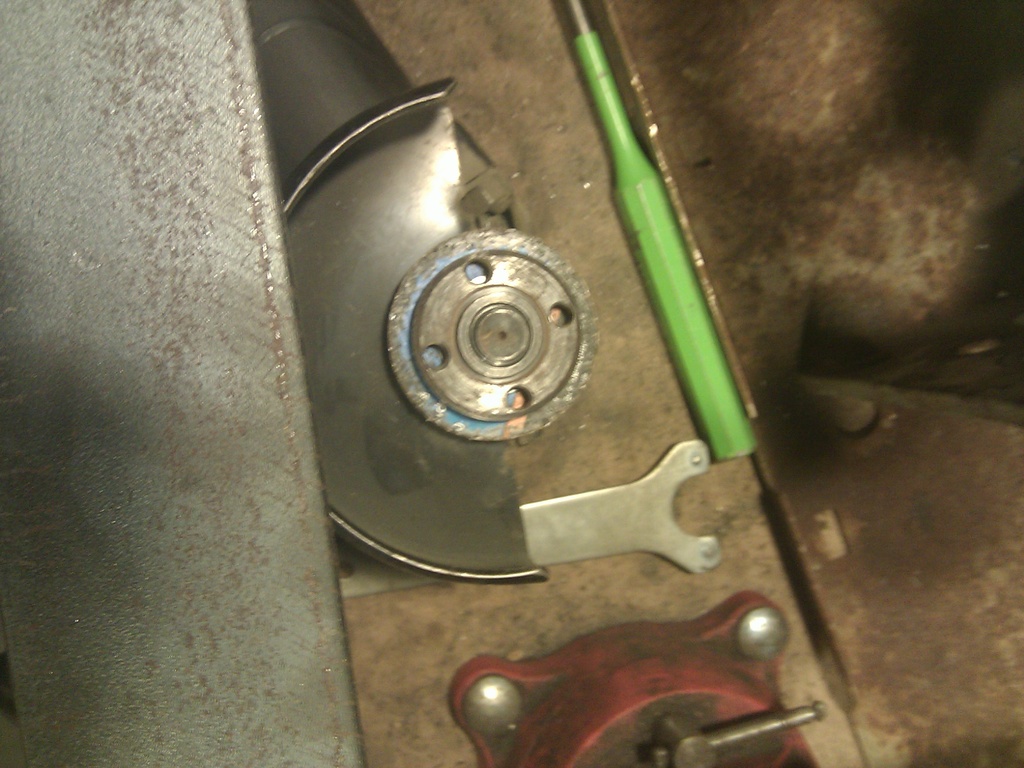
You can see how bent-up it is in this upside-down picture:

IMG_20160606_133859.jpg


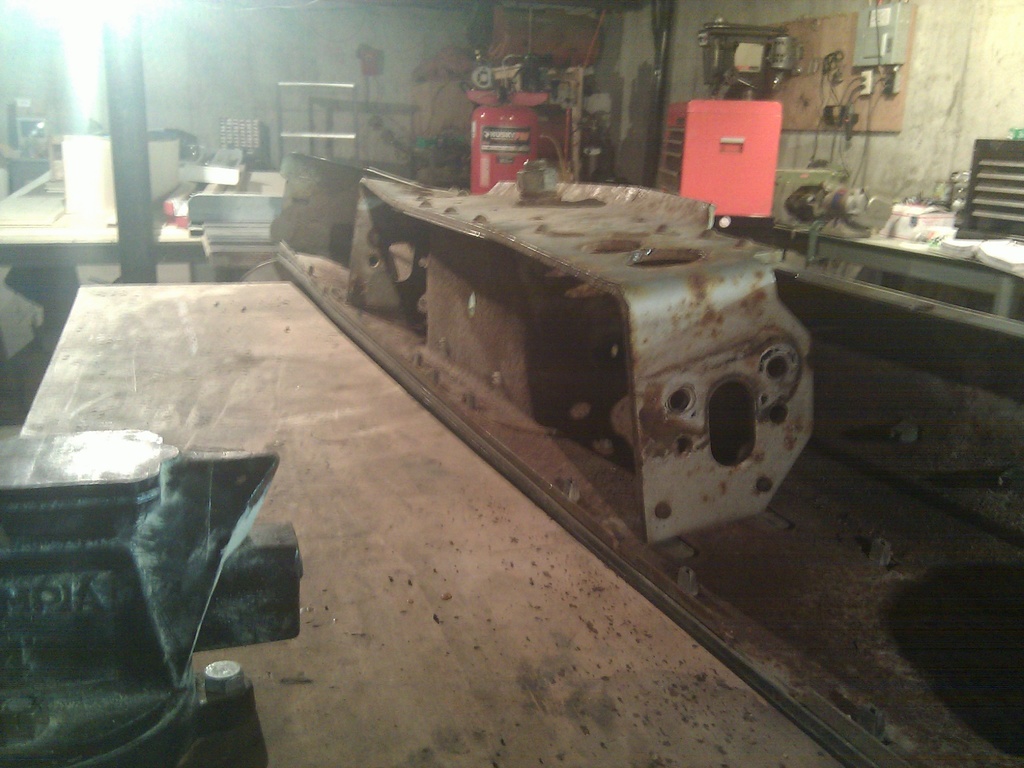
Looking at it from the back shows the damage a bit better:

IMG_20160606_133919.jpg


It was pushed in and down, sort of like someone managed to shove something heavy into it.
Maybe a trailer? Who knows.

Anyhow, I don't need the hitch part of the bumper anymore, so the plan is to get rid of that, straighten the bumper out, and reinforce it a little.
I tried bending it straight with the hitch part in, but even with a 6' lever on one end I was unable to twist the bumper far enough back to get it to actually hold the shape it's supposed to.

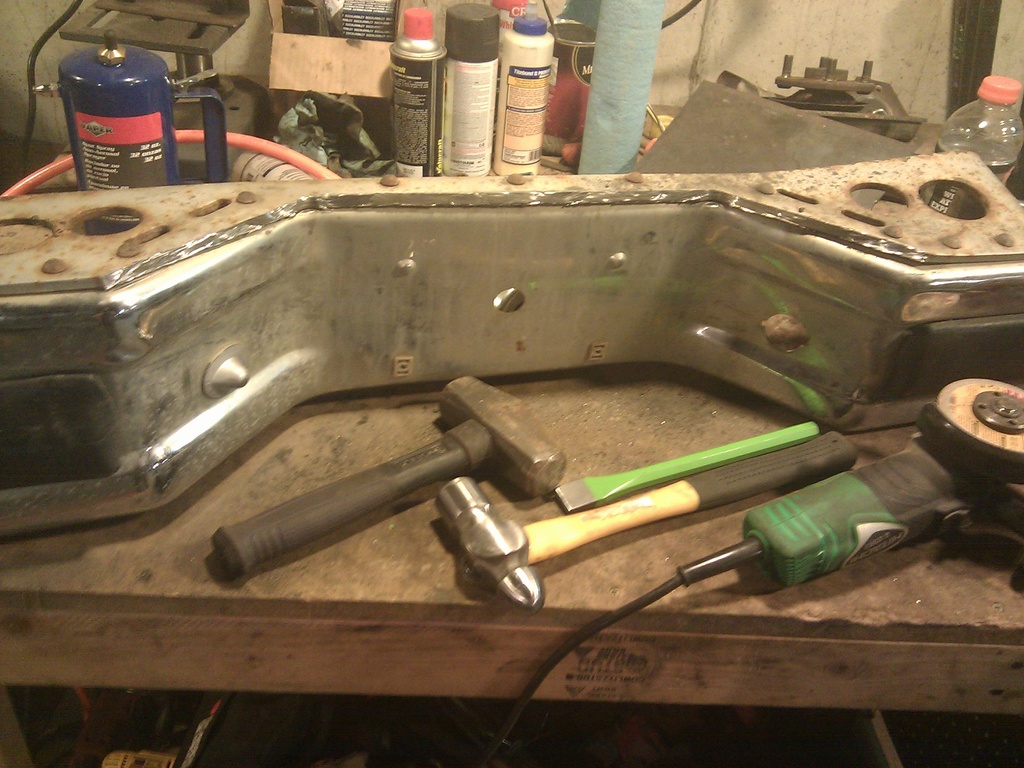
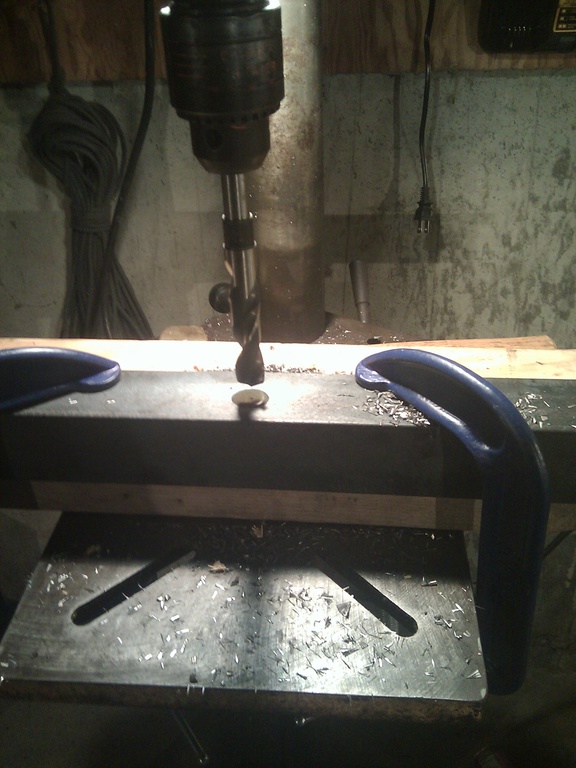
So, I painstakingly drilled out the whole step area:

IMG_20160606_141139.jpg


...just kidding; that would ****.
I drilled a couple holes to cut between so I'd get nice chamfered corners in the bumper instead of sharp angles.
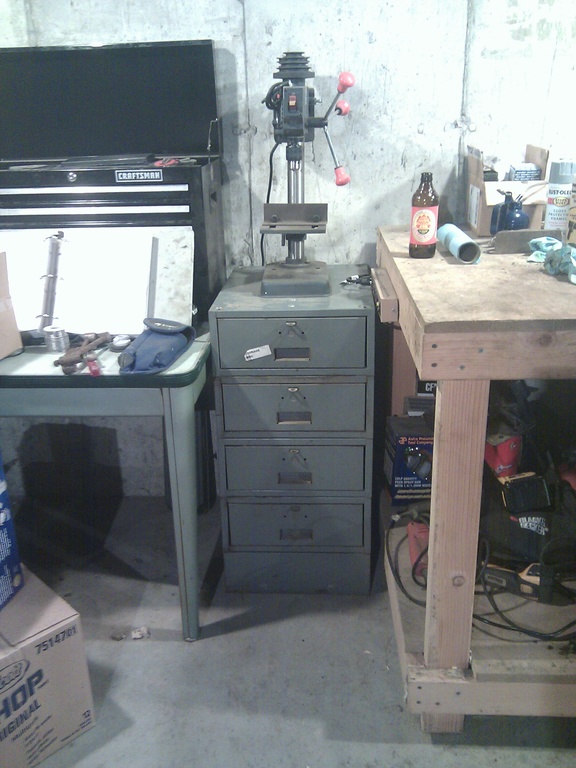
Note the handy dual-purpose drill press part support and belt sander!

(This drill press will be the topic of a future post!)

When cutting holes in steel, go slow, use a lot of lube, and wear ear protection because the bit howls like crazy.

IMG_20160606_141438.jpg


Cutting in between the holes:

IMG_20160606_150551.jpg


Since I didn't want to poke through and cut the bumper underneath, I carefully worked my way through the steel.
You can tell you're almost through a cut when the bottom of the cut starts discoloring from the heat; thin metal doesn't sink heat as well as thick metal does.

And, out:
IMG_20160606_151404.jpg


Now, let's see if we can straighten that kink out.
(This might have worked with the hitch still in; I must confess I came up with this idea for fitting the bumper in the press after I cut the plate out.)

First,a little bracing:

IMG_20160606_154808.jpg


SQUISH

IMG_20160606_160626.jpg


Despite the awful lighting and framing, you can see that it's definitely less twisted than before.
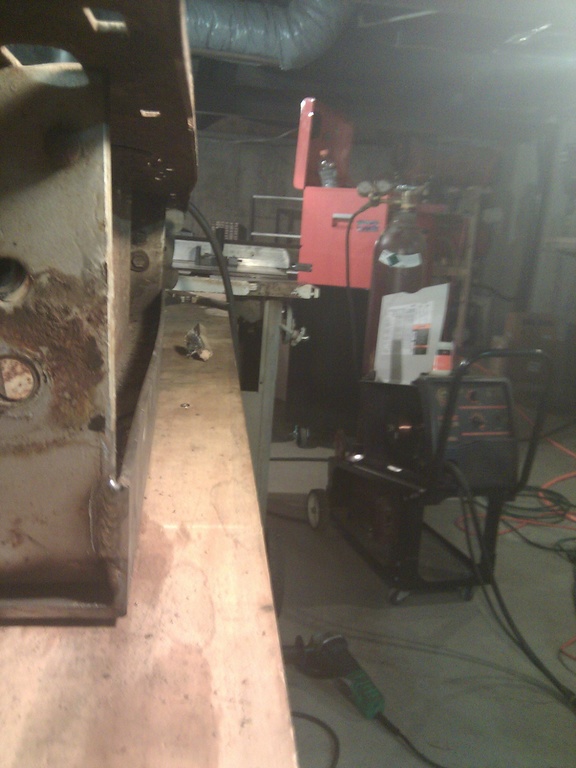
The post descending from the heavens in this picture is the ram on a 20 ton hydraulic press I built.
Also, someone told me ages ago to save my brake rotors if I got a shop press.
I had no clue what they meant until I started using one and discovered how nifty various scraps of steel are.

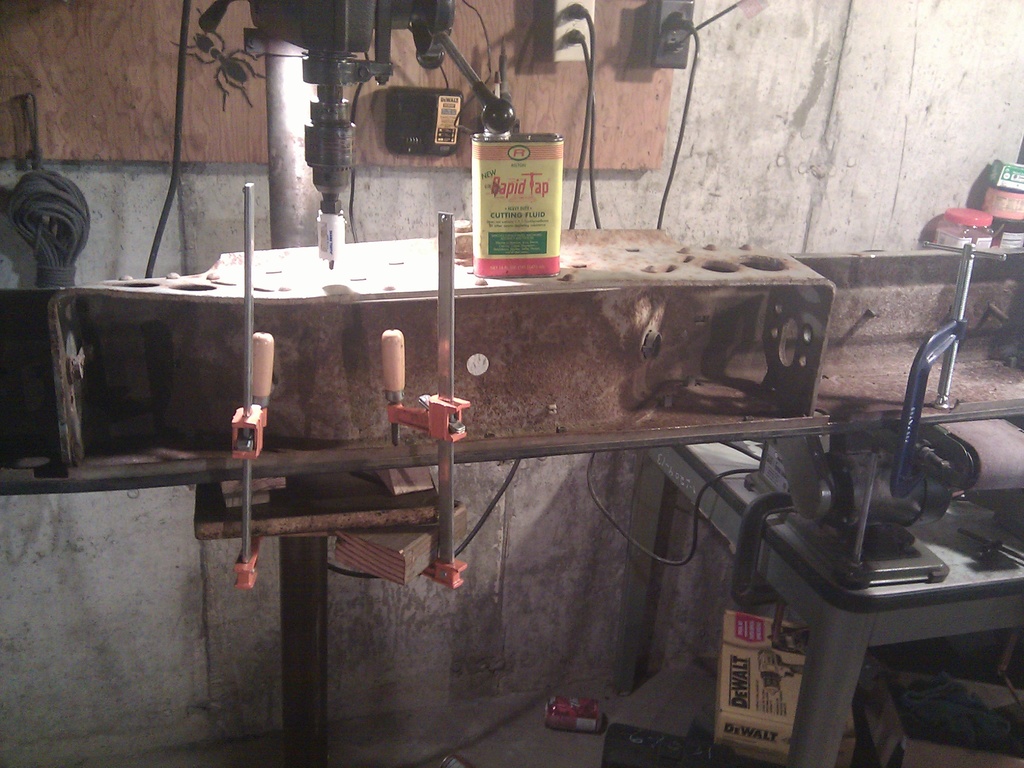
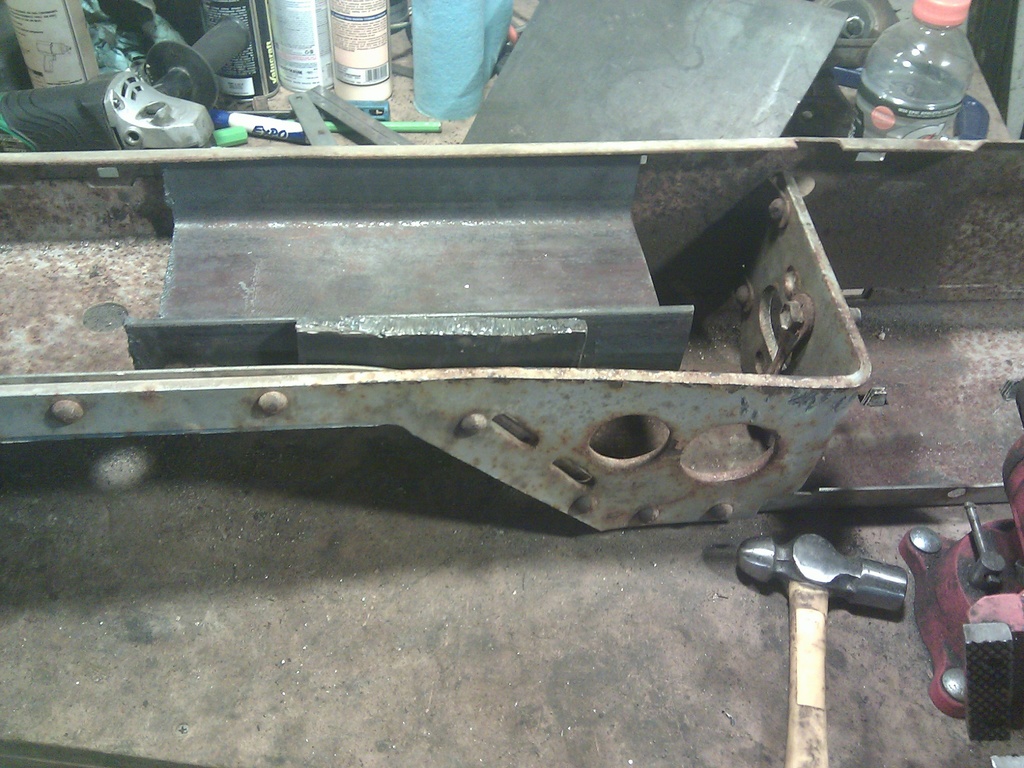
Now, time for the reinforcement: a piece of 2"x2" angle iron, 1/4" thick.

Harbor Freight cutoff discs: good 'til the last drop!

IMG_20160606_163717.jpg


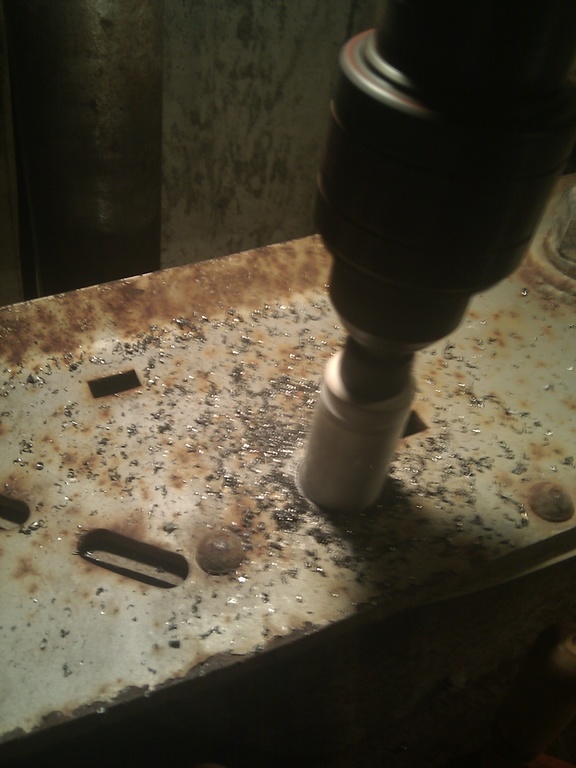
Drilling to clear the rivets with a proper bigass dril bit.
I think this one's 21/32nds?

IMG_20160606_170919.jpg


A bit of grinding and it fits:

IMG_20160606_174858.jpg


Another trick to getting bent things straight is to clamp them into shape, then weld bracing onto them.
This extremely high-tech clamp system features the hydraulic press, a floor jack, a jackstand, and a really long lever:

IMG_20160606_184039.jpg


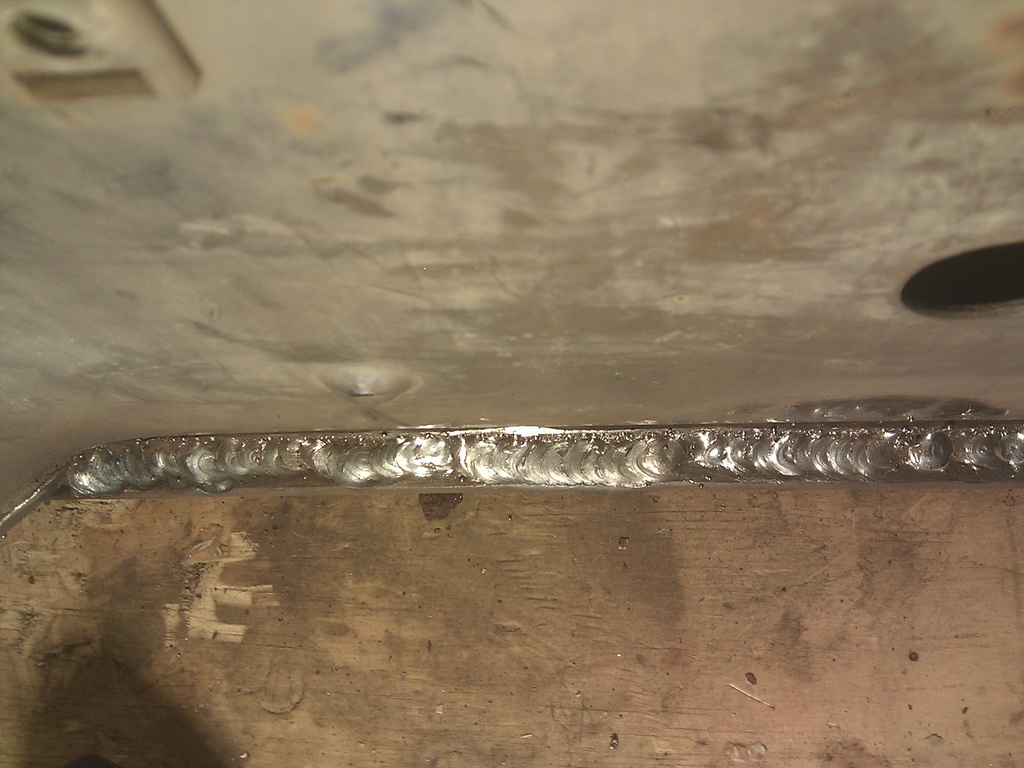
I welded the flat parts in position and did a little vertical up work on the ends.
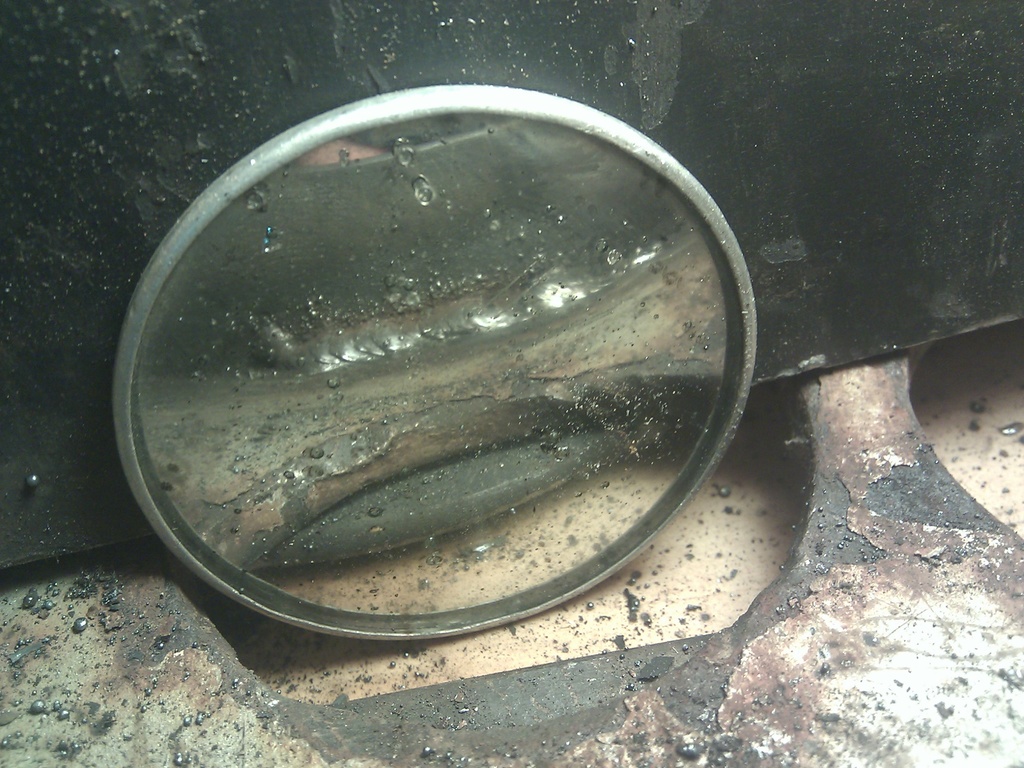
Then things got tricky: an overhead root pass on one part, and this guy:

IMG_20160606_201906.jpg


I just did a couple of tacks, since I am not nearly good enough to weld overhead in a mirror.
Then I flipped it over and did a finish pass across the root pass, which came out pretty well:

IMG_20160606_212427.jpg


I also laid down some better welds on the parts I tacked using a mirror.
Welding in a mirror is pretty easy, just do the opposite of whatever you normally do:

IMG_20160606_212353.jpg


After all this, it's straight enough for a beater truck:

IMG_20160606_212439.jpg


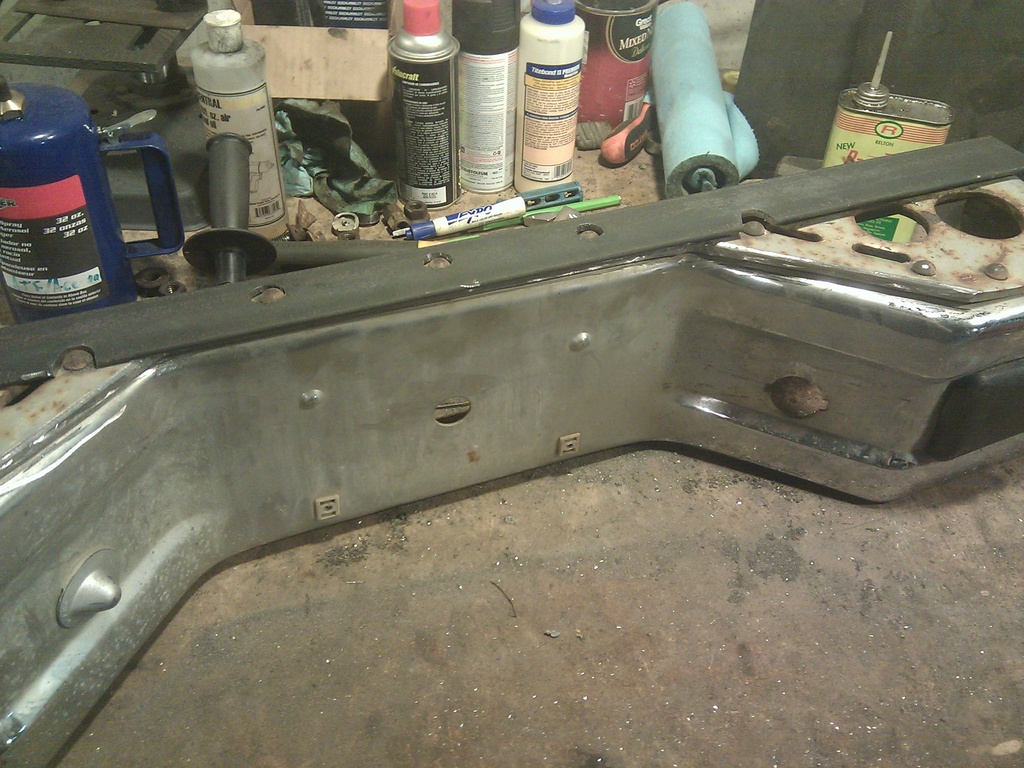
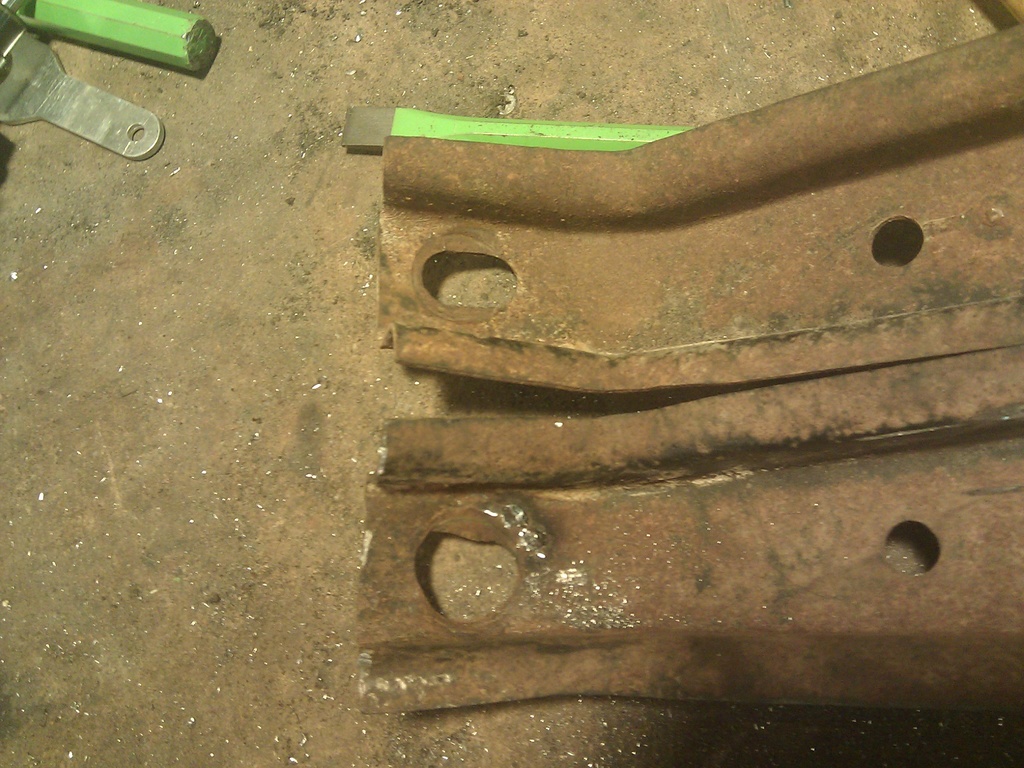
Now, for the mounting brackets.
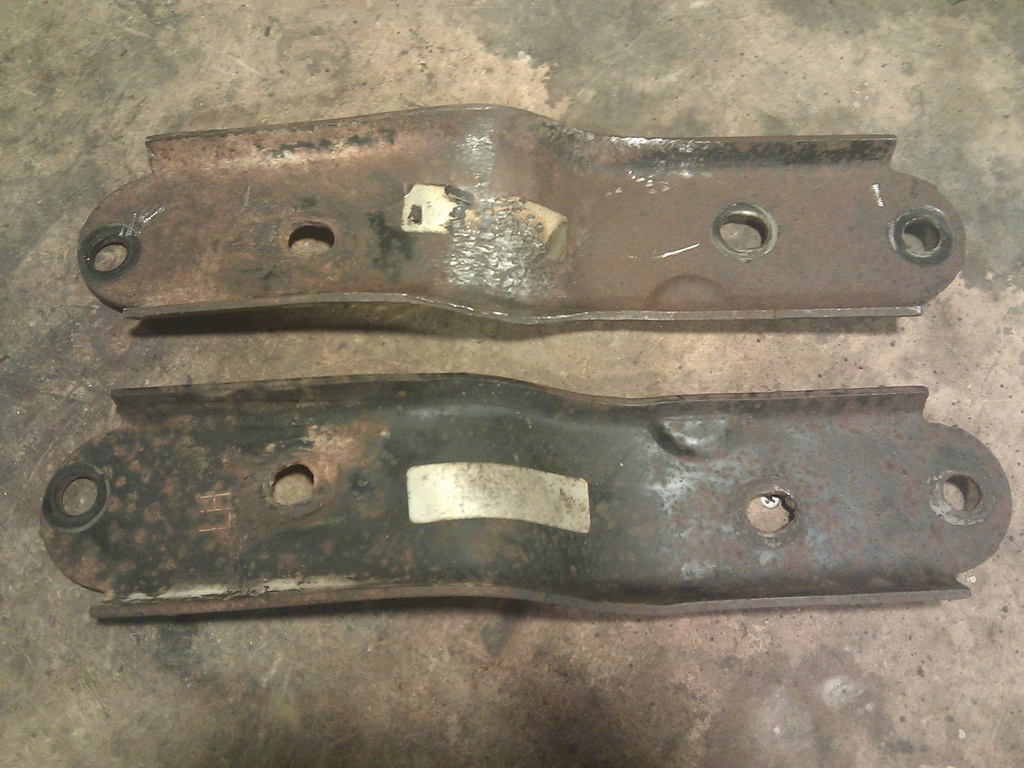
It has two that go pretty much straight back from the U I cut up to the frame, and two that sit diagonally from the ends of the bumper to the frame.
I regret not taking before pictures of the straight bracket; it was folded in and down.
I managed to straighten it out through a few passes through the press.
(Side note: C clamps are not meant to provide 20 tons of clamping force. Expect a future project where I attempt to revive the one I broke.)
Here's the after, damaged bracket on top:

IMG_20160606_133223.jpg


Here's a trick from the sheet metal/body work field: if you've got a big fold or some other situation where the metal has been stretched as it bent, you've got to shrink it back to fix the crease.
In this case, there was a pretty significant one on the bottom lip.
I held it against my 'anvil' like so:

IMG_20160606_133341.jpg


and hammered on the un-bent part to effectively force the stretched crease back into line.

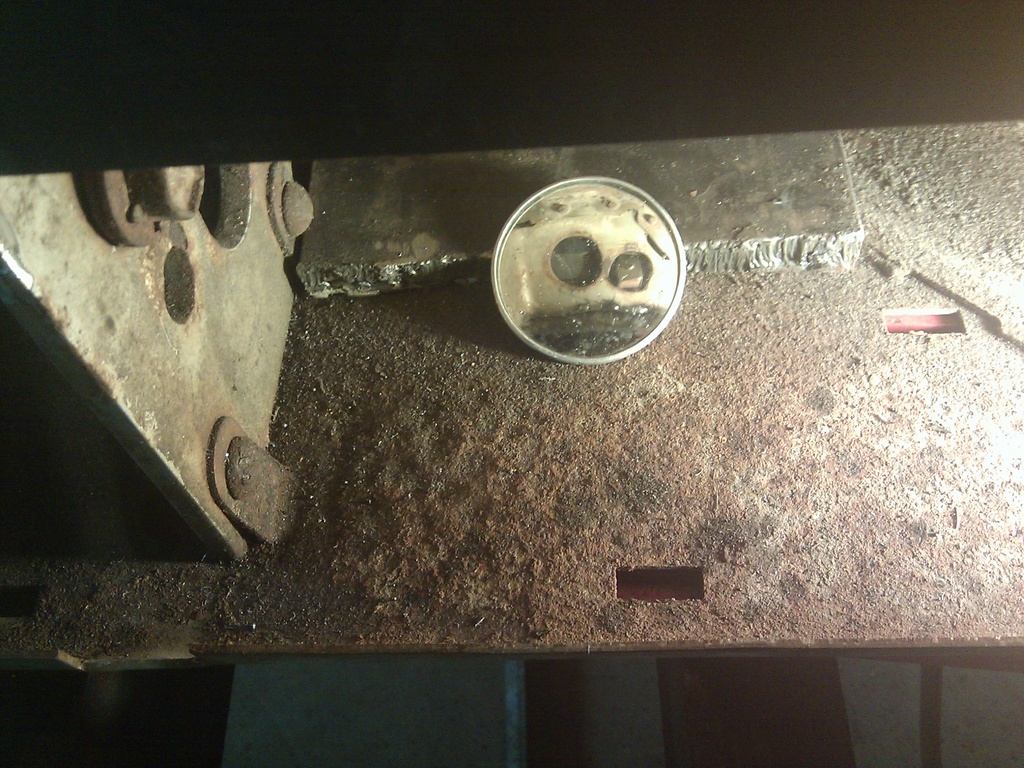
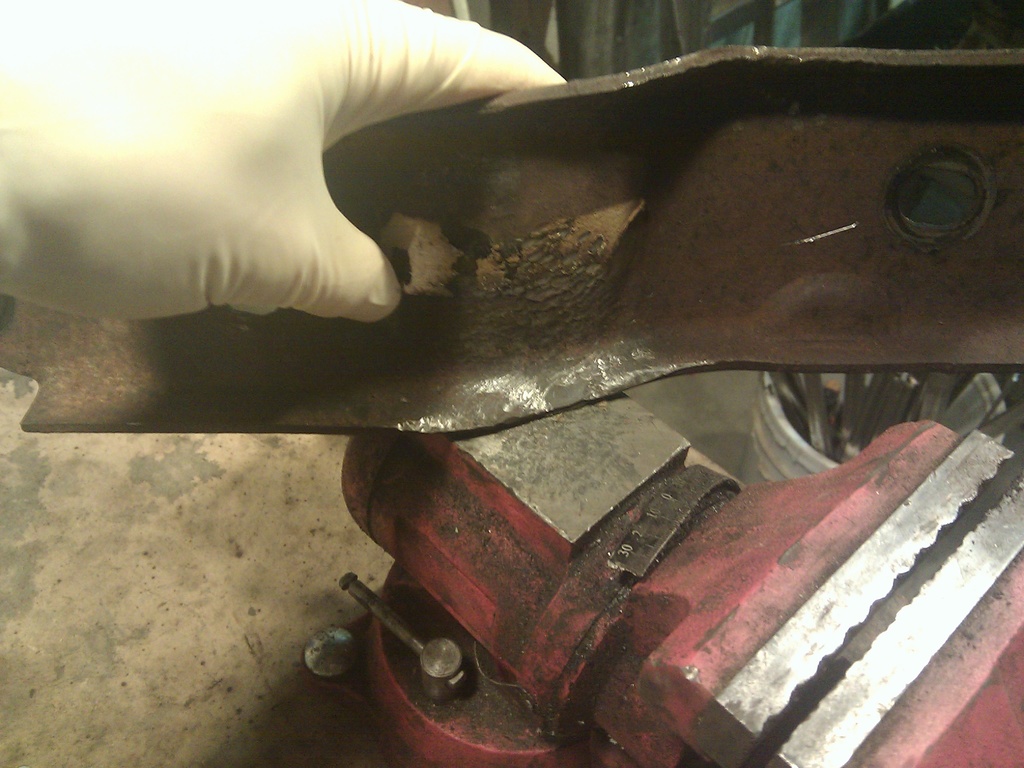
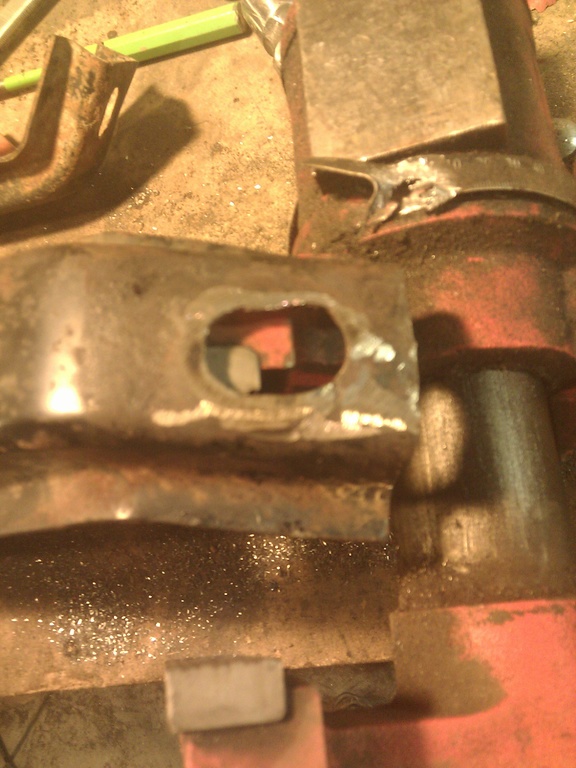
The diagonal bracket was mostly unscathed except for the frame bolt hole (good one on top):

IMG_20160606_213351.jpg


The bit of weld goober there is from me welding the nut to it since it was folded over in a way where I couldn't get a socket over the nut to undo it.

A bit of hammering and grinding later and it's at least relatively flat:

IMG_20160606_215413.jpg


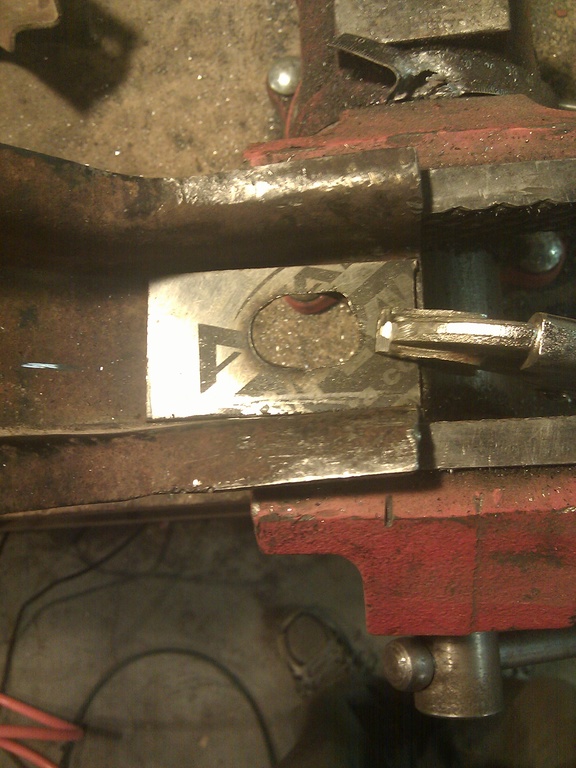
I made a patch/reinforcement from an old saw blade:

IMG_20160606_221201.jpg


Note: don't do this.
Saw blades are really damn hard to drill and weld.

I fit everything up and despite using my best calibrated eyeball, nothing seemed to quite line up, and the straight brackets were about 1/2" too close together to fit over the fender rails.
At this point I was pretty worn out, so I went to bed, got up the next morning, went to mount the bumper, and discovered that my plates don't expire for another year.
C'est la vie.

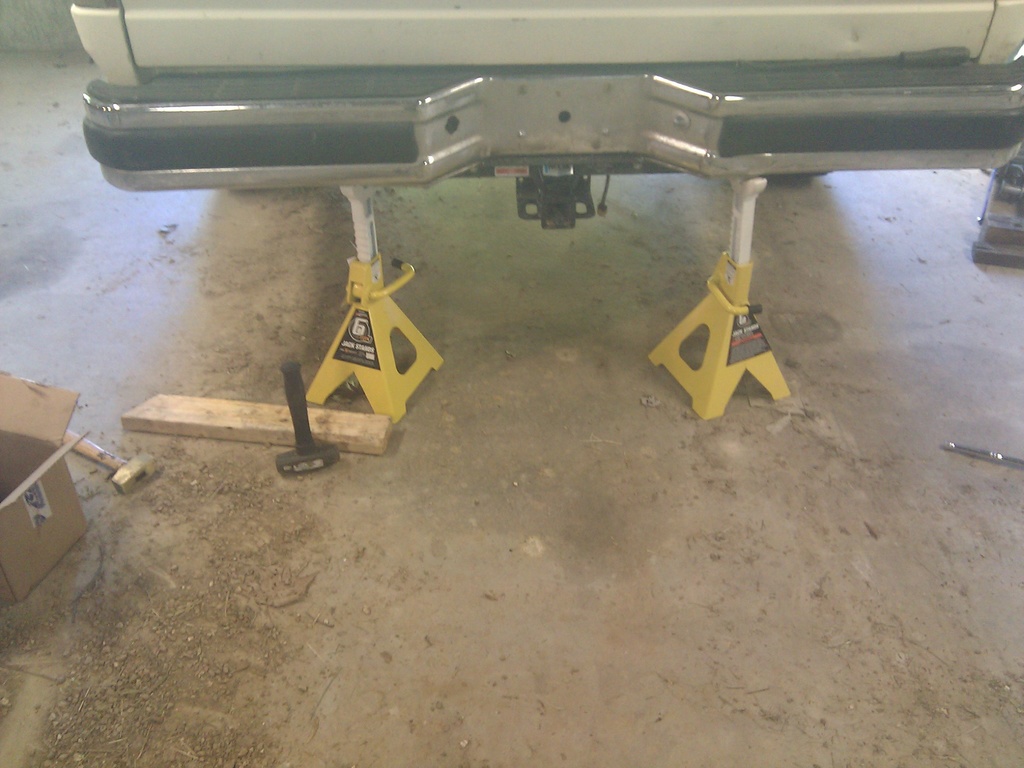
I tweaked the repaired straight bracket a bit more in the press and managed to get everything installed.
Once fit onto the truck, all the brackets magically lined up.
Note the use of precision adjustment tools.

IMG_20160607_084912.jpg


And that's that.

(I also painted it but the only thing more boring than watching paint dry is looking at pictures of paint drying on the internet.)

Overall, this was not worth the effort I put into it, even though I did save the $50 or whatever for a used bumper. I did get to learn a few new tricks, though, so I'm happy anyway.
 
OP
L

LinuxMercedes

Active member
Joined
Jul 18, 2014
Messages
27
Location
Missouri
Not much of an update, but I picked up these drawers for $20. They needed a little tweaking with a hammer and dolly to sit square and a few tack welds where the spot welds had broken.

metal-drawers.jpg


The drawers were also full of odds and ends including a couple of square wrenches that fit my lathe toolpost and a 12 gauge shotgun shell!
 
To avoid these ads, REGISTER NOW!
Top Bottom