To avoid these ads, REGISTER NOW!

Need some advice regarding framing and structural concerns

00RT

Member
Joined
Apr 18, 2020
Messages
17
Location
CT
Hi everyone,

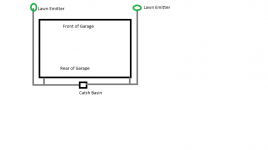
I have a 24x24 detached garage at my house that was in pretty poor shape interior-wise when I bought the place 2 years ago. It didn’t really show any signs of major water intrusion, but it’s filthy, has a strong mildew smell, lots of spiders, mice, etc. so I’ve only been using it to store some building materials and my lawn equipment until I can get it to where it needs to be.

Well, now is the time to start working on it. The interior is sheathed with plywood and there is fiberglass insulation in the walls. The ceiling appears to have been sheathed and insulated at one point as well, and I believe it was removed due to water damage. There is horribly dangerous and not remotely code-compliant electrical, old shelving and benches, random foam boards falling out of the attic, and all sorts of other wonderful things. So, my plan is to gut it down to the framing, fix any leaks/holes, clean up any mold or water damage I find, and then start fresh.

But, this brings me to where I need some advice. After moving some stuff out of the way and taking a closer look prior to starting the demo, I’m seeing a lot of things that I don’t like. It appears that I have 2x4 walls and 2x6 rafters and ceiling joists, all 16” on center. Oddly, it appears that most of the rafters on one side are 2x8. I can’t access the whole attic area yet, but the ones I can see are. More of the ones on the other side are visible, and they’re all 2x6.

Anyway, we’ll move past that for a moment. The area where I have a major concern is that I have this giant beam running the width of the garage between the gable ends. I am not sure what it is supported by on the ends because that’s still enclosed in the walls. But this beam is made of 4 2x12s sandwiched together with plywood in between. It’s massive. Given that there’s no living space up above, I’m not really sure why it’s so huge. But, here’s where things get really interesting. My expectation would be that the ceiling joists would tie into this beam with joist hangers. They don’t, though. The 12’ long 2x6s that they used for the joists just **** up against each other, and they’re sitting on top of the beam! I can’t tell if they’re toe-nailed into it or not because I didn’t have a ladder handy. It’s my understanding that the primary purpose of the joists in this application is to keep the walls from spreading apart and being the piece that makes the “A” with the rafters and gives them lateral strength. Accordingly, it seems very important that the joists are physically tied together where they meet.

My idea to fix this was to sister another 2x6 across this **** joint on one side and then nail it in to both. Does this seem like it would be sufficient? If so, can I get away with a 2’ piece to get 4 out of an 8 footer, or should I go longer? Once those are tied together, should I worry about tying them to beam to avoid any twisting using something like a hurricane tie?

My next question is regarding the beam itself. It seems to have some small gaps in between the layers in spots, and I believe that’s because one layer is just nailed to the one next to it. I thought it would be a good idea to put a large bolt through it under every other joist. Good idea or overkill?

I really appreciate it if you made it through my long post. Part of me really wants to rip this mess down and start from scratch. But, it has 2 brand new garage doors, the gutters are good, its sided to match my house, etc. and I feel like just get to an empty framed structure from scratch is going to be a lot more time and money than getting this one fixed up, and it just isn’t in the budget right now. That’s all assuming that it can be saved, but given that it’s been standing for 30+ years like this I have to think it’s not quite as bad as it looks.
 
To avoid these ads, REGISTER NOW!

BillK

Well-known member
Joined
Aug 24, 2006
Messages
9,310
Location
Beautiful Southern Maryland
When was this built ? I am betting in the 50's or earlier. I dont think joist hangers and the type of construction you are expecting came in to use until the late 60's or later. Sounds like old school construction and is probably sturdier than anything built now days. Some pictures would help understand it better but I would say if it has been standing for 60 years or more it probably isnt going anywhere.
 

Kaizen

Well-known member
Joined
Jan 9, 2015
Messages
6,948
Location
New England
Start with that beam. Post some pictures so we can see what you are talking about. Especially the ends of the beam support all the way to the floor. Figure that out then continue to other things.


Sent from my iPhone using The Garage Journal mobile app
 
OP
0

00RT

Member
Joined
Apr 18, 2020
Messages
17
Location
CT
When was this built ? I am betting in the 50's or earlier. I dont think joist hangers and the type of construction you are expecting came in to use until the late 60's or later. Sounds like old school construction and is probably sturdier than anything built now days. Some pictures would help understand it better but I would say if it has been standing for 60 years or more it probably isnt going anywhere.


That’s the part that’s so weird. My house was built in 1985. I forget where I saw it, but for some reason I want to say they added the garage in ‘88. Either way, it’s no older than ‘85. But you’re right, it looks way older from the inside.

Here’s a few photos. I originally posted from my iPad so I didn’t have them handy.
IMG_0614.jpgIMG_0613.jpgIMG_0610.jpg

You’ll also notice in the last photo that whatever is supporting the end of the beam goes between the “windows”. I’m less concerned about that though as I could very easily add extra support in front of it if I need to.


Sent from my iPhone using The Garage Journal mobile app
 

BillK

Well-known member
Joined
Aug 24, 2006
Messages
9,310
Location
Beautiful Southern Maryland
Almost looks like a flat roof from the picture of the joists ? If so it is fine. I am sure there is a support of some type in between the windows to hold the beam up. Like I said in my first post, if it has not fallen down by now it will be there for a long time. Even 1988 is 32 years.
 

u2slow

Well-known member
Joined
Nov 20, 2011
Messages
3,584
Location
BC
If I was to guess, somebody added an attic 'floor' for storage after the fact.

Maybe look for evidence of rafter and/or collar ties that were removed.
 

BillK

Well-known member
Joined
Aug 24, 2006
Messages
9,310
Location
Beautiful Southern Maryland
I think without some pictures showing the entire structure and also pictures of the attic area, we are all really just guessing. I will still stick with my feeling that if it hasnt fallen down by now it probably wont. Stop worrying about the structure and start cleaning it up and redoing the electric if it really needs it.
 
OP
0

00RT

Member
Joined
Apr 18, 2020
Messages
17
Location
CT
It’s not a flat roof. It looks to be a 5/12 pitch but I haven’t measured. It’s a typical stick framed rafter setup. Ridge beam at the top, rafters coming down to the double 2x4 top plate, and ceiling joists nailed to the rafters on top of the top plate.

The part that isn’t traditional is that the joists aren’t continuously connected the whole length from wall to wall. Typically they would either overlap and be nailed or **** up to opposing sides of a beam or something similar.

Even without knowing what’s supporting it at the ends, I have to think that the beam (once improved with some bolts) is plenty of support for the span of the joists since most of the load from the roof should be on the outside walls. The major stresses in the joists should be along their length, and with the ends “floating” they’re effectively doing nothing.

I do know that the previous owner used the attic area for storage and I’m not really planning on doing so, which is probably another argument for it being “good enough”. I just like to make sure I get things as close to “the right way” as I reasonably can.


Sent from my iPhone using The Garage Journal mobile app
 

WNYflyer

Well-known member
Joined
Sep 13, 2009
Messages
2,118
Location
Lockport, NY
Judging from the photo's the plywood floor over top of the **** ends of the two joists could be acting as the tension tie/connection to transfer tension across the butted joint.
 
OP
0

00RT

Member
Joined
Apr 18, 2020
Messages
17
Location
CT
Judging from the photo's the plywood floor over top of the **** ends of the two joists could be acting as the tension tie/connection to transfer tension across the butted joint.


Good point. I’m not sure if it’s actually attached to anything. I’ll find out when I go to remove it.

I’ve been doing more research and it looks like since you only need rafter ties every 48”, I really only need every third joist tied together as the others are only necessary to hold up a ceiling. It also looks like it’s fine for them to meet above the beam as long as each one has 1.5” of bearing. That makes me feel better about what I have not being terrible.

Regardless, being a belt and suspenders kind of guy I think I’m going to add a 2’ piece of 2x6 as a scab on every joist and connect them to the beam with metal ties. It’s like $50 in materials and it’ll make me feel better if I ever decide I want to make use of the attic for storage or hang anything from the ceiling.
 

bczygan

Well-known member
Joined
Nov 4, 2009
Messages
22,002
Location
DETROIT! Arsenal of Scrappers
If it was mine, I would do a complete examination of the entire structure noting everything needing repair and replacement.

In addition, I would do a complete structural analysis, as far as I could, to determine it's ability to support any required loads.

This would require a lot of measuring and checking. Far more information would be needed than could be done for an analysis on this online forum.

I've done those before. Needs doing. Start at the top and work your way down.

I would do this because it would tell me what I have. Sometimes the structure of old buildings is adequate for modern uses, and sometimes it isn't.

That large beam especially needs investigation, but really, the entire building needs looking at. I look first at foundations, then the roof and then the structure.

Bill
 
Last edited:

starquestMM

Well-known member
Joined
Jan 7, 2013
Messages
1,072
Location
JC, Missouri
that beam is crazy. There is an 5th and 6th piece of 2x12 scabbed on right at the end too. It'll be interesting to see what they did when you pull that plywood.

Kind of curious how the electrical boxes alternate black and white outlets.
 

banjopete

Well-known member
Joined
Oct 5, 2014
Messages
300
Location
Edmonton, Alberta, Canada
Belt and suspenders guys might also be the ones who call a structural engineer? A few hundred bucks is a cheap price for peace of mind. Local pros with local building requirements can also save a ton of headaches potentially too. Doesnt mean the work can't be diy.


Sent from my SM-G960W using The Garage Journal mobile app
 

Kaizen

Well-known member
Joined
Jan 9, 2015
Messages
6,948
Location
New England
strip the walls under the end of the beam. we need to see how its supported. for that size garage and pitch i'm guessing they used that as a lifting beam maybe with some steel attached or planned to be attached for engine lifts.
op if there is no weight on the floor you could just remove that if its not supporting anything. its possible they added it as the floor was bowing under weight but that is 2x what would be needed. i'd strip the whole thing as you said before starting any work. pictures are worth a thousand words
 
OP
0

00RT

Member
Joined
Apr 18, 2020
Messages
17
Location
CT
that beam is crazy. There is an 5th and 6th piece of 2x12 scabbed on right at the end too. It'll be interesting to see what they did when you pull that plywood.

Kind of curious how the electrical boxes alternate black and white outlets.


I know! I have no idea what the extra pieces of 2x12 are for, but they’re on the other end as well. I’m pretty confident in the overall strength of that beam. I have to assume that they pulled permits and had an inspection for the garage. It’s too big and too obvious to be something that someone could just build under the radar, so it must’ve been inspected.

The electrical is a whole different story. There is no way this could’ve passed any sort of inspection and given that it’s all on top of the interior sheathing, I’m assuming it was all added after. Aside from the intentionally dangerous (the guy electrified metal bars in front of the window as a booby trap), it’s just bad everywhere you look. The Romex is run diagonally through the joists to take the shortest path to where it needs to go, there’s switches hanging out of boxes with exposed wiring, etc. Then there’s the more subtle things a lot of people may not realize isn’t ok like romex stapled to the walls and not in conduit.

Tomorrow I’m planning to tear all that out and wire up a single outlet so I have power for a radio, shop vac, etc. while I work out there. I’ve never turned on the breaker that feeds it from the main panel since I moved in for obvious reasons, so I’ll find out soon if the underground feed has any surprises for me.

It’s amazing to think that this building was owned by the same people as my house since I’ve done a lot of work in the house and have only found a few minor issues. Although we did briefly discuss the findings of the home inspection and the wife explained the reason why most of the issues were with the garage was because she made her husband hire professionals for any work on the house. lol
 
To avoid these ads, REGISTER NOW!

Joemctag

Well-known member
Joined
Aug 11, 2017
Messages
813
Location
Outside raleigh nc
Presume the outer ends of the joists are well fastened to the rafters and the wall tops and the attic floor deck is fastened to the joists. Would keep the walls from spreading. However, with that beam, a builder would add vertical members to support the ridge (3 at 6 feet apart would be enough) so there wouldn’t be any spreading force anyway. If they’re not there, you could add them easily. Why no joist hgrs? It didn’t matter to them that the beam bottom wasn’t flush with the ceiling? They didn’t want the top 6” of the beam up in their attic storage area? They didn’t like or were too cheap to buy joist hgrs? Who knows.
 

Skiff Builder

Well-known member
Joined
Jun 7, 2016
Messages
1,779
Location
Southern NJ Coast
OP,
Those ceiling joists are butted over the beam because the bldg is 24 x 24. 12 footers were used. Guess they could have used 16' on one side and used the cutoff for collar ties higher up on the rafters.

Question for you, and I hope no one else answers it first.
If you nail a scab over those **** joints, in which direction will you angle (toe) your nails? It makes a difference.

Agree with Bill K above, your basically fine.

SkiffBuilder
 

CraigStu

Well-known member
Joined
May 22, 2014
Messages
4,017
Location
Blacksburg, Va
I think that beam will be fine especially since you don't plan to use the attic for storage. I want to see how the ends are supported though. I am like you, sistering a 2x8 to the joists would make me feel better too. I'd use construction glue and good screws.
 

Michigan Mike

Well-known member
Joined
Sep 12, 2012
Messages
449
Location
Kalamazoo Mi.
I would sister them with a plywood gusset. If you make the gussets 8" by 32" you will get 18 out of a 4x8 sheet of plywood. I would glue the heck out of them and put one on each side of the joists. If that beam is supported well on the ends I would look at some kind of a track and trolley. To me it looks substansial enough to carry some weight.
 

Fatboy148

Well-known member
Joined
Feb 15, 2017
Messages
999
I would sister them with a plywood gusset. If you make the gussets 8" by 32" you will get 18 out of a 4x8 sheet of plywood. I would glue the heck out of them and put one on each side of the joists. .
This is what I would do too vs a pieces of 2x. There are usually scraps of 5/8" plywood left from sheathing the roof and I save them for little jobs like this before we clean up the jobsite at the end. I usually use a good bit of PL adhesive and then hit it with five stick nails on each side of the joint. I like to do both sides of the joists though. IF... it a gusseted truss that I am reinforcing in an attic truss before covering it with drywall, I would stay clear of the metal gusset with the nails.
 
OP
0

00RT

Member
Joined
Apr 18, 2020
Messages
17
Location
CT
For anyone curious, the interior demo is now done and I can get a better look at everything. I now understand why it looked older than it is inside. It’s very clear that it was pieced together from random scraps the guy found.

The bad news is that the sill is rotted out badly in spots, which means some pretty major work I wasn’t planning on.

There is also rot around the windows, but I knew that. He built his own “frames” out of 1x and screwed storm windows to the outside. Fortunately, after ripping all that out, it looks like the framing around the rough opening is solid. So, I’m going to install new actual windows with flashing and everything the right way. I also have a new pedestrian door to put in but Lowe’s scrambles the item number so I need to go swap it out.

Other than that, everything is pretty solid. We had heavy rains last night and I saw no signs of water intrusion from the roof, so that’s a big relief. It’s old and needs replacing soon from the looks of it, but I probably have 5 years left on my house and would like to have them done at the same time.

Here’s some photos.
IMG_0658.jpgIMG_0659.jpgIMG_0660.jpgIMG_0661.jpgIMG_0662.jpgIMG_0663.jpgIMG_0681.jpg7c54968a086ab8aff1b488923923a5f9.jpg3cea87b4f9d3d13a6c454282f76c5f1f.jpg

You may notice there is a plate in the center where a Lally column can screw in. I actually asked the owner about this and he said he added it later on as insurance because he had a chain hoist chained to the beam in one bay that he used to pull engines. When he didn’t have weight on it, he left the column out. It has not been installed in the 2 years I’ve been here, and I’m inclined to believe it’s not necessary under normal circumstances. I measured the beam height from the floor at several points and all measurement were within 1/2”, so I don’t think it’s sagging. Realistically it looks like all it is really supporting is the center ridge support and the ceiling joists.
 

Attachments

  • IMG_0658.jpg
    IMG_0658.jpg
    151.7 KB · Views: 71
  • IMG_0659.jpg
    IMG_0659.jpg
    148 KB · Views: 72
  • IMG_0660.jpg
    IMG_0660.jpg
    146.8 KB · Views: 69
  • IMG_0661.jpg
    IMG_0661.jpg
    149.4 KB · Views: 70
  • IMG_0662.jpg
    IMG_0662.jpg
    143.7 KB · Views: 73
  • IMG_0663.jpg
    IMG_0663.jpg
    145.5 KB · Views: 70
  • IMG_0681.jpg
    IMG_0681.jpg
    95.3 KB · Views: 71
  • 7c54968a086ab8aff1b488923923a5f9.jpg
    7c54968a086ab8aff1b488923923a5f9.jpg
    109.3 KB · Views: 0
  • 3cea87b4f9d3d13a6c454282f76c5f1f.jpg
    3cea87b4f9d3d13a6c454282f76c5f1f.jpg
    101.6 KB · Views: 0

88LXi68

New member
Joined
Apr 30, 2020
Messages
4
Location
Connecticut
I followed your post from the "intro" thread and I am by no means a person with skilled knowledge of carpentry or building of structures, but that garage is similar to how the garage was built at my first house; where the slab was poured and they didn't put any type of kneewall for the sill to sit on. I had to replace a portion of the sill plate and remove all the soil around the slab and replaced it with rockbeds. I am not sure how low the ground is around the foundation of the garage, but with the rains we have been having it might be a good idea to do the rockbeds around it to reduce the chances for water intrusion once you get that sill plate changed out.
 

firebirdparts

Well-known member
Joined
Jun 8, 2016
Messages
10,586
Location
Kingsport, TN
My idea to fix this was to sister another 2x6 across this **** joint on one side and then nail it in to both. Does this seem like it would be sufficient?

Absolutely. It's a little difficult to join wood in tension, so I would probably go 3 or 4 feet. wood's cheap. You can glue it too.
 

brownbagg

Well-known member
Joined
Mar 20, 2006
Messages
5,208
that beam is the old way they did before hanger, its very common, its for the rafter to sit on top of, since long word was almost impossible to get and this was before laminated beams, steel being to costly. it just the way it was done, my dad house garage is the same way and it was built in 76
 
OP
0

00RT

Member
Joined
Apr 18, 2020
Messages
17
Location
CT
I followed your post from the "intro" thread and I am by no means a person with skilled knowledge of carpentry or building of structures, but that garage is similar to how the garage was built at my first house; where the slab was poured and they didn't put any type of kneewall for the sill to sit on. I had to replace a portion of the sill plate and remove all the soil around the slab and replaced it with rockbeds. I am not sure how low the ground is around the foundation of the garage, but with the rains we have been having it might be a good idea to do the rockbeds around it to reduce the chances for water intrusion once you get that sill plate changed out.


That’s actually exactly what I’m looking at doing. The big issue is that the garage is kind of sitting in the back corner of my property and there are a lot of trees, so leaves collect around the bottom on 2 sides. The property also slopes up a bit behind it. I had my tree guy out today to give me a quote on removing all the trees around it so I can clear an area and keep moisture from sitting next to the sill.

The other issue is that the guy had hacked on some sort of little lean-to on the back of the building as a compressor room. The idea was good, but the execution was not. It means that only half of the rear has a gutter (which I knew about) and I just discovered that a lot of branches came down during the winter onto the roof and took out what gutter was there (another reason to ditch the trees).

So, that little extension is getting ripped off this week while the dumpster is still here. I’ll then put a new gutter across the whole back and drain it away from the building. I’m already way over budget on the stuff I was going to do immediately since I found so much extra work, so the trees will have to wait for now. If I can clear all the leaves away and get the gutter situation rectified I’ll be happy for now.

Oh, I also need to do my yearly moss removal from the roof and siding, which is yet another strike against the trees.

b4912a931a672860bce2a09f1975d190.jpg
61400eadf3e9ca501d797275d3a6ff2d.jpg
 

Attachments

  • b4912a931a672860bce2a09f1975d190.jpg
    b4912a931a672860bce2a09f1975d190.jpg
    224.4 KB · Views: 0
  • 61400eadf3e9ca501d797275d3a6ff2d.jpg
    61400eadf3e9ca501d797275d3a6ff2d.jpg
    399.4 KB · Views: 0

CraigStu

Well-known member
Joined
May 22, 2014
Messages
4,017
Location
Blacksburg, Va
Maybe I am not seeing the pictures correctly but, to me, the end support for that big beam looks better on the side w/ the two windows. The other end looks like it is supported by 2x2s.
 

3onthetree

Well-known member
Joined
Nov 14, 2018
Messages
191
Your roof has a ridge board (and too shallow at that), not beam, so the rafter ties are critical. Your 2x6 ceiling joists/rafter ties can be butted together over the beam (and they are required on every rafter, not every third). They do need a way to fasten together, and a sistered section of 2x is the better method. Code requires fastening 3-5 16d nails, depending on your snow load, at both where the ceiling joists **** together and where they connect to the rafter ends. Because of the big beam the 2x6 now span only 12', so that allows you light storage up there.

You need 1x4 collar ties a minimum 48"o.c (or straps on top the sheathing when you redo the roof). Not much more to put them on every rafter.

The vertical king posts "holding" up the ridge board at each end and the middle are not needed and only creating a point load.

The big beam looks to be cutting through the top plate at each end, so you should re-connect the top plates over the beam.

Dig down around the garage and slope the grade away or you'll be constantly fighting water and sill rot.
 

88LXi68

New member
Joined
Apr 30, 2020
Messages
4
Location
Connecticut
That’s actually exactly what I’m looking at doing. The big issue is that the garage is kind of sitting in the back corner of my property and there are a lot of trees, so leaves collect around the bottom on 2 sides. The property also slopes up a bit behind it. I had my tree guy out today to give me a quote on removing all the trees around it so I can clear an area and keep moisture from sitting next to the sill.

The other issue is that the guy had hacked on some sort of little lean-to on the back of the building as a compressor room. The idea was good, but the execution was not. It means that only half of the rear has a gutter (which I knew about) and I just discovered that a lot of branches came down during the winter onto the roof and took out what gutter was there (another reason to ditch the trees).

So, that little extension is getting ripped off this week while the dumpster is still here. I’ll then put a new gutter across the whole back and drain it away from the building. I’m already way over budget on the stuff I was going to do immediately since I found so much extra work, so the trees will have to wait for now. If I can clear all the leaves away and get the gutter situation rectified I’ll be happy for now.

Oh, I also need to do my yearly moss removal from the roof and siding, which is yet another strike against the trees.

Ughhh those tree roots are going to be a pain to deal with. Once you remove that terrible lean-to, I think I would try to have 2 downspouts (one for each end of that wall), bury the downspout using some triplewall drainage pipe without the holes and run it along the sides to some lawn emitters near the entrance of the garage. You are going to be pretty deep around the foundation since you need to get the ground contact away from the structure, but once you are down enough, backfill slightly and cover it with rock. You could also try installing one of those NDS basins where the lean-to was and that will collect any pooling water behind there and allow you to tie the downspouts together.

I did a simple thing in paint to clarify any confusion.
 

Attachments

  • garage.png
    garage.png
    8.6 KB · Views: 10

nadogail

Well-known member
Joined
Jan 23, 2009
Messages
31,928
Location
Coronado, CA
Good Luck with this project. With all these cooks offering their opinions, this may turn out to be a very unique broth.

The long history of the building indicates to me that it was built well enough for it's intended purpose.

Be careful with assumptions, because in Standard Lecture #1 We learn that "the word assume is made of three words ***, You, and Me" be careful with assumptions.
 
To avoid these ads, REGISTER NOW!
Top Bottom