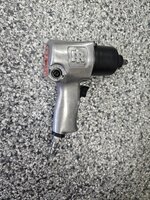
Not entirely sure how I managed this. This is an IR 231A. I tore it apart to clean, lube and replace all the gaskets. I've got the gasket kit, so I started reassembly. I warmed the body up with propane torch similar to the way I did when removing the piece . It didn't drop all the way in, so I warmed it a bit more and it managed to wedge itself in crooked instead of just dropping the rest of the way in.
I removed everything from the body again and tried to heat it up to straighten out this piece, but I just cant get it to budge. I got the body very hot, but I think the piece is warming up at a similar rate. I'd like to get something under the low side and push up from there after heating, but I'm not sure what I can get under there that would help without destroying something.
Any ideas would be greatly appreciated.