I cannot imagine a more cumbersome arrangement than an X-Y table, permanently attached to the drill press table, when trying to align the bit to a center-punched hole.
Are there any other problems that you have experienced using an X-Y table besides aligning the bit to a center punched hole?
It could be that I'm doing things all wrong, and this discussion is a good way to discover what the best practices are in using a drill press to drill through metal.
I have found that the X-Y table is actually helpful, rather than a hinderance, to aligning the chucked drill bit in the quill to center punched holes in the material to be drilled. Perhaps one of the most critical aspects of assistance is that the X-Y table enables the work piece to be moved AFTER it has already been clamped and secured.
Sometimes, the act of clamping a work piece may also shift the work piece, as clamping it, with either a vise or with vise grips, removes the air slack between material and jaw.
Whether it is an air gap, or a film of viscous cutting fluid/oil, or a rogue chip that got trapped between the material and the vise jaws, there can sometimes be a shift between where the part was positioned and held by hand, versus where the part ends up once held by a tightened down vise.
An X-Y table is useful for correcting any inadvertent shifts, WITHOUT having to loosen the grip of the vise in order to make the correction.
I would change careers rather than have to deal with such nonsense.
Does your current career involve lots of drilling with drill presses?
Your trio of drill presses with tool boxes is neat. My drill press looks similar to the one you have on the right.
Very curious to know who you learned this technique from. Surely not from a professional.
I have no idea who designed the X-Y table, but whoever designed it made it self-evident as to how to use it.. hence no one taught me. No one had to. I simply turn the dials to make the table move where I want it to go.
It takes only a split second to line it up when you can freely slide the workpiece around.
The work piece can still slide freely, by hand, on the X-Y table, prior to it being clamped.
In the present and specific case of drilling a series of eight (8) 1/2" holes through the longitudinal centerline of a 3/8" thick flat bar of steel that is only 1-1/2" wide, which is a fairly narrow width within which the 1/2" holes must more or less be centered so as to leave an equidistant margin on either side of the drilled holes across the narrow flat... an X-Y table is helpful by allowing the part to slide laterally along it's length (30"), while not traveling forward or backwards at all.

My flat bars are already drilled and done, but my questions regarding ideal pilot drill diameter remain.
I found that 1/4" was a bit too fat for an initial pilot. I don't remember the angle of the drill bit tip, but I can see where that angle would make a difference in how the bit nests into the center punch mark.
I ended up going the other direction, making the initial pilot with a 3/16 diameter bit... the smallest diameter I had with a triangular cut shank to better nest within a 3 jaw drill chuck without spinning or slipping.
I followed the 3/16" up with a 1/4" pilot, still stopping short of punching all the way through, in order to create the bowl in the hole to conserve cutting fluid.
I then jumped to the final diameter. While I said 1/2" diameter in my description of the project, the actual diameter I drilled was 33/64" , to allow wiggle room for the 1/2" bolts when aligning these bars through multiple parts simultaneously when installed.
Future corrections I could make, as instructed by GJ'er responses since I resurrected this thread:
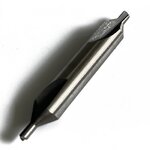
1. I should purchase a centering drill
2 I should purchase a Starrett Automatic Center Punch, since the half dozen automatic centering punches that I already have don't work consistently enough to bother using.