To avoid these ads, REGISTER NOW!

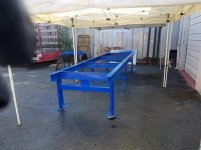
Need to build a Frame jig/fixture

Robert Haas

Well-known member
Joined
Sep 30, 2010
Messages
1,749
Anyone have any experience and or advice on the do's and don't s?

I have access to some .250 wall 6"x 6" I beam.


This will be for fabricating two frames for a pair of 1965 GMC trucks.
 
To avoid these ads, REGISTER NOW!

Thumper68

Well-known member
Joined
May 16, 2013
Messages
5,134
Location
Duluth MN
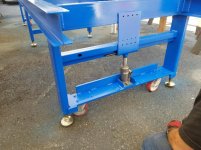
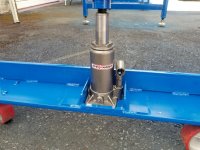
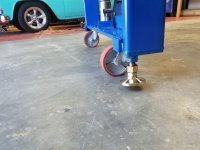
Add a bit more cross bracing than you think you need and adjustable feet with enough travel to make damn sure the thing is level. I used one at a friends shop and we had to place wood blocks under 4 of the feet to get it level due to the slope of the floor.
 

pi_guy

Well-known member
Joined
Jul 27, 2014
Messages
2,832
Location
N/A
If you doing this more than once look at Strong Hands. They make neat fixtures.

But when we do chassis repairs needing a big flat piece of steel to build the fixture on makes the difference.
 

bigguns69

Well-known member
Joined
Aug 23, 2011
Messages
411
Location
Iowa
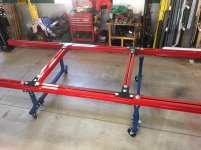
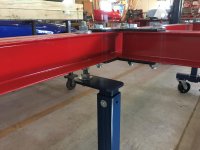
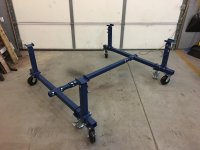
Here is what I did, 4" channel with a 3/4" gap mounted to my body cart. I level it in place in my shop. Plenty stable. Build it so you can move it. A couple of pictures of a jig that I used as a reference point.
 

Attachments

  • IMG_5772.jpg
    IMG_5772.jpg
    136.7 KB · Views: 258
  • IMG_5780.jpg
    IMG_5780.jpg
    141.6 KB · Views: 251
  • IMG_5773.jpg
    IMG_5773.jpg
    138.8 KB · Views: 234
  • IMG_5776.jpg
    IMG_5776.jpg
    131.5 KB · Views: 223
  • IMG_5846.jpg
    IMG_5846.jpg
    136.8 KB · Views: 269
  • frame jig 1.jpg
    frame jig 1.jpg
    32 KB · Views: 286
  • frame jig 2.jpg
    frame jig 2.jpg
    137.1 KB · Views: 253

joe49

Well-known member
Joined
Sep 25, 2009
Messages
1,883
Location
Tonica, Il
If you're only doing 2 frames, KISS. Shims to level, use lap joints, and just strong tacks. Don't cut up loads of material into non reuse-able lengths. Using horse's instead of legs, makes everything used more versatile.
 

vpd66

Well-known member
Joined
Mar 1, 2010
Messages
717
Location
Central Wisconsin
Here is what I did, 4" channel with a 3/4" gap mounted to my body cart. I level it in place in my shop. Plenty stable. Build it so you can move it. A couple of pictures of a jig that I used as a reference point.

Thats a really cool frame jig! Anymore details or write up on how you built it?
 

bigguns69

Well-known member
Joined
Aug 23, 2011
Messages
411
Location
Iowa
This is all I've got for dimensions.
 

Attachments

  • IMG_5644.jpg
    IMG_5644.jpg
    135.6 KB · Views: 91
  • IMG_5647.jpg
    IMG_5647.jpg
    135.8 KB · Views: 94
  • IMG_5709.jpg
    IMG_5709.jpg
    142.1 KB · Views: 97

dontlifttoshift

Well-known member
Joined
Mar 19, 2015
Messages
185
Location
Beach Park, IL
I beam is great if you are bolting or welding to it....it ***** if you want to clamp things to it.

Are you building chassis from scratch or modifying existing frame rails?
 

astroracer

Well-known member
Joined
Jun 22, 2005
Messages
3,001
Location
Mid_Michigan
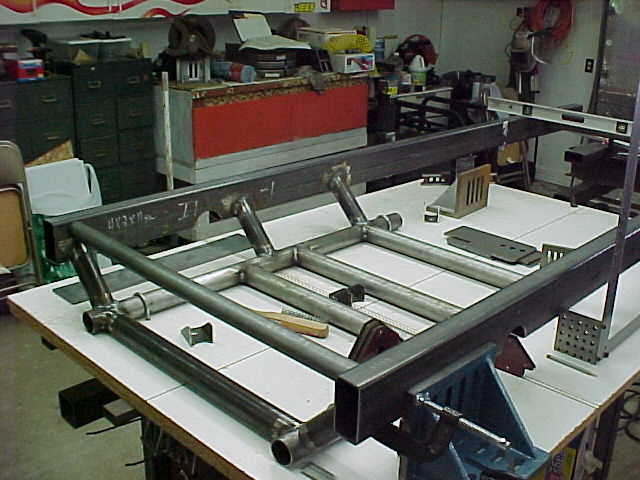
I built two identical tables using 3 x 3 x 1/4 wall tubing for the frames and 6" H beams for the sliding tops. I bolt and clamp all kinds of fab tooling to them.
74jn04jig_table1-vi.jpg


74jn04jig_table2-vi.jpg


The top is two pieces of particle board, screwed and glued together, with a melamine surface on one side.
7419jn05jigtable2-vi.jpg

I cut kerfs in the top board for centerlines and build the frames on that.
Here are some pics with a full frame for an Astro going together on it.
MVC004F-vi.jpg


MVC010F-vi.jpg

The melamine top comes out before any real welding is done. Tacks only on this stuff...
100_3986-vi.jpg


MVC010F-vi.jpg

Mark
 

zmotorsports

ALLIANCE MEMBER
Joined
Oct 20, 2009
Messages
21,496
Location
Northern Utah
Here is what I did, 4" channel with a 3/4" gap mounted to my body cart. I level it in place in my shop. Plenty stable. Build it so you can move it. A couple of pictures of a jig that I used as a reference point.

That is a nice setup. If I were building more than one every other year or so I would definitely copy this design.

Mike
 

zmotorsports

ALLIANCE MEMBER
Joined
Oct 20, 2009
Messages
21,496
Location
Northern Utah
Mine is all bolt together so I can disassemble and stand up in the corner when not in use, which is quite a lot.

I used 3"x4" tubing 14' long each with 2"x2" square tubing crossmembers that bolt into saddles. There are five crossmembers spanning across the 14' length. I installed leveling feet on four legs and it is about 2' off the ground. Nothing special but it works and I have built several sand rails on it, couple of trailers and two street rods/race cars over the past 15 years or so.

Mike
 

Cuda416

Well-known member
Joined
Mar 18, 2012
Messages
289
Location
TX
Mine is all bolt together so I can disassemble and stand up in the corner when not in use, which is quite a lot.

I used 3"x4" tubing 14' long each with 2"x2" square tubing crossmembers that bolt into saddles. There are five crossmembers spanning across the 14' length. I installed leveling feet on four legs and it is about 2' off the ground. Nothing special but it works and I have built several sand rails on it, couple of trailers and two street rods/race cars over the past 15 years or so.

Mike

Any pictures? I'll be building one for my 70 Cuda vert eventually.
 

zmotorsports

ALLIANCE MEMBER
Joined
Oct 20, 2009
Messages
21,496
Location
Northern Utah
Any pictures? I'll be building one for my 70 Cuda vert eventually.

Sorry, been away for a few days. If you look at my original Shop Projects thread I have some pictures of my frame jig in use when I was building my 6'x10' utility trailer. Sorry, can't remember exactly what page it was on.
 
To avoid these ads, REGISTER NOW!

larry4406

Well-known member
Joined
Jan 27, 2006
Messages
19,657
Location
Northern Virginia
Is it actually a 71 or just the fenders?

Sent from my SM-G920T using Tapatalk

It's a 71 barracuda vert being cloned into a cuda. 383 auto 2bbl originally will be 440-6 hemi 4spd Dana 60 shaker. It has original power top, power brakes, and AC and I have power windows to add. Been dead project for a long time. Last on the road 1985.....
 

Cuda416

Well-known member
Joined
Mar 18, 2012
Messages
289
Location
TX
Sounds like an awesome project. I thought a 383 would have made it a cuda. Mine was a 318 manual. Yup you read that right. It's 3 speed manual which was the base transmission. It wasn't upgraded. Turns out there are only 115 like that. Not on the road since 78 due to some immovable object deciding the car was too much fun, hence the missing core support.

Sent from my SM-G920T using Tapatalk
 

Cuda416

Well-known member
Joined
Mar 18, 2012
Messages
289
Location
TX
It's a 71 barracuda vert being cloned into a cuda. 383 auto 2bbl originally will be 440-6 hemi 4spd Dana 60 shaker. It has original power top, power brakes, and AC and I have power windows to add. Been dead project for a long time. Last on the road 1985.....

Just for giggles, cuz I'm "that guy", I looked it up, holy ****. I love learning new stuff. I wonder how many of the 722 were a 383 2bbl? Can't say I hate your plan, but have you considered keeping it stock?

Also, as an aside, if you're putting the Dana in for anything other than looks and cool factor, the 8 3/4 "can" be a better choice. That dana is heavy and a properly built 489 can be as good without the extra weight and overhead.

Anyway, hope to see a thread on the car someday. I'll be doing one for my Dart, then the barracuda when I get to it. It's a rust bucket.

Now, back to our regularly scheduled thread... sorry about the diversion OP.
 

70staged

Well-known member
Joined
Oct 8, 2013
Messages
200
just a suggestion for you, get the GM crash Data for the truck. That will tell you how high each alignment spot should be and then look at building the jig after by using those points.
 
OP
R

Robert Haas

Well-known member
Joined
Sep 30, 2010
Messages
1,749
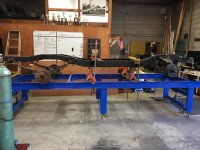
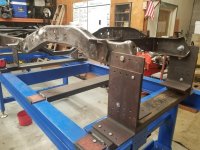
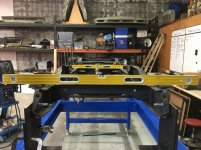
it is in use. and working as designed, actually better then I had dreamed of.

here are some pictures of the frame loaded.

IMG_4306.jpg

20171002_121805.jpg

20171002_121751.jpg

IMG_4318.jpg

IMG_4320.jpg
 
OP
R

Robert Haas

Well-known member
Joined
Sep 30, 2010
Messages
1,749
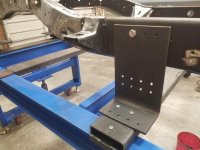
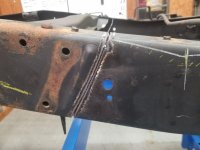
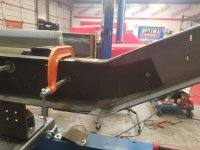
This what the fixture is for.

I can cut the frame in half and keep it completely square and level.


20171004_104926.jpg

20171004_105839.jpg

Then I can attach the new frame rails and lock them into position where they are square and true,


20171004_104926.jpg

20171004_105839.jpg

20171004_111534.jpg

20171004_111553.jpg
 
To avoid these ads, REGISTER NOW!
Top Bottom