To avoid these ads, REGISTER NOW!

New Departure Bearings - How to restore tutorial

Davefr

Well-known member
Joined
Jan 7, 2010
Messages
11,839
Location
OR
In the Delta vintage grinder thread some guys claimed New Departure double shielded bearings couldn't be restored. I told them they could and they asked for images. I have a new project with these bearings and here's how I restore them. IMHO they are among the finest USA bearings I cringe when guys toss them and replace them with cheap Chinese bearings. The only reason to toss them is when after cleaning them they are pitted and rough. (which I've never encountered).

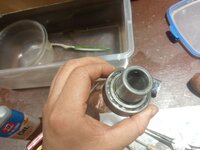
1. Drill a 1/8 shallow hole at the edge of the outer shield. Use a small pick or awl to gently pry up the perimeter/edge of the shield. Once it's standing vertical remove the inner shield and felt washer.
2. Now remove the outer shield. Use needle nose with serrated tips and work it out gradually until it's removed. Don't distort it. If you do then bend it back.
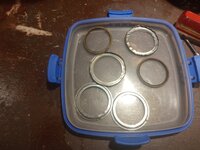
3. Now you have access the the inner ball bearing race. Clean with your choice of parts cleaner. An ultrasonic cleaner is ideal. Make sure the bearing operates smoothly and try to inspect the inner surfaces under magnification.
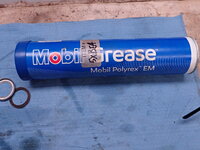
4. Repack with Mobil Polyrex EM.
5. Reassemble and tap down the edge of the outer shield. A small ball pien hammer works good.

No, they won't win any beauty contests but they should be good for many decades. Sorry images aren't all in the correct sequence.P6120026.JPGP6120028.JPGP6120031.JPGP6120038.JPGP6120040.JPGP6120044.JPGP6120045.JPGP6120050.JPGP6120041.JPGP6120029.JPG
 
To avoid these ads, REGISTER NOW!

Hoorn

Well-known member
Joined
May 19, 2020
Messages
1,140
Location
Glendora, CA
@Davefr I was very skeptical of how a shield could go back on without being completely deformed. While it's not winning any beauty contest, it does appear to me as if that would be quite functional. Thank you for taking the time to document that.
 

Placeholder17

Well-known member
Joined
Feb 25, 2024
Messages
93
Location
Maryland
Thanks for this post Dave.

I just followed your steps to open up both sides of the New Departure drill press spindle pulley bearing ND-88106, which only Hammerscale Technologies currently sells, for a complete cleaning and repacking.

I was able to get the outer shields out with relative ease, but removing the inner shields was miserable as the perimeter lip did not protrude enough to get a good grip with needlenose pliers as you suggested. in the end, I just shoved my thinnest screwdriver tip between the inner race and the inner shield and warped it out. This of course made reinstallation just as painful as I had to try to bend it back into shape. In the end, I only got the inner shields back in by roughly centering them and then lightly tapping the bent up rim with a hammer. I also had to grind down the circumference of the outer shields to reduce the diameter ever so slightly to get them back under the distorted outer shield lips. The whole process of opening, cleaning in a acetone bath, greasing, and resealing took about 3 hours, with 2/3 of that being opening it up and resealing.

I would highly recommend this procedure for practically irreplaceable custom bearings, but prepare to set aside a lot of time if you plan to refurbish all of your vintage bearings with BOTH inner and outer shields. I did refurbish a pair of New Departure bearings for a 60's Robbins & Myers pedestal fan that only had one shield on each face, which very easily popped out without any distortion once the perimeter lip was pried up.

I would warn anyone that you need to stop drilling through the outer shield as soon as you have any indentation, even if it doesn't look like a hole. In my case, with the first shield I tried, the bit compressed the outer shield into the inner shield so that they appeared to be a single thickness of steel and I kept drilling till I went through both shields (but didn't hit the balls/guides). Just make the slightest hole and start poking around the perimeter of the hole and you'll pop up the outer shield lip.
 

Attachments

  • IMG_20240810_104459496.jpg
    IMG_20240810_104459496.jpg
    460.7 KB · Views: 28
  • IMG_20240810_102914294.jpg
    IMG_20240810_102914294.jpg
    497.2 KB · Views: 27
  • IMG_20240810_103101791.jpg
    IMG_20240810_103101791.jpg
    596.7 KB · Views: 28
  • IMG_20240810_103106256_HDR.jpg
    IMG_20240810_103106256_HDR.jpg
    485 KB · Views: 27
  • IMG_20240810_112250868.jpg
    IMG_20240810_112250868.jpg
    397 KB · Views: 28
  • IMG_20240810_104451823.jpg
    IMG_20240810_104451823.jpg
    342.9 KB · Views: 29

Firebrick43

Well-known member
Joined
May 12, 2015
Messages
14,137
Location
West central Indiana
In the Delta vintage grinder thread some guys claimed New Departure double shielded bearings couldn't be restored. I told them they could and they asked for images. I have a new project with these bearings and here's how I restore them. IMHO they are among the finest USA bearings I cringe when guys toss them and replace them with cheap Chinese bearings. The only reason to toss them is when after cleaning them they are pitted and rough. (which I've never encountered).

1. Drill a 1/8 shallow hole at the edge of the outer shield. Use a small pick or awl to gently pry up the perimeter/edge of the shield. Once it's standing vertical remove the inner shield and felt washer.
2. Now remove the outer shield. Use needle nose with serrated tips and work it out gradually until it's removed. Don't distort it. If you do then bend it back.
3. Now you have access the the inner ball bearing race. Clean with your choice of parts cleaner. An ultrasonic cleaner is ideal. Make sure the bearing operates smoothly and try to inspect the inner surfaces under magnification.
4. Repack with Mobil Polyrex EM.
5. Reassemble and tap down the edge of the outer shield. A small ball pien hammer works good.

No, they won't win any beauty contests but they should be good for many decades. Sorry images aren't all in the correct sequence.P6120026.JPGP6120028.JPGP6120031.JPGP6120038.JPGP6120040.JPGP6120044.JPGP6120045.JPGP6120050.JPGP6120041.JPGP6120029.JPG


Ultrasonic cleaners will cause the balls to fret against the races and leave pitting.


Thanks for this post Dave.

I just followed your steps to open up both sides of the New Departure drill press spindle pulley bearing ND-88106, which only Hammerscale Technologies currently sells, for a complete cleaning and repacking.

I was able to get the outer shields out with relative ease, but removing the inner shields was miserable as the perimeter lip did not protrude enough to get a good grip with needlenose pliers as you suggested. in the end, I just shoved my thinnest screwdriver tip between the inner race and the inner shield and warped it out. This of course made reinstallation just as painful as I had to try to bend it back into shape. In the end, I only got the inner shields back in by roughly centering them and then lightly tapping the bent up rim with a hammer. I also had to grind down the circumference of the outer shields to reduce the diameter ever so slightly to get them back under the distorted outer shield lips. The whole process of opening, cleaning in a acetone bath, greasing, and resealing took about 3 hours, with 2/3 of that being opening it up and resealing.

I would highly recommend this procedure for practically irreplaceable custom bearings, but prepare to set aside a lot of time if you plan to refurbish all of your vintage bearings with BOTH inner and outer shields. I did refurbish a pair of New Departure bearings for a 60's Robbins & Myers pedestal fan that only had one shield on each face, which very easily popped out without any distortion once the perimeter lip was pried up.

I would warn anyone that you need to stop drilling through the outer shield as soon as you have any indentation, even if it doesn't look like a hole. In my case, with the first shield I tried, the bit compressed the outer shield into the inner shield so that they appeared to be a single thickness of steel and I kept drilling till I went through both shields (but didn't hit the balls/guides). Just make the slightest hole and start poking around the perimeter of the hole and you'll pop up the outer shield lip.
That bearing can be easily recreated if you have a lathe or someone can turn a collar for you. Then you can use green loctite to retain the collar in the standard 6205 bearing.
 
To avoid these ads, REGISTER NOW!

slowtwitch73

Well-known member
Joined
Apr 18, 2019
Messages
5,876
Location
Hellgate
You can often find nos obsolete bearings on Ebay.

There are also other alternatives besides 'made in China'

Lots can be wrong with a bearing that your eye will never pick up.

Think I'd sooner drill small hole and purge it with a needle tip grease gun... If I just had to keep the NP bearing.
 
OP
D

Davefr

Well-known member
Joined
Jan 7, 2010
Messages
11,839
Location
OR
Thanks for this post Dave.

I just followed your steps to open up both sides of the New Departure drill press spindle pulley bearing ND-88106, which only Hammerscale Technologies currently sells, for a complete cleaning and repacking.

I was able to get the outer shields out with relative ease, but removing the inner shields was miserable as the perimeter lip did not protrude enough to get a good grip with needlenose pliers as you suggested. in the end, I just shoved my thinnest screwdriver tip between the inner race and the inner shield and warped it out. This of course made reinstallation just as painful as I had to try to bend it back into shape. In the end, I only got the inner shields back in by roughly centering them and then lightly tapping the bent up rim with a hammer. I also had to grind down the circumference of the outer shields to reduce the diameter ever so slightly to get them back under the distorted outer shield lips. The whole process of opening, cleaning in a acetone bath, greasing, and resealing took about 3 hours, with 2/3 of that being opening it up and resealing.

I would highly recommend this procedure for practically irreplaceable custom bearings, but prepare to set aside a lot of time if you plan to refurbish all of your vintage bearings with BOTH inner and outer shields. I did refurbish a pair of New Departure bearings for a 60's Robbins & Myers pedestal fan that only had one shield on each face, which very easily popped out without any distortion once the perimeter lip was pried up.

I would warn anyone that you need to stop drilling through the outer shield as soon as you have any indentation, even if it doesn't look like a hole. In my case, with the first shield I tried, the bit compressed the outer shield into the inner shield so that they appeared to be a single thickness of steel and I kept drilling till I went through both shields (but didn't hit the balls/guides). Just make the slightest hole and start poking around the perimeter of the hole and you'll pop up the outer shield lip.
For the inner shields, when you bend the edge up it'll protrude above the bearing assembly outer race. You need to grab that protruding edge with a strong pair of needle nose pliers with serrated tips and ever so slightly raise it straight up evenly going around the bearing circumference several times and it will come out cleanly. (I used SO Talon grips but small needle nose Vise Grips might also work). Try grabbing that edge with the needle nose pliers and use a small screwdriver under the plier jaws tip to wedge it up just a tiny bit at a time. It will pop out without distortion and you can gently tap it back in when you re-assemble. (Just don't try and pull it out all at once)

You're right about drilling. You only penetrate enough to go thru the first outer shield.

All I can say is keep practicing. My first attempts were time consuming and ugly.

Even if someone can source NOS New Departure bearings, the grease will be still be old and need to be replaced.

P.S. I've never tried it, but maybe you could put the bearing in the freezer for a couple hours and then hit the outer race with a propane torch to slightly loosen the press fit.

p6120031-jpg.2129423
 
Last edited:

ching0n

Well-known member
Joined
Jul 21, 2016
Messages
1,496
bumping. Thanks for posting these. I ran into this w/some craftsman grinder bearings and found other methods to address it. There's methods to clean and regrease w/o disturbing the shield but there's a danger of over greasing by means of pressure/vacuum. This may or may not prove critical for an application (added drag/heat):


Tore it apart again and I couldn't figure out how to take off the grease shields (different design than above).

Here's what I did:
There is a tiny gap between the inner race and the shield (towards motor side). Take off bearings, shoot some carb cleaner into that gap and/or soak bearings in gasoline (per manual) so you can dissolve the old grease. Dry out, using grease in a tube (or syringe or grease gun with needle injector) press and use pressure to inject into the gap, repeat until dry noise when spinning disappears and you get some drag from the grease. I'm pretty sure mine had a larger gap than the one below (check yours before using solvent to remove old grease). You could bypass the cleaning and just add more grease and/or maybe drop a few drops of synthetic oil in there to re-soak the binder that could be dry.

1736278053895.png

Also, in my model, there's a spring washer on the left side behind the shield & an end cap that I'm fairly certain sets a pre-load. Manual says that when removing the shields, one must run these end caps bolted down.

Lastly, despite being held together by 4 bolts, it is possible to bolt together w/a mild twist, to avoid this, perform final bolt down with grinder sitting on a flat surface, preferably without the bottom cover/feet in place. Once I was done, I ended up w/a tiny transient induction hum similar to an oscillating fan swinging by. I can't remember if it was there before but it's possible a lack of torque or induced twist when bolting the whole thing together is the culprit. I had already applied thread lock & tightened the nuts so fixed the twist w/a mallet & could hear the noise change as I did it. Maybe next tear down I'll look into it, I was not liking how easily the lacquered cloth covered wiring was fraying so that may be the next 'upgrade'.
 
To avoid these ads, REGISTER NOW!
Top Bottom