You are using an out of date browser. It may not display this or other websites correctly.
You should upgrade or use an alternative browser.
You should upgrade or use an alternative browser.
Above 1200 Sq/FT New Garage/Barn Build
- Thread starter Samh
- Start date
Wokspaces above 1200 squarefeet.
Tugs Compound
Well-known member
What size are the garage doors?
Awesome build, keep up the good work!
Awesome build, keep up the good work!
What size are the garage doors?
Awesome build, keep up the good work!
Thanks.
The opening is 10x10, and each door section is 5x10
This is such a great multi-year build! Thanks for keeping up with it, I always enjoy seeing the progress!
Thanks. It's getting there. Definitely took longer than I anticipated. One thing I didn't realize made such a huge difference was the height of the walls. The up and down on ladders has been no joke...lol
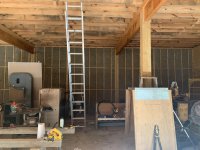
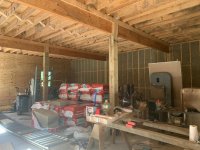
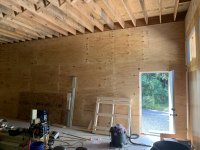
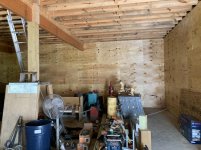
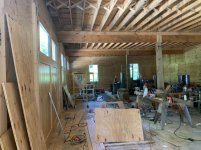
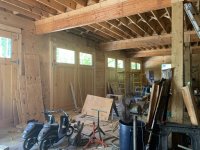
Got the rockwool insulation up and the plywood walls. Hopefully start on the electrical soon. Still need to get the windows done for the carriage doors.
Attachments


jollygreengiant
Well-known member
Building looks great, especially those doors!
I hear you on the lumber prices. We had decided to postpone some projects hoping the price would drop, but so far it's doing the opposite.
I hear you on the lumber prices. We had decided to postpone some projects hoping the price would drop, but so far it's doing the opposite.
Motoman1100
Well-known member
Love those doors.
I agree, we have several large projects but that lumber price is ridiculous. My buddy runs Contract Lumber in the Atlanta area...He said that lumber prices are at a 41 yr high.
I agree, we have several large projects but that lumber price is ridiculous. My buddy runs Contract Lumber in the Atlanta area...He said that lumber prices are at a 41 yr high.
Really wish I had bought lumber back then. The deck is all I have to finish to get my final, so I decided to bite the bullet and just buy the lumber to finish.Love those doors.
I agree, we have several large projects but that lumber price is ridiculous. My buddy runs Contract Lumber in the Atlanta area...He said that lumber prices are at a 41 yr high.
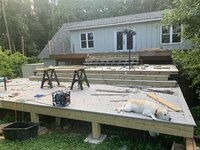
Starting the second level of the deck. Will have one more level to keep each set of stairs aroun4, and the last level will cover up a bad part of the yard. It was a lot of fun hauling the 2x10x12s from down by the front of the barn, and up around to go through the gate. Tried bringing them to the back of the barn, but the hill where the top deck is a little too steep, and a little too slick.
Attachments

More pics of the deck. This thing is getting out of hand
Attachments



Chrisb62
Well-known member
That is a massive deck...... lumber prices are down ,but still lots of money right there.
Looks great and plenty of stretch out room.
Looks great and plenty of stretch out room.
unfortunately, I purchased most of it back in may when prices where pretty high. I had been putting it off waiting for prices to go down, and they just kept going up. Figured I might as well bite the bullet, as finishing the deck is the last thing before my final. Luckily, the price had dropped a lot when it came time for the stringers, because I messed up the first batch. The cost of 2x12x12 was $21. A few weeks prior, they were $81. Glad I at least waited on the stairs.
jollygreengiant
Well-known member
Wow, that deck is going to be bigger than my shop! Looking forward to seeing it finished.
Motoman1100
Well-known member
Wow. I have to ask, what are you going to do with this building? Is this going to be your house? That deck is HUGE.
As always nice work and thanks for sharing.
As always nice work and thanks for sharing.
So the downstairs is going to be my shop for machining/fabrication, and the upstairs is for my wife. She either wants it to be an apartment/MIL suite. Basically she wants a space to design, lolWow. I have to ask, what are you going to do with this building? Is this going to be your house? That deck is HUGE.
As always nice work and thanks for sharing.
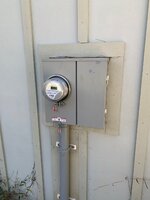
Officially have power. When the inspector came out to give the sign-off to get power installed, had him check out the deck to see if there is anything I needed to address. He mentioned the connection of the beam/board to the posts for the middle and lower section. Basically, it is like a ledger board 2x10 nailed to the side posts with some simpson deck joist tie under it. I had trouble finding anything in the code book that addressed it, so not terribly surprised. The fixes he and the other inspectors mentioned would be put a 2 ply beam under it with posts. The issue with that, is the pier that the current post sits on wouldn't have full bearing for another post. I could double up behind it, and then install 2x6 running vertically to support both. I asked about notching out the post under where the current board is, and installing a beam under it, and he said that would be acceptable also. Probably go that route.
Attachments
So I am to the point of looking at sealing the floor. Picking this over epoxy, as I had epoxy at my last shop, and the prep and application was tedious, and then if I dropped something and chipped the concrete, it was fairly noticeable. Based on what I have read here, probably going to go with Euclid DiamondHard Liquid densifier and sealer. I did break the cardinal rule though, and started filling it before I was done, so I will be cleaning it out. Probably do this in two phases. And everything that I can't move to the shipping container, will get moved to the back, and seal the front, then move everything to the front and seal the back. Have several places to clean up rusty nail spots first though.
Got the floor cleaned, except for the rust stains from during the build. Decided to leave them, as cleaning them was taking forever. Had to move everything over to one side so I could apply the densifier to the other side. Wanted to wait on a warm day to apply. Once it cures fully, I will move everything over on to that side so I can finish the other side. I am considering burnishing it, but not sure if I will or not. Thinking it might give a more uniform look to it. Not the concrete itself, but the sheen.
Attachments


So the latest section I applied the densifier to, I worked it in more vs just spreading coating it, and then after 1 hr, vacuumed up any remaining liquid. This left more of a finish that I was expecting. Applied it the same way to a previous section with similar results as that. So now I will be re-applying to the rest of the floor.
Motoman1100
Well-known member
Sam, this build is legit. What an incredible amount of work. Well done
Thanks. I am getting close to being able to use it.Sam, this build is legit. What an incredible amount of work. Well done
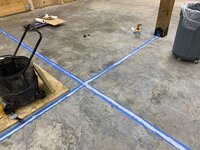
Applied densifier to the other half of the floor (i.e. the original 1st half). It now has a uniform appearance, and has more of a finish I was expecting. Spent new year's day taping the expansion joints, and then caulked the joints with Sika self leveling sealant. I didn't use a back because the joints only appeared to be 1/2" to 3/4" deep and 1/8 wide. Sort of surprised, it took 5 of the large tubes to do 188 linear feet. I think if I had to do it again, I might have used sand as a filler so the depth wouldn't have been as much. Technique I ended up at through trial and error was having a small cut tip, and squeezing it with pliers to fan it out. Then would squirt in straight down until it about filled it, and moved 1/2" at a time doing that. Would then go back and fill any low spots until it was flush. Then made sure to pull the tape off before it got tacky, that kept it from pulling the edges too bad. Hopefully I never have to do that again.
Attachments


jbrentd
Well-known member
Great job on your barn! What you have accomplished is quite amazing.
So, I spoke too soon on the densifier. Looks like it has gone back to looking like I never did anything to it. May not worry about doing any other coating. Going to focus on getting the doors sealed up and a way to lock them. First thing will be a way to fix/add a threshold below the carriage doors. When the concrete was poured, I had planned on regular roll up doors, so the concrete guys did the sill height lower than the slab height. When I decided to do carriage doors, and have them swing inward, I had a 2x thick area under the door I needed to fill. Initially, just put some pressure treated down to act as a threshold. It isn't as optimal as I would like, one, due to rain causing it to swell where I can't open my doors easily, and two, just not looking very good. I had debated on replacing with PVC, and gluing up pieces to make a threshold. Not sure if I still plan on going that route though.
jbrentd
Well-known member
I’m no flooring expert, but I think a densifier soaks in and just hardens the concrete. A lot of people go with a penetrating sealer in addition to the densifier (search for “Ghostshield 4500/8510” as an example). A penetrating sealer will also not look different, in the end. You’ll want a topical sealer if you are looking for a gloss finish.
I'm definitely no flooring expert either. I had read up on it in the flooring section, and came a across a post where someone mentioned the Euco Diamondhard was what was used for the bix box stores floors, which was the look I was going for. I think the issue I may have now, is finding a topical sealer that works over the top of what I have now. Honestly though, I may not worry about it, as I would like to start using it as quick as possible.I’m no flooring expert, but I think a densifier soaks in and just hardens the concrete. A lot of people go with a penetrating sealer in addition to the densifier (search for “Ghostshield 4500/8510” as an example). A penetrating sealer will also not look different, in the end. You’ll want a topical sealer if you are looking for a gloss finish.
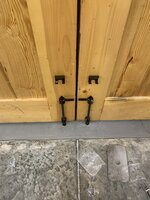
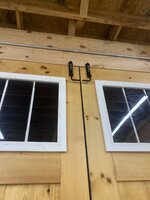
Got the cane bolts installed on the upper and lower portions of the doors so they lock now. Also got the self leveling concrete poured under the sill to bring it up since the doors swing in, and the pad was originally poured for standard doors that had an inset to keep water out.
Attachments
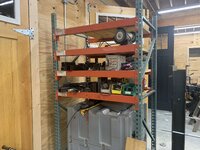
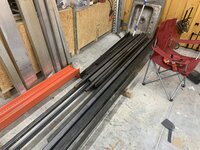
Started moving stuff into it from the garage in the house. Got pretty much all the small stuff moved, and now just need to plan where the machines will go. Once that is figured out, I can run the electrical for them. Also need to make some kind of shutters/blinds for the windows so you can't see in from outside.