To avoid these ads, REGISTER NOW!

New mini split ordered

buzz4041

Well-known member
Joined
Sep 13, 2011
Messages
730
Location
South Texas
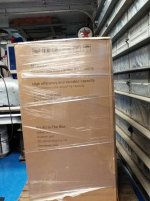
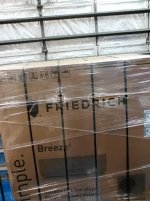
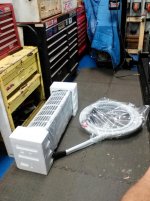
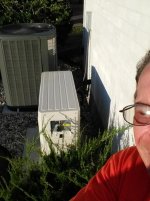
Pulled the trigger and ordered a Friedrich breeze 12 to 24k BTU unit. Should be at the house for when I arrive from Australia in a couple weeks. Will let you know how the install goes and how it works. The shop is fully insulated including doors at 1150 square feet with 10 foot ceiling. I am ready to work in comfort from now on.
 
To avoid these ads, REGISTER NOW!

Warrenator

Well-known member
Joined
May 31, 2008
Messages
781
Location
Newberg, OR
Congrats, I love mine. (In the house.) Gotta sell a non-moving project car, change out the garage door, insulate the ceiling, then I am putting one in the garage too. At least when I am banished now I will have a nice dungeon....
 

OldSoldier

Well-known member
Joined
Sep 14, 2011
Messages
131
Location
DFW
I like my 24K Breeze, I hope you do also. Install was not hard but there isn't as much room to install the lines to the outside unit as necessary if you use the hanging bracket accessory.
 
OP
B

buzz4041

Well-known member
Joined
Sep 13, 2011
Messages
730
Location
South Texas
Update I am still in airports and will be home in about 3 hours. �� Should get a start on it tomorrow though. Going to run a little conduit and pull some wire to begin with after final location is determined.
 

chrispyny

Well-known member
Joined
Nov 7, 2013
Messages
467
Location
albany, ny
This highly pertains to my interests. And i think its about time for a super comprehensive gj member step by step install. I hope you go into massive detail on this install. I desperately want a dual zone mini split for my house. The east side of my raised ranch is living/dining room which leads to kitchen and hallway, and downstairs is my mancave/den and bathroom.
I figure a 25k btu a/c only mini split with 18kbtu upstairs and 7kbtu downstairs would be KILLER. This will condition more than 2/3's of my house. I'll do the other side down the road. Keep up the good work. Pics, and details please.

Question, where did you purchase you mini split? Ty
 
OP
B

buzz4041

Well-known member
Joined
Sep 13, 2011
Messages
730
Location
South Texas
Things are going a bit slow due to jetlag and honey do list but we will prevail. Got the unit unpacked and inspected. Read the directions and picked my inside and outside location. The unit comes with a nice plastic base but due to where I live in hurricane country I opted for a concrete slab to put the outside unit on. So with the locations decided I went to the AC store and got the slab for it. Then down to HD and picked up some 1/2" EMT, wire, and a 20A-230V receptacle, and a double pole breaker.
The unit was packed very good and included free shipping with the order and the shipping company delivered and put it right in the garage for the wife. It was shipped on a pallet.
I bought it off eBay from Cool Running Hospitality Supply LLC. So far so good as it came on time and defect free. It did ship directly from the manufacturer.
 

Attachments

  • IMG_20150918_131249.jpg
    IMG_20150918_131249.jpg
    102.1 KB · Views: 108
  • IMG_20150918_131307.jpg
    IMG_20150918_131307.jpg
    106.2 KB · Views: 107
  • IMG_20150918_131916.jpg
    IMG_20150918_131916.jpg
    93.8 KB · Views: 108
  • IMG_20150918_135932.jpg
    IMG_20150918_135932.jpg
    97.8 KB · Views: 122
  • IMG_20150918_135947.jpg
    IMG_20150918_135947.jpg
    108 KB · Views: 117
  • IMG_20150918_135938.jpg
    IMG_20150918_135938.jpg
    93.7 KB · Views: 109
  • IMG_20150918_220928.jpg
    IMG_20150918_220928.jpg
    58.6 KB · Views: 112

Slowgsr

Well-known member
Joined
Nov 14, 2014
Messages
610
Location
Southern ontario
I just picked up a great condition used 2 ton mr slim. Perfect time to buy as its getting cold outside and everyone wants heaters right now
 
OP
B

buzz4041

Well-known member
Joined
Sep 13, 2011
Messages
730
Location
South Texas
The unit will go next to my house unit outside with 14" of clearance from the wall and around 12" from the other unit. I will have them staggered so their is no obstruction of air flow on the sides of either unit. Fortunately I have an open area that is perfect size to fit without any plants or major work required. Tomorrow I will lay the slab and set the unit and run the conduit before bbq with family.
 

CNGsaves

Well-known member
Joined
Sep 26, 2012
Messages
13,233
Location
KS and OK
OP . . . mind sharing what the costs are for unit and extra materials ??

What electrical wiring you using, etc ??
 
OP
B

buzz4041

Well-known member
Joined
Sep 13, 2011
Messages
730
Location
South Texas
OP . . . mind sharing what the costs are for unit and extra materials ??

What electrical wiring you using, etc ??

The unit was $1999 with free shipping. The new concrete base I elected to put in was $34. (Comes with base not required) Breaker, wire, conduit, straps, fittings was $106. Keep in mind my wiring method is my preference and more expensive than 35' of 12/2w/grd. romex most people would use. Breaker and Romex you could get out at $35 or so.

I'm using #12awg wire as it is only 35' from my panel. FLA is only 11amps at 230v.
 
OP
B

buzz4041

Well-known member
Joined
Sep 13, 2011
Messages
730
Location
South Texas
Got the conduit finished up wire pulled and hooked up. Set the concrete foundation and set the unit in place. Will drill the mounting holes tomorrow along with the holes in brick and walls for installation of inside unit and line set. During this fired up the pit and smoked up some ribs, sausage, chicken. Enjoyed the afternoon with family.
 

Attachments

  • IMG_20150920_184518.jpg
    IMG_20150920_184518.jpg
    100 KB · Views: 190
  • IMG_20150920_184456.jpg
    IMG_20150920_184456.jpg
    77.8 KB · Views: 191
  • IMG_20150920_184358.jpg
    IMG_20150920_184358.jpg
    79.2 KB · Views: 184
  • IMG_20150920_184326.jpg
    IMG_20150920_184326.jpg
    93.5 KB · Views: 192
Last edited:

theoldwizard1

Well-known member
Joined
Feb 22, 2011
Messages
43,114
Location
SE MI
... Keep in mind my wiring method is my preference and more expensive than 35' of 12/2w/grd. romex most people would use.
People trying to go cheap should know that a weatherproof junction box, properly attached to the outside wall, and flexible conduit to the unit is MANDATORY, even if you are using romex.
 
To avoid these ads, REGISTER NOW!
OP
B

buzz4041

Well-known member
Joined
Sep 13, 2011
Messages
730
Location
South Texas
First up today was to drill the wall and the brick for the line set. I used a 3" hole saw as per the instructions. After the hole on the inside wall 1/2" plywood I continued through the sheathing but at a slightly lower position to ensure the line set was going downward as it passed through the wall. Next up was the hammer drill with a long 1/4" masonry bit again slightly lower but on the centerline as this would be my guide from outside after the pilot hole was drilled.
I then proceeded outside with ladder and hammer drill in hand and a 5/16" bit. I traced my 3" hole saw to the brick after aligning my pilot hole. Then I drilled through the brick along my line at every 1/2" or so. My brick is solid so this took a bit of time. Once all my holes were drilled I got my pneumatic hammer gun with a chisel bit and knocked out the leftovers between the drilled holes and cleaned up the hole edges nice and smooth.
 
Last edited:
OP
B

buzz4041

Well-known member
Joined
Sep 13, 2011
Messages
730
Location
South Texas
I laid pattern back on the wall level and aligned with my new line set hole. I then marked the internal mounting bracket hole pattern. Removed template and installed the mounting bracket for the inside unit. I got my wife to help me for the next part. I carefully uncoiled the line set straight and fed it up through my hole in the wall. My wife went outside and supported the other end and kept it straight as I walked it up to the mounting bracket. Got it in position and clicked it on the mounting bracket. Back outside I had some leftover 1" backer rod that I cut and carefully put it around the line set inside the wall to give it a cushion against the plywood and brick. Inside the unit they supplied a nice foam cushion support for the brick area so that was squeezed in next about 1/2" from the edge of the brick.
 
Last edited:
OP
B

buzz4041

Well-known member
Joined
Sep 13, 2011
Messages
730
Location
South Texas
Next up was laying out the line set route and strapping to wall with supplied clamps. The line set on this unit is plug and play with no cutting or anything so as the manual stated I carefully coiled the excess which was 1 coil behind the unit. This line set has a peel away drain line that allowed me to remove it from the line set at the bottom of the vertical drop where I put a 90 degree bend in the lineset. I put a pvc conduit clamp on it to secure it in place below the bend about a 12". The unit is factory wired also inside this line set with a factory plug on the end that clamps in the unit.
 
Last edited:
OP
B

buzz4041

Well-known member
Joined
Sep 13, 2011
Messages
730
Location
South Texas
After all the line set clamped and tywrapped in place it was time to insert the line set into the quick connector. Then plug and clamp the electrical into the unit. Then I put the anchors in the concrete foundation. Lastly was to put the plastic shroud covers over the electrical and line set connections. I then foam injected the lineset hole at the wall. Now was time to fire it up test this baby out. I plugged the unit in to receptacle I had installed yesterday. It has a power test circuit which I verified was working and reset. Hit the start button on remote and set to 76 degrees. Shop temperature was 90 degrees when I fired it up.I checked all functions on the unit and set up instructions. 2 hours later and shop was at a nice comfortable 80 degrees with out the high humidity. Both the inside and outside units are very quiet and run smoothly. Tomorrow I will build up some lineset cover from gutter material. I could not find locally at either HVAC outlet or box stores so pvc gutter material it will be.
 

Attachments

  • IMG_20150921_192433.jpg
    IMG_20150921_192433.jpg
    67.3 KB · Views: 156
  • IMG_20150921_192419.jpg
    IMG_20150921_192419.jpg
    86.4 KB · Views: 143
  • IMG_20150921_192405.jpg
    IMG_20150921_192405.jpg
    74 KB · Views: 149
  • IMG_20150921_192338.jpg
    IMG_20150921_192338.jpg
    81.8 KB · Views: 142
  • IMG_20150921_192318.jpg
    IMG_20150921_192318.jpg
    82.6 KB · Views: 156
  • IMG_20150921_192233.jpg
    IMG_20150921_192233.jpg
    88.1 KB · Views: 164

chrispyny

Well-known member
Joined
Nov 7, 2013
Messages
467
Location
albany, ny
Did u draw a vacuum after hooking up the line set? If not, who did, and how much did they charge to acrivate the unit? Ty
 
OP
B

buzz4041

Well-known member
Joined
Sep 13, 2011
Messages
730
Location
South Texas
Did u draw a vacuum after hooking up the line set? If not, who did, and how much did they charge to acrivate the unit? Ty
No I did not as it is not required with this system. It has been designed so it is plug and play. Go the Friedrich Breeze website and read up on it. This saves you a cost of about $500 from what I have read on what others paid to have their systems vacuumed and charged and put in service. This was actually the deciding factor for me to use this system.
 

bullnerd

Well-known member
Joined
Sep 17, 2012
Messages
5,690
Location
Jersey
Well, that was easy! Very cool thanks.

Ive been looking at the Friedrichs too.

Thanks again.
 
OP
B

buzz4041

Well-known member
Joined
Sep 13, 2011
Messages
730
Location
South Texas
Paperwork say's warranty applies only if installed by a professional installer. That must be me. I filled out all the warrranty info online and it has no mention of installer or anything but the purchaser info and the units info.
 
OP
B

buzz4041

Well-known member
Joined
Sep 13, 2011
Messages
730
Location
South Texas
I finished up my lineset cover install. I used a pvc gutter material found at the lumber yard. It was quite difficult to cut out around the loop but I did. After that I put a full protection board of aluminized pvc sheet on top of that to give a cleaner look versus the circular duct look.
The unit has been set on dry mode and set at 83 degrees. And the average outside temp has been 91 and humid. The unit keeps the shop nice and dry and maintains the temperature which with reduced humidity is quite nice at 83.
 

Attachments

  • IMG_20150930_174946.jpg
    IMG_20150930_174946.jpg
    93.6 KB · Views: 112
  • IMG_20150930_175006.jpg
    IMG_20150930_175006.jpg
    109.9 KB · Views: 104
Last edited:

miketyler

Well-known member
Joined
Sep 10, 2009
Messages
635
Location
Cedar Hill, TX
Looks good, very straight forward. I wanted to use vinyl guttering as well but couldnt get lineset and drain crammed in it. I considered splitting it but really wanted lineset to be rain tight. Ultimately I bought the plastic duct kit and though it was a little pricey, did alleviate many of the shoestring workarounds I had planned. I did learn that PVC glue for plumbing works great with vinyl guttering.

My cassette unit is working great and soon will be able to test the heat mode. One question for you; you opted to retaain thee full length of lineset. Why not cut it and reflare? I would guess it might change charging capacity?
 
OP
B

buzz4041

Well-known member
Joined
Sep 13, 2011
Messages
730
Location
South Texas
Looks good, very straight forward. I wanted to use vinyl guttering as well but couldnt get lineset and drain crammed in it. I considered splitting it but really wanted lineset to be rain tight. Ultimately I bought the plastic duct kit and though it was a little pricey, did alleviate many of the shoestring workarounds I had planned. I did learn that PVC glue for plumbing works great with vinyl guttering.

My cassette unit is working great and soon will be able to test the heat mode. One question for you; you opted to retaain thee full length of lineset. Why not cut it and reflare? I would guess it might change charging capacity?

One of the reasons I went with this unit was to avoid needing an AC company come out to do anything. This system is very easy to do as long as you follow the directions. If you read up further I went into more detail on this.
 
OP
B

buzz4041

Well-known member
Joined
Sep 13, 2011
Messages
730
Location
South Texas
Do they make same setup with heat & AC?

This unit has both AC and heat. Best part for me is the dry setting which reduces the humidity and runs on a very slow output of cool air. The shop is set at 82 now but is dry and very comfortable be in. I do cool it off a bit more if I plan on extended working times.
 

mp333

Well-known member
Joined
Jan 20, 2014
Messages
91
Location
New England
How long did it take you to do the install?
Also I wonder how the heat mode would work in CT winter?
 
To avoid these ads, REGISTER NOW!
Top Bottom