To avoid these ads, REGISTER NOW!

New Polyurea flooring- thanks Justin!

lodemia

Well-known member
Joined
Nov 6, 2009
Messages
128
First and foremost, thanks to Justin from Garage Flooring LLC. This is the second project of mine that he has provided materials for, and I am nothing short of amazed at the pre and post-sale support that I received from him. He runs a great business, and he even answered my crazy emails on Saturday when I was in the thick of it.

Let's start with the plan - grind, clean, fill cracks, then full broadcast Polyurea with two coats of flakes. 1000 square feet exactly.
 
Last edited:
To avoid these ads, REGISTER NOW!
OP
L

lodemia

Well-known member
Joined
Nov 6, 2009
Messages
128
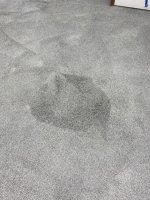
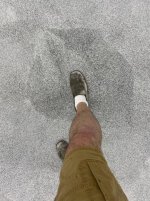
Some during pics -
 

Attachments

  • IMG_2771.jpg
    IMG_2771.jpg
    80.9 KB · Views: 188
  • IMG_2773.jpg
    IMG_2773.jpg
    50.7 KB · Views: 181
  • IMG_2776.jpg
    IMG_2776.jpg
    90.6 KB · Views: 184
OP
L

lodemia

Well-known member
Joined
Nov 6, 2009
Messages
128
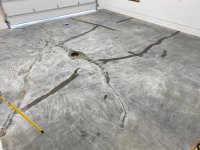
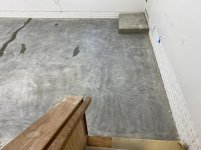
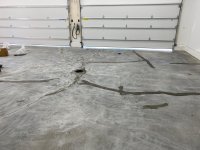
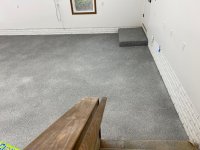
Not being satisfied with the results from the stripper and diamabrush, I got a 7" buffer with a diamabrush head and re-ground the whole thing until I had the profile I really wanted. I ground and chased all the cracks, and used gel based crack filler (again from Justin) to tidy this up. It took a very painful day to make that happen.
 

Attachments

  • IMG_2826.jpg
    IMG_2826.jpg
    149.4 KB · Views: 197
  • IMG_2827.jpg
    IMG_2827.jpg
    147.4 KB · Views: 152
  • IMG_2828.jpg
    IMG_2828.jpg
    148 KB · Views: 146
  • IMG_2829.jpg
    IMG_2829.jpg
    149.1 KB · Views: 149
Last edited:
OP
L

lodemia

Well-known member
Joined
Nov 6, 2009
Messages
128
On Sunday, I decided I didn't like the grooves in the gel epoxy, so I ground and worked on that, then it was time to start applying. It was a three person job. I rolled out the base, and my wife and daughter took care of the flakes/moving equipment.
 

Attachments

  • IMG_2834.jpg
    IMG_2834.jpg
    133 KB · Views: 146
  • IMG_2833.jpg
    IMG_2833.jpg
    122.4 KB · Views: 157
  • IMG_2832.jpg
    IMG_2832.jpg
    154.8 KB · Views: 207
  • IMG_2831.jpg
    IMG_2831.jpg
    127.7 KB · Views: 177
  • IMG_2830.jpg
    IMG_2830.jpg
    144.8 KB · Views: 190
OP
L

lodemia

Well-known member
Joined
Nov 6, 2009
Messages
128
When you read the instructions for full broadcast, you will see things like "don't be alarmed at how many chips you sweep up." We put 160lbs of chips down, and we broom-swept 50lbs up. I then got on my hands and knees and vacuumed the entire floor to get the remaining chips and knock down the edges. I have a storage area under my sunroom, and I am saving the chips for that project, assuming I ever want to do this again!
 

Attachments

  • IMG_2835.jpg
    IMG_2835.jpg
    130.4 KB · Views: 130
  • 62051112651__AEE9C368-7290-45E3-A419-B962B5D549BE.jpg
    62051112651__AEE9C368-7290-45E3-A419-B962B5D549BE.jpg
    135.6 KB · Views: 147
OP
L

lodemia

Well-known member
Joined
Nov 6, 2009
Messages
128
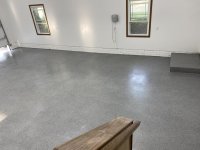
And finally, the results. After two coats of clear, it looks really nice. I know where all the repairs are, but I'm the only one. I think if I had it to do over again, I would add another coat of clear to the whole thing. When I got toward the end of the second clear coat, I was putting it on thicker to use it all, and I really like the profile of that floor over the parts that I didn't get as much material on.

Another lesson learned, and it's probably something that I overlooked - mix all the flake ahead of time. You can tell there are slight differences in the lots between the 4 boxes of flake that I used. If I would have mixed ahead of time, it wouldn't have been noticeable at all.

All in all, I'm a satisfied customer, and I hope that we can get another 30 years out of this floor!
 

Attachments

  • 62070357028__10543E46-95D5-454B-94E3-E3BFA144B525.jpg
    62070357028__10543E46-95D5-454B-94E3-E3BFA144B525.jpg
    132.4 KB · Views: 228
  • IMG_2823 2.jpg
    IMG_2823 2.jpg
    140.8 KB · Views: 224
  • IMG_2824 2.jpg
    IMG_2824 2.jpg
    134.1 KB · Views: 232

Jc737

Member
Joined
Aug 18, 2020
Messages
11
Location
WA
Nice job! Thanks for sharing as I am awaiting my kit as it shipped!
 
OP
L

lodemia

Well-known member
Joined
Nov 6, 2009
Messages
128
Nice job! Thanks for sharing as I am awaiting my kit as it shipped!

Awesome. If you ave a big area to do, I found it helpful to have blue masking tape on the wall to basically mark off the garage in 200ft sections - kind of like hashmarks. This way, you can estimate how much material to use in each section. It's not an exact science, but it was good enough for me...
 

Jc737

Member
Joined
Aug 18, 2020
Messages
11
Location
WA
Awesome. If you ave a big area to do, I found it helpful to have blue masking tape on the wall to basically mark off the garage in 200ft sections - kind of like hashmarks. This way, you can estimate how much material to use in each section. It's not an exact science, but it was good enough for me...

I only have about 420sqft so I will be marking it about halfway on the wall.

Thanks for the tip!
 

Garage Flooring

ALLIANCE MEMBER
Joined
May 21, 2011
Messages
5,288
Location
Grand Junction, CO
First and foremost, thanks to Justin from Garage Flooring LLC. This is the second project of mine that he has provided materials for, and I am nothing short of amazed at the pre and post-sale support that I received from him. He runs a great business, and he even answered my crazy emails on Saturday when I was in the thick of it.

Let's start with the plan - grind, clean, fill cracks, then full broadcast Polyurea with two coats of flakes. 1000 square feet exactly.

Thanks for the kind words and all the pictures! If it is ok I would like to pass the review and photos off to my social media person?
 
To avoid these ads, REGISTER NOW!

56Mark

Well-known member
Joined
Oct 26, 2014
Messages
359
Location
Fall Branch, TN
Would you mind sharing approximate total cost, grinder rental and all? The attached garages we park in are about 1,000 sq ft too. The concrete is only a year old and pretty clean, so I might get by just etching. Thanks
 
OP
L

lodemia

Well-known member
Joined
Nov 6, 2009
Messages
128
Would you mind sharing approximate total cost, grinder rental and all? The attached garages we park in are about 1,000 sq ft too. The concrete is only a year old and pretty clean, so I might get by just etching. Thanks

Let me know if this violates some sort of forum rule.

4 hour rental was $132 for both the floor polisherand the diamablade. If I did it again, I would rent for 24 hours so it’s not a mankiller. I only saved $20 killing myself to do it in 4 hours. I figure I have roughly $250 in misc items (acetone, sacrificial rollers, paint trays, rentals, etc ) in addition to the cost of the product. I happened to have the 7” buffers with the diamablade attachments from another project, so that was “free” so to speak.

Looking at my bill from garage flooring LLC, The 1k square foot kit was $2557, plus $100 crack filler, plus $100 install kit (rollers etc) plus $50 shoes. All prices pre-gj discount.

Hope this helps.
 
Last edited:

Garage Flooring

ALLIANCE MEMBER
Joined
May 21, 2011
Messages
5,288
Location
Grand Junction, CO
let me know if this violates some sort of forum rule.

4 hour rental was $132 for both the floor polisherand the diamablade. If i did it again, i would rent for 24 hours so it’s not a mankiller. I only saved $20 killing myself to do it in 4 hours. I figure i have roughly $250 in misc items (acetone, sacrificial rollers, paint trays, rentals, etc ) in addition to the cost of the product. I happened to have the 7” buffers with the diamablade attachments from another project, so that was “free” so to speak.

Looking at my bill from garage flooring llc, the 1k square foot kit was $2557, plus $100 crack filler, plus $100 install kit (rollers etc) plus $50 shoes. All prices pre-gj discount.

Hope this helps.

nice
 
To avoid these ads, REGISTER NOW!
Top Bottom