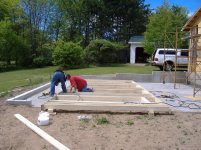
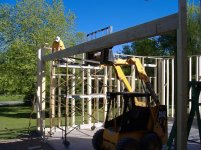
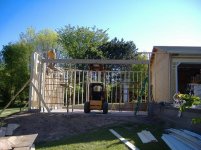
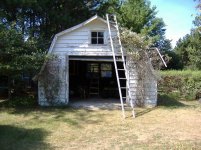
I have been hanging around this inspirational site for some time now. About three years ago I knew I had to do something about my deteriorating shed. I had initially intended on jacking the shed up off the ground to pour a slab. I would have to say thats about where this site had popped up on my google search for that topic. Lets just say that this site had changed my thought process about my initial shed idea. The shed project quickly turned into a slightly larger ordeal. I blame all of you! Here is my old shed I was going to fix up.

You are using an out of date browser. It may not display this or other websites correctly.
You should upgrade or use an alternative browser.
You should upgrade or use an alternative browser.
New Shed And Garage Addition!
- Thread starter crapola82
- Start date
autoist
MEMBER EMERITUS
Man, I'd save that old shed & add onto it as needed. I love a rambling garage - has character.
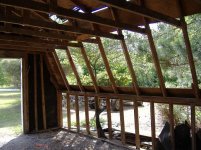
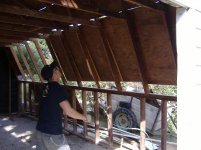
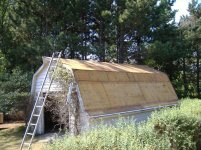
I am still trying to figure out how the picture and posting works. I have more picts to follow. During my evaluation of the shed I found many things that told me that it was time for something new. Here is some more pictures of the shed during tear down. My buddy Chris helped kick the sheeting off the sides and roof. I saved some of the sheeting which I used for unimportant aspects during the building process.
Attachments


Foul
Well-known member
In that fourth picture there - do you regularly get meteorites crashing through your roof?
voodoowagon
Active member
WOW I love it, cant wait to see more pictures of this.
Here is a picture of the shed gone. Once the sheeting was off the sides and some off the roof, the 4 wheeler made short work of pulling it down. A chain saw worked well for the rest. Then I had a pre-construction bonfire.
Does anyone know how to post pictures so they show up in the thread automatically. The way mine are showing up, you have to be logged in as a member to see the attachments. I dont really want to use the URL method using a website like photobucket. I looked on some other threads about this topic. Is there any other way?
Does anyone know how to post pictures so they show up in the thread automatically. The way mine are showing up, you have to be logged in as a member to see the attachments. I dont really want to use the URL method using a website like photobucket. I looked on some other threads about this topic. Is there any other way?
Attachments

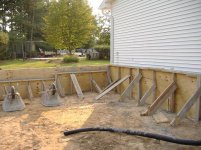
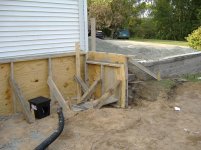
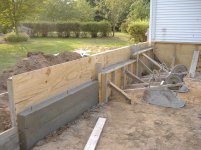
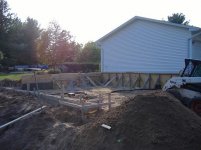
So, what started as a shed project turned into a "well, while I'm pouring concrete, I might as well pour some for a garage addition as well" type of situation. Here are pictures of the Garage pre-modification, and some shots during the concrete phase.
I contacted my local building codes, found out just how big I could build according to local code. Between the new shed, and garage addition, I will be slightly under the allowed limits. My main reason for the garage addition is because I have a heated area (the stall and a half on the right side) which was just not big enough for my tinkering needs. I wanted a bigger shop.
My land is very sandy so I had a good base......but that wasnt good enough for me. The new slab was to be poured above grade somewhat, so I was a little conserned about the far end of the slab sinking over time. So just in case, I got a 20" auger on a skid steer and sunk 4 18" sonotubes 5' down as some support pilliars. It will not sink anymore.
The new slab was poured 2.5' lower than the existing slab. It worked out well for me because of the natrual slope of the land, and the roof lined up just right. I have 10 foot ceilings in the current garage. I was looking for the magic height of 12'6" for the future hoist.
I contacted my local building codes, found out just how big I could build according to local code. Between the new shed, and garage addition, I will be slightly under the allowed limits. My main reason for the garage addition is because I have a heated area (the stall and a half on the right side) which was just not big enough for my tinkering needs. I wanted a bigger shop.
My land is very sandy so I had a good base......but that wasnt good enough for me. The new slab was to be poured above grade somewhat, so I was a little conserned about the far end of the slab sinking over time. So just in case, I got a 20" auger on a skid steer and sunk 4 18" sonotubes 5' down as some support pilliars. It will not sink anymore.
The new slab was poured 2.5' lower than the existing slab. It worked out well for me because of the natrual slope of the land, and the roof lined up just right. I have 10 foot ceilings in the current garage. I was looking for the magic height of 12'6" for the future hoist.
Attachments



autoist
MEMBER EMERITUS
So, how many bays will the 3 bay grow to?
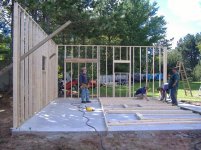
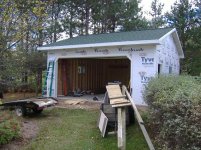
Here are the shots of the shed all completed. I just wanted to get these pictures out of the way first. The Garage Build Photos to follow in a bit. Sure is weird how you can never have enough space. Since my completion of the shed, I have practically filled it up with toys. I had to make a second floor. Inside i made a "deck" which is 8'x10', 5' off the ground in the back corner. Big enough to get two 4 wheelers or similar sized objects off the floor. I made a ramp to drive 4 wheelers, sleds, and whatever other stuff up for storage. The ramp detaches and stores off to the side. I works pretty good.
Attachments

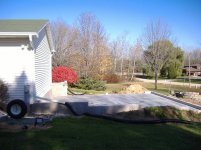
Here is a shot from the back to show the stepped off foundation to accomadate the sloping lawn. Floor is sloped with two floor drains. Vapor barrier is below the concrete. I dont have vapor barrier in the old half of the garage and its annoying in the spring. 3500psi mix. I have 6 inch curb all the way around. Walls will be 2x6" with a total height of 12'6" ceiling height. The garage sat at this stage of completion over the winter.
Attachments
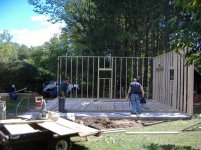
Here is the layout process. I wish I had some photos of us standing the largest wall on the left upright. Being 2x6x12, 26' long with 4 windows (extra 2x6's), it was way too heavy for us to lift. We screwed another board across the studs as a lift point. Then we stood it upright with the skid steer, ratched strapped it to the skidsteer forks and set it in place. It worked pretty slick. The back wall was built in four sections and went together great. The skid steer made short work of the garage door header as well. Although not necessary according to some building advice I received, I removed the sheeting on the old wall in order to adjoin the new studs with the old. I did not want that 7/16" piece of sheeting in between the connecting walls. I am definetly not a builder by trade, and don't really have much building knowledge at all but it just seemed right. At this point, I still had the roof in tact, so I had to cut a notch out of the gable end of 1' overhang in order for the new walls to stand up properly with the old ones. No problem for Mr. Sawsall. Notice the shed in the backround of two of the pictures. My friends laugh at me when I call it my "shed" because its bigger than some of their garages.