sachapan
Active member
After living in a house for the past six years without a garage, my wife and I bought a house in late fall with a small, attached double car garage (approximately 18' wide by 21' deep). No more parking our two motorcycles outside - yay! And room for the truck too on those cold winter nights - double yay! With two single doors, exposed studs and an open 12 foot ceiling and a single light bulb in the center, not much to look at, but a decent base to work with. The extend of the previous 'additions' from the original owners was to bang in about 40 nails in various studs presumably for hanging something.
Starting circa November 15th, the garage project phase 1 was hatched. The plan would include adding electrical circuits for outlets and lighting, insulation, drywall and paint.
There was only a concrete block wall between the house and garage, so I built out a 2x4 wall to house electrical and insulation and then be able to drywall the entire perimeter. This was attached with tapcons to the concrete block wall and screwed to the truss above.


And just a little jut out on this wall requiring the same 2x4 addition:

I ran three new 110V circuits, leaving the existing one in tact. There was an existing pair of three way switches (one inside the house and one near the exterior garage door) that controlled a single light. I added two more light boxes to this circuit in the center of the garage and then added two more light switches controlling three lights each on the perimeter, for a total of 9 lights. I also wired up two outlets that are switch controlled, higher on the wall for heat appliances or other.
Time for insulation (R-14 for walls 16" OC 2x4 and R-22 for ceiling 24" OC trusses 2x4) and vapor barrier. I always pick rock wool (Roxul in Canada) if there's a choice and there was. My wife was a trooper helping me install the insulation over a couple of cool/cold Saturday afternoons.


Having done too much drywall work on other small projects lately than I care to and because of the 12' ceilings, I contracted out the installation of 5/8" firecode rated board to a local company run by a couple of brothers:


I think the drywallers were a little surprised that I wanted three coats of mud in a garage but they were happy to do so:

It took them about five days to complete the job. I was happy with how it turned out. Since I didn't want to be painting with a roller and brush with the twelve foot ceilings, I bought one of these bad boys:

A little prep work and the next day I primed and applied two coats of semigloss white on the ceiling and walls. Once that had dried, I rolled a stripe of red at the bottom of the drywall above the concrete. (Rolling red on top of the semi gloss required about seven coats to look good: yes, I was too cheap to buy some grey primer):


And I managed to meet my goal of getting the motorcycles back into the garage just hours before the first snow of the season started blowing 'round outside (December 23rd):

I also bought two large (7'x18') car mats to drive in onto from Costco to cover up the concrete and offer some protection for the salt, mud and slush we'll be dragging in on the Durango, which is a fairly tight fit side to side through the garage door. *shakes fist at fixed side mirrors on truck* And one for the bikes to park on.
I hung the central vac unit back up, rewired the garage door openers and properly wired the safety beam for one of the doors - the previous owners had the beam installed at the ceiling immediately above the opener itself, kinda useless from a safety point of view. I had pre-run the necessary low voltage wires for the safety sensors and openers before the drywall went up for a cleaner look.
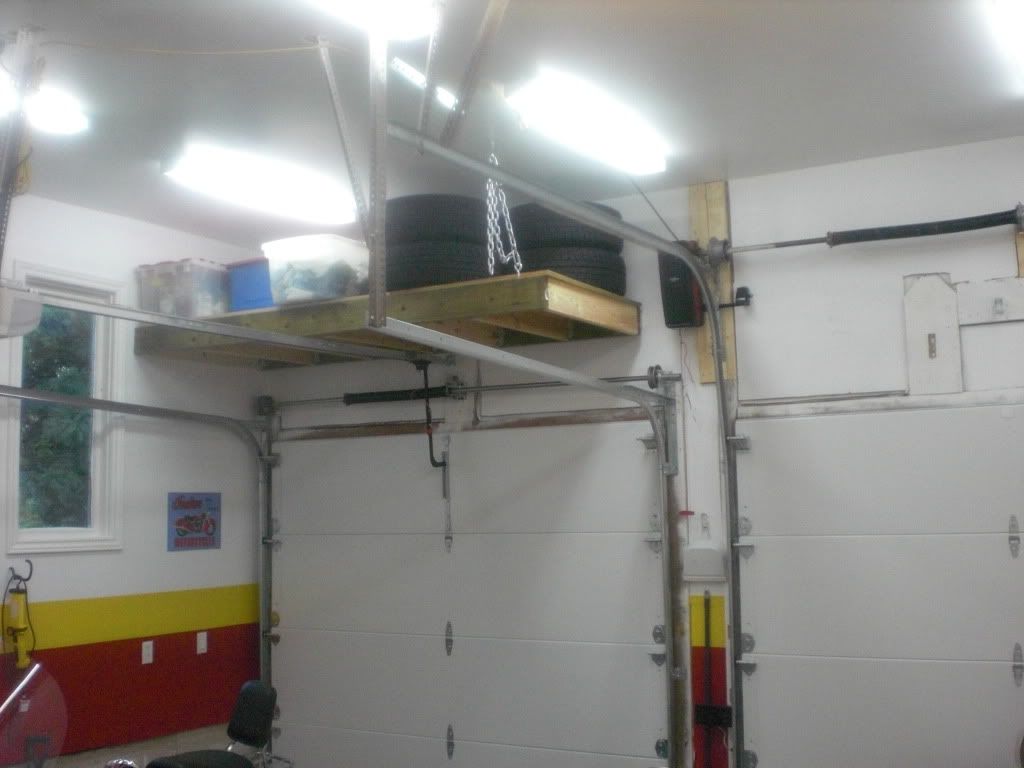
I installed the 9@2 lamp 4 foot T8 florescent lights ($23 CDN each at Home Depot after much shopping around) which are rated for 18° Fahrenheit and have the smallest ballasts I've ever seen. With the white semigloss, its like a paint booth with them all lit up. I'm glad I wired the three lighting zones, usually the center bank is sufficient but I'll be using the full candle power a fair bit I'm sure. The last house I had that had a garage had exposed studs and it was always dark in there.
I'm very happy with how the project has turned out so far. Some of the next things to do include:
- Add a natural gas ceiling mounted heater (think Mr. Heater)
- Add some insulation to the wooden garage doors (I did install side weatherstripping so you can't see daylight around the doors anymore)
- Installing cabinets - we are is the process of installing new kitchen cupboards so guess whose getting the hand me downs We seem to have a knack for having five or six renovation projects on the go simultaneously
- Replacing the man door, which is a hollow exterior wood door that doesn't seal very well or close easily.
- I plan to paint a second, thinner stripe above the red. I'm thinking fairly bright yellow, and maybe a black or blue pinstripe between/above them. I'm not trying to mimic any particular color combination or scheme with the design just want it visually interesting and bright for working in.
- Going to try my hand at a little mural on one wall - the Thrush bird (I've just always liked that mascot)

- Maybe build a mezzanine above the garage doors for storage
- Once the spring rolls around, I plan to epoxy the floor and concrete portion of the walls, although I'll keep the mats too.
- I have flirted with the idea of a lift but I think that I could only work on one side of the vehicle at a time (when the truck is parked, it is too tight to exit on the passenger side).
- Try to incorporate some of the 5 billion ideas I've seen on this forum
And then, umm, maybe actually do some work in the garage. Bikes need some winter time tune ups. My car will need an oil change soon.....and tie rods........and the truck didn't get a fall waxing because of moving....and....and...and.....
So far I've managed to keep the usual lawn care, etc junk out of the garage, although two shovels now live there but that's mostly because its winter. The house currently has an unfinished basement which is where everything is for now and in the spring/summer I plan to build a garden shed.
Looking at the pictures, I have to figure out a better way to capture the room as a whole.
Comments and suggestions for phase 2 (and beyond) welcome.
Starting circa November 15th, the garage project phase 1 was hatched. The plan would include adding electrical circuits for outlets and lighting, insulation, drywall and paint.
There was only a concrete block wall between the house and garage, so I built out a 2x4 wall to house electrical and insulation and then be able to drywall the entire perimeter. This was attached with tapcons to the concrete block wall and screwed to the truss above.
And just a little jut out on this wall requiring the same 2x4 addition:
I ran three new 110V circuits, leaving the existing one in tact. There was an existing pair of three way switches (one inside the house and one near the exterior garage door) that controlled a single light. I added two more light boxes to this circuit in the center of the garage and then added two more light switches controlling three lights each on the perimeter, for a total of 9 lights. I also wired up two outlets that are switch controlled, higher on the wall for heat appliances or other.
Time for insulation (R-14 for walls 16" OC 2x4 and R-22 for ceiling 24" OC trusses 2x4) and vapor barrier. I always pick rock wool (Roxul in Canada) if there's a choice and there was. My wife was a trooper helping me install the insulation over a couple of cool/cold Saturday afternoons.
Having done too much drywall work on other small projects lately than I care to and because of the 12' ceilings, I contracted out the installation of 5/8" firecode rated board to a local company run by a couple of brothers:
I think the drywallers were a little surprised that I wanted three coats of mud in a garage but they were happy to do so:
It took them about five days to complete the job. I was happy with how it turned out. Since I didn't want to be painting with a roller and brush with the twelve foot ceilings, I bought one of these bad boys:
A little prep work and the next day I primed and applied two coats of semigloss white on the ceiling and walls. Once that had dried, I rolled a stripe of red at the bottom of the drywall above the concrete. (Rolling red on top of the semi gloss required about seven coats to look good: yes, I was too cheap to buy some grey primer):
And I managed to meet my goal of getting the motorcycles back into the garage just hours before the first snow of the season started blowing 'round outside (December 23rd):
I also bought two large (7'x18') car mats to drive in onto from Costco to cover up the concrete and offer some protection for the salt, mud and slush we'll be dragging in on the Durango, which is a fairly tight fit side to side through the garage door. *shakes fist at fixed side mirrors on truck* And one for the bikes to park on.
I hung the central vac unit back up, rewired the garage door openers and properly wired the safety beam for one of the doors - the previous owners had the beam installed at the ceiling immediately above the opener itself, kinda useless from a safety point of view. I had pre-run the necessary low voltage wires for the safety sensors and openers before the drywall went up for a cleaner look.
I installed the 9@2 lamp 4 foot T8 florescent lights ($23 CDN each at Home Depot after much shopping around) which are rated for 18° Fahrenheit and have the smallest ballasts I've ever seen. With the white semigloss, its like a paint booth with them all lit up. I'm glad I wired the three lighting zones, usually the center bank is sufficient but I'll be using the full candle power a fair bit I'm sure. The last house I had that had a garage had exposed studs and it was always dark in there.
I'm very happy with how the project has turned out so far. Some of the next things to do include:
- Add a natural gas ceiling mounted heater (think Mr. Heater)
- Add some insulation to the wooden garage doors (I did install side weatherstripping so you can't see daylight around the doors anymore)
- Installing cabinets - we are is the process of installing new kitchen cupboards so guess whose getting the hand me downs
We seem to have a knack for having five or six renovation projects on the go simultaneously- Replacing the man door, which is a hollow exterior wood door that doesn't seal very well or close easily.
- I plan to paint a second, thinner stripe above the red. I'm thinking fairly bright yellow, and maybe a black or blue pinstripe between/above them. I'm not trying to mimic any particular color combination or scheme with the design just want it visually interesting and bright for working in.
- Going to try my hand at a little mural on one wall - the Thrush bird (I've just always liked that mascot)
- Maybe build a mezzanine above the garage doors for storage
- Once the spring rolls around, I plan to epoxy the floor and concrete portion of the walls, although I'll keep the mats too.
- I have flirted with the idea of a lift but I think that I could only work on one side of the vehicle at a time (when the truck is parked, it is too tight to exit on the passenger side).
- Try to incorporate some of the 5 billion ideas I've seen on this forum
And then, umm, maybe actually do some work in the garage. Bikes need some winter time tune ups. My car will need an oil change soon.....and tie rods........and the truck didn't get a fall waxing because of moving....and....and...and.....
So far I've managed to keep the usual lawn care, etc junk out of the garage, although two shovels now live there but that's mostly because its winter. The house currently has an unfinished basement which is where everything is for now and in the spring/summer I plan to build a garden shed.
Looking at the pictures, I have to figure out a better way to capture the room as a whole.
Comments and suggestions for phase 2 (and beyond) welcome.