90roadster
Well-known member
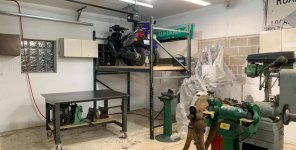
Finally got around to upgrading my welding table today. I had a beefy but small 2’ x 4’ table for years but larger garage now allowed for proper table. Went with 4’ x 5’ X 1/2” top with 3x3 uprights and 2x2 frame. Still have to add some hitch/receiver tubes all around for Beverly and Vises , maybe some paint too ...
Attachments
-
 67069DD5-DC58-4031-8AF1-2668FA7B84F0.jpg147.6 KB · Views: 1,010
 -
 07A1F98A-CFF4-41E4-974C-15F9C01CA758.jpg151.4 KB · Views: 1,072
 -
 35A5CBD0-054A-40C0-94A0-DFA743708F86.jpg152.3 KB · Views: 1,051
 -
 F053639D-3F8C-4B08-B4BA-42B1A8536A00.jpg149.1 KB · Views: 1,099
 -
 88BD6CE8-5F65-4BAE-A7C2-EDB336C86F61.jpg152.1 KB · Views: 1,112
 -
 B9B11797-62BF-4EBE-9AA4-C517911CD8A5.jpg156.1 KB · Views: 1,045
 -
 39516907-EE0B-44E8-AE4E-D703C8685CAD.jpg154 KB · Views: 990


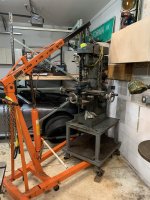
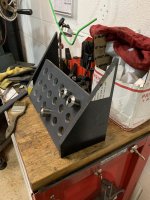
") (im super excited). This is an Enco knee mill from early 90s. Currently the first work in progress project on it is r8 collet rack
(im super excited). This is an Enco knee mill from early 90s. Currently the first work in progress project on it is r8 collet rack