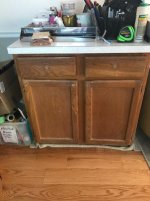
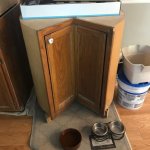
I built this bench and added the cabinets over the last 3 days.
What features should i add or am i not thinking about.
Also paint or varnish the workbench?

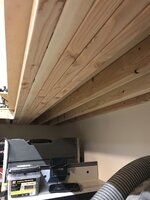
5x 2x4’s under the front of the bench so there is no deflection. There a full 8’ long and the bench is 28” deep

Todo still
-Make another cabinet / shelf for boxed tool storage above the cabinets. 2’ deep x 8’ long
-More power outlets
-switched power for the air compressor
-LED strip lights under the cabinet and above the bench
-Move large tool box where the small tool box is
-face trim on the bench
-paint or varnish the bench
-Raspberry PI4 with monitor is going on the lefts side
-drill press is being re built and refinished
-vice mounted on right side of the bench
-pull down that ugly paneling and paint the wall
-mount the grinder
Post pictures of your workbench so i can also get ideas...
Thanks!!!!
Sent from my iPhone using Tapatalk Pro
What features should i add or am i not thinking about.
Also paint or varnish the workbench?
5x 2x4’s under the front of the bench so there is no deflection. There a full 8’ long and the bench is 28” deep
Todo still
-Make another cabinet / shelf for boxed tool storage above the cabinets. 2’ deep x 8’ long
-More power outlets
-switched power for the air compressor
-LED strip lights under the cabinet and above the bench
-Move large tool box where the small tool box is
-face trim on the bench
-paint or varnish the bench
-Raspberry PI4 with monitor is going on the lefts side
-drill press is being re built and refinished
-vice mounted on right side of the bench
-pull down that ugly paneling and paint the wall
-mount the grinder
Post pictures of your workbench so i can also get ideas...
Thanks!!!!
Sent from my iPhone using Tapatalk Pro


")