To avoid these ads, REGISTER NOW!

Newbie having a blast!

winkabob

Member
Joined
Oct 31, 2007
Messages
7
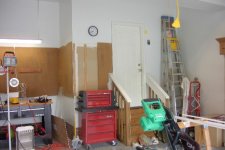
Just wanted to say hello. I've recently started updating my 2 car attached garage. It was pretty typical I think - only partially drywalled, not painted and kind of a mess. Made steady progress so far - finished the drywall install, mudding, and sanding. Sheesh - I have alot of respect for anyone that installs drywall for a living. What a pain! Thought I had the mud sanded down nice and smooth but once the semi-gloss went on it was pretty apparent that I could have done better in spots. Oh well - it is a vast improvement over what I had. I have had a great time with my project so far.

I stumbled across this board after I started poking around, trying to learn about floor epoxy. I was just planning on buying the $62 Quikrete kit from Lowe's and rolling it on. Happened to speak with a guy at work that is seriously into aviation. He mentioned some incidents he has seen where a plane would pull into a hanger with hot tires and tear up the epoxied floor when moved at a later time. Decided I had better learn more and found this board. I have learned a ton already! I have several questions and it looks like this is a great place to hang out and get advice.

Bryan
 
To avoid these ads, REGISTER NOW!
OP
W

winkabob

Member
Joined
Oct 31, 2007
Messages
7
indeed! we need pics!

:needpics:

Ok - Here is what I got so far:

Step 1: Build shed to keep lawnmower and other such stuff in it
Step 2: Insulate, install new drywall where needed, mud, sand, clean up
the environmental disaster left from sanding, prime, paint with
semi-gloss (love the semi-gloss - so easy to clean: too bad
it shows where I messed up the mud/sanding. oh well - its a
vast improvement)
Step 3: Replace the horrid Rubbermaid plastic cabinent with a metal cabinet
picked up from surplus sale at work. Mount cabinet on casters so
that it can be moved to clean behind it.
Step 4: Install 40' retractable power cord from ceiling to utilize the available
receptacle up there (door opener uses the other). Wife loved that
one - "why is that ugly thing hanging from the ceiling?" :)
Step 5: Install trim boards where needed
Step 6: Tear out the grubby old pegboard and replace with new vinyl
pegboard
Step 7: Decide what to do with brick foundation and floor (if anything)
Toying with painting bricking and going with VCT floor
 

Attachments

  • PDRM1032sized.JPG
    PDRM1032sized.JPG
    44.5 KB · Views: 12
  • PDRM1034sized.JPG
    PDRM1034sized.JPG
    65.9 KB · Views: 8
  • PDRM1035sized.JPG
    PDRM1035sized.JPG
    56.1 KB · Views: 12
  • PDRM1036sized.JPG
    PDRM1036sized.JPG
    39.2 KB · Views: 21
  • PDRM1037sized.JPG
    PDRM1037sized.JPG
    70.5 KB · Views: 18
  • PDRM1038sized.JPG
    PDRM1038sized.JPG
    57.9 KB · Views: 15

awakeinAZ

Well-known member
Joined
Nov 6, 2007
Messages
145
Location
AZ
If you got that blue extension cord thing from EBAY or Amazon, and you would like a spare cord for free, just PM me your address. I will be happy to send you mine as, the third time I used it the spring blew the case apart :(

I cut the cord off to use as a spare.

Everything looks great though!
 
OP
W

winkabob

Member
Joined
Oct 31, 2007
Messages
7
If you got that blue extension cord thing from EBAY or Amazon, and you would like a spare cord for free, just PM me your address. I will be happy to send you mine as, the third time I used it the spring blew the case apart :(

I cut the cord off to use as a spare.

Everything looks great though!

Yikes! I got mine from Northern Tool here in town. I was just about to pitch the box it came in. Think I'll hang onto it for awhile. It seemed fairly well made and I have been using that baby alot so far. Guess we'll see how she holds up.
 
To avoid these ads, REGISTER NOW!
Top Bottom