To avoid these ads, REGISTER NOW!

Northern Indiana Pole Barn: Part 1

KevinR

Active member
Joined
Apr 20, 2011
Messages
33
Long time first time, yada yada yada. Anyhow, first a little bit of catch up. Back in 2014, shortly after graduating from Purdue (Boiler Up!) I closed on an old farm house, built in the mid 1860s. House is cool, lots of character, lots of work etc etc. But more importantly, a 30 x 40 FBI Pole Barn, built in 2013. This pole barn will be the focus of this thread. I started with essentially an empty shell, gravel floor, no power. First things first, concrete was poured and work started on the electric. This was my first time doing extensive electric work, but I got it done with some help from the Interwebs and trial and error.
 

Attachments

  • barn14.jpg
    barn14.jpg
    20.7 KB · Views: 6
  • concrete.jpg
    concrete.jpg
    60.2 KB · Views: 42
  • electric.jpg
    electric.jpg
    106.6 KB · Views: 42
  • electric 2.jpg
    electric 2.jpg
    94.8 KB · Views: 40
Last edited:
To avoid these ads, REGISTER NOW!
OP
K

KevinR

Active member
Joined
Apr 20, 2011
Messages
33
The barn spent the next several years largely in this state, being used for projects on the house and work on vehicle...it's primary purpose. I remodeled most of the house in this barn, assorted pictures below. Had fun with another Jeep and did a mechanical restoration on a 1970 C10. To accommodate this work, I built some permanent temporary storage shelves.
 

Attachments

  • 4th of July Silverado.jpg
    4th of July Silverado.jpg
    95.4 KB · Views: 41
  • 83CJ on trailer.jpg
    83CJ on trailer.jpg
    86 KB · Views: 41
  • wheel off.jpg
    wheel off.jpg
    154.1 KB · Views: 43
  • 250 out.jpg
    250 out.jpg
    125.2 KB · Views: 43
  • C10 on trailer.jpg
    C10 on trailer.jpg
    135.1 KB · Views: 41
  • temp bench.jpg
    temp bench.jpg
    140.3 KB · Views: 42
  • temp shelf.jpg
    temp shelf.jpg
    98.9 KB · Views: 44
Last edited:
OP
K

KevinR

Active member
Joined
Apr 20, 2011
Messages
33
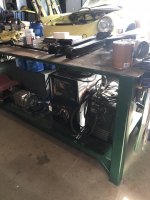
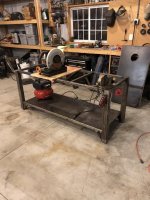
As is tradition, a welding table post. I had been welding on the floor or sawhorses for several years. When winter came around I had time to make something a little more heavy duty. Top is 1/4 in plate that I bought off Facebook. Plate started at about 60 inches wide. If anyone is curious, a tailgate is about 59 inches...

I added storage for vise grips per this forum and will add grinder storage down the line.
 

Attachments

  • 2 hobarts.jpg
    2 hobarts.jpg
    100.6 KB · Views: 28
  • welding table.jpg
    welding table.jpg
    113.1 KB · Views: 32
  • vise grips.jpg
    vise grips.jpg
    111.8 KB · Views: 31
Last edited:
OP
K

KevinR

Active member
Joined
Apr 20, 2011
Messages
33
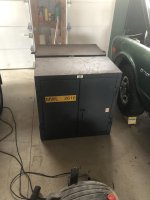
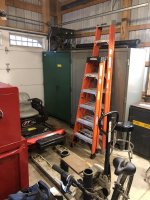
Inspired by Jack (of course) and time working at Allison Transmission, I began the hunt for Strong Hold cabinets. This forum, again, turned me on to a series of liquidation auctions for Caterpillar in Aurora IL. Hate to see a company up and leave but I was able to snag a number of these cabinets (plus some Lyons and off brands included in the sale lots that I passed off to friends). In the end, I paid between $25 and $200 for each of the cabinets. What a huge difference in the garage for cleaning things up.
 

Attachments

  • stronghold1.jpg
    stronghold1.jpg
    64.6 KB · Views: 25
  • stronger hold.jpg
    stronger hold.jpg
    109.9 KB · Views: 25
  • new lights.jpg
    new lights.jpg
    106.6 KB · Views: 25
  • strong hold.jpg
    strong hold.jpg
    94 KB · Views: 28
Last edited:
To avoid these ads, REGISTER NOW!
OP
K

KevinR

Active member
Joined
Apr 20, 2011
Messages
33
This past winter my girlfriend decided that she would like to get her dad's Alfa running. Well, she'd like me to do that. So it came over from their place.

Engine came out. Original plan was to rebuild the SPICA injection, but I found a Euro carb manifold, so that will be replacing the fuel injection. Along with a full suspension, brake, etc. rebuild.
 

Attachments

  • alfa rolled in.jpg
    alfa rolled in.jpg
    152.5 KB · Views: 24
  • gonna stay a while.jpg
    gonna stay a while.jpg
    117.3 KB · Views: 19
OP
K

KevinR

Active member
Joined
Apr 20, 2011
Messages
33
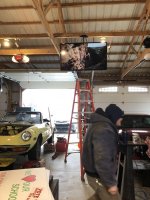
Then Corona happened. I would be working from home and needed office space. At first, this looked relatively temporary.

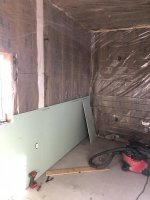
As the situation unfolded, it looked like I would be here for a while. I can deal with cold in the barn, but it's tough to conduct business with thunderous rain on a tin roof. A new plan was in order. I had been hemming and hawing about building out a heated space in here for a while, but had pout it off as we are going to move in the next couple years (hence the Part 1 in the title).

In any case, work began. I plan to have the drywall sanded and painted by this weekend. Then I can move in, reorganize the garage (again) and get back to tinkering.
 

Attachments

  • temp office.jpg
    temp office.jpg
    149 KB · Views: 36
  • temp office 2.jpg
    temp office 2.jpg
    110.5 KB · Views: 32
  • CoronaOffice1.jpg
    CoronaOffice1.jpg
    77.9 KB · Views: 32
OP
K

KevinR

Active member
Joined
Apr 20, 2011
Messages
33
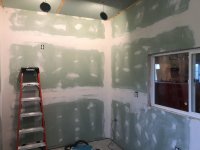
I finished sanding drywall last night! Of ANY renovation project, that is my least favorite part. More bearable this time as I wasn't making a mess of the house, and I could shut the door to the new office and keep the dust out of the garage. Rough inside dimensions are 8 feet by 14 feet. I added a window looking out into the shop. Once this is painted, the office will be home to a tanker style desk I got off the curb and my tool chest...I'm sick of the lack of climate control getting moisture in the box! Maybe a lounge chair and TV as well...
 

Attachments

  • drywall up.jpg
    drywall up.jpg
    95 KB · Views: 13
To avoid these ads, REGISTER NOW!
Top Bottom