To avoid these ads, REGISTER NOW!

Oddball (103.23590) Craftsman Drill Press?

Silverhair

Member
Joined
Oct 29, 2011
Messages
20
Location
Northern Virginia
Last weekend I acquired this Craftsman (King-Seeley – 103.23590) 12 ¼” drill press from a very nice gentleman, that I think was a short run “value priced” variation of the 15” bench top model (24505?). I’ve seen a picture of a very similar one in the 1964 Craftsman Power tool catalog (23595) and the research I’ve done hasn’t turned up much about this interesting machine – my sense is its indeed a early 60s machine. And unfortunately, I’ve had no luck finding a manual for it.

It has a Jacobs Multi-Craft MC8K33 chuck that accepts 5/64” – ½” bits, and while I don’t have a dial indicator handy, visually, runout appears minimal. Spring return is a bit weak though on the quill.

The motor (not original) sports a single step pulley, and is mounted on a swinging bracket that appears mostly original. Changing the belt on different steps seems super easy, but nothing obvious locks that bracket in-place – just the weight of the motor. Just today I found what I think will be a matching four step pulley for the motor and should have that in a week. Was this a common bracket on these machines? And does anyone know any more details on this press?
 

Attachments

  • CMANDP Side.jpg
    CMANDP Side.jpg
    1.1 MB · Views: 114
  • CMANDPmotorbracket.JPG
    CMANDPmotorbracket.JPG
    984.1 KB · Views: 110
  • CMANDPModelno.jpg
    CMANDPModelno.jpg
    317.4 KB · Views: 89
  • CMANDPMotordata.jpg
    CMANDPMotordata.jpg
    599.2 KB · Views: 96
To avoid these ads, REGISTER NOW!

FrankLee

Well-known member
Joined
Sep 13, 2010
Messages
3,616
Location
seMI, 48317
That is a 12-1/4" drill press.

Prior to 1950, 12-1/4" drill presses were also badged Craftsman. From '50 to '63 they were badged Dunlap.

Like the 15-1/2" DPs, the Craftsman 100 evolved into the Craftsman 150.

Your 103.23590 is the evolved 12-1/4" drill press with many changes. Like you said, it is in the '64 catalog. It is not in the '66 or '68 catalogs. So yes, a very short run and therefore very uncommon.


That model has been on my radar for some time. I want to compare the internals to the 103.23620/23621. From your photo, I see the spindle thrust collar and the feed return spring attachment are different.
 
Last edited:
OP
S

Silverhair

Member
Joined
Oct 29, 2011
Messages
20
Location
Northern Virginia
That is a 12-1/4" drill press.

Prior to 1950, 12-1/4" drill presses were also badged Craftsman. From '50 to '63 they were badged Dunlap.

Like the 15-1/2" DPs, the Craftsman 100 evolved into the Craftsman 150.

Your 103.23590 is the evolved 12-1/4" drill press with many changes. Like you said, it is in the '64 catalog. It is not in the '66 or '68 catalogs. So yes, a very short run and therefore very uncommon.


That model has been on my radar for some time. I want to compare the internals to the 103.23620/23621. From your photo, I see the spindle thrust collar and the feed return spring attachment are different.
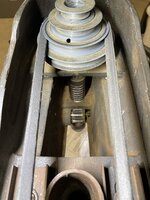
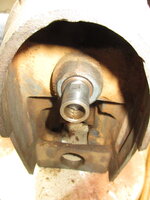
I grabbed a few photos of the inside and the rear with the motor swung up out of the way. In comparison to the earlier 23620 model, there are some differences: The motor mount; the feed return adjusting knob (mine doesnt have one), the headstock locking handle (mine needs a 1/2" wrench to adjust), and I think the base is a bit smaller on mine as well. But there are also a number of common parts.

I'm still wondering if the rear mount I have is practical?
 

Attachments

  • CMANDPInternal.JPG
    CMANDPInternal.JPG
    848.3 KB · Views: 81
  • CMANDPRear.JPG
    CMANDPRear.JPG
    792.9 KB · Views: 76

FrankLee

Well-known member
Joined
Sep 13, 2010
Messages
3,616
Location
seMI, 48317
I grabbed a few photos of the inside and the rear with the motor swung up out of the way.
Thanks for the new pictures.
In comparison to the earlier 23620 model, there are some differences: The motor mount;

I'm still wondering if the rear mount I have is practical?
It's the same concept as the later 150s with the pressed-steel pivoting mount. Some don't care for those later mounts, but I installed one on my earlier 80 and 100.
the feed return adjusting knob (mine doesnt have one),
I can't tell, but likely very similar to the later 150s.
the headstock locking handle (mine needs a 1/2" wrench to adjust),
I generally replace the lever handles with a standard hex head bolt. It just seems much safer to me. When I sell a machine, I always include the lever handle separately.
and I think the base is a bit smaller on mine as well.
It looks to be the same size as the earlier Dunlap. They printed the model number on the head panel in lieu of a separate badge on the base.
IMG_3131.JPG
But there are also a number of common parts.
No doubt.
 

Mintgrun

Well-known member
Joined
Oct 7, 2015
Messages
2,135
Location
Kingston, Wa.
I generally replace the lever handles with a standard hex head bolt. It just seems much safer to me.
I can see why.

I once watched someone grab that lever on my machine and drop the head onto the table before I could say anything. It chipped one Bakelite knob, but didn't do any damage otherwise.
 

FrankLee

Well-known member
Joined
Sep 13, 2010
Messages
3,616
Location
seMI, 48317
I can see why.

I once watched someone grab that lever on my machine and drop the head onto the table before I could say anything. It chipped one Bakelite knob, but didn't do any damage otherwise.
When I went to buy DP#126 last March, I had the motor off and was carrying it to the car. While away, the seller decided to "help" me and loosened the head lock handle. Of course the head crashed to the table. When I got home, runout on the taper was 0.018"... F**K! Fortunately, I was able to correct it to an acceptable level.

Not long after that, a guy came to buy a Craftsman 80. I always have buyers dismantle their purchase so they know how to reassemble. I asked him to loosen the motor mount bolt. Instead, he loosened the head lock... another head crash. The damage to the DP is unknown. I didn't care because he already paid me, but I still have nightmares about what if my hand got crushed by the chuck.
 
Last edited:
OP
S

Silverhair

Member
Joined
Oct 29, 2011
Messages
20
Location
Northern Virginia
Here’s a question on these; the spindle pulley will drop about 1/4” when I initially lower the feed handle/quill. The pulley will resume that height when I do the reverse. Normal?
 

FrankLee

Well-known member
Joined
Sep 13, 2010
Messages
3,616
Location
seMI, 48317
Here’s a question on these; the spindle pulley will drop about 1/4” when I initially lower the feed handle/quill. The pulley will resume that height when I do the reverse. Normal?
Not normal.

Two things...
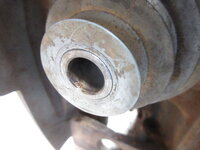
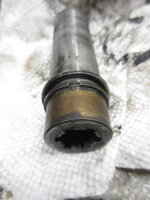
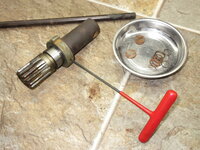
  1. The pulley sleeve is not correctly/fully installed into the pulley.
    IMG_2508.JPG IMG_8963.JPG
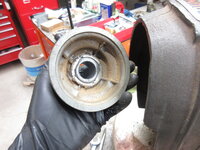
    If your 23590 is the same as earlier Dunlap models, the underside of the pulley has a steel washer that rides on the top edge of the bushing.
    IMG_2512.JPG IMG_2516.JPG IMG_2518.JPG
    The pulley sleeve has a snap ring near the bottom with a washer above.
    IMG_2527.JPG
    The bushing is press-fit into the head casting and is sandwiched between the upper pulley washer and the lower sleeve washer.
    You'll need to loosen both set screws and adjust the sleeve so there's minimal vertical play.
    IMG_2487.JPG


  2. The feed stop collar is not set correctly.
    Loosen the set screw and adjust the collar so the pinion does not back-feed the quill too far.
    IMG_2557.JPG


EDIT 11/27/2023:
Here's a thread where another member had the same issue. However, he only addressed the second issue above.
 
Last edited:
OP
S

Silverhair

Member
Joined
Oct 29, 2011
Messages
20
Location
Northern Virginia
Not normal.

Two things...
  1. The pulley sleeve is not correctly/fully installed into the pulley.
    IMG_2508.JPG IMG_8963.JPG
    If your 23590 is the same as earlier Dunlap models, the underside of the pulley has a steel washer that rides on the top edge of the bushing.
    IMG_2512.JPG IMG_2516.JPG IMG_2518.JPG
    The pulley sleeve has a snap ring near the bottom with a washer above.
    IMG_2527.JPG
    The bushing is press-fit into the head casting and is sandwiched between the upper pulley washer and the lower sleeve washer.
    You'll need to loosen both set screws and adjust the sleeve so there's minimal vertical play.
    IMG_2487.JPG


  2. The feed stop collar is not set correctly.
    Loosen the set screw and adjust the collar so the pinion does not back-feed the quill too far.
    IMG_2557.JPG


EDIT 11/27/2023:
Here's a thread where another member had the same issue. However, he only addressed the second issue above.
Thanks so much for this post! My parts looked very similar. I removed that pulley, cleaned things up a bit, re-united the pulley and its washer, and re-installed to the correct position. I now have only a hair of vertical play now. That feed stop collar wasn’t really an issue after all, though the set screw is stripped out.

As an aside; a four step pulley for my motor arrived from eBay today. Unfortunately, It wasn’t packed well and was damaged in shipment. Any suggestions for sourcing parts for my machine?
 
To avoid these ads, REGISTER NOW!

FrankLee

Well-known member
Joined
Sep 13, 2010
Messages
3,616
Location
seMI, 48317
Thanks so much for this post! My parts looked very similar. I removed that pulley, cleaned things up a bit, re-united the pulley and its washer, and re-installed to the correct position. I now have only a hair of vertical play now.
Yeah, those washers are peened/staked into the pulley and sometimes come loose. I use a center punch to re-stake them when they're loose.
That feed stop collar wasn’t really an issue after all, though the set screw is stripped out.
Those collars are cast zamac and therefore relatively soft and weak. I've never seen a set screw stripped out, but I'm not surprised.
There are a few options.
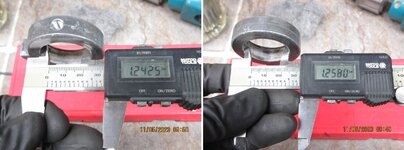
  • drill and tap the original hole for a larger set screw - This is not a great option because the collar is only 1/2" wide and 5/16" thick. The original 1/4-20 set was pushing it.
  • drill through the original hole to the opposite side and tap a new 1/4-20 hole - This is probably what I would do using a transfer punch to aid in keeping the new hole in the center of the width.
  • make or buy a new steel collar
As an aside; a four step pulley for my motor arrived from eBay today. Unfortunately, It wasn’t packed well and was damaged in shipment. Any suggestions for sourcing parts for my machine?
Ugh. Where and how badly was it damaged? Did the seller take care of it? USPS won't insure things if they are not packaged securely.
 
Last edited:
OP
S

Silverhair

Member
Joined
Oct 29, 2011
Messages
20
Location
Northern Virginia
Yeah, those washers are peened/staked into the pulley and sometimes come loose. I use a center punch to re-stake them when they're loose.

Those collars are cast zamac and therefore relatively soft and weak. I've never seen a set screw stripped out, but I'm not surprised.
There are a few options.
  • drill and tap the original hole for a larger set screw - This is not a great option because the collar is only 1/2" wide and 5/16" thick. The original 1/4-20 set was pushing it.
  • drill through the original hole to the opposite side and tap a new 1/4-20 hole - This is probably what I would do using a transfer punch to aid in keeping the new hole in the center of the width.
  • make or buy a new steel collar

Ugh. Where and how badly was it damaged? Did the seller take care of it? USPS won't insure things if they are not packaged securely.
The smallest step was cracked/torn, and had a very jagged edge. It might have been bendable back to position but likely would have torn up the v-belt. The seller gave me a refund promptly.

Scanning eBay daily for another. :)
 

FrankLee

Well-known member
Joined
Sep 13, 2010
Messages
3,616
Location
seMI, 48317
One more thing about the feed stop collar....

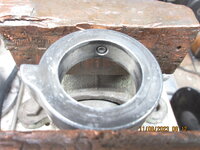
Because they are soft zamac, over-tightening the set screw can deform the collar into an egg shape. The dimension perpendicular to the set screw is smaller than the dimension parallel to the set screw. This may be the case with your collar with the stripped set screw.
feed stop collar.jpg

The deform is not visible, but in severe cases it can be very difficult to remove the collar from the pinion shaft. They can get hung-up on the set screw groove. An easy way to remove the collar is to gently squeeze the collar in a vise perpendicular to the set screw until the pinion is loose.
IMG_2921.JPG


103.23620, 103.23621, 103.23622. 103.23100, 103.23590
 
Last edited:

Mike'smeatshop

Well-known member
Joined
Apr 1, 2023
Messages
1,273
Thanks so much for this post! My parts looked very similar. I removed that pulley, cleaned things up a bit, re-united the pulley and its washer, and re-installed to the correct position. I now have only a hair of vertical play now. That feed stop collar wasn’t really an issue after all, though the set screw is stripped out.

As an aside; a four step pulley for my motor arrived from eBay today. Unfortunately, It wasn’t packed well and was damaged in shipment. Any suggestions for sourcing parts for my machine?
I have a few 4 step pulleys f you need one. Just let me know what size? From my restorations of years gone by.
 

FrankLee

Well-known member
Joined
Sep 13, 2010
Messages
3,616
Location
seMI, 48317
I also have a Craftsman 4-step cone pulley which I believe was off-the-shelf from Sears. The problem is that it does not match the drill press spindle pulley.

My o-t-s pulley is 2-1/2" tall, the drill press spindle pulley is 2-1/8" tall. The smallest step diameter on mine is 2"; the smallest step diameter on the spindle pulley is 1-3/4". The largest step diameters match; 4".

Will my pulley work on the drill press? Of course, but adjustments may be required if changing speeds.


The oe motor pulley part number on my 12-1/4"drill press is 26412-103.
 
OP
S

Silverhair

Member
Joined
Oct 29, 2011
Messages
20
Location
Northern Virginia
I also have a Craftsman 4-step cone pulley which I believe was off-the-shelf from Sears. The problem is that it does not match the drill press spindle pulley.

My o-t-s pulley is 2-1/2" tall, the drill press spindle pulley is 2-1/8" tall. The smallest step diameter on mine is 2"; the smallest step diameter on the spindle pulley is 1-3/4". The largest step diameters match; 4".

Will my pulley work on the drill press? Of course, but adjustments may be required if changing speeds.


The oe motor pulley part number on my 12-1/4"drill press is 26412-103.
I also have a Craftsman 4-step cone pulley which I believe was off-the-shelf from Sears. The problem is that it does not match the drill press spindle pulley.

My o-t-s pulley is 2-1/2" tall, the drill press spindle pulley is 2-1/8" tall. The smallest step diameter on mine is 2"; the smallest step diameter on the spindle pulley is 1-3/4". The largest step diameters match; 4".

Will my pulley work on the drill press? Of course, but adjustments may be required if changing speeds.


The oe motor pulley part number on my 12-1/4"drill press is 26412-103.
That pulley, if it’s got a 1/2“ shaft bore sounds like a winner!
 

bubinga

Well-known member
Joined
Jul 26, 2014
Messages
12,744
Location
Bridgeport Ohio. (Across River From Wheeling WV)
Thanks for the new pictures.

It's the same concept as the later 150s with the pressed-steel pivoting mount. Some don't care for those later mounts, but I installed one on my earlier 80 and 100.

I can't tell, but likely very similar to the later 150s.

I generally replace the lever handles with a standard hex head bolt. It just seems much safer to me. When I sell a machine, I always include the lever handle separately.

It looks to be the same size as the earlier Dunlap. They printed the model number on the head panel in lieu of a separate badge on the base.
IMG_3131.JPG

No doubt.
@https://www.garagejournal.com/forum/members/franklee.61589/@ FrankLeethanks again 4 all your help and info!!
 
To avoid these ads, REGISTER NOW!
Top Bottom