To avoid these ads, REGISTER NOW!

OK. Time for another homebuilt tool thread

Jim Stabe

Well-known member
Joined
Feb 18, 2009
Messages
801
Location
San Diego, Ca
The thing I enjoy most about this site is seeing what everyone actually MAKES in their shops - the Creators rather than the collectors. There have been some very inspirational threads on the subject of homemade tools but nothing in quite a while so post up your latest creations.

I'll start with a sand blaster I built to cut down the windshield glass for my MG project. I had used pressure blasters before but the things used a huge amount of abrasive and were always plugging up. I had seen references to plans online for a "pressure assist" blaster that was supposed to solve the problems with regular pressure blasters. I tried contacting the guy to purchase the plans but was never able to contact him so I looked at several pictures and read descriptions and designed my own. I must have done it right because it works great. The theory is that you use a gun from one of the old suction style blasters ( the ones that used air flow to supposedly siphon sand out of a bucket and blast parts) Home Depot online for $10. You then pressureize the sand hopper with low pressure air (7-10 psi) to move the abrasive through the feed tube to the gun. It really works slick. Here is a schematic.

View attachment schematic.pdf

I made the hopper from a discarded air tank that I cut the end off of and welded it back on backwards to provide a filling basin. The welds aren't critical because there is less than 10 psi in the tank. I put a water separator / regulator on the inlet air line to remove moisture and regulate air to the gun to about 65 psi ($30 online). A second regulator drops the pressure to 7 - 10 psi to pressurize the tank ($10 Surplus Center).

sandblaster 006.jpg

sandblaster 004.jpg
 
To avoid these ads, REGISTER NOW!

iron_worker

Well-known member
Joined
Mar 15, 2011
Messages
102
Pic links worked for me!

That's a great set up. Saved yourself some serious coin making that instead of buying a pressurized set up.

Explain how you "cut down" the windshield glass for your MG project... not sure I follow?

IW
 

MP&C

Well-known member
Joined
Oct 21, 2009
Messages
4,405
Location
Leonardtown, MD
I've posted this before, but that thread is down in the weeds so far, and besides, it fits Jims topic, so please excuse the repeat...


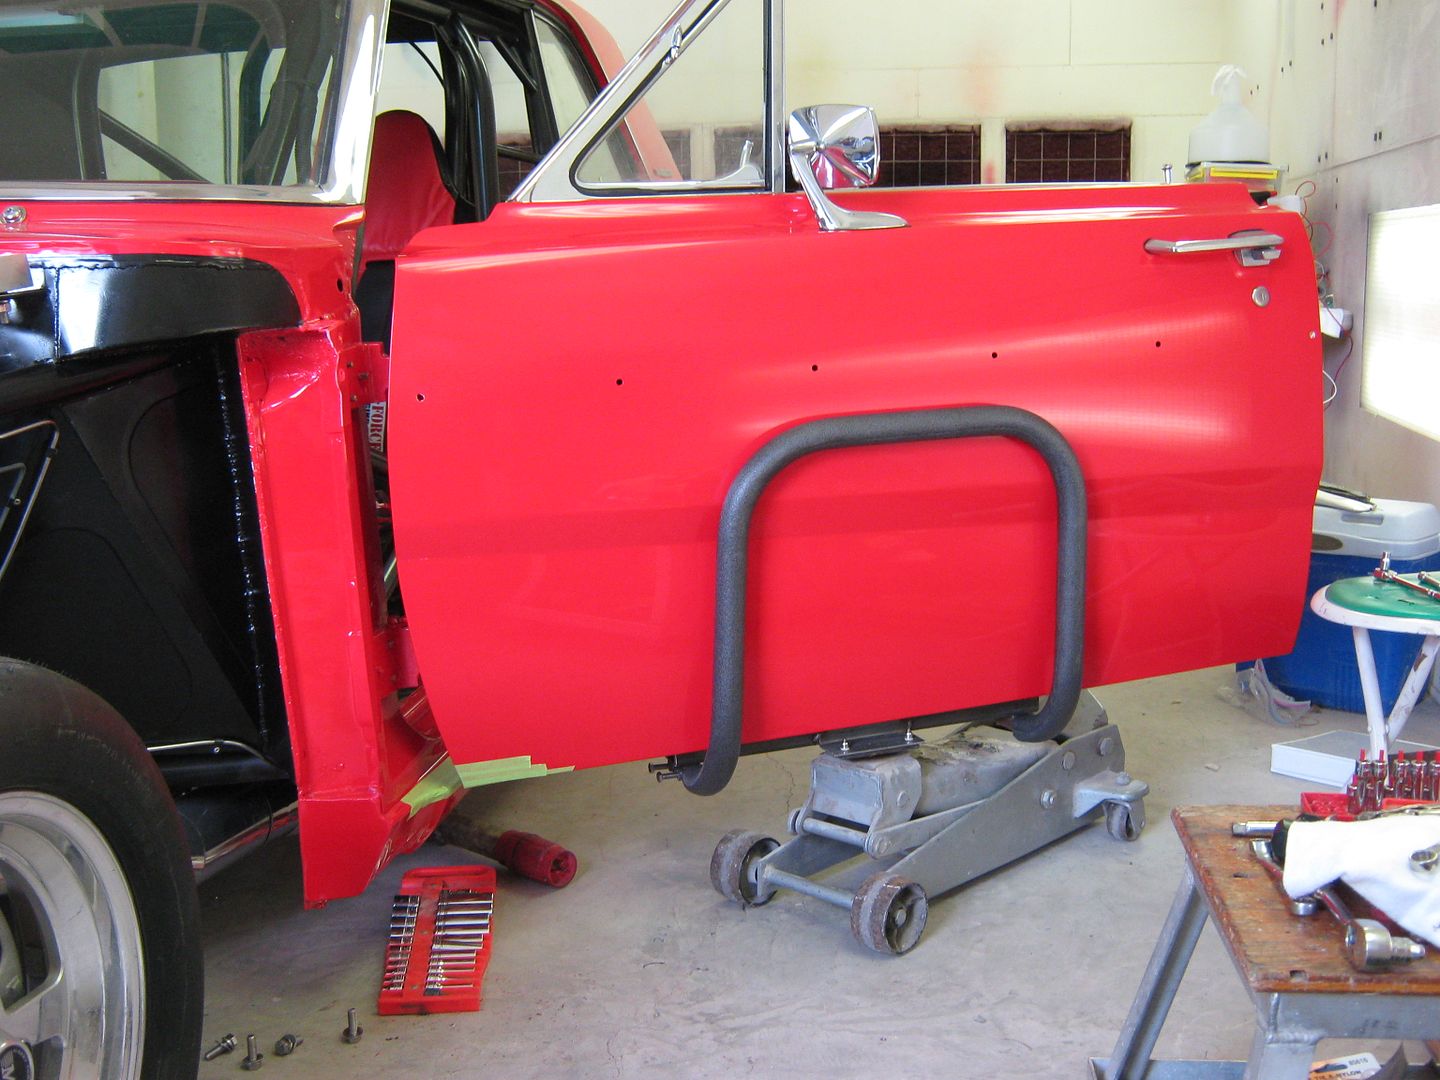
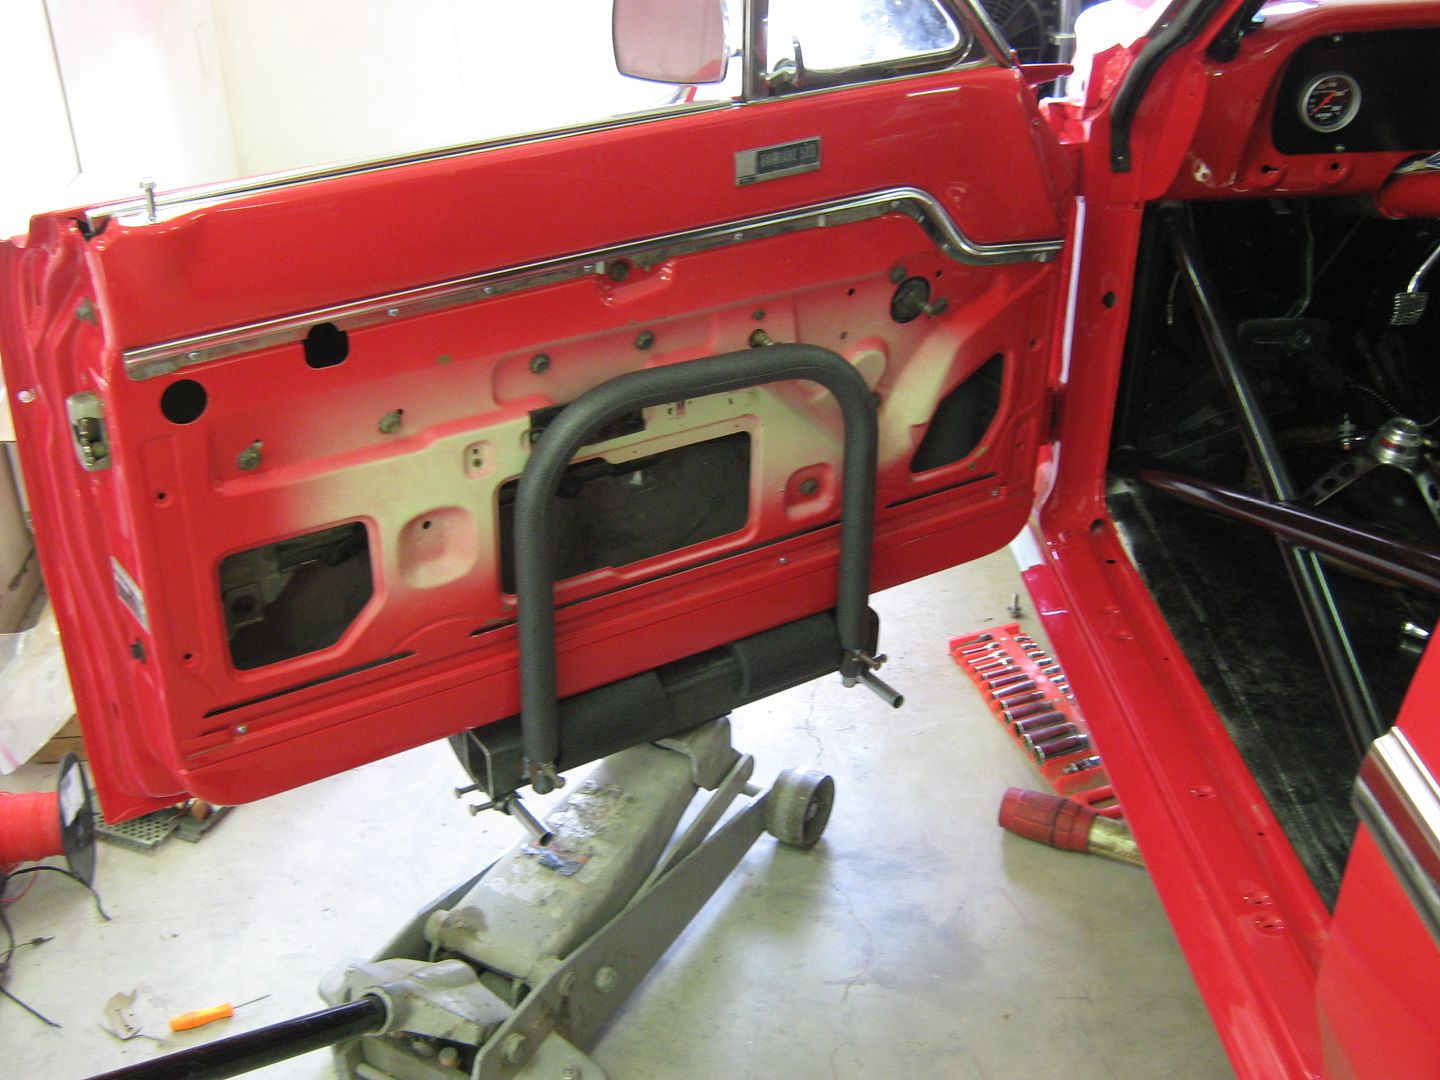
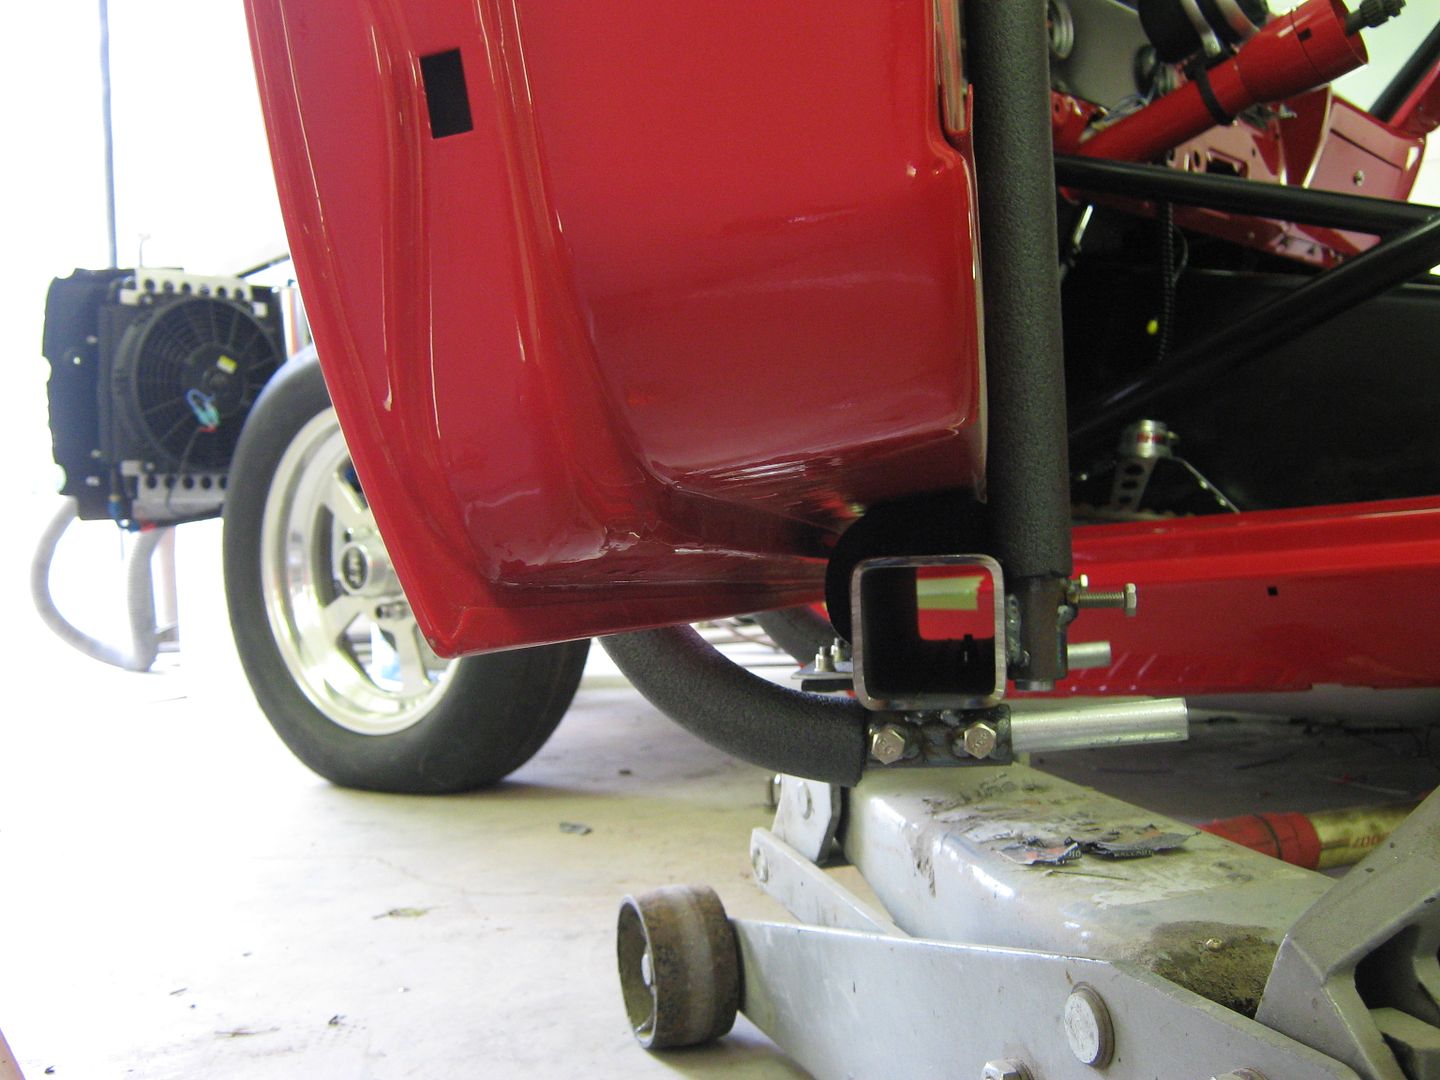
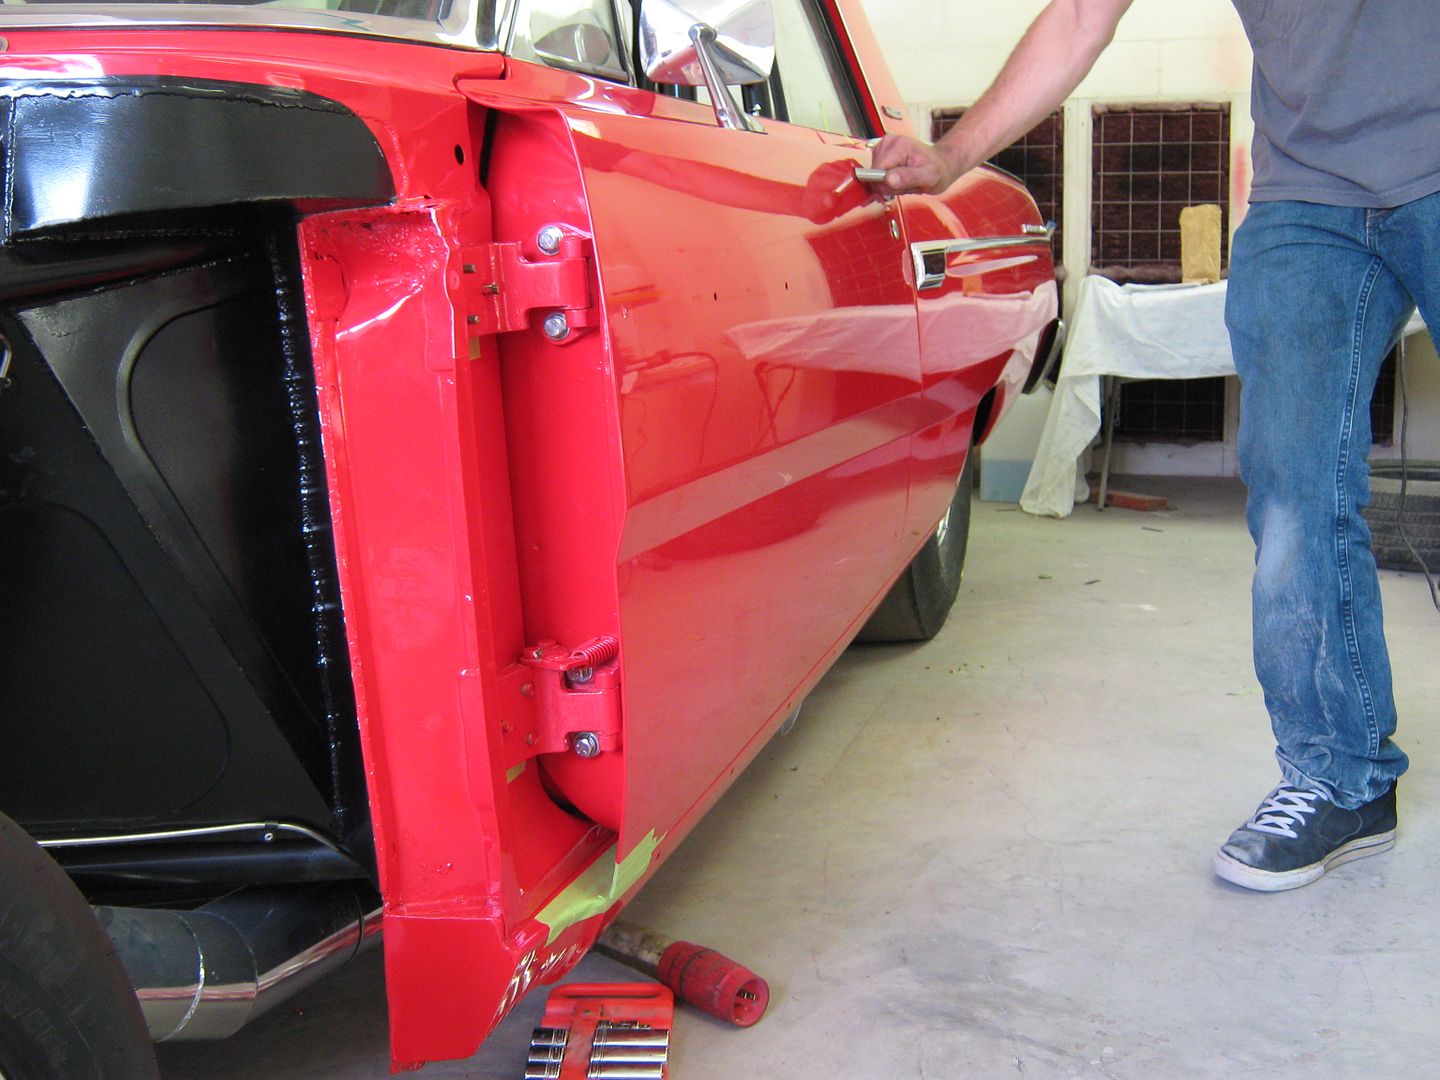
While re-assembling a 1965 Fairlane, I came up with a door installation fixture as the doors were quite heavy and we didn't need any paint chips on the new paint....

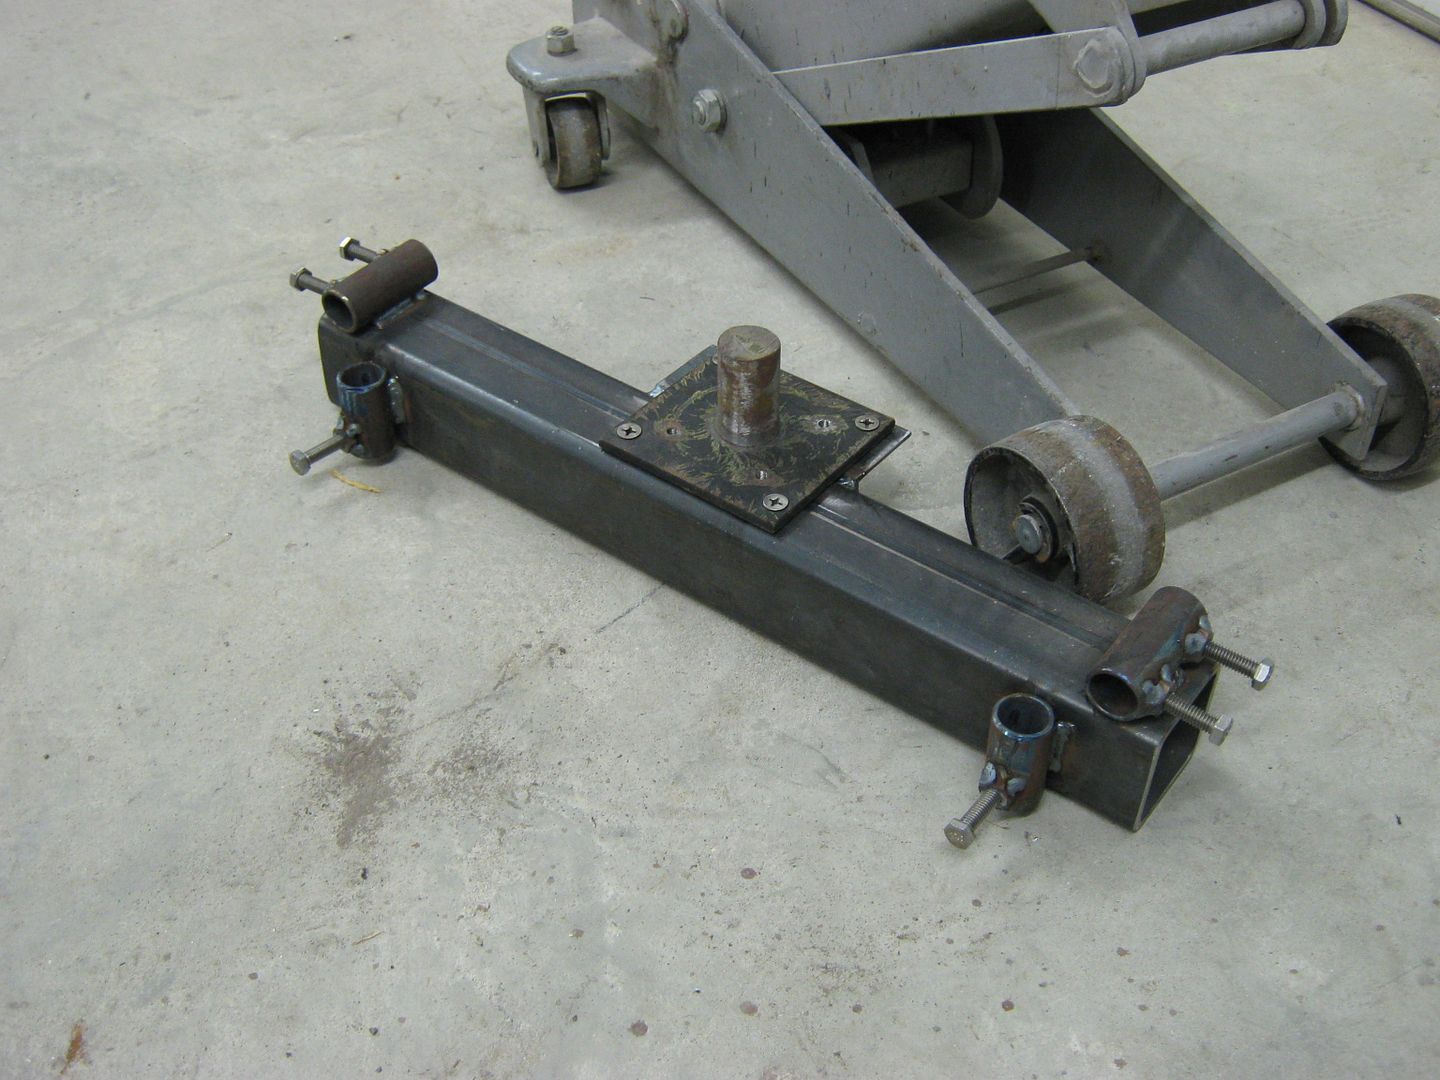
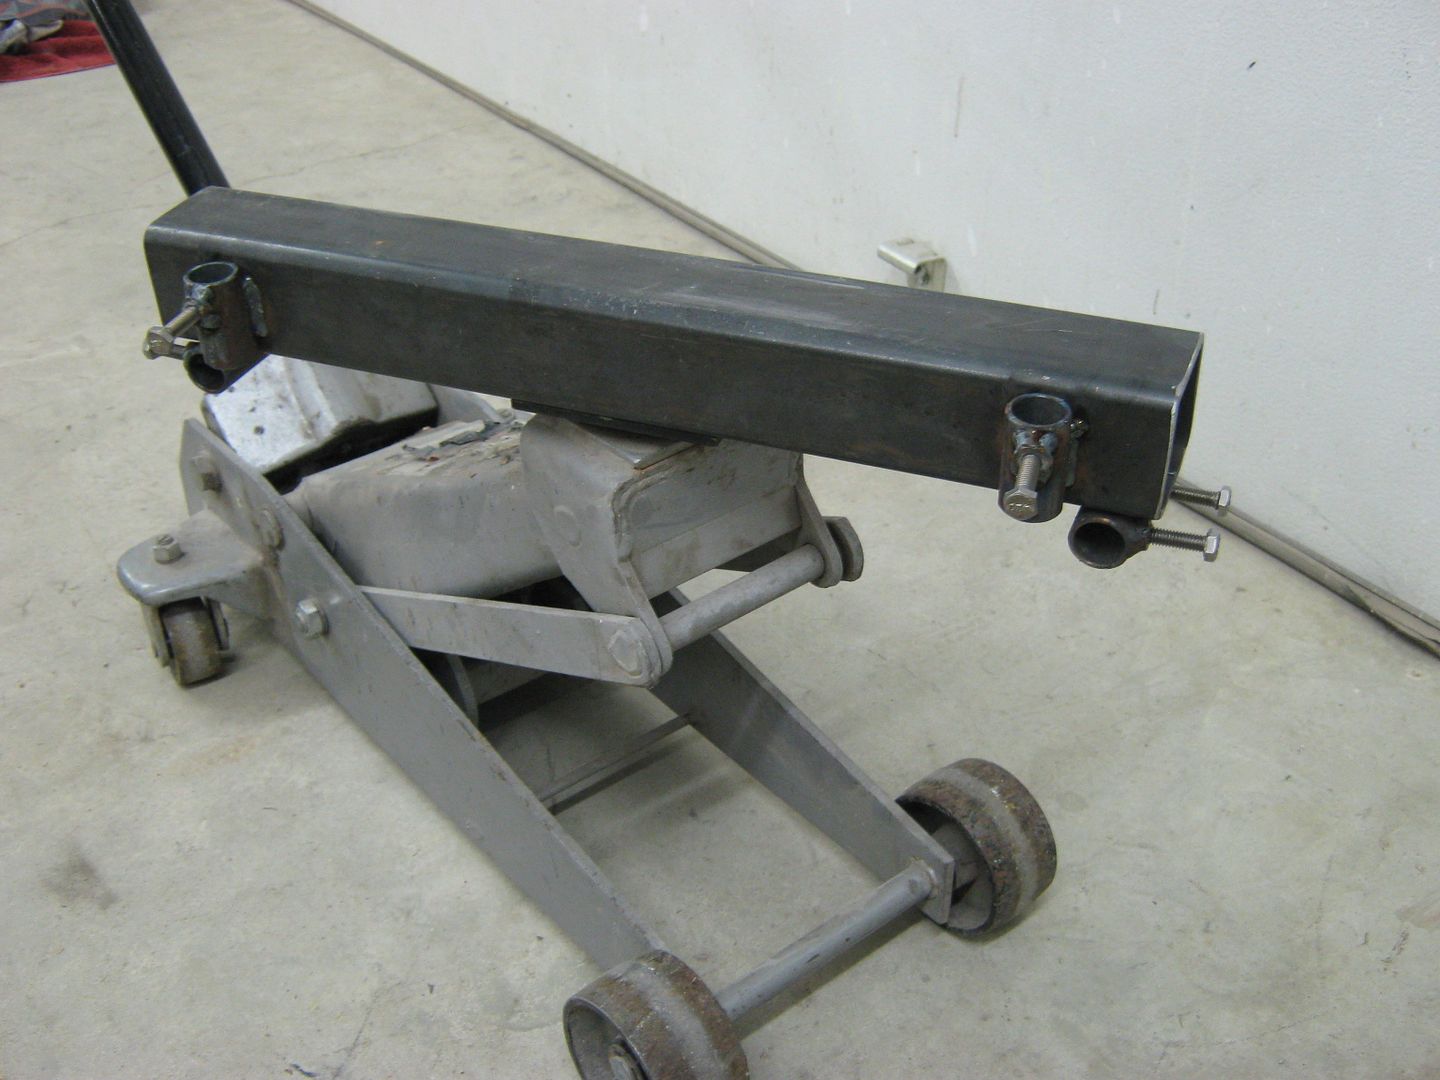
I had seen some of the cradle style that you could add to your floor jack, but I have a problem how the cradle supports the complete weight of the door across the lower edge of a door skin. Too much risk of paint damage in my view. So I came up with another version that would support the weight across a wider area on the inner door, for less risk of damage to any visible area.

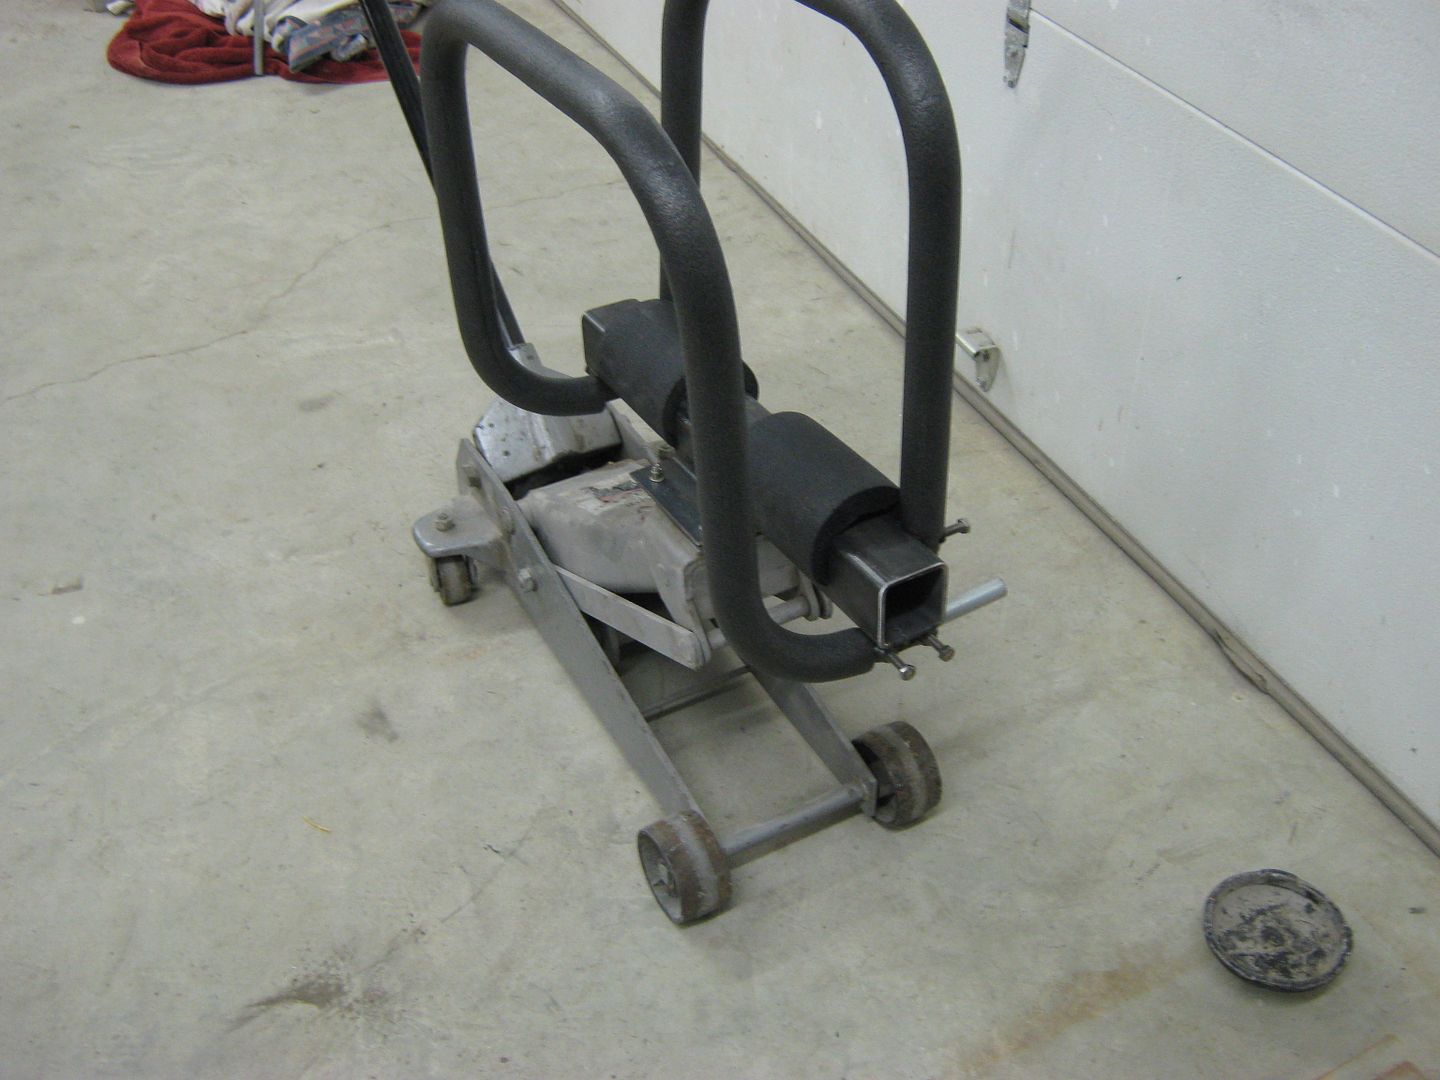
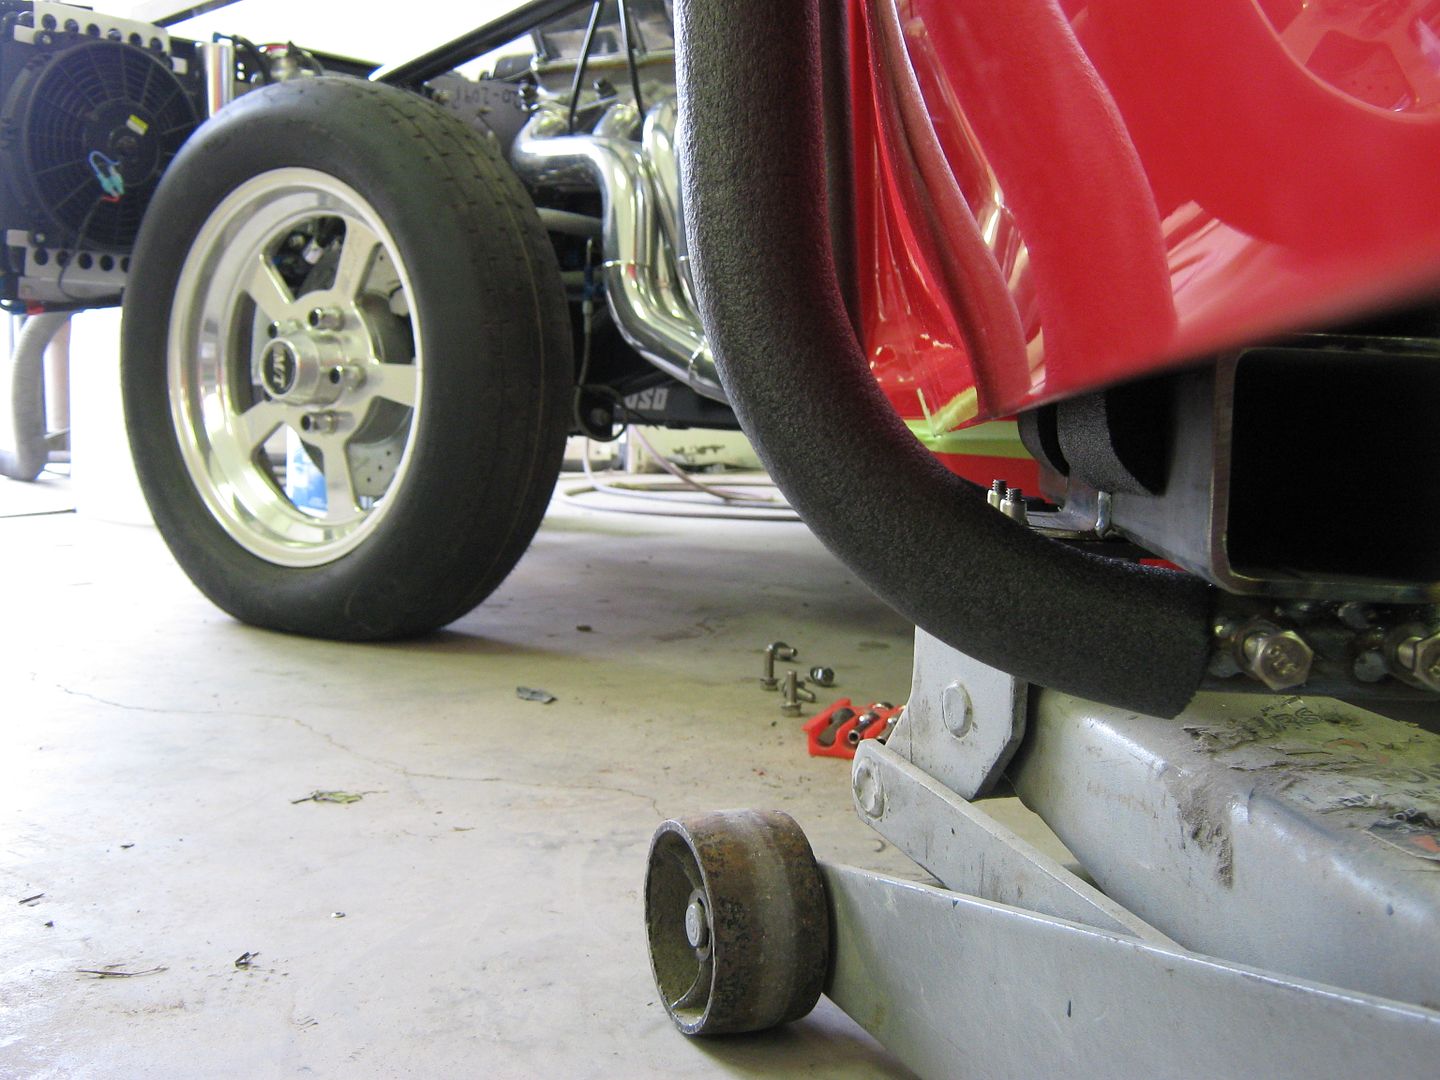
Here's the basic form, with some pipe receivers using set screws. The support braces are bent from electrical EMT and covered in pipe insulation to protect the finish..


Picture487-1.jpg


Picture488-1.jpg


Picture489-1.jpg


The support braces also help to keep the door oriented in a vertical position, to keep the door from flopping back and forth (as you may experience with the cradle style). This will help prevent paint damage/chips from excessive door movement during the install.


Picture267-1.jpg


Picture269-1.jpg


Notice nothing touches the edge of the door skin....


Picture270-1.jpg


Picture271-1.jpg


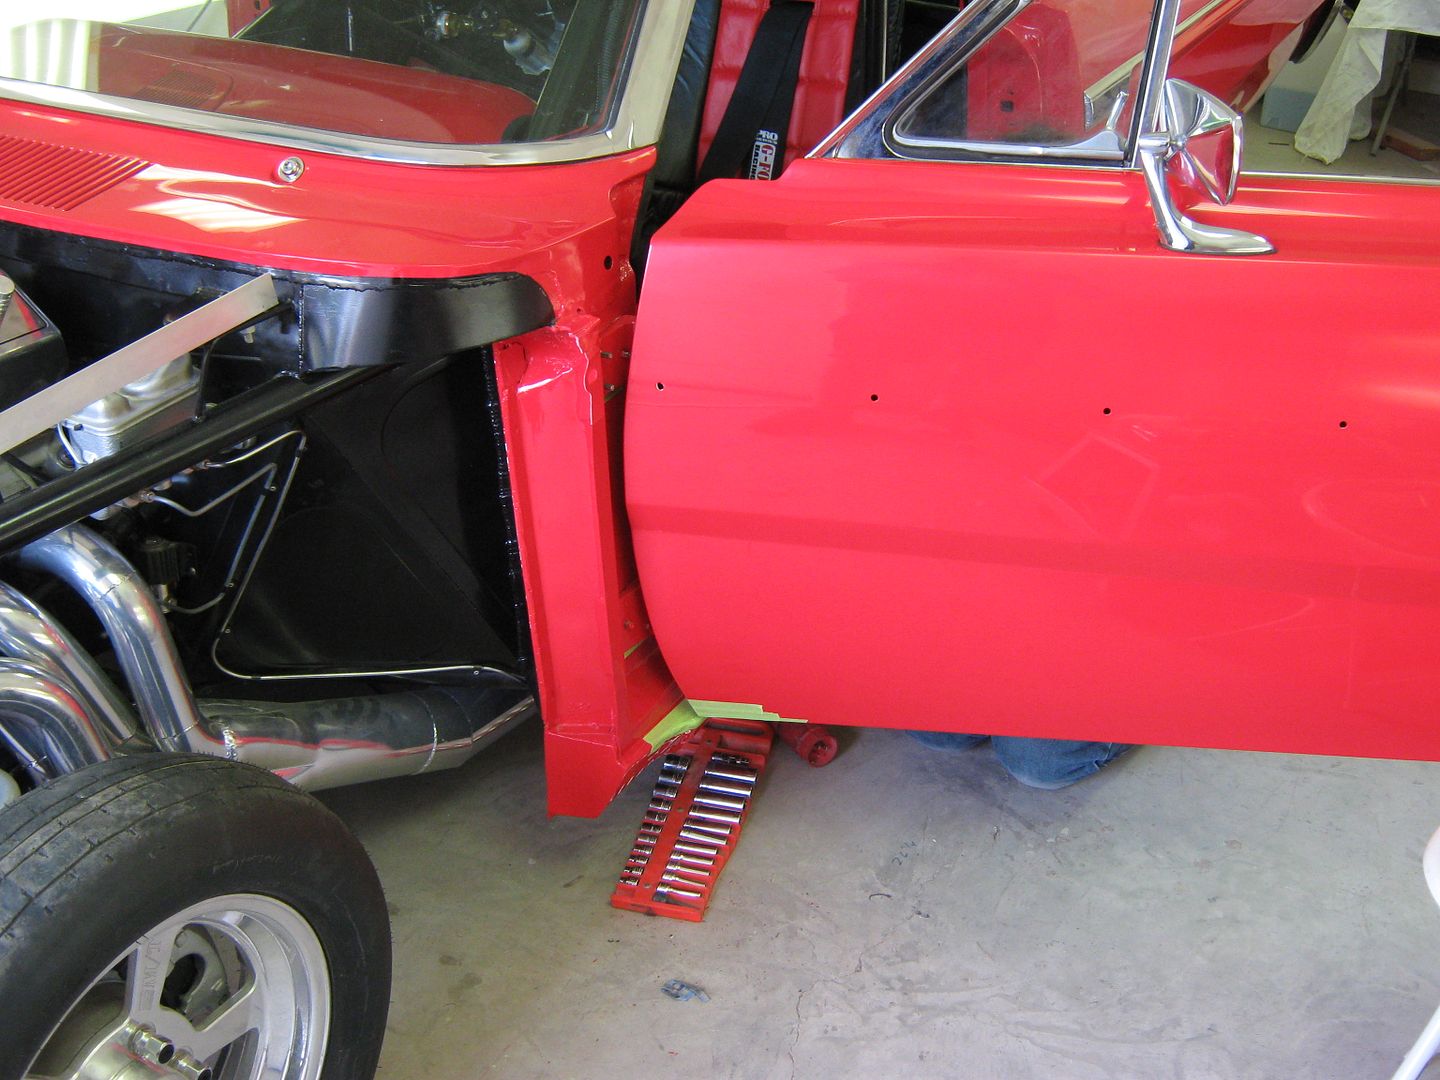
Once hinges are snug, loosen set screws for outer support brace, lower a couple inches, remove outer support brace, and simply pull jack toward rear of car to clear door.


Picture272-1.jpg


Picture274-1.jpg


Picture275-1.jpg
 
OP
J

Jim Stabe

Well-known member
Joined
Feb 18, 2009
Messages
801
Location
San Diego, Ca
Pic links worked for me!

That's a great set up. Saved yourself some serious coin making that instead of buying a pressurized set up.

Explain how you "cut down" the windshield glass for your MG project... not sure I follow?

IW

There are several ways to cut laminated glass and none of them guarantees that you won't crack it in the process.

The old timer's way is to score the cut line on both sides and then tap it on both sides to propagate the crack. Then you squirt lighter fluid on the crack and light it to soften the plastic enough so you can insert a razor blade and cut it. You had better have a spare windshield handy unless you are really good (I'm not).

Another way is to cut it on both sides with a diamond blade in an angle grinder with coolant sprayed on. You can razor blade the plastic if the heat and/or vibration hasn't created a crack.

The safest and slowest way is to mask the inside of the cut on both sides with tombstone etchers resist tape and then sandblast down to the plastic on both sides. It will probably take most of a whole day but it induces less stress on the glass and produces a nice edge in the process.

I haven't done it yet. I'll post my success or failure when I do in a couple months. Wish me luck.
 
To avoid these ads, REGISTER NOW!

R6 Racer

Well-known member
Joined
Feb 21, 2010
Messages
1,632
Location
Northern Ontario Canada
Jim Stabe I love that idea!
I am planning on building my own blast cabinet in the future. (Quite a few projects in front of that) I already have a blast pot & avoid using it because of the mess & the large volume of abrasive it uses. I was trying to think of a way to use my blast pot in conjunction with my future blast cabinet & I think your idea will be it!

Thanks
Steve
 
OP
J

Jim Stabe

Well-known member
Joined
Feb 18, 2009
Messages
801
Location
San Diego, Ca
Jim Stabe I love that idea!
I am planning on building my own blast cabinet in the future. (Quite a few projects in front of that) I already have a blast pot & avoid using it because of the mess & the large volume of abrasive it uses. I was trying to think of a way to use my blast pot in conjunction with my future blast cabinet & I think your idea will be it!

Thanks
Steve

Nice thing is that the guns are so cheap that you can have a dedicated one in the cabinet and just hook up the air and abrasive hoses to connections on the outside of the box. Your foot pedal could control the air to the blast unit.
 

bluebolt

Well-known member
Joined
Dec 28, 2008
Messages
5,447
Location
Benton LA
I've posted this before, but that thread is down in the weeds so far, and besides, it fits Jims topic, so please excuse the repeat...


While re-assembling a 1965 Fairlane, I came up with a door installation fixture as the doors were quite heavy and we didn't need any paint chips on the new paint....

I had seen some of the cradle style that you could add to your floor jack, but I have a problem how the cradle supports the complete weight of the door across the lower edge of a door skin. Too much risk of paint damage in my view. So I came up with another version that would support the weight across a wider area on the inner door, for less risk of damage to any visible area.

Here's the basic form, with some pipe receivers using set screws. The support braces are bent from electrical EMT and covered in pipe insulation to protect the finish..


Picture487-1.jpg


Picture488-1.jpg


Picture489-1.jpg


The support braces also help to keep the door oriented in a vertical position, to keep the door from flopping back and forth (as you may experience with the cradle style). This will help prevent paint damage/chips from excessive door movement during the install.


Picture267-1.jpg


Picture269-1.jpg


Notice nothing touches the edge of the door skin....


Picture270-1.jpg


Picture271-1.jpg


Once hinges are snug, loosen set screws for outer support brace, lower a couple inches, remove outer support brace, and simply pull jack toward rear of car to clear door.


Picture272-1.jpg


Picture274-1.jpg


Picture275-1.jpg

So Googling for a DIY door lift and of course it takes me to GJ LOL. If I build this I will post up!
 
To avoid these ads, REGISTER NOW!
Top Bottom