To avoid these ads, REGISTER NOW!

Old COMPANION bench top drill press disassembly?

1982fxr

Well-known member
Joined
Jan 7, 2012
Messages
10,012
Location
Phoenix
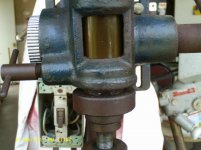
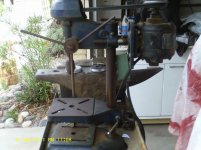
Got this yesterday. How do I get the handle, spindle, etc apart?

What is holding the front pulley on? Set screw is removed....

Looks like I need a chuck too.

Runs nice and tight:rocker:
 

Attachments

  • IMAG00044.jpg
    IMAG00044.jpg
    130.8 KB · Views: 144
  • IMAG00035.jpg
    IMAG00035.jpg
    131.6 KB · Views: 130
  • IMAG00014.jpg
    IMAG00014.jpg
    138.2 KB · Views: 171
  • IMAG00062.jpg
    IMAG00062.jpg
    137.7 KB · Views: 164
To avoid these ads, REGISTER NOW!
OP
1

1982fxr

Well-known member
Joined
Jan 7, 2012
Messages
10,012
Location
Phoenix
I saw the pins for the round knob at 3 and 9 o'clock. I started driving the 3 o'clock pin rearward, towards the motor. See first pic in first post, that pin. It went in a little ways and the knob locked up. I got scared and stopped. Ahhhhh:confused:
 

RCStocker

Well-known member
Joined
Aug 12, 2012
Messages
1,266
Location
Indiana, California, Australia
You might have a problem.
You need to take something else apart first.
If the pin locked up anything you will have a problem getting that part off.
I am an old tool and die maker in my former life. You also need new handles. Thoese are home made and while they will give you good leverage they will be in the way.

The first think is to take the bold out of the center of the piece that holds the handles. It might have a set screw or bolt. They come both way. With out better photo's and being there it will be hard to determine how to take it apart.
 

rasman57

Active member
Joined
Dec 29, 2009
Messages
30
Go to VINTAGEMACHINERY.org and look up your model by looking at the photos of drill presses. Then you can go to the resource material and usually find a parts diagram.
I suspect you have to remove the return tension spring for the quill and the depth handle. On my 1946 Craftsman model, the return spring knob has a small bolt UNDERNEATH the knob and screws up into the casting. You would have to bend over and look under the knob, but all are different.
You will find great resources there and for sure someone who has done that model before.
 
Last edited:

Outlawmws

Well-known member
Joined
Aug 9, 2011
Messages
39,349
Location
The Badlands
That Companion is an Atlas built DP. (Late 30's early 40's for Sears) So that should give you added resources for info.

On the pulley, see if they had two set screws; one to tighten one to lock...

The left side "screw"with the lever handles is the quill positioning lock and should just unscrew.

The big knob on the left is either for tensioning the quill return for the main crank, or is a cover for that assembly There will be a coiled spring (sort of like a tape measure uses) under it to keep the quill up when not locked or in use by the main crank.

Once you have the tension off that spring you can remove it and any nuts/keepers on the crank keeping it in. then it can pull from the other side.

Once that and the pulley are out, the quill assembly should drop out.

The spindle is inside the quill itself and on that one probably only has a thrust bearing for downward force and bronze bushings for rotational movement of the spindle itself.


I agree, the main crank handles are long, but a hack saw solves that once you decide a good useable length.
 

Toolhunter

Well-known member
Joined
Oct 22, 2012
Messages
62
Location
Michigan
First off great find and they are heavy buggers aren't they haha.

ok so here goes

unplug lol i say it because I would forget
loosen the or remove the cross pin that looks like it holds the shaft
2013-03-06_22-54-31_253_zpsc4150ece.jpg


you have the nicer model with more handles but you need to remove the handles and the top nut for the depth gauge
2013-03-06_22-54-45_884_zpsc05ed520.jpg


mine has little clips that keep the handle from sliding out when the tensionee bolt is loosened
2013-03-06_22-55-11_159_zps59624386.jpg


once your handles are off you will remove the shaft return spring
2013-03-06_22-55-27_206_zpsf5f2c59b.jpg


NOTE! it does not unscrew but is a twist lock also it keeps tension to return the shaft to 0 so when you take it out the shaft may slide down and be easy as it is under a bit of tension so let it unwind slowly and give a bit of a jiggle as grease and 70 years of sitting may have gummed it up
2013-03-06_22-56-07_887_zps06e5397d.jpg


once this is removed the piece that had the handle in it can be removed it will slide to the left once removed there is nothing holding the shaft so dont let that hit your foot

2013-03-06_22-56-27_359_zps4689b7c4.jpg


once that comes out you should be able to slide out the shaft
at this point you should have some parts that look like this
2013-03-06_22-56-57_523_zps1d99bde1.jpg


to remove the top pulley remove the bolt in the front holding the pulley cover on. by the way your lucky you have that its hard to find haha.

2013-03-06_22-57-16_353_zps1c99bbb0.jpg


slide off your belt if you haven allready

2013-03-06_22-57-44_625_zpsea945c5b.jpg


remove top pulley

2013-03-06_22-57-58_804_zps9dfa4e28.jpg


from there you can see the screws that hold on the bearing or bushing for the pulley


2013-03-06_22-58-10_635_zps0803ae49.jpg


Mine came with a jacobs chuck also mine did not have its bearings with it. your bearings may be snap rings and can be removed sears still sells parts for these also and your serial and model number should be on the base you can use that for parts also mine is about a 1941 or 42 yours will be in the same ball park


have fun and if you need anything else let me know

TH
 

Toolhunter

Well-known member
Joined
Oct 22, 2012
Messages
62
Location
Michigan
You might have a problem.
You need to take something else apart first.
If the pin locked up anything you will have a problem getting that part off.
I am an old tool and die maker in my former life. You also need new handles. Thoese are home made and while they will give you good leverage they will be in the way.

The first think is to take the bold out of the center of the piece that holds the handles. It might have a set screw or bolt. They come both way. With out better photo's and being there it will be hard to determine how to take it apart.

sorry my eyes are blurry looks like what stocker says is true I dont remember seeing those handles before but either way get a can of PB blaster given the nuts a coat because to remove the assembly they will need to come off.
 

wjhpc

Well-known member
Joined
Dec 27, 2007
Messages
58
Location
Tucson and San Diego
Toolhunter:Can you reverse the order and take off the spindle pulley assembly first (your last 2 pictures) by simply removing the bolt that holds on the puley cover? or is there something that stops the pulley assembly from pulling out the top as you show until the other items below ae removed? the reason i ask is that i have the same model and after pulling the pulley cover bolt, the pulley assembly rides up a quearter inch or so and them firmly stops. not sure what is holding it.

thanks,

Jim
 

wjhpc

Well-known member
Joined
Dec 27, 2007
Messages
58
Location
Tucson and San Diego
thanks Toolhunter and Outlaw - jiggled out the spindle pulley assembly from the cast iron head successfully! There is a set screw holding the motor pulley to the shaft in the mtor. once that is out, pulley is still tight on the motor shaft - do i need to pull it off with a gear puller?

thanks,

Jim
 
OP
1

1982fxr

Well-known member
Joined
Jan 7, 2012
Messages
10,012
Location
Phoenix
thanks guys, I got it apart this morning. I sure was nervous driving the piece out the side. Used plenty of heat and lube but wow she didn't give up easy.
 

Outlawmws

Well-known member
Joined
Aug 9, 2011
Messages
39,349
Location
The Badlands
thanks Toolhunter and Outlaw - jiggled out the spindle pulley assembly from the cast iron head successfully! There is a set screw holding the motor pulley to the shaft in the mtor. once that is out, pulley is still tight on the motor shaft - do i need to pull it off with a gear puller?

thanks,

Jim

Yes BUT!!!

You want to be VERY careful with the pulley/s they are VERY fragile, so you want to be pulling on something solid. this may take some trick fixtureing to accomplish...
 

wjhpc

Well-known member
Joined
Dec 27, 2007
Messages
58
Location
Tucson and San Diego
Outlaw: i knew i was right to be nervous! so to pull the pulley off the motor shaft, the drive bolt of the gear puller will go against the motor shaft end and the 3 "claws" should have some type of wood shims under the pulley lip or something similar to spread the load, as opposed to hooking the claws directly under the pulley lip?

Jim
 

Outlawmws

Well-known member
Joined
Aug 9, 2011
Messages
39,349
Location
The Badlands
Jim, I would go with a bigger 2 hook puller, and a couple of 1/2" square/flat steel bars against the shaft below the pulley;

Then add a couple of cross pieces under those bars and pull from between the long bars. (I hope this is clear enough) You will need a second pair of hands to set this up, but then you are pulling on the center of the pulley hub where it has some strength.
 

Toolhunter

Well-known member
Joined
Oct 22, 2012
Messages
62
Location
Michigan
thanks guys, I got it apart this morning. I sure was nervous driving the piece out the side. Used plenty of heat and lube but wow she didn't give up easy.

Did you get it out? I'm kind of surprised it took a lot of force, if it is out check the spline on the shaft and the cut outs for damage as it may have been kinked and you would want to remove any burrs for smooth operation. Also make sure there are no cracks in the housing old cast can crack easy.

Outlaw: i knew i was right to be nervous! so to pull the pulley off the motor shaft, the drive bolt of the gear puller will go against the motor shaft end and the 3 "claws" should have some type of wood shims under the pulley lip or something similar to spread the load, as opposed to hooking the claws directly under the pulley lip?

Jim

Sorry for the delay I work on call and was up most of the night but I would not use a 3 jaw puller on these just too great of a change to beak the pulley. If this is your only way of removing it check to see if you can purchase a new/used pulley just in case.

How would I get it out?

Make sure there are no more set screws
Spray with penetrating oil let it sit for a hour or so and cover the motor opening to stop anything from leaking into it
Slide some 1x4 or so under both side of the pulley and rest the boards on top of something so as the motor can hang free such as stacked up 4x4's or car ramps
heat up the pulley some and use a punch and a 2lb or so mini sledge to drive motor shaft though pulley

The idea is to go as easy as you can and watch your fins to make sure they are not bending or cracking. I would use cheap pine as it is soft, Don't forget the motor will fall out and they not easy to catch with your hands full so pad the landing with something. This may not be the best way but I have never had good luck with jaw pullers.

Im sure they make a tool for this and may not be the best idea but I under stand being in a pinch and not wanting to spend any more than I have too.

It may be hard to understand what I was saying as to the setup so I'll try to get a pic up
 

Toolhunter

Well-known member
Joined
Oct 22, 2012
Messages
62
Location
Michigan
2013-03-09_01-22-24_511_zps4579b283.jpg


This is what I mean I found some scrap door trim and noticed if you made a notch to compensate for the shaft it may work better and to zip tie the boards so they will not slip. The outside of the fins are the weakest get what ever you use as close to the shaft as possible.
 

wjhpc

Well-known member
Joined
Dec 27, 2007
Messages
58
Location
Tucson and San Diego
Toolhunter: that is an ingenious setup, but my motor pulley is sitting virtually flush with the motor housing, so i do not see the opportunity to slide the boards under the smallest pulley end.

Jim
 
To avoid these ads, REGISTER NOW!

wjhpc

Well-known member
Joined
Dec 27, 2007
Messages
58
Location
Tucson and San Diego
toolhunter: success here! your pics on pulley removal got me thinking about how to pull without putting pressure on the bearing. I jury rigged something similar to yours: I put towels on the floor, called my wife to the garage, rested the non pulley end of the motor shaft on the towels, had her pick up the motor an inch or so by the pulley, and then i whacked the pulley end of the motor shaft with a punch and large hammer. Viola! Motor dropped to the towels, greasy pulley left in my wife's hands. thanks for the input! Other members had also counseled me to be ultra-cautious with the gear puller, so i was happy to follow your lead on this.

Jim
 

Toolhunter

Well-known member
Joined
Oct 22, 2012
Messages
62
Location
Michigan
toolhunter: success here! your pics on pulley removal got me thinking about how to pull without putting pressure on the bearing. I jury rigged something similar to yours: I put towels on the floor, called my wife to the garage, rested the non pulley end of the motor shaft on the towels, had her pick up the motor an inch or so by the pulley, and then i whacked the pulley end of the motor shaft with a punch and large hammer. Viola! Motor dropped to the towels, greasy pulley left in my wife's hands. thanks for the input! Other members had also counseled me to be ultra-cautious with the gear puller, so i was happy to follow your lead on this.

Jim

Sweet! Makes me happy I was able to help, When it gets alil warmer maybe this friday haha I will be cleaning mine up new paint and what not I need to order the bearing for it though as it only came with the retaining collars. I have found the size I need and they are 7.99 for two plus free shipping on ebay, My local hardware had them as well but they want 17.99! per bearing, I spend alot of money at this hardware so I dont feel bad about finding another source. Hope you get it going again, There are a few vintage books for these that explain how to use them speed/ material type and what not.

do you have the same chuck as mine?

Whats going on with your chuck is it frozen up on the spindle? If it is I would try to soak it in a penetrant or use ATF that can help to free it up. Most of these oldies only need a good cleaning and relube to be back in service as they were truly built to last.
 

JRock1000

Member
Joined
Jan 3, 2018
Messages
5
Hi, apologies for resurrecting a zombie thread, and thanks for having me.

I've got one that's nearly identical to the OP (an old one, with the 1 bar through a spindle for the quill feed), INCLUDING the Keyless Chuck.
That's what My question pertains to.
I'd like to replace it.
That keyless chuck is not great (although the rest of the drill is solid and awesome).
The jaws and springs in mine are shot (won't hold a bit straight), and even if they weren't, It doesn't quite fit a 1/2" shank.
The end of the spindle that the chuck attaches to is threaded 1/2" - 24. I have a nice chuck that's threaded 1/2" - 20.

My question is (for those that have taken it apart) :
Is the Spindle shaft 1 piece? IE: it's one piece of steel that goes all the way through the pulley - down to the threaded section that the chuck attaches to
OR
Does the threaded section the chuck attaches to seat in to the shaft? IE: Jacobs taper or set screw

I could just turn a coupler on the lathe, but that would decease my height by a few inches, and add to runout by lengthening the distance from the chuck to the quill.
If the shaft is one piece, eventually I might machine a new shaft with the correct threading.
If the shaft is an assembly, it'd be easy to pop out the existing chuck attachment and machine a new chuck attachment with the correct interface.

Thanks!
Jesse
 
OP
1

1982fxr

Well-known member
Joined
Jan 7, 2012
Messages
10,012
Location
Phoenix
Wow an oldie!

Mine is cleaned and painted, slapped back together so I didn’t lose pieces when I moved two years ago. Need to disassemble, grease, reassemble. And I still have to do the motor.
 

JRock1000

Member
Joined
Jan 3, 2018
Messages
5
Sure is! But I keep coming back to it anytime I do a search on this old Companion.
I have the same kind of chuck as yours (the Keyless), which leads me to believe that we have the same kind of spindle shaft.
Do you remember the configuration?
Is the Spindle shaft one piece, from the top, all the way down through the threaded chuck arbor?
Thanks!
 
OP
1

1982fxr

Well-known member
Joined
Jan 7, 2012
Messages
10,012
Location
Phoenix
I don’t remember and lost all my tear down pics. I do need to pop it apart again but not sure when I’ll get to that.

The garage is not a fun place to be this time of year in Phoenix
 
OP
1

1982fxr

Well-known member
Joined
Jan 7, 2012
Messages
10,012
Location
Phoenix
Also we’re these built by atlas or built by walker turner who supplied them to atlas who supplied them to sears?
 

JRock1000

Member
Joined
Jan 3, 2018
Messages
5
The garage is not a fun place to be this time of year in Phoenix
Oof, I'll bet. I'm lucky that my garage is attached to my basement, so it stays pretty cool...
Except that I can't open the door on hot days, because all the machines condensate and rust before my eyes.

Also we’re these built by atlas or built by walker turner who supplied them to atlas who supplied them to sears?
I get them all mixed up. I know there was an incestuous relationship between them all, but for this drill in particular, I don't know any of the history.

It should be a 101 model number prefix, which would be Atlas, I've also seen Atlas branded of the same style.
Sounds right, I'll have to check the Model Number on mine

Funny thing, I replaced a 90's sears companion DP with this one.
Besides the chuck, this one is way nicer.
 

454ragtop

Well-known member
Joined
Mar 24, 2008
Messages
5,011
Location
Carver, MA
Atlas sourced, same as an Atlas model 42. I have one that I rec'd incomplete, parted it out, few parts left, some listed on Ebay.
 

JRock1000

Member
Joined
Jan 3, 2018
Messages
5
Thanks! Did you happen to pull out the shaft from the Quill and spindle?
Is it the same 1/2 - 24 Chuck arbor? Is the shaft 1 piece (all the way to the threaded chuck arbor), or an assembly (where I could replace just the portion with the chuck arbor)?
 

454ragtop

Well-known member
Joined
Mar 24, 2008
Messages
5,011
Location
Carver, MA
Sorry, I have not disassembled the quill assembly, planned to sell it as a unit. Pretty sure the spindle is 1 piece though, can't really think of any reason why it wouldn't be.
 

borgafeller

New member
Joined
Aug 19, 2020
Messages
1
Location
MI
Hi, new to the team.....just wondering if anyone knows where I could find the knob and spring assembly. I am working on a Sears Companion drill press and it is what I need to complete this project.
 
To avoid these ads, REGISTER NOW!
Top Bottom