
You are using an out of date browser. It may not display this or other websites correctly.
You should upgrade or use an alternative browser.
You should upgrade or use an alternative browser.
One Million Unfinished Projects
- Thread starter MARKSTANG
- Start date

Warning: More Cheapness showing
New aftermarket horns can be found online for around $13, reproduction replacement are $50-$60, pick-N-pull used are $5. Then there's me.
The horn(s) weren't working and I traced the wiring, good 12V through the steering wheel, then clamped the horn button down and found 12V at the horns behind the grille. Must be an internal issue.

This 58-year-old horn is made of 2 halves riveted together. One half is cast alloy, the other is stamped steel. There is a steel diaphragm sandwiched between the halves, insulated by rotting paper gaskets.
Diagnostics begins with an Ohm-meter test between the wire connector and the steel half of the case (chassis ground). Meter says the coil has 1.4K Ohms, so its not open and not shorted

De-construction begins by drilling out the 6 rivets.

We know which half is steel - it's rusty! There's the electromagnet coil in the steel shell - seems well-insulated by plastic parts. Like a loudspeaker, there's a solid steel pole in the middle of the diaphragm.

The sacrificed rivets and dead gasket

Unlike a loudspeaker's voice coil, which fluctuates to an audio signal, this coil is like one in a relay. When a current is applied, It pulls the pole and diaphragm down until a mechanical switch opens the circuit, springs back, closing the circuit, repeat on-off-on-off-on-off....
What opens the switch? The pole in the center of the diaphragm has this insulated fiberboard ring that pries the switch contacts apart once the pole has moved far enough into the electromagnet coil.

New aftermarket horns can be found online for around $13, reproduction replacement are $50-$60, pick-N-pull used are $5. Then there's me.
The horn(s) weren't working and I traced the wiring, good 12V through the steering wheel, then clamped the horn button down and found 12V at the horns behind the grille. Must be an internal issue.
This 58-year-old horn is made of 2 halves riveted together. One half is cast alloy, the other is stamped steel. There is a steel diaphragm sandwiched between the halves, insulated by rotting paper gaskets.
Diagnostics begins with an Ohm-meter test between the wire connector and the steel half of the case (chassis ground). Meter says the coil has 1.4K Ohms, so its not open and not shorted
De-construction begins by drilling out the 6 rivets.
We know which half is steel - it's rusty! There's the electromagnet coil in the steel shell - seems well-insulated by plastic parts. Like a loudspeaker, there's a solid steel pole in the middle of the diaphragm.
The sacrificed rivets and dead gasket
Unlike a loudspeaker's voice coil, which fluctuates to an audio signal, this coil is like one in a relay. When a current is applied, It pulls the pole and diaphragm down until a mechanical switch opens the circuit, springs back, closing the circuit, repeat on-off-on-off-on-off....
What opens the switch? The pole in the center of the diaphragm has this insulated fiberboard ring that pries the switch contacts apart once the pole has moved far enough into the electromagnet coil.
Last edited:
Repairs begin with a hand-cut cork gasket since I didn't have any of the "paper" stuff -assuming it needs to be water tight.

And give the switch contacts a good scraping with some emery cloth.

Assembled with some #8 bolts (screw heads temporarily un-clocked) and tested on a gel cell 12VDC battery. It let out a commanding squawk! in spite of the puny battery and wiring.

And give the switch contacts a good scraping with some emery cloth.
Assembled with some #8 bolts (screw heads temporarily un-clocked) and tested on a gel cell 12VDC battery. It let out a commanding squawk! in spite of the puny battery and wiring.
Did you know this screw will tune a horn? When screwed in, it pushes the switch contacts apart, setting a greater distance and dwell time that the switch is open, altering the frequency of the vibration.

Now it's time for cosmetics, sanding, primer, paint, re-assembly.
Like the Boy Scout said: "Beep Repaired".
Now it's time for cosmetics, sanding, primer, paint, re-assembly.
Like the Boy Scout said: "Beep Repaired".
Last edited:
This week I got back to working on the Mustang. I had time for a quick little project to assemble an isolated portable fuel system. The gas tank is new, but I'm plannng to replace the line that runs under the car end-to-end. 5+ decades of off-road excursions, neglect, and modifications have taken their toll on the steel tubing.
I never thought I would have much use for these stepped drills, most of the projects I work on have holes that need to be deeper than the steps these cutter had.
But sometimes you need a bigger hole in the middle of a fender washer. I got a starter set at Harbor Freight and they get used quite often. Note the wear.

I used my 1970's Monkey Ward's brand knockoff Dremel , or is that "dental" tool to fine tune (read HOG OUT) the hole diameter.

Until it was a snug vapor-tight fit (smell that? sniff sniff. sarcasm.) to a length of 5/16" fuel hose.

Then wrapped washer with a split O-ring.

Filter on the sending end of the hose


at approximately the ride height of the gas tank in the car, just a few yards closer to the fuel pump.

I never thought I would have much use for these stepped drills, most of the projects I work on have holes that need to be deeper than the steps these cutter had.
But sometimes you need a bigger hole in the middle of a fender washer. I got a starter set at Harbor Freight and they get used quite often. Note the wear.
I used my 1970's Monkey Ward's brand knockoff Dremel , or is that "dental" tool to fine tune (read HOG OUT) the hole diameter.
Until it was a snug vapor-tight fit (smell that? sniff sniff. sarcasm.) to a length of 5/16" fuel hose.
Then wrapped washer with a split O-ring.
Filter on the sending end of the hose
at approximately the ride height of the gas tank in the car, just a few yards closer to the fuel pump.
Domesticating the garage.
After a year and a half, I have started to re-organize the "storage" side of the detached building. At times there are 1 or two project cars in there, plus a pile of boxes as-unloaded from the moving truck in 2022. Technically I think I have another year and a half before "moving/unpacking" becomes "hoarding".
I cleared one corner and then re-filled it with comfort stuff. I bought this 88-can stainless bar back beer cooler at a yard sale this spring. Couldn't pass up a $3K refrigerator for $100. It spent a lot of time in an outdoor kitchen (under roof but exposed to weather and humidity) so I must deal with some effects to make it more serviceable. In the mean time it keeps the beverages cold.

The diner booth came from a neighborhood pizza place that was remodeling. The 80's called.
The bar top is leftover planks of flooring and the sides are bi-folding closet doors from a house remodel. Our home's previous owners stashed a lot of materials in the barn in the backyard.
My 1952 Toastmaster toaster is a working marvel of postwar automation. It has no lever on the side to start toasting. You drop a slice or 2 of bread in the slots and a motor and geartrain lowers the bread inside and then gently raises it when done.
After a year and a half, I have started to re-organize the "storage" side of the detached building. At times there are 1 or two project cars in there, plus a pile of boxes as-unloaded from the moving truck in 2022. Technically I think I have another year and a half before "moving/unpacking" becomes "hoarding".
I cleared one corner and then re-filled it with comfort stuff. I bought this 88-can stainless bar back beer cooler at a yard sale this spring. Couldn't pass up a $3K refrigerator for $100. It spent a lot of time in an outdoor kitchen (under roof but exposed to weather and humidity) so I must deal with some effects to make it more serviceable. In the mean time it keeps the beverages cold.
The diner booth came from a neighborhood pizza place that was remodeling. The 80's called.
The bar top is leftover planks of flooring and the sides are bi-folding closet doors from a house remodel. Our home's previous owners stashed a lot of materials in the barn in the backyard.
My 1952 Toastmaster toaster is a working marvel of postwar automation. It has no lever on the side to start toasting. You drop a slice or 2 of bread in the slots and a motor and geartrain lowers the bread inside and then gently raises it when done.
Diversions.
The beverage cooler had one functional flaw when I bought it, the seller was honest and told me it didn't drain the water condensation. After a month of operation, the water had filled the bottom of the case and frozen into a 2" thick block of ice. We emptied the box and let it thaw. That's a lot of water pulled from my humid garage air.
The refrigeration system has a compressor and condenser outside the case and an evaporator and fan inside the in it's own smaller cabinet, attached underside to the top of the case. The "floor" panel of the evaporator cabinet has one intentional drain hole with a bung fitting that fits a flexible drain hose. The hose end in a drip tray outside the case, mounted under the condenser.
Unlike all of the rest of the cooler case panels the smaller inside evaporator cabinet is not stainless steel, its galvanized. After X decades of exposure there was a line of perforations and pinholes that had rotted through this panel and was thus raining down the interior of the cooler case instead of flowing out the drain tube. I suspect the manufacturer considers this a sacrificial part since replacements are available - only $249.
My long term solution was to add a fiberglass skin to the inside. It seems to be holding.
Feeling crafty.
I have a stack of 45 rpm records that didn't survive my childhood and recently decided to drill them and make a lamp.
We didn't have any 12" or 10" records so I bought a few at the thrift store to make this sculpture:

The base is a retail fixture made of stainless steel. It had a microphone stand vibe so I stuck a lamp socket on it and voila. The top record has a warning label: "Disc Jockey Use Only."
I have a stack of 45 rpm records that didn't survive my childhood and recently decided to drill them and make a lamp.
We didn't have any 12" or 10" records so I bought a few at the thrift store to make this sculpture:
The base is a retail fixture made of stainless steel. It had a microphone stand vibe so I stuck a lamp socket on it and voila. The top record has a warning label: "Disc Jockey Use Only."
One-off records
In my hunt for used vinyl non-compact discs I have run across a couple of these. Some were labeled "Property of U.S. Air Force". And a couple had hand-written labels identifying the content. The instructions often recommend a certain type of stylus needle. No mention of Elvis or Memphis, but if I find something interesting I'll probably buy a turntable.


I think this is an audio recording of a lovely couple's wedding ceremony. Made on-site on a blank 33 1/3 rpm From the era before magnetic tape, or perhaps when everyone had a record player, but not a tape deck.
I googled the address. The wedding chapel is still there in Las Vegas. I hope the Nelsons are doing well.
In my hunt for used vinyl non-compact discs I have run across a couple of these. Some were labeled "Property of U.S. Air Force". And a couple had hand-written labels identifying the content. The instructions often recommend a certain type of stylus needle. No mention of Elvis or Memphis, but if I find something interesting I'll probably buy a turntable.
I think this is an audio recording of a lovely couple's wedding ceremony. Made on-site on a blank 33 1/3 rpm From the era before magnetic tape, or perhaps when everyone had a record player, but not a tape deck.
I googled the address. The wedding chapel is still there in Las Vegas. I hope the Nelsons are doing well.
Another sketchy experiment
The hood springs on the Mustang were looking a bit crusty. I pulled one off and let it percolate in the electrolysis tank for a week. That did a pretty good job of loosening the outside surface rust, but left a lot inside and between the coils. I needed a way to spread the spring open and the coils apart to mechanically abrade the rust. And the old paint. Not the 1965 factory paint, but at some point in the early 1980s I went full Tijuana underhood custom and painted the hood springs white. Not the hinges, just the springs.
These tension springs are not terribly strong, you can pull them open with your hands. I'm not exceeding the working dimensional limits, as 99% of their life time they have been stretched out, but the potential energy needs to be respected.
My first thought was to rig up a kind of turnbuckle and a 2x4 board to stretch the spring open, and preferred safely. I couldn't find a turnbuckle but I had this length of square tube, a handful of steel rings, and a vice grip clamp. about 1" of stretch will pull all the coils apart with a gap wide enough to slip a piece of sandpaper between them.

Say ahhhh. Let the flossing begin. Pneumatic die grinder pushing the smallest WalMart brass wire brush.

Bare steel. Ready for primer and paint. Which I'm thinking I'll do in the "stretched" mode to get the new coating in between the coils. It will be satin black this time.

The hood springs on the Mustang were looking a bit crusty. I pulled one off and let it percolate in the electrolysis tank for a week. That did a pretty good job of loosening the outside surface rust, but left a lot inside and between the coils. I needed a way to spread the spring open and the coils apart to mechanically abrade the rust. And the old paint. Not the 1965 factory paint, but at some point in the early 1980s I went full Tijuana underhood custom and painted the hood springs white. Not the hinges, just the springs.
These tension springs are not terribly strong, you can pull them open with your hands. I'm not exceeding the working dimensional limits, as 99% of their life time they have been stretched out, but the potential energy needs to be respected.
My first thought was to rig up a kind of turnbuckle and a 2x4 board to stretch the spring open, and preferred safely. I couldn't find a turnbuckle but I had this length of square tube, a handful of steel rings, and a vice grip clamp. about 1" of stretch will pull all the coils apart with a gap wide enough to slip a piece of sandpaper between them.
Say ahhhh. Let the flossing begin. Pneumatic die grinder pushing the smallest WalMart brass wire brush.
Bare steel. Ready for primer and paint. Which I'm thinking I'll do in the "stretched" mode to get the new coating in between the coils. It will be satin black this time.
What's in Grandpa's toolbox?
A couple of posts (years) ago I mentioned that I had my Grandpa's toolbox, passed along from my dad about 30 years ago. I've kept, abused, and neglected it in a couple of undignified garages. Occasionally It offers some buried treasure in the form of the right item needed at the right time.


Top section: Cotter Pins and used ignition points.
He put them back in the box the new one came in. 'cause I might need it someday.'
or 'My car ran better with the old ones, so I'll put them back in.'


a faucet valve seat re-facing tool every 1950s housewife needed:

Top drawer: Lined with Green felt - cutting bits, 1/4" drive tools, soapstone, decimal conversion charts, a little notebook (his handwriting was flawless) and indicator tools:

Center drawer:
A depth micrometer, another depth micrometer, another depth micrometer,


A couple of posts (years) ago I mentioned that I had my Grandpa's toolbox, passed along from my dad about 30 years ago. I've kept, abused, and neglected it in a couple of undignified garages. Occasionally It offers some buried treasure in the form of the right item needed at the right time.
Top section: Cotter Pins and used ignition points.
He put them back in the box the new one came in. 'cause I might need it someday.'
or 'My car ran better with the old ones, so I'll put them back in.'
a faucet valve seat re-facing tool every 1950s housewife needed:
Top drawer: Lined with Green felt - cutting bits, 1/4" drive tools, soapstone, decimal conversion charts, a little notebook (his handwriting was flawless) and indicator tools:
Center drawer:
A depth micrometer, another depth micrometer, another depth micrometer,
Last edited:


Grandpa's Toolbox - Bottom drawer,
Here Lefty - stick this into a spinning machine spindle an inch away from your finger

Do-It-Yourself molding
I may have to invest in a table saw!

The gory details - These were used by the surgeon to drill into his femur when he got his hip replacement. He kept the cutters since the hospital was probably going to throw them away. Maybe as a souvenir... or maybe to use in the shop. I've been kind of squeamish about trying them to cut anything.


Allen wrenches in a canvas bag

more hand tools

....and under the bottom drawer, coated in powdery rust, paper dolls!
Not a shocker. He had 4 daughters, I'd like to think my mom put them there for safe keeping around 1947.

Here Lefty - stick this into a spinning machine spindle an inch away from your finger
Do-It-Yourself molding
I may have to invest in a table saw!
The gory details - These were used by the surgeon to drill into his femur when he got his hip replacement. He kept the cutters since the hospital was probably going to throw them away. Maybe as a souvenir... or maybe to use in the shop. I've been kind of squeamish about trying them to cut anything.
Allen wrenches in a canvas bag
more hand tools
....and under the bottom drawer, coated in powdery rust, paper dolls!
Not a shocker. He had 4 daughters, I'd like to think my mom put them there for safe keeping around 1947.
Miss the Pontiacs
Well-known member
Enjoyed the trip through Grandpa’s toolbox. Maybe that was your Mom who tucked away some of her treasures.
Last edited:
captain14
Well-known member
One thing I noticed were a lot of the tools still had the original box/container they came in. Most of the tools now you buy come in a plastic blister that’s trashed right away. And cheaper too.
Ford52PU
Well-known member
Granddad was right about the points and condensors the new ones stink.
Felt like channeling my inner Leonardo
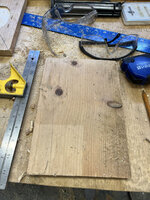
It starts with a scrap of 1x8. Found in the...... 3 guesses....the barn.

drew a guide around this "shoe" overlapped in both directions so it will fit either way.

Unloaded the Fisher•Price preschool woodshop router. just eyeballing the perimeter cut

I thought I should just cut along these inner webs. But, as the talking Barbie said, "Math is hard!"

So I routed the whole - hole. Holes. It was such fun I made 2.

For artistitc reasons I have a supply of old skateboard wheels. My skating days are decades passed, so we can re-purpose these.

.... and we have mobilized our ancient iron lawn swing. Now I can lift, pull, and skootch it from one side on the yard to the other when I mow the grass. Or to change the point of view.


It starts with a scrap of 1x8. Found in the...... 3 guesses....the barn.
drew a guide around this "shoe" overlapped in both directions so it will fit either way.
Unloaded the Fisher•Price preschool woodshop router. just eyeballing the perimeter cut
I thought I should just cut along these inner webs. But, as the talking Barbie said, "Math is hard!"
So I routed the whole - hole. Holes. It was such fun I made 2.
For artistitc reasons I have a supply of old skateboard wheels. My skating days are decades passed, so we can re-purpose these.
.... and we have mobilized our ancient iron lawn swing. Now I can lift, pull, and skootch it from one side on the yard to the other when I mow the grass. Or to change the point of view.
Attachments

Safety Under the Lift.
I've only put 1 car up on the lift - the 3,000 lb. Mustang. It feels rock-steady at 6 feet off the floor-not that I've pressed the issue. The car is nose-heavy and I have it on the asymmetric arms "backwards" - meaning the long arms to the front of the car.
My lift is 9,000 capacity so I feel it's capable of holding anything in our fleet, but I wanted a little more stability when it's time for the 4,000 lb. mini-van, or 5,000 lb. pickup. So - I've been casually shopping for under-hoist jack stands online and it seems the Taiwanese-sourced 3/4 ton stands range from $65 to $115 depending on the retailer. Occasionally they do appear on Face_place and I landed this mis-matched pair last week :


They had been left outside for some time and I really only examined lower end to see what sins the faded powder coating was hiding. Finding no broken welds or significant rust, they followed me home and went into the shop. Only then did I realize that the screw jack portion and the cast steel hand levers were rusted together and wouldn't budge.

Each of the acme-threaded jack stems was given 48 in the electrolysis tank, which did great at removing the surface rust from the bare steel, but it didn't fix the issue where the parts were oxide-joined. Each one was soaked in a 50-50 acetone-hydraulic fluid mix of penetrant.

Needing a way to hold these over-sized wing nuts while twisting with leverage, I clamped a length of square steel tubing to the car cross-member.
Then made a special "wrench adapter" that would slip over the "head" of the screw.

Made from an equally-rusted scrap of 2x3 tube.

this tube was rotated by my largest (18") import/knockoff crescent wrench that I bought 20 years ago to overhaul a transmission.
Success! They didn't even see me sweat. It's time to start the cleanup and re-assembly.
There were clues to the original thrust bearings and races included. The wingnuts ride against these bearings at the top of the jack stand body tube.


The skeletal remains of the thrust bearings were given an electrolysis / wire brush / lube treatment but didn't seem recoverable, So replacements are on order from AmaCon. Thus raising my inve$tment 20%.
I've only put 1 car up on the lift - the 3,000 lb. Mustang. It feels rock-steady at 6 feet off the floor-not that I've pressed the issue. The car is nose-heavy and I have it on the asymmetric arms "backwards" - meaning the long arms to the front of the car.
My lift is 9,000 capacity so I feel it's capable of holding anything in our fleet, but I wanted a little more stability when it's time for the 4,000 lb. mini-van, or 5,000 lb. pickup. So - I've been casually shopping for under-hoist jack stands online and it seems the Taiwanese-sourced 3/4 ton stands range from $65 to $115 depending on the retailer. Occasionally they do appear on Face_place and I landed this mis-matched pair last week :
They had been left outside for some time and I really only examined lower end to see what sins the faded powder coating was hiding. Finding no broken welds or significant rust, they followed me home and went into the shop. Only then did I realize that the screw jack portion and the cast steel hand levers were rusted together and wouldn't budge.
Each of the acme-threaded jack stems was given 48 in the electrolysis tank, which did great at removing the surface rust from the bare steel, but it didn't fix the issue where the parts were oxide-joined. Each one was soaked in a 50-50 acetone-hydraulic fluid mix of penetrant.
Needing a way to hold these over-sized wing nuts while twisting with leverage, I clamped a length of square steel tubing to the car cross-member.
Then made a special "wrench adapter" that would slip over the "head" of the screw.
Made from an equally-rusted scrap of 2x3 tube.
this tube was rotated by my largest (18") import/knockoff crescent wrench that I bought 20 years ago to overhaul a transmission.
Success! They didn't even see me sweat. It's time to start the cleanup and re-assembly.
There were clues to the original thrust bearings and races included. The wingnuts ride against these bearings at the top of the jack stand body tube.
The skeletal remains of the thrust bearings were given an electrolysis / wire brush / lube treatment but didn't seem recoverable, So replacements are on order from AmaCon. Thus raising my inve$tment 20%.
Last edited:

Painting the bare spring in its stretched yoga position. As pre-Woodstock Fords were primarily satin black underhood , these parts will blend in or look conspicuously new-ish.
What’s the deal with spray paint cans? I used to buy the 78-cent per can generic stuff at K-Mart and paint 4 bicycles and a model car!
Now- 1 or 2 coats on 2 parts and it sputters out dry and empty.
Ready to go under the car
New thrust bearings were delivered, measured the same as the old bits.

Proper fit between the tube post and the screw. The bearing rides in a cup-like race, similar to a bicycle frame in the one stand, the other just sets on top of a thick steel cap.

Assembled and ready for usage.

The burgundy paint (to cover the faded red powder coat) was selected because I had a lot of it. Left over from the covid-era tailgate party trailer quarantine project. I'm hoping it will be visible enough and I won't trip into/over them, since my cataract and replacement lens surgeries, my peripheral vision on the right side is a little narrower than it was before.
New thrust bearings were delivered, measured the same as the old bits.
Proper fit between the tube post and the screw. The bearing rides in a cup-like race, similar to a bicycle frame in the one stand, the other just sets on top of a thick steel cap.
Assembled and ready for usage.
The burgundy paint (to cover the faded red powder coat) was selected because I had a lot of it. Left over from the covid-era tailgate party trailer quarantine project. I'm hoping it will be visible enough and I won't trip into/over them, since my cataract and replacement lens surgeries, my peripheral vision on the right side is a little narrower than it was before.
Can I get a "Heck Yeah”!?
A few weeks ago I bid on a tool chest in a local online auction. The photos showed a couple of Craftsman ratchets that I can use, so I just bid enough to "watch" the auction and I was surprised to find that I'd won and had to go pick it up the next Friday.
It appears to be a many partial sets of hand tools, hardware, and materials. I've been doing a lazy gradual inventory and found brand names I hadn't heard of before:
Palmera (Spain)
Gedore (India)
Bonney (Pennsylvania)

The majority are SAE sizes,
except the Italian screwdrivers.


The crusty steel tools are going through the electrolysis treatment and a quick scrub, then will be put to work on the Mustang. I told my dad that I don't think there's any bolts as big as 1-3/8" on the Mustang, so he said I need to buy a tractor.
How did I do?
A few weeks ago I bid on a tool chest in a local online auction. The photos showed a couple of Craftsman ratchets that I can use, so I just bid enough to "watch" the auction and I was surprised to find that I'd won and had to go pick it up the next Friday.
It appears to be a many partial sets of hand tools, hardware, and materials. I've been doing a lazy gradual inventory and found brand names I hadn't heard of before:
Palmera (Spain)
Gedore (India)
Bonney (Pennsylvania)
The majority are SAE sizes,
except the Italian screwdrivers.
The crusty steel tools are going through the electrolysis treatment and a quick scrub, then will be put to work on the Mustang. I told my dad that I don't think there's any bolts as big as 1-3/8" on the Mustang, so he said I need to buy a tractor.
How did I do?
Last edited:
captain14
Well-known member
GJ rules clearly say “No self suckage” It must be awarded by other GJ members.
Craftsman Saltus wrenches look nice. I should have bought a set when they were carried in the Craftsman tool catalog.
Post up the process you use for the rust removal and tool box cleanup.
Craftsman Saltus wrenches look nice. I should have bought a set when they were carried in the Craftsman tool catalog.
Post up the process you use for the rust removal and tool box cleanup.
Timing is everything
Today I re-installed the thermostat housing, alternator, and distributor in the Mustang. That was a cozy 30 minutes. I was feeling confident so I decided to check the ignition timing.
I had everything hooked up (battery / remote starter switch / timing light) and the ignition key-switch turned on. Cranked the engine over about 15 second and there was no flashing from the timing light.
I bought this timing light "about" 1982 for my dad, because I had mangled his seriously professional model in a bizarre fan entanglement incident. It was the best that I could afford and I remember paying dearly - $26 - at the Montgomery Ward auto department for this imported plastic model. Dad gave it back to me when I moved across country. I'm pretty sure all of his cars were computer controlled by that time.
It worked the last time I used it, but I'm thinking now that was around 2009. I gently opened the case and found that (like a lot of my tools) either it got left out in the weather, or this capacitor got carsick all over the circuit board.

This lead me to an hour-long shopping search ,both local and shipped. It seems that I can still buy a timing light for $26 up to $250. The reviewers aren't kind on any of them. A common theme is they work once and then something breaks and they stop working.
I was half dozing when I remembered that I bought a briefcase with some automotive tools at a thrift store.
Several Years and one move ago.
It's a good thing I remembered where I stored it.

Jackpot!
Not one, but 2 timing lights. also 1 compression gage, a dwell / tach / points angle meter, and other accumulated dross.
It seems the Sun light has a recessed switch trigger that's a little too recessed.

Let's fing out why:

a simple momentary spring-loaded trigger switch. The plastic outer case broke and the spring self-unloaded.
My solution:

hey - there's a spring in an aligator clip. and the pigtail can be yanked in case of smoke, sparks, or other non-commital concerns.
It worked! and the timing was pretty close, with plug #1 sparking in the neighborhood of TDC.
Today I re-installed the thermostat housing, alternator, and distributor in the Mustang. That was a cozy 30 minutes. I was feeling confident so I decided to check the ignition timing.
I had everything hooked up (battery / remote starter switch / timing light) and the ignition key-switch turned on. Cranked the engine over about 15 second and there was no flashing from the timing light.
I bought this timing light "about" 1982 for my dad, because I had mangled his seriously professional model in a bizarre fan entanglement incident. It was the best that I could afford and I remember paying dearly - $26 - at the Montgomery Ward auto department for this imported plastic model. Dad gave it back to me when I moved across country. I'm pretty sure all of his cars were computer controlled by that time.
It worked the last time I used it, but I'm thinking now that was around 2009. I gently opened the case and found that (like a lot of my tools) either it got left out in the weather, or this capacitor got carsick all over the circuit board.
This lead me to an hour-long shopping search ,both local and shipped. It seems that I can still buy a timing light for $26 up to $250. The reviewers aren't kind on any of them. A common theme is they work once and then something breaks and they stop working.
I was half dozing when I remembered that I bought a briefcase with some automotive tools at a thrift store.
Several Years and one move ago.
It's a good thing I remembered where I stored it.
Jackpot!
Not one, but 2 timing lights. also 1 compression gage, a dwell / tach / points angle meter, and other accumulated dross.
It seems the Sun light has a recessed switch trigger that's a little too recessed.
Let's fing out why:
a simple momentary spring-loaded trigger switch. The plastic outer case broke and the spring self-unloaded.
My solution:
hey - there's a spring in an aligator clip. and the pigtail can be yanked in case of smoke, sparks, or other non-commital concerns.
It worked! and the timing was pretty close, with plug #1 sparking in the neighborhood of TDC.
Last edited:
The bonus timing light
THis little grey guy is made by Rite Autotronics Corp. (RAC)

The silver warning sticker says the trigger switch on this model is for a remote starter ONLY.

These clamps are both yellow. Not the usual read and black. so how does it get power?

These I recognize, no wimpy inductive clamp connection here. A good solid terminal that snaps onto the #1 ignition wire, but at the distributor end or the spark plug? I went with the spark plug end.
I clipped the yellow clamps to the + battery terminal and the start lug on the starter solenoid, and it functions as a remote starter switch. So I guess there's no low-voltage requirement on the RAC timing light, it just displays the spark because it is in series with the spark plug. I was thinking that I couldn't use it until I get the engine running and idling, but guess what? It worked also - its little Xenon or Neon bulb was blinking away as the engine cranked over. A bit dim, but working.
THis little grey guy is made by Rite Autotronics Corp. (RAC)
The silver warning sticker says the trigger switch on this model is for a remote starter ONLY.
These clamps are both yellow. Not the usual read and black. so how does it get power?
These I recognize, no wimpy inductive clamp connection here. A good solid terminal that snaps onto the #1 ignition wire, but at the distributor end or the spark plug? I went with the spark plug end.
I clipped the yellow clamps to the + battery terminal and the start lug on the starter solenoid, and it functions as a remote starter switch. So I guess there's no low-voltage requirement on the RAC timing light, it just displays the spark because it is in series with the spark plug. I was thinking that I couldn't use it until I get the engine running and idling, but guess what? It worked also - its little Xenon or Neon bulb was blinking away as the engine cranked over. A bit dim, but working.
The Thrift Store briefcase keeps on giving.

Someone bought stuff at K-Mart

Warranty card for Rite Autotronics, never mailed but partially filled in . The 3-piece tuning tools set was bought at K-Mart in the EastGate Mall in Richmond, VA. My old neighborhood, in 1976. About 22 years before I moved there.
An order form for replacement parts - good to know the bulb is replaceable.
a Dress Marking Pencil, Made in Japan, White lead. I'd bet for enhancing the timing marks on the crankshaft balancer.

Petersen's tuning book - as long as YOUR car is a pre-1976 AMC, GM, or Ford. $3.50 at K-Mart.

I remember when parts came with all the instructions you needed to install them.

P.O. was a customizer as well as a tuner. How to install aftermarket air horns. I wonder if they came from K-Mart?
Someone bought stuff at K-Mart
Warranty card for Rite Autotronics, never mailed but partially filled in . The 3-piece tuning tools set was bought at K-Mart in the EastGate Mall in Richmond, VA. My old neighborhood, in 1976. About 22 years before I moved there.
An order form for replacement parts - good to know the bulb is replaceable.
a Dress Marking Pencil, Made in Japan, White lead. I'd bet for enhancing the timing marks on the crankshaft balancer.
Petersen's tuning book - as long as YOUR car is a pre-1976 AMC, GM, or Ford. $3.50 at K-Mart.
I remember when parts came with all the instructions you needed to install them.
P.O. was a customizer as well as a tuner. How to install aftermarket air horns. I wonder if they came from K-Mart?
Attachments

Last edited: