To avoid these ads, REGISTER NOW!

Between 265 & 485 SQ/FT one step forward and 2 steps back: Small 2 car garage

Workspaces sized between 265 and 485 squarefeet.

runwhatyabrung

Well-known member
Joined
Sep 1, 2013
Messages
166
Location
Ottawa Canada
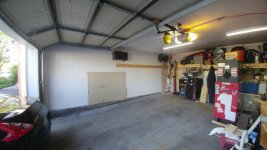
one step forward and 2 steps back: Small garage (17.5 x 20)

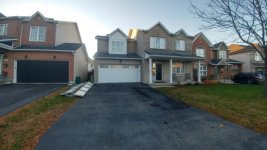
Nothing is ever simple, sometimes for everything I do, it needs to get undone and reconfigured. This has been my experience in getting my small 2 car garage (17.5 x 20) organized. We bought the house in spring 2017 after our old place sold and we had 9 weeks to find something. I was looking for something bigger but the wife fell in love with the floor plan (and the price). We had been looking at everything that was hitting the market in the city for about 1 year. (Typical suburban tract home) so I was ready to live with a slightly smaller garage. Essentially, I consider it to be a big single car garage and not a double.
 

Attachments

  • Front1.jpg
    Front1.jpg
    155 KB · Views: 227
  • Floor plan.jpg
    Floor plan.jpg
    79.7 KB · Views: 217
Last edited:
To avoid these ads, REGISTER NOW!
OP
R

runwhatyabrung

Well-known member
Joined
Sep 1, 2013
Messages
166
Location
Ottawa Canada
Garage started off as pretty much a bare box with nothing. So first thing I did was put up some shelves on the exterior and back wall. Whole plan was to use one side to store the car and the other as needed.


We then had an 8 x 12 shed built in the back yard to take care of all the stuff that tends to gravitate to the garage but does not necessarily belong there Lawmower, shovels, wheelbarrow…

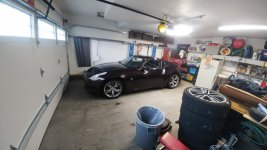
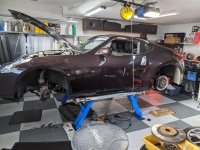
My original plan was always to get a lift at some point. But because the ceiling was so low, I had the re-adjust my goals. Bought a small lift to take care small jobs. Was originally going to go for a maxjack but the ceiling was too low to use at full extension. This thing goes up to 26": so enough for me to get under on the crawler without having to **** in my gut.
 

Attachments

  • Shelves.jpg
    Shelves.jpg
    71.6 KB · Views: 264
  • 370Z on lift.jpg
    370Z on lift.jpg
    72.8 KB · Views: 263
OP
R

runwhatyabrung

Well-known member
Joined
Sep 1, 2013
Messages
166
Location
Ottawa Canada
Did a few more changes, added a hose reel to the front, (hose bib is all the way to the back) changed the screw in bulbs to 4ft LED fixtures, added an extension reel to the ceiling next to the garage door opener and lived with the garage as-is for 2 years when I finally decided to start organizing it in July 2019.
 

dubber

Well-known member
Joined
Dec 31, 2012
Messages
5,326
Location
Canada's Capital
Best of luck creating your new space. It’s funny seeing how a lot of builders define double garages. Through my experience buying and selling I saw a ton of homes with a “double” that was truly for a small car, and a smart car.

What lift brand is that? And what’s your take on it?
 
OP
R

runwhatyabrung

Well-known member
Joined
Sep 1, 2013
Messages
166
Location
Ottawa Canada
Best of luck creating your new space. It’s funny seeing how a lot of builders define double garages. Through my experience buying and selling I saw a ton of homes with a “double” that was truly for a small car, and a smart car.

What lift brand is that? And what’s your take on it?

Thanks things are moving along quite well, I will be using every square inch of the available space. Lift ia an EZcarLift. It's 2 giant screw jacks powered by a drill. It's really sturdy and well built, weighs about 120lbs, can be taken apart and carried in the trunk of most cars with seats folded down. It's not cheap, more expensive than quickjacks but raises the car higher and leaves full access to the car underneath from the sides. If you are interested in seeing it, I'm also in Ottawa, shoot me a PM
 

Attachments

  • EZcarLift.jpg
    EZcarLift.jpg
    66 KB · Views: 233
Last edited:
OP
R

runwhatyabrung

Well-known member
Joined
Sep 1, 2013
Messages
166
Location
Ottawa Canada
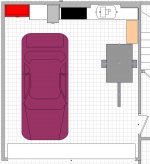
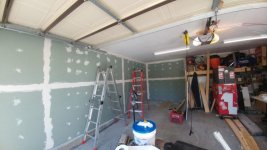
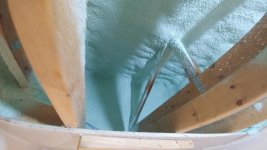
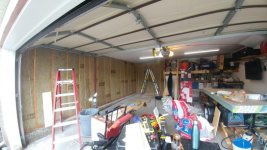
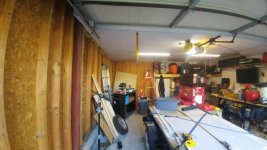
As I said at the start, I do a lot of 1 step forward and 2 steps back. To re-organize the garage, I made a small floor plan to scale including all the big items to be placed around. I then removed all wall mounted shelves from the exterior wall installed the first year to the back corner and added small shelves below. I Did this while it was really hot and started considering putting in an insulated garage door to keep the garage a little cooler in the summer and warmer in the winter. While planning this, I found out from a neighbor that even though the exterior walls were dry walled and mudded, there was no insulation in there and in the roof portion over the garage.
 

Attachments

  • Shelves removed.jpg
    Shelves removed.jpg
    65.9 KB · Views: 173
  • garage Layout.JPG
    garage Layout.JPG
    97.6 KB · Views: 140
OP
R

runwhatyabrung

Well-known member
Joined
Sep 1, 2013
Messages
166
Location
Ottawa Canada
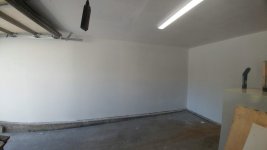
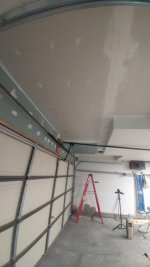
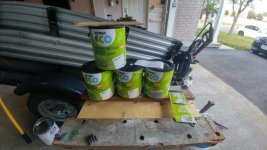
So out came the old drywall where no insulation was, new insulation was installed in the walls and in the ceiling. For the roof portion It was simpler to go for spray foam in there and get the most of R value, also meant I did not have to install venting for that area. Drywall was re-installed and re painted using recycled paint (really impressed with the stuff)
 

Attachments

  • Wall repainted.jpg
    Wall repainted.jpg
    77.6 KB · Views: 141
  • Ceiling re-drywalled.jpg
    Ceiling re-drywalled.jpg
    49.5 KB · Views: 138
  • New drywall.jpg
    New drywall.jpg
    64 KB · Views: 140
  • 20190920_113145.jpg
    20190920_113145.jpg
    59.6 KB · Views: 138
  • New wall insulation.jpg
    New wall insulation.jpg
    83 KB · Views: 137
  • drywall removed 3.jpg
    drywall removed 3.jpg
    65.2 KB · Views: 139
  • Drywall removed 2.jpg
    Drywall removed 2.jpg
    72.8 KB · Views: 149
OP
R

runwhatyabrung

Well-known member
Joined
Sep 1, 2013
Messages
166
Location
Ottawa Canada
After all painting was done, (amazing coverage out of recycled paint for $10 a gallon on sale) got the new insulated door and opener installed. This was done just in time before winter as the summer car got put into hibernation mode.
 

Attachments

  • recycled paint.jpg
    recycled paint.jpg
    79.7 KB · Views: 149
  • New door 3.jpg
    New door 3.jpg
    78.5 KB · Views: 148
  • New door opener 2.jpg
    New door opener 2.jpg
    124.9 KB · Views: 176
  • New door opener 1.jpg
    New door opener 1.jpg
    144.3 KB · Views: 168
OP
R

runwhatyabrung

Well-known member
Joined
Sep 1, 2013
Messages
166
Location
Ottawa Canada
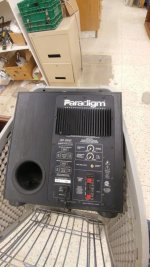
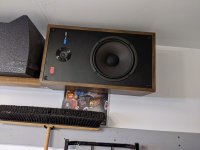
While doing the renos I managed to find great deals to keep tunes going in the garage. Already had old Sony garage sale speakers ($20) I had been using, then I found a pair of old style Realistic Minimus 7 for $9.99 at Value Village and a small Paradigm powered sub for all of $15 at the ReStore :)
Added to that an old 32" LCD screen I had in the basement along with an Nvidia Shield and I no longer needed in the house and it's sounding pretty good in there. :rocker:
 

Attachments

  • PDR10.jpg
    PDR10.jpg
    84.9 KB · Views: 107
  • Sony.jpg
    Sony.jpg
    110.2 KB · Views: 95
  • Minimus7.jpg
    Minimus7.jpg
    89.4 KB · Views: 107

el monte slim

Well-known member
Joined
Apr 4, 2018
Messages
243
Location
Midwest USA
I commend you for the steps you've implemented to improve that space, and I believe you're taking the right approach by considering it to be a large single car garage. Also, thank-you for including the information about your lift, as I was unaware of that particular product.

I must say it annoys me when architects and building developers define a 17.5' x 20' space as a "double" garage. However, my annoyance rises to whole new level when they drywall attached garages without proper insulation and a vapor barrier. I consider that kind of cost-cutting to be unacceptable negligence, and I'd be surprised if it conforms to local building codes.
 
OP
R

runwhatyabrung

Well-known member
Joined
Sep 1, 2013
Messages
166
Location
Ottawa Canada
... However, my annoyance rises to whole new level when they drywall attached garages without proper insulation and a vapor barrier. I consider that kind of cost-cutting to be unacceptable negligence, and I'd be surprised if it conforms to local building codes.

I feel the same way, when the house was built, the the builders did not need to insulate exterior walls of attached garages, (not sure what the code says now) only the walls that are considered living space were to be insulated. In this case the builder decided to "pretty it up" by putting drywall over studs and not insulating, it;s just putting lipstick on a pig and most people like that :headscrat. Most of my neighbors have no idea, the houses are now hitting 20 years old and they are now needing new garage doors (cheapest steel doors came with the house) they are now spending big dollars on putting an insulated garage door while the walls contain no insulation. I am just happy I found out before getting the new door.
 
OP
R

runwhatyabrung

Well-known member
Joined
Sep 1, 2013
Messages
166
Location
Ottawa Canada
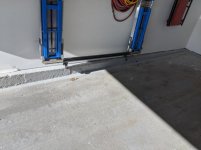
And now spring is on the edge of showing up, (calendar wise it's here but thermometer wise not) in February I took advantage of Swisstrax Canada sale. Got enough silver and Slate Grey diamondtrax to do a large checkerboard pattern on the whole floor. the garage does not get used to bring cars in and out in winter, I picked the solid tiles instead of the flow through ones. Everything was shipped and arrived first week in March It will all get installed once weather turns back to normal: for here probably not before end of May.
 

Attachments

  • Swisstrax1.jpg
    Swisstrax1.jpg
    114 KB · Views: 102
  • Swisstrax2.jpg
    Swisstrax2.jpg
    112.1 KB · Views: 99
OP
R

runwhatyabrung

Well-known member
Joined
Sep 1, 2013
Messages
166
Location
Ottawa Canada
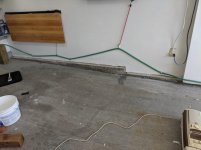
So spring has been slow going in these parts. Had some grey concrete paint that had been left behind by the previous owners. Cleaned the top of foundation that showed and gave it a coat of paint:
 

Attachments

  • Edge painted 2.jpg
    Edge painted 2.jpg
    84.1 KB · Views: 101
  • Edge painted 1.jpg
    Edge painted 1.jpg
    84.9 KB · Views: 101
  • before painting trim 3.jpg
    before painting trim 3.jpg
    95.4 KB · Views: 95
  • Before painting trim 2.jpg
    Before painting trim 2.jpg
    80.2 KB · Views: 91
  • before painting trim 1.jpg
    before painting trim 1.jpg
    80 KB · Views: 123
OP
R

runwhatyabrung

Well-known member
Joined
Sep 1, 2013
Messages
166
Location
Ottawa Canada
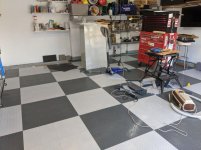
And the tiles are in, sure makes a difference in feel. Already had neighbors poking their noses in . One said it looked more like a showroom than a garage: give it a few days before I mess it up. Next step is to bring a 60 Amp 220 panel in there and add a few outlets.
 

Attachments

  • floor almost done.jpg
    floor almost done.jpg
    101.5 KB · Views: 161
  • Floor done.jpg
    Floor done.jpg
    102 KB · Views: 157
  • Car in with floor done.jpg
    Car in with floor done.jpg
    111.2 KB · Views: 163
Last edited:
To avoid these ads, REGISTER NOW!
OP
R

runwhatyabrung

Well-known member
Joined
Sep 1, 2013
Messages
166
Location
Ottawa Canada
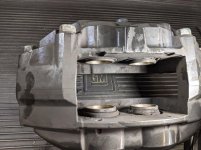
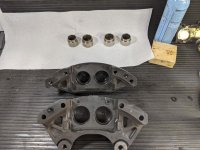
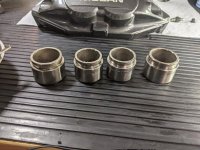
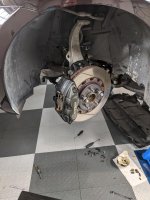
So this is what I get to do in my small garage: After the last lapping day last year, checked the car and found that my brake calipers piston boots were burnt off, (I am running brake ducts right to the back of the disk and upgraded brake fluid to Motul RBF 600, so never experienced any brake fade.) Stored the car for the winter and started rebuilding the front calipers last week, one side was easy peasy, the other side, one of the seals had twisted itself inside the bore between the piston and caliper. Made removing the damn thing a pain in the ***. 100 PSI from the compressor would not budge it. I managed to get it out using vice grip on the lip and twisting it out. Thank god they are cheap, 4 replacements are coming in from Rock Auto. Might be able to get this done by the time May is here. Could not find titanium shields to islote the calipers from the heat so going with 2 piece slotted rotors in front hopping that it helps in the cooling

This is what the better of the 2 caliper looked liked before tearing apart:

Dead caliper pistons, new ones coming in.

One side done, other side half done.
 

Attachments

  • PXL_20210410_172804138.jpg
    PXL_20210410_172804138.jpg
    151.2 KB · Views: 117
  • PXL_20210412_113458561.jpg
    PXL_20210412_113458561.jpg
    155.1 KB · Views: 109
  • PXL_20210410_193508743.jpg
    PXL_20210410_193508743.jpg
    150.2 KB · Views: 102
  • PXL_20210414_203457310.MP.jpg
    PXL_20210414_203457310.MP.jpg
    152.7 KB · Views: 90
  • PXL_20210413_205006989.jpg
    PXL_20210413_205006989.jpg
    99.6 KB · Views: 88

Mark_17

Well-known member
Joined
Jun 27, 2018
Messages
754
Location
NJ
So this is what I get to do in my small garage: After the last lapping day last year, checked the car and found that my brake calipers piston boots were burnt off, (I am running brake ducts right to the back of the disk and upgraded brake fluid to Motul RBF 600, so never experienced any brake fade.) Stored the car for the winter and started rebuilding the front calipers last week, one side was easy peasy, the other side, one of the seals had twisted itself inside the bore between the piston and caliper. Made removing the damn thing a pain in the ***. 100 PSI from the compressor would not budge it. I managed to get it out using vice grip on the lip and twisting it out. Thank god they are cheap, 4 replacements are coming in from Rock Auto. Might be able to get this done by the time May is here. Could not find titanium shields to islote the calipers from the heat so going with 2 piece slotted rotors in front hopping that it helps in the cooling

This is what the better of the 2 caliper looked liked before tearing apart:

Dead caliper pistons, new ones coming in.

One side done, other side half done.

My 4 wheeler (1988 TRX 250r) had some seized calipers that compressed air couldn't budge. I put a zerk fitting in the caliper and pumped it full of grease and it slowly worked itself out. No hassle, no shocking POP from the puck trying to fly out. Wasn't fun cleaning all of the grease out but I'd still do it again.
 
OP
R

runwhatyabrung

Well-known member
Joined
Sep 1, 2013
Messages
166
Location
Ottawa Canada
My 4 wheeler (1988 TRX 250r) had some seized calipers that compressed air couldn't budge. I put a zerk fitting in the caliper and pumped it full of grease and it slowly worked itself out. No hassle, no shocking POP from the puck trying to fly out. Wasn't fun cleaning all of the grease out but I'd still do it again.

knew about that trick, but because it's a 4 pot caliper that had been split in 2 at that point, too many holes to plug to keep the grease under pressure at that point to pop that last piston. I had to use a hard rubber ball with a wadded rubber glove held in place with a c clamp to plug up one piston hole and another with a rubber piece over the crossover tube that connects both sides of the caliper. I could have become a big greasy mess real fast, :lol: air was much cleaner.
 
OP
R

runwhatyabrung

Well-known member
Joined
Sep 1, 2013
Messages
166
Location
Ottawa Canada
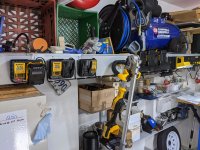
Got more cordless devices that need charging so added an area to charge and store the batteries until needed. The advantage of sticking with one brand is that I have many chargers.

Charging corner.jpg
 
OP
R

runwhatyabrung

Well-known member
Joined
Sep 1, 2013
Messages
166
Location
Ottawa Canada
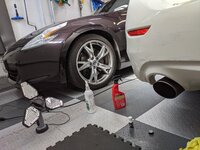
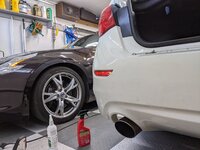
Even though the garage is small, If I scoot the 370Z real close to the wall and my tire trailer is standing up on end next to the other wall I can fit in a 2nd car for some sheltered work. So back in December , somebody backing up scraped the back corner of the bumper on my daily driver. It's a 2017 and I am cheap and did not feel like paying $$$ to get this repaired through a body shop. It's a car I intend to drive into the ground so I don't expect the results to be showroom material.


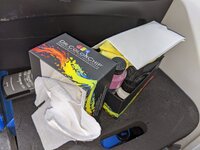
Bought a paint kit from Dr Colorchip,

Mr Color Chip.jpg

Scratch was bad enough
Before.jpg

after cleaning up the area with a claybar, Applied one coat using the squeegee method they provided,

After 1 coat.jpg

Put on a second, coat buffed it out by hand with the blending compound provided and put on a 3rd coat with more hand buffing.

Buffed down.jpg

For $59.95 US plus shipping I give the kit 2 thumbs up. I did not expect showroom finish so maybe my expectations were low to start with.

It's still somewhat rough and unless you look for it will not get noticed too much. I am just thankful to not have metallic paint.

this is where I say close enough for Government work, it looks better in pictures, the job is a solid 6 footer.

Good enough for Government work.jpg I let it cure overnight and take the buffer to it later today
 
OP
R

runwhatyabrung

Well-known member
Joined
Sep 1, 2013
Messages
166
Location
Ottawa Canada
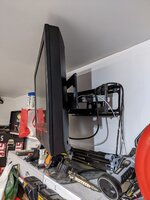
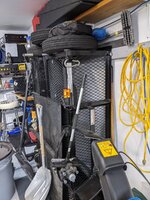
In my forever effort to tweak the garage space, over the summer I moved a few things around ( remember this is 1 step forward, 2 back) Originally, I had put an old LCD tv against the wall with the amp above on a shelf. Found that the screen made it awkward to store the trailer in the upright position when not used. You could do it but you had to be careful not to hit the screen and it became useless with the trailer in storage mode. The TV is only used when I play spotify or YouTube instructional videos but I do appreciate it for that. Since I had bought an articulated screen mount that proved to be useless in the house when used with a big screen, I repurposed it to the garage and moved the screen above a storage shelf and close to the ceiling.
 

Attachments

  • tv bracket.jpg
    tv bracket.jpg
    259.5 KB · Views: 63
  • trailer up.jpg
    trailer up.jpg
    431.7 KB · Views: 79

CoyoteDuster

Well-known member
Joined
Dec 21, 2016
Messages
49
Location
USA
Nice work. I too have the challenge of a low-ceiling garage really too small for two cars, but wanting to put two in on occasion. having nearly everything hanging, or on wheels helps me reconfigure as needed.
 
OP
R

runwhatyabrung

Well-known member
Joined
Sep 1, 2013
Messages
166
Location
Ottawa Canada
Completed the installation of the Mini Split 2 days ago. First run brought temperatures down from 30C (87F) to 24C (75F) in about 1 hour
There are so many videos about these on "The Tube" that it's not worth going over the install process except some points to watch out for that might not be too clear or need tweaking. Did everything in stages over many days, so I would guess that it's a day's job for 2 guys that have not done it before. I bough everything from Amazon, could have done it directly from Senville but Amazon had a sale that made it cheaper.

Senville HL-550 Wall Mounting Bracket: for $90 CDN after tax, it was all minor nuisances, but for what they charge, at least provide something that does not require buying new mounting hardware (Poor design, get something else)

Strike 1: the wall bracket is a U channel and the provided lag bolt's heads is too big, you cannot fit a socket over it once in the
channel, so had to buy GRK structural screws with Torx heads
support bar wrong lag bolt.jpg
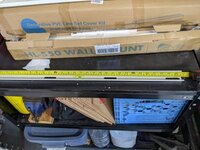
Strike 2: The bar is 31.5 inches wide, if it was just a few inches more you would be able to it 3 stud of 16"inch OC or 2 at 24" OC and none of the holes line up for either measurement. Mounted pressure treaded 2x4 horizontally and attached bracket to that (doesn't matter if you are installing on brick)

support bar lenght.jpg
Strike 3: The bolts supplied are not long enough to attach unit to the arms, so had to get longer ones.


Air Jade 3 inch 14ft AC PVC Line Set Cover: The Kit was OK to work with, but it can get pretty tight in there once you get at 90 degrees turns, just a touch bigger than 3 inches would make life easier but not a deal breaker

Outdoor unit.jpg


Aura Series Mini Split Heat Pump, 12000 BTU


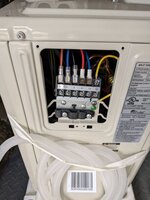
The supplied control cable has different mounting connectors at each end where if they had just put spades at each end you would not have to guess. There was no real reason to have different ends and have the spade ends with an isolator over top (I put the spade end on inside unit)

Wire ends.jpg

The built in wire strain relief on the outside unit is too close to the bracket where the wires enter. So you are better off bypassing it and putting the strain relief right where it enters the unit. For the control cable used a 3/8 Flexible cord connector and small washer to seal it up and AC cable a whip with built in strain relief.

Outdoor connection.jpg


The provided instructions had different values for the AC line torque if you used the printed or downloaded manuals or the online FAQ. Had to reach out to them and they confirmed to use the values on the FAQ. I have not been able yet to add the device to smart phone but for the moment the remote will do

Indoor finished.jpg
 
OP
R

runwhatyabrung

Well-known member
Joined
Sep 1, 2013
Messages
166
Location
Ottawa Canada
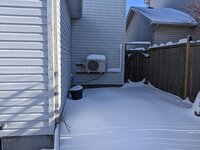
Mid January update, it's the first winter I use it. Has been keeping the garage to whatever temp I set it at, it's been going to -20C for past few nights and temp is staying pretty even inside. AS for electricity consumption, looks like we used a bit more kwh on the last bill compared to the year before in the same time period, nothing to complain about. Went for little trek in back yard to look at outdoor unit and appears to be doing fine. Will have to look at things in the spring as it looks like it is sagging a little to the heavy (compressor) side of the unit, which would take more points against the wall brackets which I did not rate too well to start from.
 

Attachments

  • Outdoor unit January.jpg
    Outdoor unit January.jpg
    598 KB · Views: 63
OP
R

runwhatyabrung

Well-known member
Joined
Sep 1, 2013
Messages
166
Location
Ottawa Canada
Catch up moment, spent a lot of time in the garage this winter and spring. Was able to retire earlier in the year (yay!) bought a whole slew of parts to put on the car to get it ready for upcoming autocross season. Started the work in early March but even with sub Zero temps outside, heat pump kept garage nice and warm and never was a problem, actually used the AC when re-installing the transmission as it was +30C (86F) at that point

  • new poly urethane bushing set for rear differential​
  • Poly urethane differential mount​
  • new JWT clutch with lighter single mass flywheel and braided flex line​
  • fully adjustable front upper control a-arms​
  • new front swaybar and endlinks​
  • new track tires Nankang Sportnex CRS to replace 10 year old R888 tires​
  • custom alignment​

Everything was done in the garage other the alignment and mounting tires.
some picture to come
 

evildky

Well-known member
Joined
May 1, 2005
Messages
774
Location
Louisville, KY
Those CRS's are in a different league from the R888's when new, at 10 years those things had to be rocks. also I don't think the CRS's will age as well, of course they also are likely to wear out before the age out.

With that flywheel upgrade i assume your running BSP?
 
OP
R

runwhatyabrung

Well-known member
Joined
Sep 1, 2013
Messages
166
Location
Ottawa Canada
Those CRS's are in a different league from the R888's when new, at 10 years those things had to be rocks. also I don't think the CRS's will age as well, of course they also are likely to wear out before the age out.

With that flywheel upgrade i assume your running BSP?

Small club running kind off lax SCCA rules, I'm running in STU , maybe should be in XA but I am not competitive yet in STU. I am not as fast and nimble as I was over 12 years ago. Drove car for first time in event on the weekend and I really like the new tires. It's a plus that I can drive to the event on the new tires, probably will get rid of my tire trailer and make some room in the garage.
 

evildky

Well-known member
Joined
May 1, 2005
Messages
774
Location
Louisville, KY
Small club running kind off lax SCCA rules, I'm running in STU , maybe should be in XA but I am not competitive yet in STU. I am not as fast and nimble as I was over 12 years ago. Drove car for first time in event on the weekend and I really like the new tires. It's a plus that I can drive to the event on the new tires, probably will get rid of my tire trailer and make some room in the garage.
I thought about XA right after posting. I've driven a lot of street miles to and from events on various 200 UTQ tires. Some are better than others in the rain but I've not found any that couldn't last a year. A proper LSD should be high on your list if you haven't already. For autocross the viscous might as well be an open.
 

evildky

Well-known member
Joined
May 1, 2005
Messages
774
Location
Louisville, KY
Small club running kind off lax SCCA rules, I'm running in STU , maybe should be in XA but I am not competitive yet in STU. I am not as fast and nimble as I was over 12 years ago. Drove car for first time in event on the weekend and I really like the new tires. It's a plus that I can drive to the event on the new tires, probably will get rid of my tire trailer and make some room in the garage.
Also, please "write a letter" to the SEB asking for flywheel allowance in street touring classes. it's a silly rule with these non serviceable duel mass flywheels on so many cars. I've made this request a couple times now. I figure if enough of us ask eventually they'll allow it.
https://crbscca.com/
 
OP
R

runwhatyabrung

Well-known member
Joined
Sep 1, 2013
Messages
166
Location
Ottawa Canada
I spent part of last week getting the camera ready for autocross. Dusted off the goPro (The car is faster than the driver)


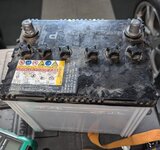
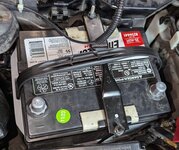
In the morning when I left for the event. Battery was dead on the car. Not enough juice, put it on 10A charge and for 15 minutes and car starts . Brought booster cables with me in case but did not need them all day. This morning still read 12.8v. Twice before it was slow at cranking over, Guess it's was time to change it, 13 years is good enough for an OEM battery . As a side note, Nissan was still using non sealed batteries on their cars in 2011. Picked up an AGM Energizer battery this morning and just installed. To make the old hold down was secure in place properly, had to make little corner pieces out of some PVC piping I had around. New battery top not as wide as the old one . Let's see how many years this battery will last. If it's as good as OEM, car will be over 25 years old by then
 

Attachments

  • old battery.jpg
    old battery.jpg
    282.2 KB · Views: 13
  • new battery.jpg
    new battery.jpg
    251.4 KB · Views: 12
Last edited:
To avoid these ads, REGISTER NOW!
Top Bottom