To avoid these ads, REGISTER NOW!

One year later 40'x80'

OP
F

fnieto

Well-known member
Joined
Aug 27, 2013
Messages
1,401
Location
Tucson,Arizona
Update,

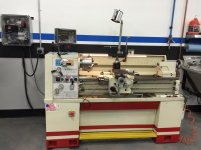
Well over a year and plenty of projects later, but as far as the shop goes some upgrades to the plate roller and lathe.

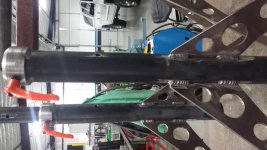
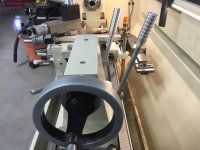
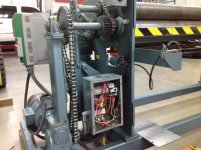
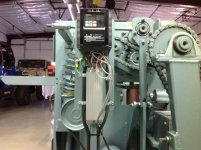
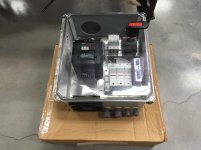
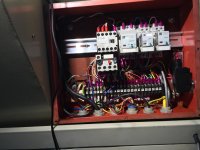
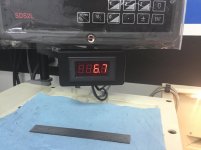
First the plate roller, It got a new control system with much needed safety upgrades. A variable speed Pot, hour meter, brake resistor, pilot lights, E-stop and Hitachi VFD where added to bring the machine up to par. The large VFD was set up for 460V 3 phase and I have 240 3 phase (RPC). The original factory control system was a mess to say the least.
 

Attachments

  • IMG_0064.jpg
    IMG_0064.jpg
    135.3 KB · Views: 620
  • IMG_0065_2.jpg
    IMG_0065_2.jpg
    138.8 KB · Views: 615
To avoid these ads, REGISTER NOW!
OP
F

fnieto

Well-known member
Joined
Aug 27, 2013
Messages
1,401
Location
Tucson,Arizona
The finished work on the plate roller. Runs smooth and brakes nicely. The VFD was "auto tuned" via laptop. The cover was modified with a 4" hole to access the VFD. The safety upgrades are located in from of the machine.
First job was a rolled cone to build a "Chiminea" from .125 HR.
 

Attachments

  • IMG_0629.jpg
    IMG_0629.jpg
    143.2 KB · Views: 617
  • IMG_0627.jpg
    IMG_0627.jpg
    140.1 KB · Views: 594
  • 20150509_171020.jpg
    20150509_171020.jpg
    142.6 KB · Views: 600
  • 20141219_165153.jpg
    20141219_165153.jpg
    141.2 KB · Views: 805
  • mms_picture.jpg
    mms_picture.jpg
    138.9 KB · Views: 979
OP
F

fnieto

Well-known member
Joined
Aug 27, 2013
Messages
1,401
Location
Tucson,Arizona
A four tool box island work bench was built to share the space between bay 3 (machining) and bay 4 (automotive). Two boxes facing the machine area store tooling and the other two boxes store automotive tools. A 10K lift was also added to the fourth bay.
 

Attachments

  • IMG_0749.jpg
    IMG_0749.jpg
    151.1 KB · Views: 1,242
  • 20150903_104905.jpg
    20150903_104905.jpg
    147.2 KB · Views: 1,301
  • IMG_1205.jpg
    IMG_1205.jpg
    130.3 KB · Views: 1,125
OP
F

fnieto

Well-known member
Joined
Aug 27, 2013
Messages
1,401
Location
Tucson,Arizona
The lathe got a new 8" 4 jaw scroll chuck, 5C scroll chuck, new LED lighting and complete new control system with a Hitachi VFD. A friend of mine is a real talented electronics whiz.
The wall mount enclosure was built using his design. Many hours went into this modification. In the end the lathe has variable speed control, by-pass button,new lit jog, lit E-stop, two speed motor control, tachometor and the coolest feature is the hall sensor thats incorporated to the carriage stop with micrometer adjustment. This feature will stop the machine applying dynamic braking in less than 1.5 seconds. Repeatability on DRO is 3 tenth (.0003). The VFD was also "auto tuned" for smooth range of operation. I might need to replace the original two speed 3 HP motor to one that allows total VFD control in the near future.
 

Attachments

  • IMG_1278.jpg
    IMG_1278.jpg
    141.4 KB · Views: 856
  • IMG_1301.jpg
    IMG_1301.jpg
    140.1 KB · Views: 836
  • IMG_1340.jpg
    IMG_1340.jpg
    134.5 KB · Views: 808
  • IMG_1302.jpg
    IMG_1302.jpg
    138 KB · Views: 774
  • IMG_1327.jpg
    IMG_1327.jpg
    130.5 KB · Views: 718
  • IMG_1382.jpg
    IMG_1382.jpg
    134.5 KB · Views: 741
  • IMG_1369.jpg
    IMG_1369.jpg
    135.4 KB · Views: 698
Last edited:

rattle_snake

Well-known member
Joined
Jun 25, 2015
Messages
5,173
Location
Chandler, AZ
Wow impressive shop, equipment, and knowledge. Amazing. I can tell it took a lot of planning and attention to detail to get to where you are.
 
OP
F

fnieto

Well-known member
Joined
Aug 27, 2013
Messages
1,401
Location
Tucson,Arizona
Thanks a lot guys, I really enjoy working in the newer shop and the extra effort is nothing new, OCD perhaps haha.
Like I mentioned, the electronics couldn't have been possible without my friend Mark. I'm blessed to learn more from him.
Anyway, I'll try post up more photos of the shop when time permits but for now, I'd like to share a surge protector I installed at the service panel feeding the house,old shop and new shop. We have issues during monsoon season resulting in lightning strikes and power surges. I have found my home stereo systems surge protection "tripped" on more occasions than I can recall.
This is an industrial setting zone surge protector and is rated to 80KVA spikes in a nano second. Easy install and straight forward. Its a Cooper Zone Defender Pro with strike counter. As I been investing in the shop equipment, I figured protect it.
Something others might consider.
 

Attachments

  • IMG_1402.jpg
    IMG_1402.jpg
    136.1 KB · Views: 504
  • IMG_1404.jpg
    IMG_1404.jpg
    144.8 KB · Views: 483
  • IMG_1403.jpg
    IMG_1403.jpg
    133.5 KB · Views: 477

rmack898

Well-known member
Joined
Jan 23, 2007
Messages
3,148
Location
Honu Grove NE Florida
Paco, having only seen snap shots of your shop before, it was impressive, but seeing the whole build star to finish really shows the magnitude of what you have there.
That is really an awesome shop.
 
OP
F

fnieto

Well-known member
Joined
Aug 27, 2013
Messages
1,401
Location
Tucson,Arizona
Thanks Mac,
I not very good at posting in progress projects, mostly due to dirty hands and frankly not thinking about it at the time. I find myself focusing on the task at hand and when its over, its too late. I have been trying to improve on this but get frustrated with computer related issues due to my ignorance. Its weird how building complex things can be trumped by weak computer skills.
I appreciate the feedback.
 
OP
F

fnieto

Well-known member
Joined
Aug 27, 2013
Messages
1,401
Location
Tucson,Arizona
The upgrades continued on the lathe with a spider built yesterday. The spider also has two stacked earth magnets imbedded for the tachometer to work.The 4th photo shows the magnets. A rotary table makes life easy for those indexed holes.
 

Attachments

  • IMG_1395.jpg
    IMG_1395.jpg
    137.1 KB · Views: 498
  • IMG_1437.jpg
    IMG_1437.jpg
    132.7 KB · Views: 477
  • IMG_1440.jpg
    IMG_1440.jpg
    142.4 KB · Views: 512
  • IMG_1444.jpg
    IMG_1444.jpg
    132.1 KB · Views: 487
  • IMG_1451.jpg
    IMG_1451.jpg
    145.7 KB · Views: 484
  • IMG_1450.jpg
    IMG_1450.jpg
    144.9 KB · Views: 459
  • IMG_1443.jpg
    IMG_1443.jpg
    135.6 KB · Views: 462
Last edited:

ASHMAN_AZ

Well-known member
Joined
Jun 17, 2015
Messages
182
Location
Vail, AZ
Your shop equipment and specialty tooling is amazing.

How do you like the large swapcooler? Im undecided if I want to do one large one like yours or multiple smaller ones in zones.

What do you use for heat?

I like the patina garage doors I want to do the same style on mine. Who did you order the Janis doors through?
 
OP
F

fnieto

Well-known member
Joined
Aug 27, 2013
Messages
1,401
Location
Tucson,Arizona
Your shop equipment and specialty tooling is amazing.

How do you like the large swapcooler? Im undecided if I want to do one large one like yours or multiple smaller ones in zones.

What do you use for heat?

I like the patina garage doors I want to do the same style on mine. Who did you order the Janis doors through?

The swamp works great with a 30* pull down slightly less during monsoon season. Having two wet sections makes huge difference at 12K CFM.
I would not change a thing on on it. I do see a difference on my electric bill but comfort is king. Calculating the ductwork correctly is also a must.

As for heating, the R30 insulation keeps the shop cool in the summer and helps a ton in the mild winter. I have a 80K BTU propane salamander heater that I have used only twice for about 20 minutes each time (outside temp was 28 and inside was 40). Keeping the doors closed until 10 am keeps the heat in. As you know we have mild winters :thumbup:.

The doors where ordered by C&D doors. Clem the owner is honest and fair. Commercial doors are just expensive period.The rust finish was painted on then activated/neutralized and rusts a little with each rain.
 
OP
F

fnieto

Well-known member
Joined
Aug 27, 2013
Messages
1,401
Location
Tucson,Arizona
Tachometer probe pick up bracket is secured by the existing top stud that secures the end cover. The tack works excellent even at 6.7 RPM.
After much consideration I decided to upgrade the drive motor to complete the entire build. My friend Mark believes this will resolve minor issues with motor cogging resulting from slight incompatibilities between the VFD and non induction motor that is well over 15 years old.

The new motor is designed to work with VFD's and has encoder. http://www.electricmotorwholesale.com/LINCOLN-LM03995.html
Mark found one on eBay (guy has three left) and I scored it for $403.32 with shipping so a great find. This will be the "icing on the cake" providing countless torque in a wide RPM range.
 

Attachments

  • IMG_1454.jpg
    IMG_1454.jpg
    125.8 KB · Views: 261
  • IMG_1452.jpg
    IMG_1452.jpg
    125.4 KB · Views: 271
  • IMG_1453.jpg
    IMG_1453.jpg
    131.1 KB · Views: 270
  • IMG_1457.jpg
    IMG_1457.jpg
    130.1 KB · Views: 270
  • IMG_1459.jpg
    IMG_1459.jpg
    138 KB · Views: 273
OP
F

fnieto

Well-known member
Joined
Aug 27, 2013
Messages
1,401
Location
Tucson,Arizona
Got the new motor installed and parameters set including programming the VFD with "auto tune" The machine runs so smooth with a ten fold in speed in each gear selection. Zero cogging and zero harmonics, a real nice match to the new control system. The encoder was removed as the VFD has no need for it on a lathe application.Two brake settings on micro toggle switch. position 1 brakes in 1 second (Chuck stops) position 2 brakes in 3-5 seconds depending on chuck size.
 

Attachments

  • IMG_1504.jpg
    IMG_1504.jpg
    143.8 KB · Views: 280
  • IMG_1519.jpg
    IMG_1519.jpg
    137.5 KB · Views: 273
  • IMG_1498.jpg
    IMG_1498.jpg
    146 KB · Views: 274
OP
F

fnieto

Well-known member
Joined
Aug 27, 2013
Messages
1,401
Location
Tucson,Arizona
finished the spider tips and made spacers for the side motor cover as the shaft protrudes about 3/16". I could have moved the motor in further requiring a adaptor plate, but the added hight might have been a problem. A new cover was also made from scrap aluminum diamond plate. Drilled/tapped to 5/16-24 cap screws and counter bored the dimond profile for a flush head.
 

Attachments

  • IMG_1490.jpg
    IMG_1490.jpg
    127.5 KB · Views: 273
  • IMG_1500.jpg
    IMG_1500.jpg
    141.7 KB · Views: 280
  • IMG_1501.jpg
    IMG_1501.jpg
    131.1 KB · Views: 281
  • IMG_1505.jpg
    IMG_1505.jpg
    128.2 KB · Views: 279
  • IMG_1508.jpg
    IMG_1508.jpg
    138.2 KB · Views: 309
  • IMG_1509.jpg
    IMG_1509.jpg
    135.7 KB · Views: 301
  • IMG_1527.jpg
    IMG_1527.jpg
    128.2 KB · Views: 308
To avoid these ads, REGISTER NOW!

Jon In Tucson

Well-known member
Joined
Jun 20, 2013
Messages
94
Location
Tucson, AZ
Fneito,
Wow! Read your entire build thread. Excellent planning, nicely thought out and executed well. You have quite an investment in "retirement"... I live on the other side of town from you, Ina/La Canada. I hope to get started on a 24X30 shop this year and I'll definitely incorporate some of your ideas into my build. God bless.
Jon In Tucson
 
OP
F

fnieto

Well-known member
Joined
Aug 27, 2013
Messages
1,401
Location
Tucson,Arizona
Turned out awesome Paco. One of these days I will have time to get back and complete my outboard spider.

Mike.

Thank you Mike, I already have a job for the spider. Need to thread a .308 barrel.
The new tachometer forced me to build the spider after years of putting it off.
The lathe runs so nice now and the proximity sensor stop is a game changer.
Take care.
 
Last edited:
OP
F

fnieto

Well-known member
Joined
Aug 27, 2013
Messages
1,401
Location
Tucson,Arizona
Fneito,
Wow! Read your entire build thread. Excellent planning, nicely thought out and executed well. You have quite an investment in "retirement"... I live on the other side of town from you, Ina/La Canada. I hope to get started on a 24X30 shop this year and I'll definitely incorporate some of your ideas into my build. God bless.
Jon In Tucson

Hi Jon,
feel free to PM me if I can help you out any way I can.
Paco
 

-Brent-

Well-known member
Joined
Dec 23, 2009
Messages
4,709
Location
Utah
Wow. What a place! In my next life I want to be a machinist. :D 
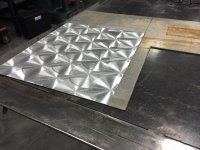
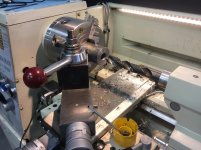
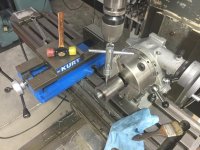
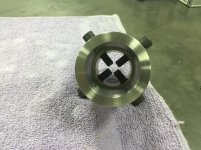
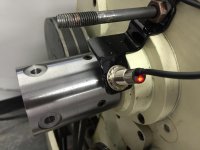
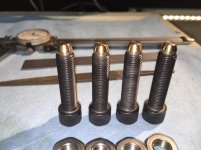
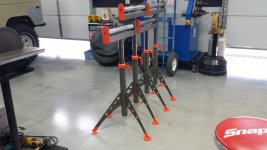
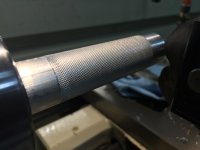
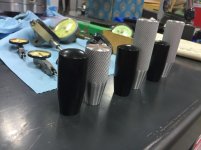
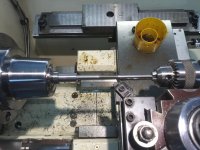
How about some project pics?
 
Last edited:
OP
F

fnieto

Well-known member
Joined
Aug 27, 2013
Messages
1,401
Location
Tucson,Arizona
Lathe/Mill project from recent past. .308 precision rifle. Saga 12 twins and my personal Saiga12 (which was lost along with all my black weapons in a boating accident).
 

Attachments

  • IMAG0203.jpg
    IMAG0203.jpg
    147.9 KB · Views: 698
  • IMG_0162.jpg
    IMG_0162.jpg
    145.4 KB · Views: 689
  • IMAG0291.jpg
    IMAG0291.jpg
    146.8 KB · Views: 708
  • IMAG0294.jpg
    IMAG0294.jpg
    143.1 KB · Views: 681
OP
F

fnieto

Well-known member
Joined
Aug 27, 2013
Messages
1,401
Location
Tucson,Arizona
Then theres welding fabrication projects.
14K lb dump trailer, glass panel railing and recent adjustable roller stands.
I try to work on a wide variety of projects. Too many to to post but you get the picture. Have done several telephone entry gates for small custom home developments (under six homes per developments , due to permit hassles).
No flat rate wrought iron work, only custom projects.
 

Attachments

  • IMG_0613.jpg
    IMG_0613.jpg
    140.4 KB · Views: 810
  • 20150327_104954.jpg
    20150327_104954.jpg
    149.4 KB · Views: 840
  • IMG_1216.jpg
    IMG_1216.jpg
    134.4 KB · Views: 938
  • 20150714_124218.jpg
    20150714_124218.jpg
    143.6 KB · Views: 867
  • 20150822_143454.jpg
    20150822_143454.jpg
    134.5 KB · Views: 933
OP
F

fnieto

Well-known member
Joined
Aug 27, 2013
Messages
1,401
Location
Tucson,Arizona
More lathe upgrades.
New lever knobs and carriage quick stop. The feed lever,carriage lock and 1/2 nut lever where knurled and tapered. The lever knobs where also lengthened a bit longer than the plastic originals.
The head stock lever knobs grooved and tailstock lever knobs also lengthened for a better feel.
 

Attachments

  • IMG_1583.jpg
    IMG_1583.jpg
    127.8 KB · Views: 300
  • IMG_1584.jpg
    IMG_1584.jpg
    117.9 KB · Views: 288
  • IMG_1600.jpg
    IMG_1600.jpg
    132 KB · Views: 338
  • IMG_1635.jpg
    IMG_1635.jpg
    135.9 KB · Views: 308
  • IMG_1632.jpg
    IMG_1632.jpg
    127.5 KB · Views: 283
  • IMG_1591.jpg
    IMG_1591.jpg
    134.4 KB · Views: 300
Last edited:
OP
F

fnieto

Well-known member
Joined
Aug 27, 2013
Messages
1,401
Location
Tucson,Arizona
To lock the carriage stop, two 4mm cap screws located under the block would need to be accessed making it difficult as the lead screw would hinder the allen wrench from fully engaging the screws, a real PITA.
Drilling a hole through the top of the block between the dial shaft and bed way allowed for a custom made screw (10-24) that would engage the lower clamp plate for locking. The hole was counter bored for a flush fit. The original 4mm cap screws where replaced with 1/4" drill rod that thread into block and serves as guides for bind free movement. The custom screw was also made from drill rod. Two small grub screws where also added for even clamping and fine adjustment.
The modification makes for a quick 1/4 turn lock and no more tweeted neck or sore knees. Slides very smooth and locks down tight. The proximity stop is an awesome feature for threading, turning to a shoulder as well as blind boring/threading. This feature allows for the 1/2 nut to stay engaged throughout entire threading operation and can be done at 300+ RPM without the worry of crashing.
 

Attachments

  • IMG_1571.jpg
    IMG_1571.jpg
    127.5 KB · Views: 232
  • IMG_1570.jpg
    IMG_1570.jpg
    142.9 KB · Views: 242
  • IMG_1574.jpg
    IMG_1574.jpg
    131.1 KB · Views: 234
  • IMG_1660.jpg
    IMG_1660.jpg
    134.8 KB · Views: 230
  • IMG_1661.jpg
    IMG_1661.jpg
    144.6 KB · Views: 236
  • IMG_1665.jpg
    IMG_1665.jpg
    136 KB · Views: 235
OP
F

fnieto

Well-known member
Joined
Aug 27, 2013
Messages
1,401
Location
Tucson,Arizona
Very nice shop, I like the gantry crane outside.

Thank you sir, the gantry sees very little use these days now that we have a fork lift. The large barn owls perch up there at night leaving evidence of their kill from the previous nights hunt. Heheh.
 
To avoid these ads, REGISTER NOW!
Top Bottom