To avoid these ads, REGISTER NOW!

OSB: Holds Nails Well?

walrus

Well-known member
Joined
Nov 12, 2008
Messages
11,681
Location
Maine
Ugh. My eyes hurt they're so tired. There is a lot to read on this subject on the net and the archives here. Still can't make up my mind.

Going to be thinking about the fire resistance of 5/8 rock, though. That detail is stuck in my mind.

Is it going to be an unheated space? If so I wouldn't use sheetrock. Holds alot of heat or cold, dew point, condensation and then mold.
 
To avoid these ads, REGISTER NOW!
OP
B

Bull

Super Moderator
Joined
Dec 12, 2005
Messages
16,189
Location
MA
Is it going to be an unheated space? If so I wouldn't use sheetrock. Holds alot of heat or cold, dew point, condensation and then mold.

It's unheated for now, since I am finishing it off as time and money are available. But I do want it to have some kind of heat at some point so I can do stuff out there in the winter.
 

wbrian63

Well-known member
Joined
Mar 31, 2010
Messages
843
Location
Houston, TX
Man, painting OSB looks like a bear.

If one does want OSB my inclination would be to either sheath it in a thin GWB or stain, whitewash, or clear coat it.

A bear is an understatement.

I've seen many installations of OSB over the years in "rustic" settings where they just put a clear finish. Looked really nice, in those settings.

For me, in this application, I need max reflectivity, and you only get that with light colors, preferrably those in a glossier sheen.

Plus, manufacturers now feel the need to print all sorts of information on the surface of OSB. There's a "born on" date, a "max structural strength orientation" statement, a "1/8" spacing between sheets" installation warning, etc. etc. etc. Not too pretty to look at.

Plus, all the places where their printer apparently sprung a leak and sprayed black ink all over the place. Apparently, the "printed" ink is heat bonded somehow, as it covers completely (or nearly so) with a single coat of primer. The "over spray" shows thru, but thankfully covers OK.
 
OP
B

Bull

Super Moderator
Joined
Dec 12, 2005
Messages
16,189
Location
MA
A bear is an understatement.

The frustrating thing from a research standpoint is that the information available to me runs the gamut from your nightmarish experience to people saying they screwed OSB to the wall and slapped some paint on it and it looks fine ten years later. :wtf::headscrat
 

ChristopherLutz

Well-known member
Joined
Jun 17, 2010
Messages
270
Location
Flower Mound, TX (DFW)
Bull,

What's the cost differential between plywood and OSB?

As I understand it, OSB was created to save money AND still provide sheer strength...it's not really designed for anything other than sheer.

You really don't need sheer - perhaps biting the bullet and going with 1/2 plywood would solve your issue?

If the walls are still open, why not cut some 2x4's and run them horizontally (attached to your diagonal studs). Then you can have a nice "stud" to screw the cabinets into and it won't matter what you put on the walls.

Apologies if redundant, I sheepishly admit I didn't read every word of every post.
 

51rider

Well-known member
Joined
Dec 21, 2009
Messages
502
Location
London, England.
Bull,
If you haven't already found the detail on French Cleats, take a look in the special 'garage Issue' magazine that featured a number of GJ members spaces. It gave dimensions & clear drawings/photos of how to install french cleats.

Just to throw something further in the mix, how about use of CPB aka Cement particle board?

You can get it in various thicknesses and in external or internal grade. It will hold a variety of surface finishes and depending upon which system you choose, jointing may be as simple as running caulk between each sheet & trimming off the excess prior to surface decoration. the downside is the cost when compared to OSB.

I'm just stunned though that a GJ moderator doesn't have a LM3800 opener-I thought they were de rigeur:lol_hitti
 
Last edited:

walrus

Well-known member
Joined
Nov 12, 2008
Messages
11,681
Location
Maine
I didn't think painting OSB was that bad. Long nap roller and lots of paint. Its a pain but so is any painting:thumbup:
 
OP
B

Bull

Super Moderator
Joined
Dec 12, 2005
Messages
16,189
Location
MA
Bull,

What's the cost differential between plywood and OSB?

If the walls are still open, why not cut some 2x4's and run them horizontally (attached to your diagonal studs). Then you can have a nice "stud" to screw the cabinets into and it won't matter what you put on the walls.


7/16 OSB is $8.97 per sheet and 5/8 drywall is $8.37 per sheet at HD. I didn't check Lowes, but assume the prices would be quite close.

I sort of did what you said with the 2/4, except I used pine trim stock and ran the pieces vertically (most of them at least; had to finish the job w/scraps since this is a budget gig!)

Bull,
If you haven't already found the detail on French Cleats, take a look in the special 'garage Issue' magazine that featured a number of GJ members spaces. It gave dimensions & clear drawings/photos of how to install french cleats.

I'm just stunned though that a GJ moderator doesn't have a LM3800 opener-I thought they were de rigeur:lol_hitti

What magazine is that? I'm a bit dense and not sure where to find this magazine :headscrat

I had to Google that LM3800 reference. I selected one of the options that the Overhead Garage Door Co. provided me with. I'm really not too opener-savvy; didn't know there was a moderator model! :lol_hitti

I didn't think painting OSB was that bad. Long nap roller and lots of paint. Its a pain but so is any painting:thumbup:

Isn't it funny, Walrus, how different the experiences of people are with this? From nightmare to no-biggie!
 

thdewey

Well-known member
Joined
Feb 26, 2008
Messages
532
Location
Gastonia, NC
What's so hard about painting OSB? Oil based primer and a light colored exterior latex painted with a long nap roller. I chaulked the seems and nail heads before painting the latex.

Whatever you choose, please post a picture of the finished product.
 

bluesman2a

Well-known member
Joined
Aug 16, 2005
Messages
1,312
Location
Atlanta, Ga.
I'm really only seeing a few in this thread that have had issues with OSB. Those folks have had very specific issues. I see a WHOLE lot more folks that don't like taping/finishing drywall.

On the plus side, if you don't like the way the OSB looks, in a year or so hang some drywall on top of it, problem resolved, AND your drywall will be ever so much more sturdy.
 

walrus

Well-known member
Joined
Nov 12, 2008
Messages
11,681
Location
Maine
Isn't it funny, Walrus, how different the experiences of people are with this? From nightmare to no-biggie!

I could see where it might be if you used a regular roller(short nap), but with 1/2 nap it was roll, roll, roll like any other paint job in a house.
I did one coat of oil primer and then 2 coats of latex. Covered fine as far as I was concerned
 
OP
B

Bull

Super Moderator
Joined
Dec 12, 2005
Messages
16,189
Location
MA
wbrian63's experience is the one that is freaking me out. Did you see the pics of all the giant flakes that popped on him?

I am picking up materials either today or tomorrow. What's it gonna be folks, what's it gonna be? :lol_hitti

I will post some pics when I am done, and also of the stages prior to being finished. I warn you, though, this is just one section of one wall that I am doing; basically one bay. That's all I have time/money for right now. My list of summer projects is longer than John Holmes'...well you get the idea.:spit:
 

TheShrine

Well-known member
Joined
Oct 27, 2008
Messages
1,168
Location
Texas Hill Country
Plus, manufacturers now feel the need to print all sorts of information on the surface of OSB. There's a "born on" date, a "max structural strength orientation" statement, a "1/8" spacing between sheets" installation warning, etc. etc. etc. Not too pretty to look at.

Not necessarily. There are NO markings on my walls.

What's it gonna be folks, what's it gonna be? :lol_hitti

Obviously, I'm biased, but I'd go with the OSB.

HPIM2738.jpg


HPIM2572.jpg


HPIM2310.jpg


HPIM2300.jpg
 

wbrian63

Well-known member
Joined
Mar 31, 2010
Messages
843
Location
Houston, TX
Not necessarily. There are NO markings on my walls.


Where did you get your materials? The big-box stores in Houston all have marked-up ****.

Bull - the "pops" you see are where I actually took the time to remove the layers that had bulged out from the surface of the sheet. About 50% were just bubbles - no visible detachment at the edges of the delamination. The rest had one or more places where you the chip had completely detached and you could see a black line or gap.

I thought possibly that the bubbles would recede when the paint dried, as they weren't visible when I started painting, but "sprang up" due to the moisture in the paint causing the wood fibers to swell. Many smaller bubbles did disappear or reduce dramatically, but many didn't. The balance of the detached chips were immediately visible as I put the primer on the wall. You could even "hear" the chips as the roller passed over them - kind of a hollow sound.

Note - only a few of these were visible with the sheet installed. There's simply too much variation in the color and pattern to easily see changes in elevation that reveal the presence of a detached chip. Once the color is somewhat homogenous, they show up like dog **** on a freshly mowed lawn...

The effort isn't as bad as I make it sound. Remember, I'm fighting the heat right now - it was 108f in the shop at 4p yesterday. That tends to put one in a "mood"... What I will say is that once you remove the pops, there is a noticeable scar on the surface of a once "relatively" smooth sheet.

The quality of the OSB in general isn't great, but we must rememeber that it was NEVER intended to be a presentation-grade product. It's meant to be an underlayment.

Some people choose to use it as such and have good results (previous thread being a perfect example of this - it does look really nice...)

My shop will look just fine when all is said and done - from 20 feet at the right angle and in the proper light, if you close one eye and stand on one foot... ;)

Here's my vote - sheetrock with french cleats. That is if you don't mind taping and floating sheetrock... That's gonna look the best.

You might also consider OSB with (I think I mentioned before) 1/4" sheetrock. It's probably not available at HD or Lowes, but it will run about $4 or so per sheet. Of course, at that price, you might as well spring for BCX plywood...

Sorry - I'm not much help - it's the heat - I hope...
 

lupinsea

Well-known member
Joined
Mar 30, 2010
Messages
261
The other option is OSB (or preferably plywood if you can swing it) for the lower section of wall where you're more likely to hit it. Then do sheetrock above that.

I'm just not a fan of the chippy OSB texture showing through the paint. I'd rather the OSB wood chips either just have a clear coat or put on a semi-transparent stain or something.

If high reflectivity is critical and a whitewash on the OSB is not in the cards then I'd look at a different product, something that will produced a nice painted finish. Either sheetrock, plywood (which I don't mind being painted), or perhaps some masonite glued up over the OSB with battens to cover the seams. This is pretty much the pegboard material with out the holes. It's has a smooth uniform finish to it that would paint well. The fiber cement board might be another option, too, as that is available in smooth sheets. It's not something I would think could be taped and mudded so the panel joints should be worked into the design of the wall somehow.
 

slip knot

Well-known member
Joined
Mar 22, 2010
Messages
2,861
Location
Texas gulf coast
I used 1/2" ply on my shop walls. Wrapped the bottom 2ft with hardi panel for fire protection. I do a lot of welding and cutting in there. Also I didnt run the wood all the way to the floor just the Hardi so I can go in with a hose and wash the floor down

On my rental units I've started putting 1/2" ply on all the walls and then 1/2" rock. Its funny to watch my evictees trying to carry their furniture out with broken hands. But I aint fixing holes in rock anymore.
 
To avoid these ads, REGISTER NOW!
OP
B

Bull

Super Moderator
Joined
Dec 12, 2005
Messages
16,189
Location
MA
That's funny. What kind of turd puts holes in the wall of the place they live?

I have heard of that happening quite often in both rentals and foreclosures.

The electrician I used to use also has rental properties. He had a whole year's worth of horror stories, including destroyed drywall after he finally was allowed to evict his roach of a tenant.

I will have a small update later this evening.
 

PassnThru

Well-known member
Joined
Jan 5, 2010
Messages
6,512
Location
Bowling Green KY
I could see where it might be if you used a regular roller(short nap), but with 1/2 nap it was roll, roll, roll like any other paint job in a house.
I did one coat of oil primer and then 2 coats of latex. Covered fine as far as I was concerned

+1 or more. My detached garage is OSB - walls and ceilings. A half inch nap is required. I put a coat of primer + 2 finish coats. I would have done the same with virgin drywall. I had absolutely zero problems with pop outs and chips even with a latex primer. I didn't know anyone at the time that had done it - plenty of people were willing to tell me that you don't want to paint OSB - that it would **** up too much paint. Of course, none of them had actually tried it. When you think about it, unless the glue they use to bind the chips together actually ***** up paint (unlikely) then it can't be any worse than painting plywood.
As for appearance, the texture is rough. There are seams. Seems to fit a garage as far as I'm concerned and I have no regrets. :beer:
 
OP
B

Bull

Super Moderator
Joined
Dec 12, 2005
Messages
16,189
Location
MA
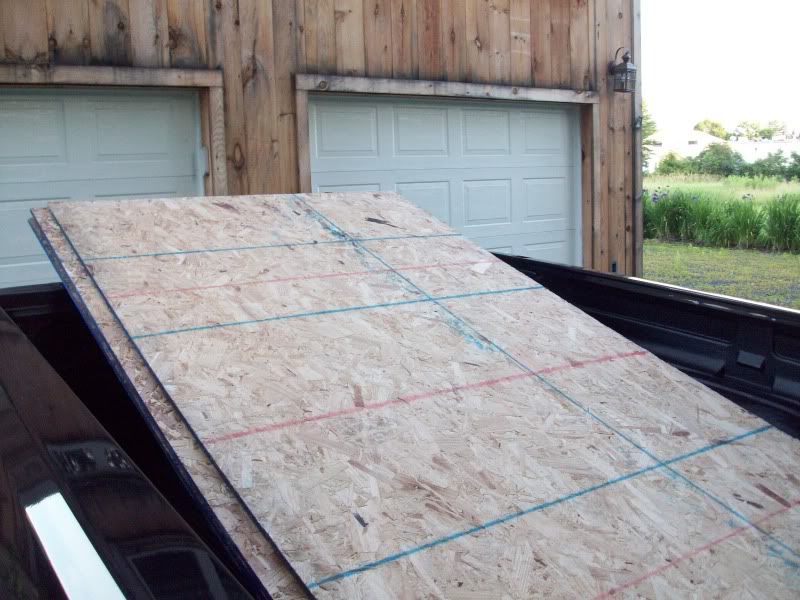
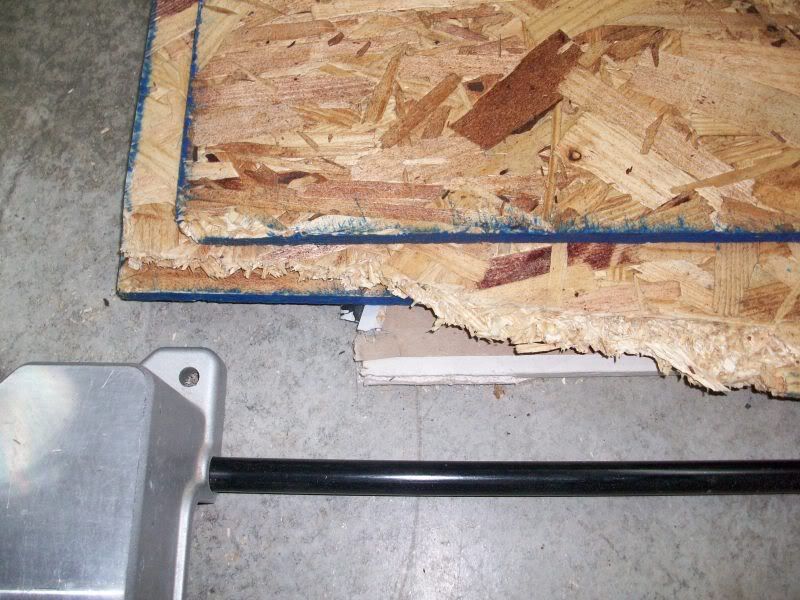
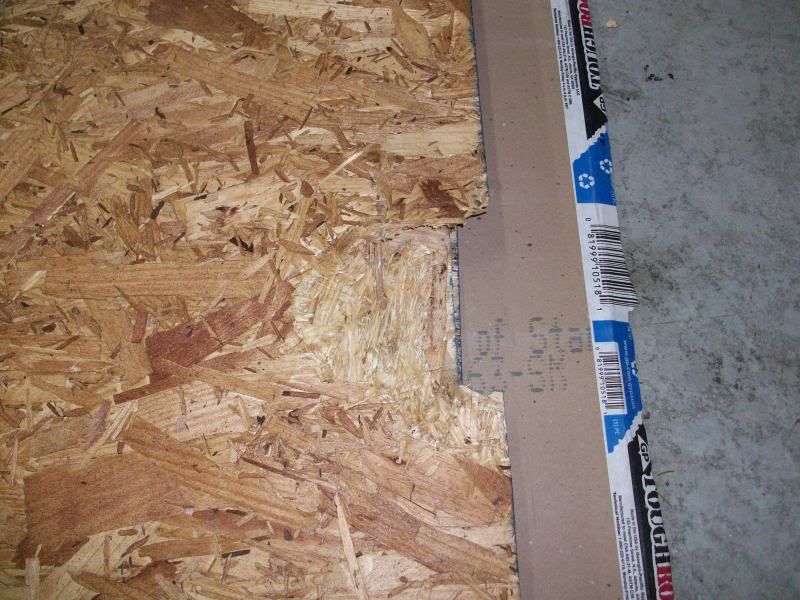
So. I told my wife that I was going to Lowes to do more product price research. I spent some time comparing prices to what HD had (they were essentially identical) and was about to leave the store, still not having committed to either drywall or OSB. One of the employees, and older, grizzled looking gentleman, asked me if I needed help just as I was leaving. To be polite, I told him I was just doing research and probably did not need any help. He persisted. I explained the situation. He then told me to come with him to the nearby entrance door and see a selection of "culled" i.e. damaged building materials outside. There were seven sheets of 7/16 OSB at 1/2 price. So, that made the decision for me. This is a budget project, folks, so being able to walk out of there with six sheets (I left the worst one) of OSB for $28 was a no-brainer. Since I'm using furring strips anyway, I am going to be able to trim the damaged parts of the OSB and still have no problem with the edges landing on wood to be fastened to.

I am not in love with the stuff, as it feels cheap/crappy and seems to shoot splinters into my hands at every opportunity. But, I can tell that it is going to resist being damaged much better than even 5/8 drywall, and I am confident about the painting now thanks to some of you who shared your stories here.

Are the screw heads going to stand a little proud here? I am using 1 1/4" coarse thread drywall screws because I have a million of them on-hand. If I go slowly enough, some of them will dimple the surface and be flush, while other stand proud and further screwing just makes them strip out the wood they are in and start spinning freely. It's not a big deal, I'm just curious.

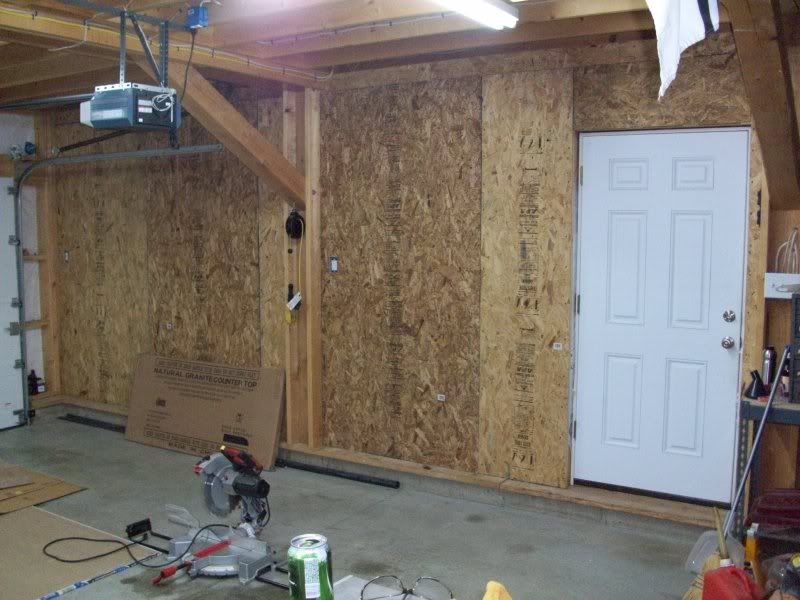
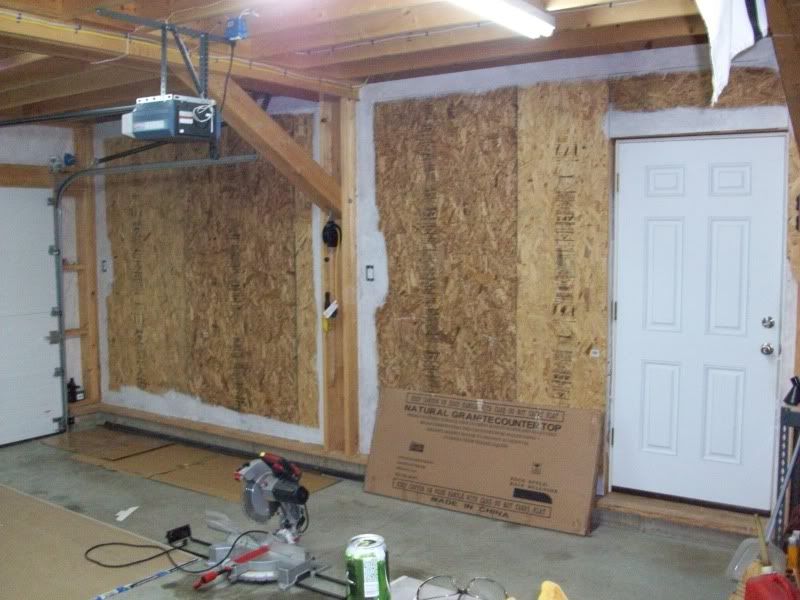
Here are some pretty boring, uninspired progress pics for tonight. I didn't have much time out there, and since I am not a pro I go slowly and take my time so I can achieve at least a mediocre level of quality. You can see most of the furring strips (still need to do more). I decided to arrange the OSB vertically.

I included a couple pics of the most major damage to the OSB sheets. Some have very little. What I picture are the worst spots. For $4.50 per sheet, who cares?!

Oh, and yes, I will be placing these shiny side out, as some of you have said to do.

I will definitely be keeping an eye on that damaged materials pile outside of the store. Using that stuff, even a poor scrub like me can afford to do some home improvements!

100_4592.jpg


100_4594.jpg


100_4595.jpg


100_4596.jpg
 

Torque1st

MEMBER EMERITUS
Joined
Sep 14, 2008
Messages
5,668
Location
KC Metro, Kansas
Good choice. That is what "material selection" is all about. I have used "seconds" many times to save money. It just takes a little more mental energy to use material like that. I have much more mental energy than cash.
 

Jack Olsen

Super Moderator
Staff member
Joined
Mar 22, 2009
Messages
6,678
Location
Los Angeles
Good score.

If I had a few screws that spun freely and wouldn't sink, I'd back them out and use a countersink bit to make a little more room. The leading edge of the screw should find a fresh section of 2x4 that way.

Are you using an impact driver for the screws? In my opinion, it makes for a huge improvement over a cordless (or corded) drill as a driver. Huge.
 
OP
B

Bull

Super Moderator
Joined
Dec 12, 2005
Messages
16,189
Location
MA
Oh gosh, Jack. You are exposing me here.

I own neither a countersink bit nor an impact driver :(

I'd love to own both. I bet the impact driver is well, well beyond my limited financial means right now.

Unless they have some beat up ones outside of Lowes at half price! :bounce:

Actually...does HF have impact drivers? :headscrat

EDIT: I checked, and they don't. :(

Good score.

If I had a few screws that spun freely and wouldn't sink, I'd back them out and use a countersink bit to make a little more room. The leading edge of the screw should find a fresh section of 2x4 that way.

Are you using an impact driver for the screws? In my opinion, it makes for a huge improvement over a cordless (or corded) drill as a driver. Huge.
 
Last edited:

Torque1st

MEMBER EMERITUS
Joined
Sep 14, 2008
Messages
5,668
Location
KC Metro, Kansas
An impact gun is orders of magnitude better than a drill-driver. The impact does not cam out like an ordinary drill driver.

I have a DeWalt unit that came as a "freebie" when I bought a set of DeWalt cordless tools. It was certainly not free, I paid for it somehow. It was too wimpy for a real impact. I have a couple 1/2" air impacts. I didn't know what to do with it until I tried driving a screw... -WOW!!!!!
 
OP
B

Bull

Super Moderator
Joined
Dec 12, 2005
Messages
16,189
Location
MA
Go ahead...rub it in, rub it in! :lol_hitti

An impact gun is orders of magnitude better than a drill-driver. The impact does not cam out like an ordinary drill driver.

I have a DeWalt unit that came as a "freebie" when I bought a set of DeWalt cordless tools. It was certainly not free, I paid for it somehow. It was too wimpy for a real impact. I have a couple 1/2" air impacts. I didn't know what to do with it until I tried driving a screw... -WOW!!!!!
 

Jack Olsen

Super Moderator
Staff member
Joined
Mar 22, 2009
Messages
6,678
Location
Los Angeles
Oh gosh, Jack. You are exposing me here.

I own neither a countersink bit nor an impact driver :(
I didn't either, until recently. I did my whole garage without one -- and it actually might be the most expensive hand tool I own (at $99, through a close-out) -- and I use it all the time, now.

But you can definitely get by with a drill; it's just slightly more time consuming. If you've got two drills, then put a countersinking bit (they're literally a couple of bucks) in one and a driver bit in the other. Zip-zip. You'll know before you drive in the fastener that the head will be flush with the OSB, and the little pilot hole the countersinking bit puts in will make the screw go in fast and easy.
 

lawfarm

Well-known member
Joined
Jul 12, 2008
Messages
719
Location
NorCal
Bull,

One other sidenote. Drywall screws may be fine for hanging the OSB, but when you go to hanging the cabinets and heavy stuff, make sure you get load bearing screws (either lag screws or other load bearing screws). I usually use _______ brand (can't think of it...but they're sold at HD, Lowes and Menards, and come in a green box. I wanna say trex, but that's the decking...humphh). But anyhow--drywall screws don't have shear enough strength to hold the lateral loads of cabinets safely. I know there are probably millions of cabinets installed with drywall screws across the country, but wait until you have one fall because the screws sheared! Get some good ones!
 
OP
B

Bull

Super Moderator
Joined
Dec 12, 2005
Messages
16,189
Location
MA
I did my whole garage without If you've got two drills, then put a countersinking bit (they're literally a couple of bucks) in one and a driver bit in the other.

Hmm...yes I believe my wife will approve of that purchase, then!


Bull,

One other sidenote. Drywall screws may be fine for hanging the OSB, but when you go to hanging the cabinets and heavy stuff, make sure you get load bearing screws (either lag screws or other load bearing screws). I usually use _______ brand (can't think of it...but they're sold at HD, Lowes and Menards, and come in a green box. I wanna say trex, but that's the decking...humphh). But anyhow--drywall screws don't have shear enough strength to hold the lateral loads of cabinets safely. I know there are probably millions of cabinets installed with drywall screws across the country, but wait until you have one fall because the screws sheared! Get some good ones!

I hear you on that! I always use load bearing screws of some kind for hanging heavy stuff. Good advice.
 

ChristopherLutz

Well-known member
Joined
Jun 17, 2010
Messages
270
Location
Flower Mound, TX (DFW)
Bull - great score.

I might have the least amount of patience on the planet...but, I'm getting inspired by the stories here. By taking your time, doing the research, you're going to get a fantastic outcome.


The garage posted earlier in this thread - with OSB on top and the white plastic below looks FANTASTIC. If you're only concerned about one bad experience and see a lot of good experiences, playing the odds is a smart move.

Besides - your worst case scenario is 're-doing' it. Even if you have to do that, the project will go very quickly because you can pull the OSB down and use a a template for whatever the new sheets are...saving yourself a ton of time measuring.

I'm very inspired by the energy and tips on this board....good luck hanging the OSB
 

Bullitt21

Member
Joined
Mar 7, 2010
Messages
19
Location
Houston
Yea, keep us updated with the pics of the OSB and the final outcome. I want to put this on my wall and ceiling. The only thing I'm concerned with is the seams. I really don't care all that much if there are seams showing, but is there a way to make it seamless. I know these might be dumb questions to you all, but I'm new to the whole construction game.
 

bluesman2a

Well-known member
Joined
Aug 16, 2005
Messages
1,312
Location
Atlanta, Ga.
If you've got two drills, then put a countersinking bit (they're literally a couple of bucks) in one and a driver bit in the other. Zip-zip. You'll know before you drive in the fastener that the head will be flush with the OSB, and the little pilot hole the countersinking bit puts in will make the screw go in fast and easy.

Personally, I find this to be more work than necessary. I used drywall screws on mine. I could see how you might need to do this with plywood, but wirh OSB the screw heads sink just fine without coundertinking. In fact if you are not using an impact, hopefully you have a drill with a clutch on it. It will be easy to OVER drive the screws in many cases, too deep into the material. On my Makita I just found the appropriate setting on the clutch that put the heads just below the surface. This worked well for probably 98% of the screws.

Can't quite tell from the pics, but on mine, we made some pucks out of OSB, and would put them down on the floor when doing the initia placement, to keep the sheeting up off the concrete. This will keep the OSB from wicking up moisture off the concrete and you can always put down some trim later if you don't like the look.

One other tip with OSB, try to stay back from the edges by at least 1/2 to 1" this will keep it from cracking along the edge as the screw seats itself.
 
Last edited:

Torque1st

MEMBER EMERITUS
Joined
Sep 14, 2008
Messages
5,668
Location
KC Metro, Kansas
The pilot bit avoids that edge cracking. It is hard to stay back 1/2 to 1" when the stud is only 1-1/2" wide.

Personally, I find this to be more work than necessary. I used drywall screws on mine. I could see how you might need to do this with plywood, but wirh OSB the screw heads sink just fine without coundertinking. In fact if you are not using an impact, hopefully you have a drill with a clutch on it. It will be easy to OVER drive the screws in many cases, too deep into the material. On my Makita I just found the appropriate setting on the clutch that put the heads just below the surface. This worked well for probably 98% of the screws.

One other tip with OSB, try to stay back from the edges by at least 1/2 to 1" this will keep it from cracking along the edge as the screw seats itself.
 
OP
B

Bull

Super Moderator
Joined
Dec 12, 2005
Messages
16,189
Location
MA
The bottom of the OSB is resting on a pressure treated plate, so moisture should not be an issue.

I have all the OSB in this section done. I'm happy because my seams are all tight and there was very, very little waste even though I had to make a lot of cuts after the full sheets went up.

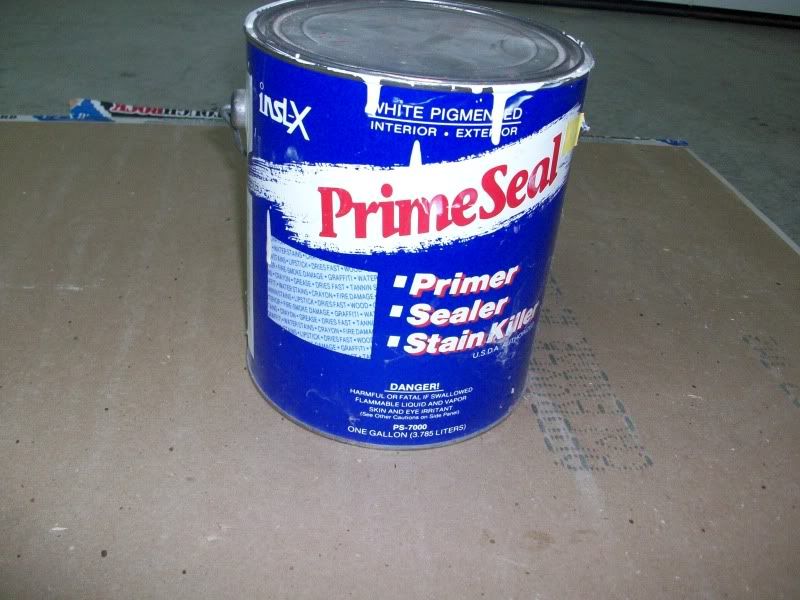
I found two gallons of oil-based primer/stain blocker in my basement, purchased probably eight years ago. Glad I can finally use it, and save some money by not having to buy any at the store. BTW, I am not that impressed with Killz. We have used it on the cheap pine trim that we have used in the rooms we remodeled so far. Even after multiple coats, knots eventually bleed through the white paint.

Anyway, I cut in the edges, and hopefully tomorrow can roll the primer out. I am thinking two coats would be wise, though I'd like to get away with just one.

Anyone want to buy a granite slab? I am so tired of moving that one in the pic back and forth while I do this. But, there's no other place to put it! :willy_nil

100_4629.jpg


100_4630.jpg


100_4631.jpg


100_4632.jpg
 

Dominico

Well-known member
Joined
Jan 13, 2010
Messages
288
Location
Michigan
My garage and two cents worth.

The ceiling and walls are all 7/16" OSB 4 x 8 sheets screwed with galvanized screws. The ceiling seams/joints were covered with lattice strips. I made my own strips by ripping 2x4's this gives you 1 1/2" wide lattice strips (huge cost savings). The lattice was then air nailed to the ceiling. Any voids where the strip meets the OSB panel were caulked. This gives the ceiling a continuous flow look. Everything was then primed with Zinser primer and painted with Olympic paint (Lowes). At first blush it looks like a drywall knock down ceiling.

Note: I grew up in the Plaster/Dry wall trade and my family has been in business for three generations (60 yrs) so I know a little something about the trade. I used OSB because of the heating and cooling variations in Michigan. This has a negative effect on dry wall and yes, even good old fashion wet plaster or what is now referred to as thin wall. I made a ton of money doing side jobs fixing seam blow outs and cracks in peoples garages.It is much like concrete work you can never 100% predict what it's going to do over time.

I hung the OSB on the walls vertical and kept the joints as tight as possible. The joints were then belt sanded to knock down any high spots (very few). I experimented with the stripe i.e. different types of tape (kept bleeding through - no clean line).

I found the best thing was to paint the stripe and trim it using the same principals as the ceiling. I just ripped 1/2" x 6" boards on edge to give you 1/2" lattice strips. I then primed and painted them. Next I snapped a line on top and bottom of the blue stripe and followed it with the 1/2" strip. This gives you crisp clean straight lines.

The corner bench is made from 3/4" plywood (good one side). I just made the bench frame top with 2x4's. I then ripped one sheet of 3/4" x 8' plywood to give you a 24" wide top and screwed it to the frame. Fastened the top to the wall (37" high) via the underside 2x4 frame and add the legs for support. I then finished the edge/face of the bench top. Lastly I laid a 24" wide strip of thin rubber on the bench top. Very inexpensive project.

There is no wrong or right way as long as you are happy that's all that matters. All said and done ....I have NO regrets and am pleased with my selection.
 

Attachments

  • Garage floor part 4 005.jpg
    Garage floor part 4 005.jpg
    149.4 KB · Views: 55
  • Finished Garage 001.jpg
    Finished Garage 001.jpg
    168.5 KB · Views: 55
  • Finished Garage 002.jpg
    Finished Garage 002.jpg
    145.9 KB · Views: 51
  • Finished Garage 003.jpg
    Finished Garage 003.jpg
    148.4 KB · Views: 57

Wingnut65

Well-known member
Joined
Apr 21, 2010
Messages
3,170
Location
Tampa Bay, FL
This has turned into one heck of a how-to thread. Some of the finished garages that have been posted here look really great.

Are the screw heads going to stand a little proud here? I am using 1 1/4" coarse thread drywall screws because I have a million of them on-hand. If I go slowly enough, some of them will dimple the surface and be flush, while other stand proud and further screwing just makes them strip out the wood they are in and start spinning freely. It's not a big deal, I'm just curious.

I know its too late now for Bull, but here is a tip I came across many years ago for spinning screws... The reason the screws spin is the lack of wood in the hole it just stripped. I have had great success of using toothpick(s) stuffed in the hole to give the screw enough to bit on. This adds wood for the full length of teh screw and not just at the tip. The square/round ones add more wood and the flat ones can compress a little better. It may take a couple toothpicks to get a grip. Be careful if the hole is near an edge of the wood, too many in the hole may split the wood. NOTE that this is NOT a structural repair and should not necessarily be used over head, but for a few screws, it works. I've even used this when tapcons spin in a concrete wall - it adds just enough bite to hold.
 
OP
B

Bull

Super Moderator
Joined
Dec 12, 2005
Messages
16,189
Location
MA
Painting, Caulk, and Aquanet

I need to caulk the seams on my OSB tomorrow. I would also like to paint tomorrow as well, but I know caulk takes a while to dry and I don't want to have to wait overnight. So, I did some Googling and found that you can SUPPOSEDLY spray Aquanet over the caulk, let set for a short while, then paint.

Sounds crazy, right?

Crazy enough to try, maybe...:bounce:

http://www.ehow.com/how_5424733_paint-over-caulk-long-wait.html
 
To avoid these ads, REGISTER NOW!
Top Bottom