To avoid these ads, REGISTER NOW!

Out with the old...

Beerhippie

Well-known member
Joined
Oct 13, 2023
Messages
10,001
Location
Far NE Oregon
Great progress Timm!

I like that control pane! cool/retro!

Yeah, knock off a few corners off that card frame and it looks good to go!

Is "2" high speed? if so you can reverse two of the wires so the scale makes sense.

I wanted to be able to keep a speed setting which is why I added the "start button" If its not clear where to do that I can look it up again I think.

If you don't need the start switch (spot for it in the "frequency": hole) maybe use that hole for a light switch? There are some cool LED "ring lights" that give great light 360 degrees around the chuck. IIR they were posted in the vintage DP thread.

It's great your drive pulley fits! I got lucky with motor #2 and it was 5/8", and I had a pulley "out of stock"
Bummer. I don't get to use the cool Italian box. That was a generator/controller for a ******** that fed crowns to our old Italian bottling machine. It cost $4K to replace when it died.

But... after cutting the card back down a bit to fit perfectly, it suddenly occurred to me that it had to accommodate a bunch of wires and these two switches:

53534333877_2ff8dd6714_b.jpg

Left is start/stop, right is forward/reverse.

I simply ran out of space, especially depth for the switches. Yeah, I could make an extension for the box, or tack another box on the bottom, but then I lose a day's working time and/or all the cool factor that it had. I'll find another worthy project for it in the future.

Now I have a plain-vanilla gray plastic enclosure from an old analog timer. Boring, but it will fit everything. Besides, I don't really need a NEMA 12 rated enclosure for this.

As for the direction of the dial on the pot, I already got that sorted.

I don't know if the drive pulley will fit yet. It seems like a good idea to keep the DP functional until the project is ready to install. I'll have holes to drill still.
 
Last edited:
To avoid these ads, REGISTER NOW!
OP
O

Outlawmws

Well-known member
Joined
Aug 9, 2011
Messages
39,320
Location
The Badlands
Drag about the box change. but unless you had a small "switch box" that could have been added to top/bottom/side, better to keep moving.
 

Beerhippie

Well-known member
Joined
Oct 13, 2023
Messages
10,001
Location
Far NE Oregon
Oh, well....

Second choice enclosure:

53535748315_a4dd8884aa_b.jpg

I can never get that labeler tape to stick well to textured plastic, no matter how clean it is.

Choke still has to be mounted externally.
 

Beerhippie

Well-known member
Joined
Oct 13, 2023
Messages
10,001
Location
Far NE Oregon
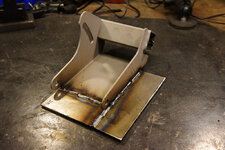
How did I ever get stuff done before I had a welder?

53535936604_60b3549614_b.jpg

53535936609_14d9ab6a6c_b.jpg

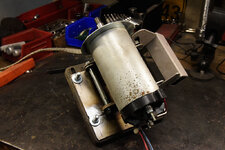
I believe--and hope--I'm done with the heavy drilling so I can start taking the old parts off and putting the new ones on. First thing is to check the fitment of that motor mount--I may have to re-drill the holes a little lower. Gotta take the old motor off first to check so it may be a while if I have to put it back on to drill new holes.
 

Beerhippie

Well-known member
Joined
Oct 13, 2023
Messages
10,001
Location
Far NE Oregon
Of course, the shaft of the old motor is smaller than the new one. I get to grind the new motor shaft down to fit--and hopefully, keep it concentric.
 
OP
O

Outlawmws

Well-known member
Joined
Aug 9, 2011
Messages
39,320
Location
The Badlands
Might be easier to drill the pulley? center it with a close fit shaft or drill bit and clamp it, then drill?
 

Beerhippie

Well-known member
Joined
Oct 13, 2023
Messages
10,001
Location
Far NE Oregon
The pulley (sheave stack) is what drives the drill press. I'd need the drill press to bore out the sheave stack. Catch 22.

Besides, I'm done grinding the shaft down. It was tedious near the end, just creeping up on a firm fit, but I got it and kept it within reasonable concentricity. Using the motor itself for a lathe and hand-holding an angle grinder... not quite machinist's standards, but works for an old hippie. Flatted one side of the shaft for the grub screw while I was at it.

The sheave height is close enough I can fine-tune it by moving the stack on the shaft. Happy with that. Since I used the pivot mount for the motor, plus the original adjustment plate, I have a fairly large choice of belt sizes when it comes time to replace it.

Now the wiring....
 
Last edited:

Beerhippie

Well-known member
Joined
Oct 13, 2023
Messages
10,001
Location
Far NE Oregon
It's seven-thirty or thereabouts and I've been working on this since nine-thirty or so this morning.

My hands are filthy--why is electrical stuff always so dirty?--my back hurts and my eyes are getting blurry--and I just found another problem needin' fixin'.

I'm leaving it at this:

53535838381_95c9dd89f9_b.jpg

I'll sew it up in the morning. Or whenever I get back at it.
 
Last edited:

Beerhippie

Well-known member
Joined
Oct 13, 2023
Messages
10,001
Location
Far NE Oregon
Got off to a late Sunday start today. Sleep in, drink coffee, book....

But I got back to it after lunch.

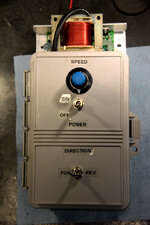
Control box, sorted:

53538102235_7bf323a716_b.jpg

Mounted, ready for testing:

53537866808_0db3f8e87f_b.jpg

53536800747_b26651f9eb_b.jpg

It works! No smoke, no sparks! It'll go from damn slow to scary fast without ever touching a belt! Forward or reverse!

I've ordered a laser tachometer. When that gets here, I'll calibrate the speed control knob.
 
OP
O

Outlawmws

Well-known member
Joined
Aug 9, 2011
Messages
39,320
Location
The Badlands
Awesome Timm! Don't forget to keep oil on those bushings! Speaking of which, is your DP All bushings or just the top?
 

Beerhippie

Well-known member
Joined
Oct 13, 2023
Messages
10,001
Location
Far NE Oregon
Both ends of the quill are bronze bushings. Probably not made with 1.3 hp in mind! I used high-pressure Moly grease on the bushings when I reassembled it. I guess I can just occasionally dribble some 30 wt. down the spindle?

I may have to pull the quill out at some point and take to my local machinist to see if he can fit it with roller bearings.

Anyhow, it passed the acid test--after a few toothing pains:

53537814211_df524ab63a_b.jpg

A 1/2" hole in 1/2" 316L stainless. That's about as abusive as I'll ever get with it. It's taking some trial and error to figure out what the right speed setting is. At the lowest speeds, it does want to bog the motor down. I never tripped the thermal protection, so that's good, and the motor never got hot to the touch, which is really good. From about 1/3 speed up, it seems to really be feelin' its oats.

One big difference from the old, 1/3 hp motor is that the bit didn't "catch" at the bottom of the hole, but just kept going right on through. Definitely more power.

I'm really interested in what the tach will tell me about the speeds. I've abused my bigger Forstner bits by using them in a press that doesn't go slow enough, but now I can just dial in the proper speed for each bit and material.
 
Last edited:
OP
O

Outlawmws

Well-known member
Joined
Aug 9, 2011
Messages
39,320
Location
The Badlands
One suggestion if the 'Staff" will have access and use it: get a thick chunk of ply as a sacrificial top and drill the same center hole in it.

No need to bolt it down, just setup some slats/cleats the width of the Bolt slots and drop it in place. easy to remove if needed. My one mark in an "Arc of Shame" in my old DP was put there by a guy helping me fab up some stands for work. He claimed to be a machinist too! (Probably was the shop sweeper...)
 
To avoid these ads, REGISTER NOW!

Beerhippie

Well-known member
Joined
Oct 13, 2023
Messages
10,001
Location
Far NE Oregon
One suggestion if the 'Staff" will have access and use it: get a thick chunk of ply as a sacrificial top and drill the same center hole in it.

No need to bolt it down, just setup some slats/cleats the width of the Bolt slots and drop it in place. easy to remove if needed. My one mark in an "Arc of Shame" in my old DP was put there by a guy helping me fab up some stands for work. He claimed to be a machinist too! (Probably was the shop sweeper...)

A little too late--like several decades too late--for that. The center hole is about twice as large as it originally was, offset and irregular. There are dimples around the center hole.

Biggest problem will being educating my co-workers in how it now works. I'm adding some labeling, particularly not to switch directions without the power off, but you also need to start with the speed set to dead stop, then turn it up to about 1/4 of the way to get it spinning. You can them turn it down if needed.

I sure do like the fact that the motor stops NOW when I turn it off. I wonder if the big ceramic resistor on the controller board is a brake shunt? Seems kind of small for that.
 

Beerhippie

Well-known member
Joined
Oct 13, 2023
Messages
10,001
Location
Far NE Oregon
Here it is in action:

https://flic.kr/p/2pyTsiw
I also learned from some Youtube research that I can disable the safety function on the MC60--for use in a treadmill--that it has to start 0 rpm--by simply clipping a lead on a resistor--R19. Now I can find the speed I want, leave it there and turn it back on at the same speed.
 

Beerhippie

Well-known member
Joined
Oct 13, 2023
Messages
10,001
Location
Far NE Oregon
A package arrived at the shop from E-replacement Parts yesterday, which left me puzzled: When did I last order from them?

On opening the box, I found it was a new set of grips and some screws for a Skil HW77. I then recalled ordering those.... in July! For a company that over-charges for shipping, they sure take their time about it!

Anyhow, out with the old, in with the new:

53562008035_a0e7bed206_b.jpg

I bought that HW77 Mag back in the spring of '92. I can't help but wonder how many studs, plates and rafters it's cut over the decades. It's had numerous sets of brushes, cords, and oil changes--especially back when it was running six to eight hours a day, 5 days a week. Those old grips have shaped themselves to my hand, but they were about to fall apart. New ones will take some getting used to.

Amazingly, the table (foot) is still perfectly flat! This was a worry with the magnesium table back in the day, but it saved a pound or so over the standard steel table. Pounds matter when you're lugging a saw up to and around the roof framing of a building.

Kudos to Skil for still providing all the parts for these old workhorses. I'll be passing that saw on to a new generation of builders one of these days.
 
Last edited:

Beerhippie

Well-known member
Joined
Oct 13, 2023
Messages
10,001
Location
Far NE Oregon
The saw Timm! The saw! :ROFLMAO:
It's a Milwaukee Cat. No. 6230. It's the only Porta-Band I've used, so I don't know how it compares to to other models. It's a beast, both for handling and cutting. Always a bit of a fiddle to find blades for, so it must be different from most. I put new tires on it a few years ago and sourcing those was a quest, too.
 
OP
O

Outlawmws

Well-known member
Joined
Aug 9, 2011
Messages
39,320
Location
The Badlands
The "***********" part is how deep it can cut, and compared to the original Portabands, its a good inch, inch an a half deeper. That's a good thing for cutting. Tt is harder on the blades as it requires more twist on them to get the depth. They work harden faster, and then snap.
 
To avoid these ads, REGISTER NOW!
Top Bottom