To avoid these ads, REGISTER NOW!

PA 24x32 Remodel

rweaver1214

Member
Joined
Jan 16, 2013
Messages
18
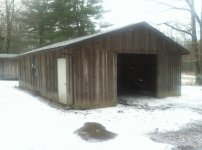
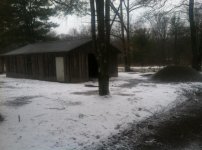
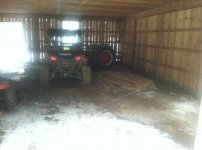
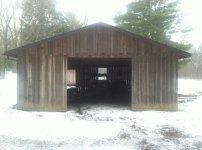
2 years ago I bought my house and it had a 24x32 pole barn garage that was never even close to finished. The original owners ran out of money (as with th entire house) so my first two years have been spent getting the house completed. Now that its nearly done I am going to start working on the garage. It's a standard pole building it currently has rough cut for sheating which i plan to overlay with 7/16 osb then house wrap. I will also be replacing the two 36x48 windows, closing off one man door, having a new garage door installed and putting a new floor in. The goal for this year is simply weathered in. I cant do everything at once since I do everything on a cash on hand basis, but all good things come in time. I attached some pics of what I am starting with. We ran water and electric underground last fall, so once the weather breaks i will be grading the floor and bringing in gravel and compacting it to get ready for cement.
 

Attachments
  • IMG_2702.jpg
    IMG_2702.jpg
    130.9 KB · Views: 83
  • IMG_9389.jpg
    IMG_9389.jpg
    75.8 KB · Views: 72
  • IMG_4893.jpg
    IMG_4893.jpg
    63 KB · Views: 66
  • IMG_0334.jpg
    IMG_0334.jpg
    61 KB · Views: 88
  • IMG_0252.jpg
    IMG_0252.jpg
    62.3 KB · Views: 81
Last edited:
To avoid these ads, REGISTER NOW!
OP
R

rweaver1214

Member
Joined
Jan 16, 2013
Messages
18
Here are some updated pics (I'm not sure if I uploaded them right) the first one is the new sheathing and house wrap on, the second shows the floor graded with the gravel in ready for cement, the third shows the recessed lights in the soffit with the new windows. The floor is being poured this Saturday I will try to get some pics of the drain layout and the pad outside the man door I have formed up. I ordered a door from overhead door company last week so it should be in by mid September. I put the 3 recessed lights down each side in the soffit mainly for looks and also because I will be keeping my coal bin on the lower side of the garage so it will e nice to be able to see what I'm doing down there. The rain has really held up the floor but ice the floor is in things should start moving along a lot quicker.
 

Attachments

  • image.jpg
    image.jpg
    149.6 KB · Views: 56
To avoid these ads, REGISTER NOW!
OP
R

rweaver1214

Member
Joined
Jan 16, 2013
Messages
18
Got the floor in Saturday, vapor barrier underneath 6" of cement with wire mesh and finer mesh sprayed withba curing agent after final troweling, cut control joints after this pic was taken
 
OP
R

rweaver1214

Member
Joined
Jan 16, 2013
Messages
18
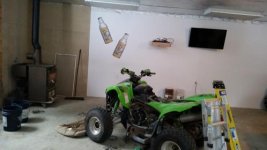
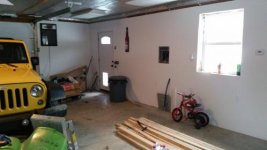
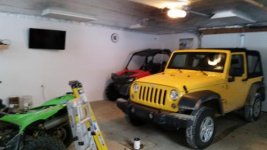
I guess I lost track of time lol I have since sold this property but thought I would share a couple pics of te finished interior. We studded out the walls wired and insulated with unfaced r19 then put a true vapor barrier over everything. Put OSB on the walls painter with kilz original primer then painted white. For the ceiling I used foil faced double bubble then put furring strips on 24" centers. For the attic we blew in loose fill cellulose. I was happy with how the project turned out but got a good deal on nicer property with some acreage so I had to bite the bullet and sell the house. It's ok though the new place has a 30x36 detached 2 stall with a bathroom!
 

Attachments

  • image.jpg
    image.jpg
    18.9 KB · Views: 23
OP
R

rweaver1214

Member
Joined
Jan 16, 2013
Messages
18
Of course a picture of the new garage couldn't hurt.
 

Attachments

  • image.jpg
    image.jpg
    147.1 KB · Views: 33
OP
R

rweaver1214

Member
Joined
Jan 16, 2013
Messages
18
Thanks I appreciate that! I have some plumbing work to do and that's about it! The original owners of this place actuallyover in the garage while they built the house so it's insulated and finished already. I will have to get some interior pics of the new set up.
 
To avoid these ads, REGISTER NOW!
Top Bottom