CoconutPete
Well-known member
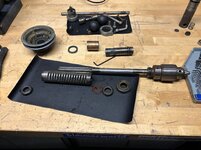
I have wanted a drill press for years and I'm once again about to start a project related to my car which will be a lot easier having one, so me and my son went for a drive and picked this up. I have always loved these.
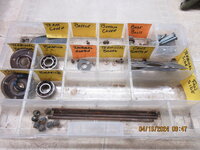
Anyway, it's missing the key for the chuck and has no balls (haha) on the handle. It needs a cord too, but I Have plenty of those, i just choppped one off my coffee maker that I threw out.
The balls (haha again) seem to be readily available on Amazon. The handle has small snap rings on the end to keep it from falling out. Is a hole that is just big enough along with perhaps some2-part epoxy the way? Something else?
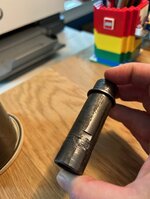
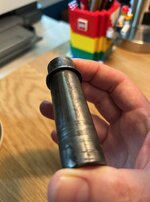
Last but not least ... forgive me, I grew up with the metric system... how do I find out what size chuck that is so I know what key to buy?
Thank You
Anyway, it's missing the key for the chuck and has no balls (haha) on the handle. It needs a cord too, but I Have plenty of those, i just choppped one off my coffee maker that I threw out.
The balls (haha again) seem to be readily available on Amazon. The handle has small snap rings on the end to keep it from falling out. Is a hole that is just big enough along with perhaps some2-part epoxy the way? Something else?
Last but not least ... forgive me, I grew up with the metric system... how do I find out what size chuck that is so I know what key to buy?
Thank You