To avoid these ads, REGISTER NOW!

Picking up a American Scale vice tomorrow, cant wait

Mr. Wonderful

Well-known member
Joined
Jan 15, 2018
Messages
1,772
Location
Pacific Northwest
Loren,

Another note on your awesome new vise, That NOD stamping on the side is the same as a columbian I picked up recently. Mine was stamped NOD 1543, I cant read the last number on yours. If it is 1543 it is the number of a Navy contract to more than double the destroyer output of a Tacoma shipyard prior to WWII. Just an FYI.
 
To avoid these ads, REGISTER NOW!

RTM

Well-known member
Joined
May 13, 2019
Messages
13,139
Location
SF Bay Area
I really want to take the jaws off, but those screws have hardly any depth to them and the are standard, not Phillips which makes it even harder. I'll eventually try some heat and a impact tool.

In the vise repair thread, there is a note to take the bit out of your impact driver, and close it in the vise jaws, with the tip in the slot of the screw. Then use a open end wrench to loosen the screw a little, open the vise a hair, repeat. Great way to get lots of holding pressure to keep the screw in the slot. Much less futzing about than holding the vise in a second vise, keeping it from walking When you whack it, etc.

It’s worked several times for me on my vises, YMMV.
 

drivesitfar

Well-known member
Joined
Oct 23, 2013
Messages
36,009
Location
Pacific Northwest
Loren: FYI if it’s me I rarely take out jaws unless broken or damage to repair behind them cause my copper jaw covers give plenty of grip. Your call but that vise is pristine for its size and age in my book.
 
OP
L

Loren

Well-known member
Joined
Nov 16, 2019
Messages
90
Location
Lake Stevens, Wa
Mr. Wonderful, I can barely make out the number 3. So it is the same as yours. So that means the ship originated in Tacoma, is that what your saying? Would that put the vice being made in the early 40"s? That's great advice on getting the screws out, thank you. I'll be saving that project for another day. Haha.. Again, thanks for all the great advice from everyone, I truly appreciate it.
 

Mr. Wonderful

Well-known member
Joined
Jan 15, 2018
Messages
1,772
Location
Pacific Northwest
Loren,

That contract wasn't for things on the ships as far as I can tell. It looks like it bought tools and equipment to build the ships. Mine is also marked "pipe shop". If you google NOD 1543 you can read the contract. It's pretty interesting. I couldn't find anything listing vises specifically. It is interesting that they bought both columbians and american scale. I would have thought they would just go with one brand. What are the odds two vises from the same contract almost 80 years ago would pop up in the same month???
 
OP
L

Loren

Well-known member
Joined
Nov 16, 2019
Messages
90
Location
Lake Stevens, Wa
Yea, that is crazy!! I'll have to Google the number. The thrust washer idea us great and it will be EASY!! I have a whole gaggle of washers!!
 

drivesitfar

Well-known member
Joined
Oct 23, 2013
Messages
36,009
Location
Pacific Northwest
Loren: maybe now you can understand a little why some of us really like our Vises (vices)?

nice bit of history going on there too.

since your huge vise already moved with one finger after you cleaned it up, greased it and put in a thrust bearing or two is there any difference? i bet it still works as good or maybe better, but I bet it looks a lot better.

great work on your first big vise and again WELCOME TO OUR FORUM!!
 
OP
L

Loren

Well-known member
Joined
Nov 16, 2019
Messages
90
Location
Lake Stevens, Wa
Drivesitfar, the handle action is soooooo smooth now, that a 2 year old would have no problem turning it. It turns smoother than my Morgan chicago 45!!! Just got done making the thrust washer and instead of having the handle make just over 1 revolution before moving the jaws, it engages at about 1/3, its AWESOME!!!! Here is a pic of the thrust washer and my now (baby) vice.
 

Attachments

  • 20200404_080204.jpg
    20200404_080204.jpg
    102.2 KB · Views: 55
  • 20200404_080212.jpg
    20200404_080212.jpg
    100 KB · Views: 53
  • 20200404_082431.jpg
    20200404_082431.jpg
    120.3 KB · Views: 63
To avoid these ads, REGISTER NOW!

drivesitfar

Well-known member
Joined
Oct 23, 2013
Messages
36,009
Location
Pacific Northwest
LOREN: sounds AWESOME. while you are in garage and have a chance before you mount or make a stand for that American Scale how about a picture or two of it sitting next to your LITTLE MORGAN to show us all how big your new BABY (vise) is?

cheers and glad you are enjoying some of your home time while our world figures out this crazy virus.
 
OP
L

Loren

Well-known member
Joined
Nov 16, 2019
Messages
90
Location
Lake Stevens, Wa
Will do, Im now inside the house. Ill have to unbolt the American Scale from the current huge semi truck wheel with a pole welded to it. That is what the vice is sitting on now, only temporary though until the metal scrap yard by my house opens up after the virus issue goes away, they had to close down. I need that steel plate to mount this thing on. I will certainly get side by side pics though, next time I unbolt it.
Have a great day!!!
 
OP
L

Loren

Well-known member
Joined
Nov 16, 2019
Messages
90
Location
Lake Stevens, Wa
I know it's off topic, but here is a picture of my 67 Camaro that I restored.
 

Attachments

  • 20190527_063706.jpg
    20190527_063706.jpg
    145.9 KB · Views: 56
OP
L

Loren

Well-known member
Joined
Nov 16, 2019
Messages
90
Location
Lake Stevens, Wa
First jaw plate bolt replacement is finished, than the Lord!!! 3 of the 4 bolts broke off flush with vice. Easy out with lots of heat didn't work, even after letting them soak in penetrating oil for 4 days. Each one had to be drilled out. The last one (of course) the drill bit broke way down inside. But once that was taken care of I ran a tap down all of them, went to my LOCAL Ace picked up 4 new allen head bolts, ground them down to exact dimensions of the 1 good bolt that came out and there ya have it!! Very happy with it.
Now one more side to go, but that is another project for another day.
 

Attachments

  • 20200410_084951.jpg
    20200410_084951.jpg
    153.1 KB · Views: 52

ssdave

Banned
Joined
Apr 11, 2015
Messages
2,913
Location
Eastern Oregon
Here's a repost of a thrust bearing conversion I did a while back on my Wilton Patternmakers vise; thrust bearings make the vise action ultimately smooth!

I asked the other day about finding parts for a wilton woodworking vise, and couldn't find any. I have the ability to make parts, just prefer to buy if they're available. So, decided to make them and show the process.

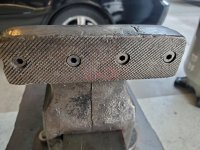
Here is the vise, with a makeshift wooden handle. I think this was a $5 or $10 yard sale find, I've had it quite a while and found it cleaning out a bottom shelf last week.

DSCF0041_zpscjoxmci9.jpg


The shaft was somewhat beat up from having pliers or a pipe wrench on it. I cleaned it up with a file.

DSCF0043_zps5jgjd4oe.jpg

DSCF0097_zpsh9zuighq.jpg


I chucked a steel bar in the lathe, and drilled it 9/16" to fit the vise shaft.

DSCF0091_zpsan8kytva.jpg


Parted the piece off to the right length, reversed it in the chuck, and turned the nose to a nice shape:

DSCF0093_zpsknhvy5pr.jpg


The hole in the vise shaft was off center, apparently they drilled it and the nose piece together originally. Made it irritating to lay out and get the pin hole right:

DSCF0098_zps0snoq9kp.jpg

DSCF0100_zpssadcmcjd.jpg


Drilled it, and it looks good:

DSCF0101_zps5tcrleno.jpg


DSCF0102_zpsfpbdieg1.jpg


Ordered a few parts from McMaster Carr, came in two days. A 17/32" rod, two threaded ball ends, and a thrust bearing assembly, to upgrade the vise slightly.

DSCF0103_zpsnwkq75is.jpg

DSCF0104_zpsukgd2h6l.jpg


The vise jaw bearing surface was cupped shape from either original design or wear. Had to file it flat for the thrust washer to bear on.
DSCF0105_zps402fpa8b.jpg

DSCF0106_zps6zr3yqsv.jpg

DSCF0107_zpsppyjywuc.jpg


Bored out a recess in the end of the nose cap to hold the thrust bearing just a little less deep than the bearing assembly.

DSCF0108_zpsawdreuok.jpg

DSCF0109_zps7afbuafa.jpg

DSCF0110_zpsmxlwmck6.jpg


I threaded the ends of the rod for the handle, drilled the nose piece for the handle, and screwed it all together. Put a roll pin to hold the assembly on the shaft, and done:

DSCF0111_zpsmzw66d1j.jpg


The thrust bearing makes it unbelievably smooth to lock down and release. I like that so well, I think I'll take apart my 4" columbian and rebuild it with a thrust bearing.

Total time in this work shown was about 4 hours.

I'll polish this all on the buffer when I get a chance, and strip the paint off the vise and repaint. Another days project.

dave
 

drivesitfar

Well-known member
Joined
Oct 23, 2013
Messages
36,009
Location
Pacific Northwest
Loren: that is one great looking 67 Camero so don't apologize for posting it cause car, tool and garage pictures are some our versions of awesome **** so to speak.

Dave: did you (or can you) post that up on the vise repair 101 thread cause i'd like to read and analyze it later and i'm positive others will like it too? thanks for posting and WELL DONE:thumbup:
 
To avoid these ads, REGISTER NOW!
Top Bottom