To avoid these ads, REGISTER NOW!

Place to build a Samurai

SamuraiJack

Well-known member
Joined
Sep 16, 2020
Messages
131
Location
Nashville, TN
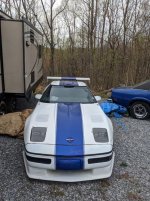
Hello - I have been lurking here for several years. it is not unusual for me to be referencing a 10 year old post that turns out to be very helpful. So with that in mind here is my garage build. If you have recommendations, I'm all ears. The overall plan is to have a nicer place to finish up my Samurai build. I was also recently talked into buying a C4 Corvette that needs some work.

Here is the plan.
Have a new patio and parking pad poured
Tear out and repour the garage floor
Install new lighting
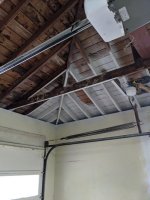
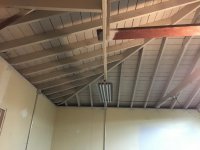
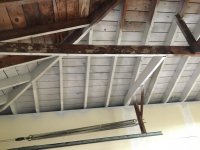
The ceiling is open rafters and is very dark, so they are getting painted
Paint the walls
Install new garage door
Install new entry door
Put up storage above the garage door
Paint the work bench and install a stainless steel top
Build or buy some rolling tool carts
Install overhead air and power
Install a large propane heater for when my southern family is up

Here is the Samurai in its current state and the Vette in all its glory.
 

Attachments

  • IMG_0556.jpg
    IMG_0556.jpg
    150.6 KB · Views: 238
  • IMG_0596.jpg
    IMG_0596.jpg
    152.9 KB · Views: 199
To avoid these ads, REGISTER NOW!
OP
S

SamuraiJack

Well-known member
Joined
Sep 16, 2020
Messages
131
Location
Nashville, TN
I have already been making some decent progress before starting this thread so I'll get you all caught up to today.
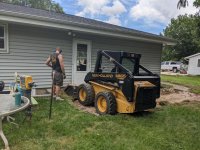
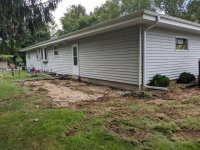
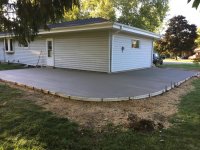
The new patio and parking pad are poured. I installed an 30amp RV outlet for visitors. The patio is 15x20 and the parking pad is 12x20 and it wraps around the house. I did all the hard work of tearing up the old patio and sidewalk, disposing of the concrete and putting down the base. The old fill around the house was sand and rocks. so over the years it all settled and was sloping towards the house. We used 18 yards of base and it ended up being a foot thick in several places and I ran a compactor over it as we spread out the base. I left the pour to some professionals, who came out made quick work of making it look awesome. The concrete is 4000psi with fiber mesh and it is all 4 inches thick. I sealed the whole thing after a month of curing with SX5000 from foundation armor (I cannot give an opinion on it yet since it has only been down for 3 days)

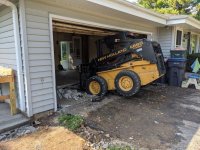
I'm also really lucky i have a neighbor with a skid steer.
 

Attachments

  • EUJO4718.jpg
    EUJO4718.jpg
    50.5 KB · Views: 111
  • 9359.jpg
    9359.jpg
    149 KB · Views: 120
  • 62675.jpg
    62675.jpg
    149.8 KB · Views: 132
  • 30468.jpg
    30468.jpg
    151 KB · Views: 111
OP
S

SamuraiJack

Well-known member
Joined
Sep 16, 2020
Messages
131
Location
Nashville, TN
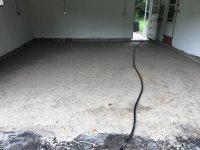
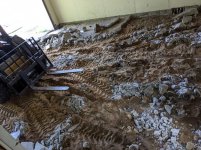
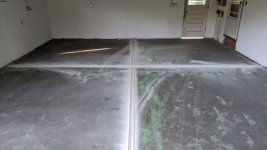
The next big step was tearing out the garage floor. But this also involved moving all my tools and junk somewhere else. It took a day to clear out the garage. The old concrete was already broken into several pieces and heaved a lot. I spend a while breaking out some corners and around the garage door tracks by hand so they would not be destroyed. Once again my neighbor is awesome and we managed to tear out the old concrete in about 4 hours with the skid steer. The garage floor base was also all sand with 2-3 inches of air space between the concrete and base in the back quarter of the garage. We ended up taking about 4 big scoops of sand out to make some extra room for the base. My kids thought the indoor sand box was the best thing ever and spent hours playing in there for a week.

The base course ended up being 8 yards of traffic bond that I compacted as we spread it out.
 

Attachments

  • IMG_0682.jpg
    IMG_0682.jpg
    148 KB · Views: 134
  • IMG_0715.jpg
    IMG_0715.jpg
    146.5 KB · Views: 129
  • IMG_0714.jpg
    IMG_0714.jpg
    153.1 KB · Views: 141
  • IMG_0712.jpg
    IMG_0712.jpg
    144 KB · Views: 138
  • IMG_0711.jpg
    IMG_0711.jpg
    150.1 KB · Views: 141
  • KIYW5425.jpg
    KIYW5425.jpg
    152.3 KB · Views: 127
  • HSWR7564.jpg
    HSWR7564.jpg
    110.3 KB · Views: 129
OP
S

SamuraiJack

Well-known member
Joined
Sep 16, 2020
Messages
131
Location
Nashville, TN
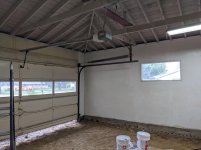
We some time between the concrete base arriving and again before the finishers came so I spent some time painting the ceiling to brighten the whole place up. I had an older spray gun from another project and it worked like a charm. Sure it uses 3x more paint but I was able to paint the ceiling in about 8 hours. Having kids and responsibilities resulted in the 8 hours being split over 4 days.

I was very happy with the result. The whole place is a significantly brighter.
 

Attachments

  • IMG_0717.jpg
    IMG_0717.jpg
    126.2 KB · Views: 105
  • IMG_0716.jpg
    IMG_0716.jpg
    84.3 KB · Views: 88
  • IMG_0680.jpg
    IMG_0680.jpg
    108.3 KB · Views: 97
  • IMG_0675.jpg
    IMG_0675.jpg
    125.1 KB · Views: 106
OP
S

SamuraiJack

Well-known member
Joined
Sep 16, 2020
Messages
131
Location
Nashville, TN
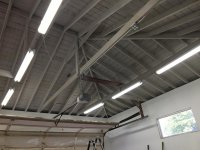
Lights! I had previously purchased a case of T8 single sided 5000k LED bulbs. By purchased I mean they were free from a friend who was not going to use them. So I ordered 6 fixtured from Prolighting, 4 were 2 bulbs and 2 were 3 bulbs. I have 3 ceiling joists and mounted the lights directly on the outside two joists. I wanted to split them up switch wise so it was not all or nothing but I also did not want them to be switched one side or the other. I ended up mounting the 3 bulb fixtures one on each joist and wiring up as one switch. I mounted the 4 two bulb fixtures in front of them and wired them to their own switch. After looking through the lighting section here I was able to surmise that romex between the lights may or may not be code but definitely looks amateur, so I ended up putting of conduit and using MC wire between the lights. I think it came out great and it sure lights the place up. The pictures are of the final install, a before pic, with just the 4 two bulb fixtures on and then all of them on.
 

Attachments

  • IMG_0691.jpg
    IMG_0691.jpg
    129.6 KB · Views: 88
  • IMG_0700.jpg
    IMG_0700.jpg
    125.4 KB · Views: 88
  • IMG_0701.jpg
    IMG_0701.jpg
    135 KB · Views: 93
  • IMG_0702.jpg
    IMG_0702.jpg
    133.2 KB · Views: 90
OP
S

SamuraiJack

Well-known member
Joined
Sep 16, 2020
Messages
131
Location
Nashville, TN
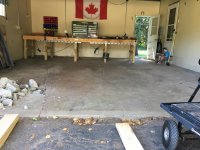
The floor is poured. I left the concrete pour and finishing to the professionals. It is 5.5inches thick, 4000psi with fiber mesh. it ended up being 8 yards in total and it looks awesome. Overall I was able to save about $2k on the floor by doing all the prep myself. From here on out my updates will be a little more spaced out since I only get the weekends to work on/in the garage. The new garage door, opener and back door are next on the list.
 

Attachments

  • IMG_0710.jpg
    IMG_0710.jpg
    100.5 KB · Views: 103
  • IMG_0709.jpg
    IMG_0709.jpg
    136.6 KB · Views: 100
  • IMG_0707.jpg
    IMG_0707.jpg
    149.1 KB · Views: 106
  • IMG_0705.jpg
    IMG_0705.jpg
    148.8 KB · Views: 92
OP
S

SamuraiJack

Well-known member
Joined
Sep 16, 2020
Messages
131
Location
Nashville, TN
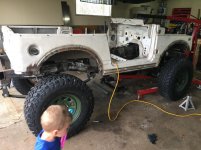
It has 12 inch frame stretch in the front and back. It is sitting on rebuilt straight axles out of an '85 toyota pickup with disk brakes all around (the axles took forever to find up here). The engine and auto trans are out of a '96 geo tracker, which are installed but still need a bit of maintenance. The suspension is all spring over on 2inch lifted leafs from an '85 toyota. I built a new trans tunnel that bolts in/out, built a new trans cross member and all new body mounts. It is on 33" tires right now and I think they look like just the right size.

I just have to do something about the wheel wells then I'm going to start on body work and getting it all back together.

When it is done I want it to be mostly road legal and be a decent off-roader but still have the samurai look. The interior is going to be all original with a soft top and the whole thing is going to be painted desert tan. I don't really like the Samurai's where all that is left is a firewall and hood.
 

tez929rr

Well-known member
Joined
Dec 26, 2005
Messages
3,772
Location
Welfare, TX
Pretty cool. We have a Samurai we bought new in 93 for my wife to use as an airport car. Put antique plates on it in 2018. What amazed me when I had to replace a couple of parts is how robust the aftermarket is for Samurais. On the rare occasion that she gasses it up someone inevitably asks her if she will sell it. We make trips to Ft Davis, TX, every year and I keep meaning to stop at this place and ask about all the Samurais sitting outside.

View media item 106836
 
To avoid these ads, REGISTER NOW!
OP
S

SamuraiJack

Well-known member
Joined
Sep 16, 2020
Messages
131
Location
Nashville, TN
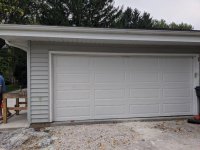
Garage door install. This is my first time installing a garage door and opener, looking back it was fairly straight forward but at the time it was not. I was able to get the whole thing installed and opening in about 5 hours but the bottom panel was hitting the old trim boards. It turned out that the very first brackets (Step 1 of the instructions) that attached the cable to were on upside down. The tracks had to all come off and move down about a half inch so the rollers would stay in the track. After that everything went fairly smooth it just took an entire day to do. Here are some before and after pics.
 

Attachments

  • IMG-0731.jpg
    IMG-0731.jpg
    144.9 KB · Views: 58
  • IMG-0732.jpg
    IMG-0732.jpg
    145.8 KB · Views: 59
  • camphoto-1804928587.jpg
    camphoto-1804928587.jpg
    123.1 KB · Views: 68

tboy

Well-known member
Joined
May 23, 2013
Messages
149
Location
Central Ohio
Nice work so far. At some point did you remove the asphalt driveway? Looks like it was there and is now gone in the pictures. Very lucky with your neighbor!
 
OP
S

SamuraiJack

Well-known member
Joined
Sep 16, 2020
Messages
131
Location
Nashville, TN
Thanks! The asphalt is still there and plan on replacing in the spring. The traffic bond I used as the garage base was sitting right there and I have not cleaned the driveway off yet.
 
OP
S

SamuraiJack

Well-known member
Joined
Sep 16, 2020
Messages
131
Location
Nashville, TN
Awesome builds!
I couldn't help but notice the GRM sticker on the C4.
Are you on their forum as well?

I'm not over there yet. When it is the Vetts turn I'll get over there with a build thread. I purchased it from a guy in Knoxville area. Here are a couple more pics.
 

Attachments

  • IMG-0598.jpg
    IMG-0598.jpg
    149.1 KB · Views: 77
  • IMG-0595.jpg
    IMG-0595.jpg
    148.2 KB · Views: 76
OP
S

SamuraiJack

Well-known member
Joined
Sep 16, 2020
Messages
131
Location
Nashville, TN
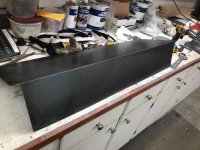
Work Bench question. I'm planning on using 14 gauge stainless steel on my work bench. Why you ask? I purchased several sheets of 3'x10' 16 gauge SS at an auction for $50 a sheet. I'd like to bend a 1 inch lip on the front edge to go over the edge of the work bench.

I don't have a brake that can bend it. Do any of you have any ingenious methods of bending it? I'm thinking of clamping it to the work bench, scoring where I want it to bend and use some tin benders to slowly get it to 90 then go along and fasten it to pull down any high spots.
 

Trm303

Well-known member
Joined
Aug 4, 2020
Messages
162
Location
Cape May
It has 12 inch frame stretch in the front and back. It is sitting on rebuilt straight axles out of an '85 toyota pickup with disk brakes all around (the axles took forever to find up here). The engine and auto trans are out of a '96 geo tracker, which are installed but still need a bit of maintenance. The suspension is all spring over on 2inch lifted leafs from an '85 toyota. I built a new trans tunnel that bolts in/out, built a new trans cross member and all new body mounts. It is on 33" tires right now and I think they look like just the right size.

I just have to do something about the wheel wells then I'm going to start on body work and getting it all back together.

When it is done I want it to be mostly road legal and be a decent off-roader but still have the samurai look. The interior is going to be all original with a soft top and the whole thing is going to be painted desert tan. I don't really like the Samurai's where all that is left is a firewall and hood.


You are definitely off to a great start! Unfortunately there is a lot of overlapping tin on these that water likes to hide behind and rot out. I built mine with a similar concept in mind but kept it in a much more stock configuration. Last week I got a little stuck 67d315ab99a2c2a7c413bcbde610547b.jpg


Sent from my iPhone using The Garage Journal mobile app
 

Attachments

  • 67d315ab99a2c2a7c413bcbde610547b.jpg
    67d315ab99a2c2a7c413bcbde610547b.jpg
    186.6 KB · Views: 1
OP
S

SamuraiJack

Well-known member
Joined
Sep 16, 2020
Messages
131
Location
Nashville, TN
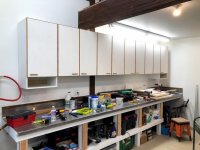
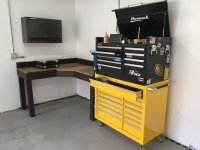
Work Bench and extra storage. The old work bench was 3 feet deep and 12 feet long which took up to much space in a small garage. It took it apart and built a smaller work bench in the corner it came out quite nice. The only additional thing I have to do is add the stainless steel top. A small overhead cabinet was installed and I purchased a US general 44 to go with the top box.

I built some shelving above the garage door for bins, it came out great and they are really strong. This is the first time my commuter car has ever been in there so I'm really happy about it. My wife also crafted some curtains for the window to spruce the place up a little.

The only things left are to get everything put away, replace the entry door and possibly get a natural gas heater out there. I'm shooting to get it all done next weekend and will post some completed pictures of the final product.
 

Attachments

  • IMG-0763.jpg
    IMG-0763.jpg
    146.6 KB · Views: 21
  • IMG-0751.jpg
    IMG-0751.jpg
    122.3 KB · Views: 23
  • IMG-0756.jpg
    IMG-0756.jpg
    108.9 KB · Views: 19
  • IMG-0748.jpg
    IMG-0748.jpg
    39.3 KB · Views: 17
  • IMG-0747.jpg
    IMG-0747.jpg
    45.7 KB · Views: 16
  • IMG-0749.jpg
    IMG-0749.jpg
    105.7 KB · Views: 20
  • InkedIMG-0761_LI.jpg
    InkedIMG-0761_LI.jpg
    125.3 KB · Views: 18

Slednut

Well-known member
Joined
Dec 20, 2012
Messages
2,554
Location
Washington state
Work Bench question. I'm planning on using 14 gauge stainless steel on my work bench. Why you ask? I purchased several sheets of 3'x10' 16 gauge SS at an auction for $50 a sheet. I'd like to bend a 1 inch lip on the front edge to go over the edge of the work bench.

I don't have a brake that can bend it. Do any of you have any ingenious methods of bending it? I'm thinking of clamping it to the work bench, scoring where I want it to bend and use some tin benders to slowly get it to 90 then go along and fasten it to pull down any high spots.

My friend bent his with a hammer and 2x4, it's not perfect but looks pretty good. He did attached it to the bench and then bent it.

Scoring the back side with a cut off wheel will make a better bend. I did this to a piece of 14 gauge steel and the bend came out really nice.
 

Attachments

  • Sheet metal bend.jpg
    Sheet metal bend.jpg
    102.5 KB · Views: 16
  • Wade's.jpg
    Wade's.jpg
    86.6 KB · Views: 19
To avoid these ads, REGISTER NOW!
Top Bottom