nailheadmatt
Well-known member
- Joined
- Jun 22, 2021
- Messages
- 147
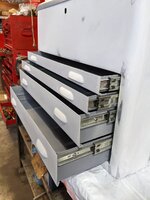
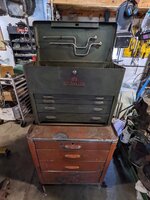
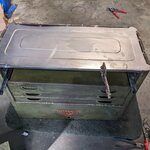
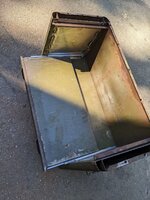
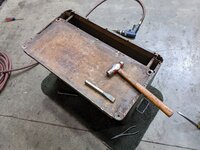
i own a couple of these 40s 9998s, out of the many plomb boxes ive collected. this one has the very early slider design, that pre dates the twice as thick friction sliders with the set screws that the later ones as well as later 9990s came with. floor skin was super stretched out on this one before i got it. sliders were bent badly. even after countless hours of trying to fix the sliders, i only got it decent, when empty. but drawers would bind up with weight in them. i like keeping stuff original, whenever possible, but decided that this one had a lot strikes against it. this is progress so far. made new floor skin. removed all friction slider brackets. roller bearing sliders i got were slightly too thick to fit, so i recessed the new inner skins a 1/16" on each side and that gave me the space i needed. cut a 1/4" off the back of the new roller mounting brackets so they fit within the recessed panel without hanging over. was originally going to make a new lip in the front of the floor pan with a break, but decided 1/2 tubing will be way stronger. this is progress so far, before i start blasting it and body working it. i always prefer to powdercoat whenever possible but this ones too rough. needs to be skimmed and blocked. i hate crinkle finish as it always looks dingy. either going to go with a gloss olive drab color, or maybe a sea foam color would look cool and era appropriate. more pics to come as i continue with progression on the project
Attachments
-
 287137107_4585852371517641_4064771654841941554_n.jpg351.9 KB · Views: 67
 -
 289793589_343236024639238_3904760575139971969_n.jpg158 KB · Views: 60
 -
 289097060_4110810559043565_8994352524784873350_n.jpg321 KB · Views: 54
 -
 289289752_744712893649580_4949945754488877669_n.jpg195 KB · Views: 54
 -
 289093722_363424099051030_6710380561314657402_n.jpg376.5 KB · Views: 52
 -
 289745889_283721943927592_6714802688146393929_n.jpg486.6 KB · Views: 55
 -
 288206860_568554138219640_2828508160707448213_n.jpg359.2 KB · Views: 53
 -
 288863821_358355939717979_4006040985760073628_n.jpg449.1 KB · Views: 52
 -
 288201002_336137868699112_7668995298297081716_n.jpg464.5 KB · Views: 53
 -
 288207193_496662548928685_1226024571149901309_n.jpg317 KB · Views: 55