newhollandpuller
Well-known member
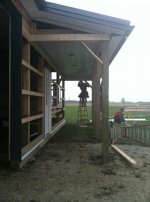
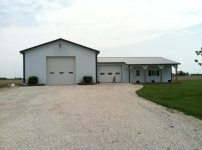
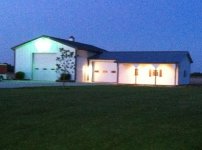
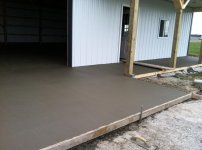
After admiring all the beautiful garages and great project ideas, I firgured I would share my modist pole barn addition. The current building was 30x50x14 and the addition is 30x40x10 with a 24' porch.

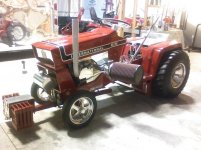
") ) Open RPM all Billet internal parts turns 9,000 RPM at the line and will turn 7200++ going down the track pulling 9000lb weight transfer (tractor and driver weigh in at 1050lbs). its a fun hobby I can do with my family. The Yellow cub is a stock tractor for son and neighbor kid to pull. The Red one is one I wish I never sold! it was a NQS Super Stock 50.5 CID with open natural induction 54MM flat slide carb made 80HP on a flat head side valve motor - was a heck of ride.
) Open RPM all Billet internal parts turns 9,000 RPM at the line and will turn 7200++ going down the track pulling 9000lb weight transfer (tractor and driver weigh in at 1050lbs). its a fun hobby I can do with my family. The Yellow cub is a stock tractor for son and neighbor kid to pull. The Red one is one I wish I never sold! it was a NQS Super Stock 50.5 CID with open natural induction 54MM flat slide carb made 80HP on a flat head side valve motor - was a heck of ride.


WOW!!!!!!!!!!!!! This place is NICE!!
This project was a fast forward deal time wise.
No surface mount wiring? Have any close-up pics of the wall receptacles fit and finish?
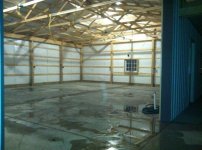
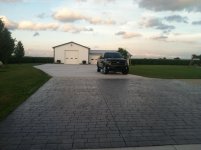
Was the interior metal dedicated for that purpose, or was it an exterior product? The fit and finish looks super nice. Also, nice concrete work. I'll have to show my wife your exterior landscape treatment. We're waiting for the bulldozer when it dries up some to break ground for a 3,600 sqft bldg.
That's a nice addtion. Very well done.
The addition looks great!!! How far apart were your trusses spaced, four feet?
I really can't tell by the pic, but were the 2x4's on top of the trusses laid flat?
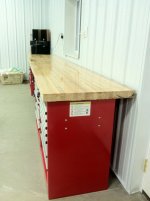
Looks great, i love that butcher block top for your workbench. Are the pillows for when you have or want to sleep out there

Thank You - Yes the building went up fast after it started - I had months of planning (I really think my wife thought I was crazy I must have measured and placed stakes in our yard 100 times trying to figure out the best lay out, they always look bigger on paper) and getting the subs lined up so it could go off as quick as possible.
I personally hate surface mounted conduit and electrical boxes (but they are easier than pulling wire through the walls if you need to add a welder plug or something after it's all done). If you're going to go this route you have to leave the boxes hanging when they come to hang the interior steel then they can move them to fall in the middle of the ribs. My Nephew did the electrical and had these shims to help pull the boxes out when mounting receptacles to try to get them as flush as possible. I will try to post some pictures of it - I need to go out there tonight and work on a new chassis.
The interior metal is what they call liner panel and looks just like the exterior metal just a different paint process and a little thinner.


What a beautiful place you have! Thanks for sharing, it's inspiring. And BTW, that a lot of concrete!!
Nice!