To avoid these ads, REGISTER NOW!

Poor Mans Welding Cart Build

PurpleZj

Well-known member
Joined
Feb 1, 2014
Messages
150
Location
Louisburg, Ks
I've been wanting/needing a welding cart for awhile now but I just never had the spare money to put towards getting one. So I follow the rule of if you can't afford to buy it, build it. I've had this engine stand sitting around for probably 15+ years and its been used twice and its always in the way. I had some other parts laying around for a smoker rebuild that never happened that were what I needed for the cart so I got to cutting. I really only usually have saturday mornings to tinker so I'd say probably two more weekends worth of work haha
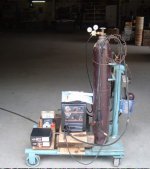
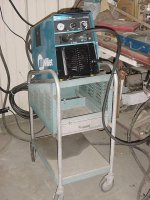
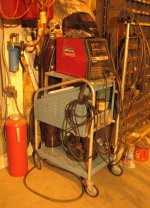
First I found one online that was similar to what I was starting with as inspiration
29792301_10213340839654227_7504264873224589828_n by zach kolich, on Flickr


The Engine Stand
29597415_10213340840014236_8863424690744103391_n by zach kolich, on Flickr

Base frame layout. Narrow the rear cross tube so I could add a front cross tube as I wanted it to have 4 wheels for stability
29695044_10213340840254242_3637353616287703032_n by zach kolich, on Flickr

A quick mockup of the wheel layout
29793260_10213340840414246_1256578524555481658_n by zach kolich, on Flickr

Utilized the hitch tube from an old banged up hitch rack for the vertical support. Will be using a receiver tube to make the height adjustable which also gives me the ability to easily add another shelf for another machine in the future. Lets the cart grow with me easily
29597336_10213340840574250_6528874275780004576_n by zach kolich, on Flickr

Side supports for the lower shelf
29597316_10213340841334269_1684096703294879986_n by zach kolich, on Flickr

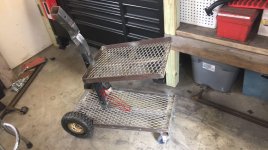
Laid down the expanded sheet for the lower shelf
29597462_10213340841574275_8442453152462503473_n by zach kolich, on Flickr

Started the main shelf where my welder will sit. This and the side supports are made from the original engine stand 2x3 tube upright
29793010_10213340842254292_6767551752190964219_n by zach kolich, on Flickr

Quick test fit to make sure I like how it looked
29595476_10213340844814356_5901634650945086141_n by zach kolich, on Flickr

More shelf supports with wheels mocked up
29597262_10213340845654377_3118796253979044282_n by zach kolich, on Flickr

I decided the rear wheels needed to come forward and inboard so I used the trusty eyeball decide where they would sit
30414978_10213376592028014_664731658905190400_n by zach kolich, on Flickr

Aside from having a ton of flat bar from the never started smoker rebuild I found a small piece of exhaust tube that had the perfect radius to match the rear wheels
30412133_10213376592348022_7641431553335099392_n by zach kolich, on Flickr

First wheel mount made, didn't turn out to my liking so I made sure I killed it on the other side. Went and bought another 5/8"x5" bolt to make a new mount for the first side.
30412251_10213376592508026_6599818627329818624_n by zach kolich, on Flickr

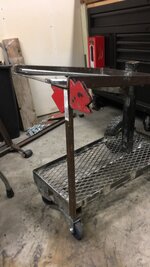
How its looking so far
30415218_10213376592308021_8279867463949090816_n by zach kolich, on Flickr

It still needs a lot of work, but the structure is there.
To Do:
-Finish top shelf
-Add push/pull handles
-Add cord hangers
-Add gun "holster" for holding it while I'm working
-Start finish welding everything
-Throw some paint on it
-Make/mount quadplex extension cord so I can plug my angle grinder/welder into the cart and only have one cord running to the wall.
 
To avoid these ads, REGISTER NOW!

crab

Well-known member
Joined
Jan 8, 2015
Messages
940
Looks pretty nice, I'll be watching to see it finished .
 

toolferone

Well-known member
Joined
Feb 27, 2016
Messages
93
Location
Raleigh, NC
Liking it so far. Looks like it needs some kind of push or pull handle on it. Look forward to seeing it finished.
 
OP
P

PurpleZj

Well-known member
Joined
Feb 1, 2014
Messages
150
Location
Louisburg, Ks
looks good so far


Thank you

I like it so far... look forward to seeing it completed. :thumbup:


Thank you, I can’t wait to finish it. But then that means I have to start another project lol

Great idea on the usage of the engine stand and I like the design you are working with


Thank you, I really got tired of it being in the way so it works out. A lot of good designs out there but for what materials I had I think it should turn out pretty cool

Liking it so far. Looks like it needs some kind of push or pull handle on it. Look forward to seeing it finished.


Thank you. And yep it’ll have a push handle off the top of the vertical support and a pull handle off the front of the top shelf once it’s complete. Tinkering/fabricating seems to be my therapy


Sent from my iPhone using Tapatalk
 

bad_idea

Well-known member
Joined
Jun 11, 2011
Messages
4,332
Location
Pasquotank, NC
You've perked my interest. Looking good so far. What will stop the machine from sliding off the top shelf? I envision you welding under the car, the lead gets snagged, and the machine drops off the shelf.
 
OP
P

PurpleZj

Well-known member
Joined
Feb 1, 2014
Messages
150
Location
Louisburg, Ks
You've perked my interest. Looking good so far. What will stop the machine from sliding off the top shelf? I envision you welding under the car, the lead gets snagged, and the machine drops off the shelf.


Thank you. And the top shelf will be similar to the bottom shelf with the expanded sheet on the bottom and an angle iron perimeter so that will keep it from falling off. In the last picture it is just set on the top shelf supports to give a better idea of the finished layout.


Sent from my iPhone using Tapatalk
 

bad_idea

Well-known member
Joined
Jun 11, 2011
Messages
4,332
Location
Pasquotank, NC
Cool. Make sure you have clearance to the angle iron frame to open the side cover. Been there, screwed that up.
 
OP
P

PurpleZj

Well-known member
Joined
Feb 1, 2014
Messages
150
Location
Louisburg, Ks
Looks great!


Thank you!

Cool. Make sure you have clearance to the angle iron frame to open the side cover. Been there, screwed that up.


Lol oh I’ve already thought about that and will be triple checking before anything gets glued together. Now here’s a dilemma I ran into. I’ve always ran fluxcore with the plan of eventually switching to solid/gas. The cart is almost done and capable of holding a bottle, and i don’t have enough wire left on my roll of fluxcore to finish the cart with. Even the 4lbs roll seems to last me quite awhile so I’d hate to buy another roll just to use maybe 5% of it to finish weld the cart when my next project(cowl hood for my mustang) I need to run .025 and gas.


Sent from my iPhone using Tapatalk
 
OP
P

PurpleZj

Well-known member
Joined
Feb 1, 2014
Messages
150
Location
Louisburg, Ks
On another note. Had to stop by Home Depot to pick up a pressure washer, while I was there I grabbed a box for the carts power station. Still not completely sure where it’ll get mounted on the cart but I’ll figure it out. Working on convincing the boss to let me get a 150cf c25 bottle
IMG_0162.jpg


Sent from my iPhone using Tapatalk
 

kursplat

Well-known member
Joined
Jun 7, 2010
Messages
911
Location
S.Cal
well there goes the "free engine stand" thread i was going to start tomorrow... :mad:
 

bad_idea

Well-known member
Joined
Jun 11, 2011
Messages
4,332
Location
Pasquotank, NC
Shop around for your argon bottle. I got 2 quotes for the same bottle - one shop wanted $260 plus $30 to fill, other shop wanted $130 for a full bottle ($12 to refill in future). Be sure to ask cost to refill the bottle, the savings in cost of bottle can quickly be eaten up by refill costs for the life of the cylinder.
 
OP
P

PurpleZj

Well-known member
Joined
Feb 1, 2014
Messages
150
Location
Louisburg, Ks
Shop around for your argon bottle. I got 2 quotes for the same bottle - one shop wanted $260 plus $30 to fill, other shop wanted $130 for a full bottle ($12 to refill in future). Be sure to ask cost to refill the bottle, the savings in cost of bottle can quickly be eaten up by refill costs for the life of the cylinder.


Yeah it’s pretty much just airgas and praxair around here from what I can find. I work across the street from an airgas and it would be $50 to refill the 150cf. Found a retired guy selling some full/in cert 150cf bottles for 175. That’s a 1/3rd the price new from airgas/praxair

well there goes the "free engine stand" thread i was going to start tomorrow... :mad:


You’re welcome haha

PurpleZj top job..:thumbup:


Quote So I follow the rule of if you can't afford to buy it, build it. Quote.:thumbup:


Spot on..:thumbup:


Thank you very much


Sent from my iPhone using Tapatalk
 
OP
P

PurpleZj

Well-known member
Joined
Feb 1, 2014
Messages
150
Location
Louisburg, Ks
I think I’m just gonna stay with flux core for now. At least to finish the cart, it’s just easier. Once the cart is done I’ll start working on the transition to gas. Anyways, stay tuned I hope to make a decent amount of progress this weekend


Sent from my iPhone using Tapatalk
 

Kenstone1

Well-known member
Joined
Oct 2, 2015
Messages
734
Nice
You might want to consider putting fenders or covers over those pneumatic tires though...
:eek:
 
OP
P

PurpleZj

Well-known member
Joined
Feb 1, 2014
Messages
150
Location
Louisburg, Ks
Nice
You might want to consider putting fenders or covers over those pneumatic tires though...
:eek:


Yeah I’ve been thinking about it. But that’ll come later if I do. I have a few spares laying around if I have an issue


Sent from my iPhone using Tapatalk
 
To avoid these ads, REGISTER NOW!

aka Larry

Well-known member
Joined
May 2, 2012
Messages
8,034
Location
Eastern, NC
Nice
You might want to consider putting fenders or covers over those pneumatic tires though...

I'd revise that statement to say "You might want to swap in some hard rubber wheels instead".

I've built three carts with those same pneumatic wheels and they always leak down and constantly need to be inflated. Two of the three carts are used outside on non-hard surfaces (not welding carts) so I've kept the pneumatic wheels. The other one is only used in the shop on a concrete floor, so I just swapped them out for the hard rubber ones to avoid constantly adding air to the damn things.
 
Last edited:
OP
P

PurpleZj

Well-known member
Joined
Feb 1, 2014
Messages
150
Location
Louisburg, Ks
Ah yeah. That is the eventual plan to have the solid ones. Just focusing what little money I plan to invest finishing it and making it look pretty lol. I’ll worry about the rear tires later once they become enough of a headache


Sent from my iPhone using Tapatalk
 
OP
P

PurpleZj

Well-known member
Joined
Feb 1, 2014
Messages
150
Location
Louisburg, Ks
Ok I made more progress. Not as much as I wanted to but oh well.
Top shelf made
IMG_0199.JPG
With welder sitting on it
IMG_0200.JPG
Some more of the upright. Still have to decide where to mount the power box. The two places it looks best either interfere with the eventual bottle placement or the wire access door. I may have to switch to two single outlet boxes instead of the dual so I can mount them along the side of the upright tube.
IMG_0201.jpg
Rear wheel mounts. Going to add more support to them
IMG_0202.JPG

Although I’ve made progress I still feel no closer to being done lol


Sent from my iPhone using Tapatalk
 

BukitCase

Well-known member
Joined
Apr 11, 2017
Messages
1,075
Location
Oregon
I've yet to have a weld break (since 1973), but it doesn't stop me from being paranoid when it comes to NOT having to replace expensive toys); so if I were building that style cart, I'd add a tube gusset (see markup) - And maybe a handle in front of the welder so you're not tempted to think your mig gun is a "leash" - and maybe replace the casters with locking ones later...

Cool design tho, and once you get the C25 gas going you're gonna LOVE "half price wire" (offset by gas cost tho) and easy cleanup with just a wire brush... Steve
 

Attachments

  • PMWC-gusset.JPG
    PMWC-gusset.JPG
    140.3 KB · Views: 95
Last edited:
OP
P

PurpleZj

Well-known member
Joined
Feb 1, 2014
Messages
150
Location
Louisburg, Ks
Thanks for the idea I’ll look into adding one. And I snuck back out for a little bit because the more i thought of how the upright was turning out the more i hated it. So I cut it off. I’m not sure what the next step is for it but I have time to figure it out.
IMG_0203.jpg
Trying to come up with a handle I kind of like this idea. It’s the supplied handle for my new tool box and will most likely never get used. I’ll need to cut the brackets off and shorten it by about an inch to make it fit. But I’m gonna sit on it for a little bit and see if I truly like it.
IMG_0204.jpg


Sent from my iPhone using Tapatalk
 

BukitCase

Well-known member
Joined
Apr 11, 2017
Messages
1,075
Location
Oregon
I would put the handle across the FRONT of the cart, just below the welder - that's the direction those wheels are gonna want to go... Steve
 
OP
P

PurpleZj

Well-known member
Joined
Feb 1, 2014
Messages
150
Location
Louisburg, Ks
Ehhh I have an idea rolling around in my head. Got lucky and had the perfect piece to cut up and make it with laying around. Will just have to see when I can make it back out to the shop


Sent from my iPhone using Tapatalk
 
OP
P

PurpleZj

Well-known member
Joined
Feb 1, 2014
Messages
150
Location
Louisburg, Ks
I’m also trying to figure out the logistics of adding a drawer. Would be nice to keep my welding stuff with the cart


Sent from my iPhone using Tapatalk
 
OP
P

PurpleZj

Well-known member
Joined
Feb 1, 2014
Messages
150
Location
Louisburg, Ks
I finally worked through the drawer design in my head. I hijacked the drawer slides off an old in cabinet trash can bracket. Those will be mounted to the sides of the current top shelf, then I’ll make another angle iron frame with a cross brace or two underneath to act as the drawer body. The bottom will be mesh with a small solid bottom section for extra tips/small stuff. Then I’ll build a new upper shelf and mount it 4” or so above the drawer bottom. And for extra stability I’ll be running legs down from the front corners of the top shelf to the bottom of the cart as I’ll be adding a decent amount of weight with the addition of the drawer. Then it’s back to the handle design lol


Sent from my iPhone using Tapatalk
 
OP
P

PurpleZj

Well-known member
Joined
Feb 1, 2014
Messages
150
Location
Louisburg, Ks
An idea of how the tracks will be addedab9821e85a8cc2d1b558105403ad1236.jpg
Quick mock up of support legs, I may spring for some tube instead of using the angle iron I have on hand
ce88259b056e5b9dce9c904560c8457d.jpg
And I got some much needed supplies. Needed some proper PPE for all this metal work, and I was needing a band file to shave down the inside of a tube for setting up a hitch mount for my bench grinder
25519d66d690cba31b2180f395a9c913.jpg


Sent from my iPhone using Tapatalk
 

Attachments

  • 25519d66d690cba31b2180f395a9c913.jpg
    25519d66d690cba31b2180f395a9c913.jpg
    271.4 KB · Views: 4
  • ce88259b056e5b9dce9c904560c8457d.jpg
    ce88259b056e5b9dce9c904560c8457d.jpg
    288.3 KB · Views: 3
  • ab9821e85a8cc2d1b558105403ad1236.jpg
    ab9821e85a8cc2d1b558105403ad1236.jpg
    381.6 KB · Views: 5

bad_idea

Well-known member
Joined
Jun 11, 2011
Messages
4,332
Location
Pasquotank, NC
You're going to want to get some filters for that half mask. :lol:

I really like the P100 filters (pink pancake filter), they fit under a weld shield pretty good. BUT, a respirator is a last resort not a first choice. Meaning you should use adequate ventilation to keep the fumes out of your breathing area. A fan blowing across your work area works well. Couple doors open, and you are golden.

Awesome decision to get the face shield. A face shield has saved my *** once or twice. It kills me seeing all of these car shows on tv using a grinder w/ no guard, face shield, gloves, or long sleeves.
 
OP
P

PurpleZj

Well-known member
Joined
Feb 1, 2014
Messages
150
Location
Louisburg, Ks
You're going to want to get some filters for that half mask. :lol:

I really like the P100 filters (pink pancake filter), they fit under a weld shield pretty good. BUT, a respirator is a last resort not a first choice. Meaning you should use adequate ventilation to keep the fumes out of your breathing area. A fan blowing across your work area works well. Couple doors open, and you are golden.

Awesome decision to get the face shield. A face shield has saved my *** once or twice. It kills me seeing all of these car shows on tv using a grinder w/ no guard, face shield, gloves, or long sleeves.


The filters were on order they just showed up today actually lol. The pink p100s are what I got. I have my shop fan hung on the wall ready to go for that exact purpose I’ve just been waiting for it to warm up a tad bit more as it puts out a ton of air. Yeah I’ve never had a problem with just safety glasses before but for some reason this project I had one too many close calls with debris and my eyeballs that I decided it was finally time to pick up a face shield, and for it being Harbor Freight its really nice. I’ll always wear glasses and gloves and now my face shield. I messed up earlier in the project by wearing wearing my soft back work gloves while using a flap wheel on my angle grinder. Feel like I was darn close to getting to bone haha.


Sent from my iPhone using Tapatalk
 

BD1

Well-known member
Joined
Mar 18, 2007
Messages
4,602
Location
north side
You'll like that band sander. I bought a Dynabrade years ago and it's amazing. It is one of my go to tools for my artwork. After yours dies, you'll buy a real one.
 
OP
P

PurpleZj

Well-known member
Joined
Feb 1, 2014
Messages
150
Location
Louisburg, Ks
You'll like that band sander. I bought a Dynabrade years ago and it's amazing. It is one of my go to tools for my artwork. After yours dies, you'll buy a real one.


Good to hear. It falls under the “specialty” tool category for me as in it’ll rarely get used after this so i go cheap, that’s what I love about Harbor freight.


Sent from my iPhone using Tapatalk
 
OP
P

PurpleZj

Well-known member
Joined
Feb 1, 2014
Messages
150
Location
Louisburg, Ks
Sorry everyone. Last couple weekends have been crazy busy and I’ve been sick as a dog. I should be able to make time this weekend


Sent from my iPhone using Tapatalk
 

sberry

Banned
Joined
Jun 18, 2005
Messages
35,747
Location
Brethren, Michigan
I field tested a unit for Hobart, set it on the engine stand until I could build a real cart for it.
 

Attachments

  • Hobart cart.JPG
    Hobart cart.JPG
    52.6 KB · Views: 93
  • eng cart.JPG
    eng cart.JPG
    30.8 KB · Views: 80

sberry

Banned
Joined
Jun 18, 2005
Messages
35,747
Location
Brethren, Michigan
If I was starting this would think like the OP did and a good place to start is the cheap engine stand. Its painted, its fitted to some extent and a guy could fundamentally add some brackets and be right there.
As for the shop mower, if you note the thing the welder sits on is a chair frame. The biggest thing was to add some front wheels. They needed the spacing to make the swivels work and as for load, each only carries 1/2 and the tank is over the fronts which were fairly stout.
I didn't cut much, simply went to the pile and pulled pieces, welded on, this took less than an hour to finish. Its actually in the storage barn on a shelf, I moved the machine along with a plasma to sit on top of a synch 300 that takes up space. I then traded carts out to another feeder I use for steel, the Hobart has been relegated to spool use for alum and has long leads.
I got rid of 2 carts that I wasn't really using anyway.
I have evolved changes over the years, its getting to the point I cant trim the function much more, really cant make it much better. I have actually reduced some stuff along the last remodels, simply got rid of stuff I was storing in my work area and never used.
 

Attachments

  • plas cart.JPG
    plas cart.JPG
    43.4 KB · Views: 64
  • Plaz Hob Synch.jpg
    Plaz Hob Synch.jpg
    122.3 KB · Views: 61
  • SP cart.JPG
    SP cart.JPG
    71.3 KB · Views: 61
  • shopping welder.jpg
    shopping welder.jpg
    49.9 KB · Views: 61
  • Welder group new.jpg
    Welder group new.jpg
    145.3 KB · Views: 60
  • plaz lead holders.JPG
    plaz lead holders.JPG
    36.5 KB · Views: 62
Last edited:
OP
P

PurpleZj

Well-known member
Joined
Feb 1, 2014
Messages
150
Location
Louisburg, Ks
Long time no update. Life has gotten crazy busy and it’s been too hot in the shop for me to want to be in there. But I’m working on a full motion wall mount for my shop fan to make shop time bearable. I’m ready to get this cart done


Sent from my iPhone using Tapatalk
 
To avoid these ads, REGISTER NOW!
Top Bottom