To avoid these ads, REGISTER NOW!

Powermatic 1200HD

dwall174

Well-known member
Joined
Jun 1, 2012
Messages
453
Location
Southeast Michigan
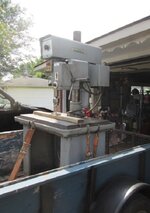
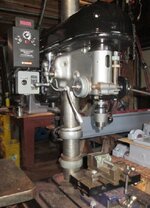
I recently bought a Powermatic 1200HD with the power down feed attachment from a local on-line auction. I wasn't able to check it out in person, but I got it for only $160 so I figured it was worth a chance.
IMG_8740.JPG
Not really sure what it weighs, but I'm guessing it's over 1200lbs.
I had to separate the head from the base to get it in my garage.
IMG_8748.JPGIMG_8749.JPGIMG_8758.JPG

Judging by the auction pictures I had assumed that the power down feed wasn't working correctly based on the fact that the engaging lever was missing!
Auction Pic 7 .jpg

After getting a chance to go through it & checking everything out, I discovered that there were several damaged/missing items in the power down feed gearbox.
Repairs Needed .jpgIMG_8776.JPGIMG_8783.JPG

Doug
 
To avoid these ads, REGISTER NOW!

kaymccampbell

Well-known member
Joined
Feb 27, 2015
Messages
29,587
Location
Upstate New York
Nice get. Easy enough to repair. You may have to fabricate something for it. It'll keep you off the streets at night.
Make sure you clean and lube the reeves drive. Cause otherwise those presses slip something awful. A lot of times, a shop would disable the downfeed, cause you have to have an operator with a brain to use one, and those have always been in short supply, even in the machinist trade.
 
OP
D

dwall174

Well-known member
Joined
Jun 1, 2012
Messages
453
Location
Southeast Michigan
Other than the power down feed being damaged! The drill press seemed to be in fairly good shape mechanically.
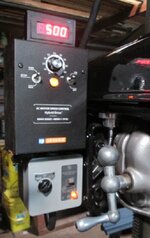
The 1150's & 1200's built after 1990 come from the factory with a VFD for variable speed. The potentiometer (speed control dial) was damaged, so I wasn't able to test out the VFD. I ran the motor off of my RPC & it ran fine.

Doug
 
OP
D

dwall174

Well-known member
Joined
Jun 1, 2012
Messages
453
Location
Southeast Michigan
Nice get. Easy enough to repair.
Well, it was until I started to disassemble the power down feed unit!
I realized that the worm gear & worm-drive gear were also damaged.
IMG_8801.JPGIMG_8803.JPG

A lot of times, a shop would disable the down feed, cause you have to have an operator with a brain to use one, and those have always been in short supply, even in the machinist trade.
Apparently, this was one of those shops that had employees that just manhandled the machinery.

Doug
 

kaymccampbell

Well-known member
Joined
Feb 27, 2015
Messages
29,587
Location
Upstate New York
Other than the power down feed being damaged! The drill press seemed to be in fairly good shape mechanically.
The 1150's & 1200's built after 1990 come from the factory with a VFD for variable speed. The potentiometer (speed control dial) was damaged, so I wasn't able to test out the VFD. I ran the motor off of my RPC & it ran fine.

Doug
It's probably just a 10K pot.
 
OP
D

dwall174

Well-known member
Joined
Jun 1, 2012
Messages
453
Location
Southeast Michigan
After thinking it over a little I ended up deciding too completely disassemble the drill press & do a basic refurbishing of the drill press like I have done with some of my other old machines.
Power feed parts
IMG_8859.JPGIMG_8848.JPG

Parts after cleaning them up, wire-wheeling them to remove the old paint & priming/repainting.
IMG_8873.JPG

Current condition after installing new bearings & reassembling everything mechanical other than the damaged/missing power feed parts.
I relocated the position of the legs with the concave portion facing outwards since I plan to add a storage cabinet under the tabletop.
IMG_8985.JPGIMG_8993.JPGIMG_8988.JPGIMG_9001.JPG

Doug
 
Last edited:
OP
D

dwall174

Well-known member
Joined
Jun 1, 2012
Messages
453
Location
Southeast Michigan
I'm able to find all the parts needed to rebuild the power feed gearbox, however I'm not 100% sure the worm gear that was in there is the original gear!

The one that was in there & damaged is a Browning CWG1280-1
I haven't been able to locate the Browing CWG1280, but I was able to cross reference it to a Martin W1280 or a Boston Gear G1054RH.

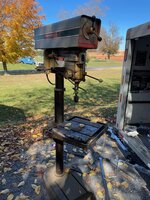
Judging by this pic. of the power feed gearbox,
IMG_8775.JPG
I'm guessing it was replaced at one time since there's no yellow paint on it like the rest of the parts!

If anyone happens to have one of these Powermatic drill presses with the same style power down feed, I would be really grateful if they could take a look inside the cover & see if there happens to be a part# visible on the gear.

Doug
 
OP
D

dwall174

Well-known member
Joined
Jun 1, 2012
Messages
453
Location
Southeast Michigan
Fantastic price.
good deal op.:)(y)(y)
Thanks for the (y)

As for the price!
I really didn't need another drill press, but I was already registered & watching the auction for a 16" State disc sander.
State Disc Sander .jpg
The sander ended up going for like $450, I stopped bidding at $250.

While watching the auction I noticed the 1200HD only had an opening bid of $80 on it. :rolleyes:
I placed a maximum bid of $200 on it & too my surprise I got it for $160. :)

As an added bonus the chuck turned out to be a good condition Jacobs 18N ball bearing Super Chuck.
IMG_8770.JPG

Doug
 

jzucadi

New member
Joined
Oct 19, 2021
Messages
3
After thinking it over a little I ended up deciding too completely disassemble the drill press & do a basic refurbishing of the drill press like I have done with some of my other old machines.
Power feed parts
IMG_8859.JPGIMG_8848.JPG

Parts after cleaning them up, wire-wheeling them to remove the old paint & priming/repainting.
IMG_8873.JPG

Current condition after installing new bearings & reassembling everything mechanical other than the damaged/missing power feed parts.
I relocated the position of the legs with the concave portion facing outwards since I plan to add a storage cabinet under the tabletop.
IMG_8985.JPGIMG_8993.JPGIMG_8988.JPGIMG_9001.JPG

Doug
Do you have any more photos of the restoration? I picked up a 1200 at an auction in October and I'm a little intimidated about taking it apart. Were the bearings expensive?
 
OP
D

dwall174

Well-known member
Joined
Jun 1, 2012
Messages
453
Location
Southeast Michigan
Were the bearings expensive?
Total for the bearings was around $120
IMG_8879.JPG
The spindle's drive pulley assy. bearings were the largest & most expensive at about $25 ea, probably because they also have external snap-rings.

Do you have any more photos of the restoration?
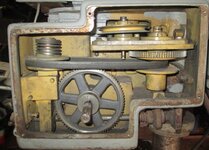
The upper spindle pulley & belt assembly had me a little puzzled, but eventually I figured it out. :rolleyes:

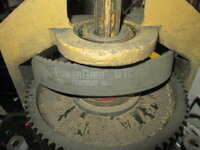
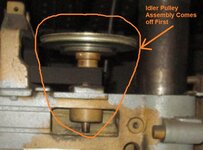
First you need to remove the two bolts holding the idler pulley assembly in-place & slide it forward a little, this will give you some room to get the toothed belt off of the large pulley.
IMG_8823.JPG
This will allow you to remove the idler pulley assembly from the belt.
Idler Pulley Assembly .jpg
The upper spindle drive pulley assembly needs to be removed as one unit.
Upper Bearing Assembly .jpg
There's a retaining snap-ring that positions the lower bearing almost flush with the top of the head casting.
IMG_8835.JPG
Knowing that the bearing had the retaining ring, it naturally had to be removed from the top!
I loosened & remove the return spring assembly, slid the pinion shaft out, and then removed the spindle & quill assembly. With the quill/spindle removed you can use a piece of wood/plastic about the size of the bearing & long enough to drive the bearing out of the head casting.
I used a small hydraulic jack & a piece of wood to push it out, but it's just a snug slip fit so a few taps of a hammer should work fine.

Doug
 
OP
D

dwall174

Well-known member
Joined
Jun 1, 2012
Messages
453
Location
Southeast Michigan
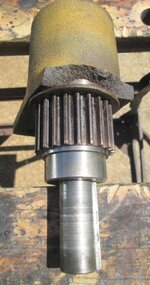
Trying to remove the toothed pulley from the idler pulley assembly was a "PITA"
There was no room behind the pulley to get a bearing separator onto, so I thought I could press the smaller lower shaft through the bearing housing a little to get enough room to get a bearing separator behind the pulley.

Well, that turned out to be a big mistake. :eek:
I ended up breaking off one of the side mounting tabs.
IMG_8837.JPG
It turns out that there was a small shoulder machined into the shaft on the smaller end & a hidden c-clip behind the toothed pulley.
IMG_8858.JPG
I ended up having to cut two slots into the sides of the pulley in order to get a bearing separator on it & pull it off.
IMG_8885.JPG

The break only affected a small part of the actual bearing area, so I welded it with some nickel welding rod.
IMG_8856.JPG IMG_8854.JPG

Doug
 
To avoid these ads, REGISTER NOW!
OP
D

dwall174

Well-known member
Joined
Jun 1, 2012
Messages
453
Location
Southeast Michigan
Thanks!
that's a criminal price.:pimp:
By getting it for what I paid for it, I figured it was worth putting some more $$ into it & rebuilding it.

I'm still up in the air on what I want to do with the power down-feed assembly, the damaged worm gears & other parts would run about $400 to replace.

For less than 1/2 that price I could probably come up with an electric version using a 12-volt gear motor. :unsure:
With all the mechanical drive parts removed, there's plenty of room inside the original power down-feed housing to mount a gearmotor.
IMG_8971.JPG
Here's a simple copy & paste idea of what I'm thinking about!
Electric Idea 1 .jpg
The only thing I would need to come up with is some kind of mechanical clutch system to engage/disengage the pulley/belt on the pivot shaft.

Doug
 

loganb

ALLIANCE MEMBER
Joined
Dec 29, 2011
Messages
5,587
Location
Omaha, NE
Awesome score and nice work on the restoration! Just picked up a 3 phase 1150 I'm in the process of adding a VFD too and the powerfeed option is about the only reason I'd probably get a different machine though for my mostly woodworking usage the feed mechanism isn't as useful.
 

Woods_Wanderer

Well-known member
Joined
May 31, 2020
Messages
174
Location
Virginia
Don't feel too bad about snapping that tab dwall, I snapped off the machined shoulder on the shaft of that exact same assembly last week pressing it apart in the wrong direction :confused:

Very nice work otherwise!

Edit: If you decide to junk the whole downfeed unit, lemme know and I'll buy it off you.
 
OP
D

dwall174

Well-known member
Joined
Jun 1, 2012
Messages
453
Location
Southeast Michigan
Awesome score and nice work on the restoration!
Thanks!

I'm a little intimidated about taking it apart.
The mechanical parts didn't worry me, but the VFD (programing) is somewhat intimidating to me. :headscrat
I'm hoping that the default programing is still set on the Baldor Drive that's standard on the 1200HD.
IMG_8751.JPGIMG_8754.JPG

Just picked up a 3 phase 1150 I'm in the process of adding a VFD too

I haven't finished the wiring yet since I'm also going to be adding a digital tachometer & modifying the front plate to mount the display.

I installed a hybrid VFD & a digital tachometer on an old 17" Delta DP-600 drill press!
However, there was no programing needed. :cool:
IMG_8437.JPGIMG_8416.JPG
The only required adjustments are to select the voltage & HP by setting the correct micro switch & switching a jumper wire for the voltage.
In my case the VFD came factory set for 240V & 1HP, so I didn't even need to adjust anything.

Doug
 
OP
D

dwall174

Well-known member
Joined
Jun 1, 2012
Messages
453
Location
Southeast Michigan
I snapped off the machined shoulder on the shaft of that exact same assembly last week pressing it apart in the wrong direction :confused:
It's pretty amazing how much pressure those little snap-rings can handle!
In my case it was probably about 5-tons.
IMG_6921.JPG
My Famco 3-1/2C is rated at 8-tons in the compound 4-to-1 setting, but I had it set in the normal 1-to- 1 ratio.
Very nice work otherwise!
Thanks!
Edit: If you decide to junk the whole downfeed unit, lemme know and I'll buy it off you.
I'll keep you in mind if I do!

Doug
 

jzucadi

New member
Joined
Oct 19, 2021
Messages
3
Here's a few more pictures of the upper spindle pulley & bearing support assembly.
IMG_8869.JPGIMG_8888.JPGIMG_8889.JPGIMG_8865.JPG

Doug
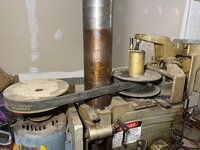
These photos are great, thank you for sharing. It seems that details on the 1200 are a little less common than the 1150. The 1200 is such a beast. I realize now that you have a 1200HD not an older 1200. Mine is a 1200 from the early 80s. When I finally got the top cover off I saw that this one did not use a rubber belt to drive the spindle. This one uses a chain, which I don't know enough to know if this was standard or a rarer option. It's the first bike chain I've seen in a 1200, but I don't have that much experience. Maybe this was common. I will be very careful taking this apart since I don't know how to weld and won't be able to repair things like you can. Thanks again for all the photos and details, even though the mechanism is different it is still helpful.

1200_1.jpg

1200_2.jpg
1200_3.jpg
 
OP
D

dwall174

Well-known member
Joined
Jun 1, 2012
Messages
453
Location
Southeast Michigan
I realize now that you have a 1200HD not an older 1200. Mine is a 1200 from the early 80s.
Judging by the first two numbers in the serial number, I think mine was made in 99
This one uses a chain, which I don't know enough to know if this was standard or a rarer option. It's the first bike chain I've seen in a 1200, but I don't have that much experience. Maybe this was common.
I have rebuilt about a dozen drill presses throughout the years & that's the first drill press period that I've seen with a chain drive!
The only other chain assembly I've seen on a drill press was on an old Delta DP-220 I rebuilt a few years ago. The chain assembly on that unit was connected to a big spring that fits inside the column & helps raise the head assembly.
IMG_0758.JPGIMG_0760.JPGIMG_0761.JPG

Doug
 
OP
D

dwall174

Well-known member
Joined
Jun 1, 2012
Messages
453
Location
Southeast Michigan
Besides the newer 1200HD models that use the toothed pulley & belt set-up, the only other two designs I've seen for the gold or yellow style 1200's are;
The reeves style variable speed drive.
Reeves Variable Speed Belt .jpg
And the step pulley style adjustable speed set-up.
Step Pulley Style .jpg

Both of those styles of the 1200's used the double v-belt/pulleys for the secondary (spindle) drive.

Doug
 

jzucadi

New member
Joined
Oct 19, 2021
Messages
3
Judging by the first two numbers in the serial number, I think mine was made in 99

I have rebuilt about a dozen drill presses throughout the years & that's the first drill press period that I've seen with a chain drive!
The only other chain assembly I've seen on a drill press was on an old Delta DP-220 I rebuilt a few years ago. The chain assembly on that unit was connected to a big spring that fits inside the column & helps raise the head assembly.
IMG_0758.JPGIMG_0760.JPGIMG_0761.JPG

Doug
I thought it was odd seeing a bike chain, glad to hear it is not common. I got this at a school auction and I wonder if the teacher did some modifications. The motor does not look original either. The chain is on a very large sprocket on the spindle, much large than the pulley that the original rubber belts rode. I think this allows this 1200 to go below 100 rpm which is amazing. I might not even need to use the vfd to slow it down much at all. I felt like I overpaid a bit but it is worth it just to find this bike chain drill press
 
OP
D

dwall174

Well-known member
Joined
Jun 1, 2012
Messages
453
Location
Southeast Michigan
The mechanical parts didn't worry me, but the VFD (programing) is somewhat intimidating to me. :headscrat
Being these VFD'S are new to me I've been researching them some more before I wired the drill press back up!

I was a little confused the by how the drill press was originally wired up with no disconnect or fuses, there was just a 30-Amp plug wired directly to the VFD?

From what I've read this is normal for a VFD since they have overload protection built into them.

When I got it & first plugged it in it didn't run & the VFD just showed STOP and then it would go into stand-by.
Looking over the wiring is when I noticed the potentiometer wires were all twisted together & broken off of the base of the potentiometer, only one wire was still connected to the potentiometer.

I temporally wired it up the way it was before with the new potentiometer just to make sure the VFD was still working ok.
It does run, but the speeds seem fairly low!

Being that I'm going to be adding a tachometer to the drill press I'll be able to get a better idea of the speed it's running at. Seeing that the original potentiometer was damaged & not working, I'm guessing that they may have just controlled the speed from the VFD'S keypad?

Doug
 
OP
D

dwall174

Well-known member
Joined
Jun 1, 2012
Messages
453
Location
Southeast Michigan
I temporally wired it up the way it was before with the new potentiometer just to make sure the VFD was still working ok.
It does run, but the speeds seem fairly low!
I was able to find an owner's manual on-line for the Baldor VFD & it showed how to reset the VFD to the factory settings.
I reset it & the drill press runs a little better, but it still seemed pretty low.

I tried to temporarily wire up the tach & it looks like I may have gotten a defective unit :sad: The digital display jumps all around & there seems to be letters in place of some of the numbers? I was able to get a reading of 59 RPM pretty consistently with the VFD set at 20hz. I also visually timed the light on the sensor & it was just about once a second which would work out to 60RPM.

Given this is pretty close to the 50RPM shown on the low range scale of the original front plate, I'm thinking that 20hz. is probably pretty close to the min. VFD setting. :unsure: Just to see if there was a big reduction in power/torque, I drilled several 7/8" holes in some 1/2" thick scrap stock at the 20hz. setting. To my surprise, there was no fluctuation in the VFD'S display & no bogging down or belt slipping. :cool:

Doug
 
Last edited:
OP
D

dwall174

Well-known member
Joined
Jun 1, 2012
Messages
453
Location
Southeast Michigan
Edit: If you decide to junk the whole downfeed unit, lemme know and I'll buy it off you.
Eventually I'll be converting the power down-feed over to an electric controlled system similar to what l described in post #17.
I'll be keeping the power-feed disconnect linkage, housing & outer cover, but the reeves drive pullies & upper bearing assembly I'll be selling if you're interested.
Pullies & Bearing Plate .jpg
Doug
 
To avoid these ads, REGISTER NOW!
Top Bottom