To avoid these ads, REGISTER NOW!

Project 66 Rustang

bigguns69

Well-known member
Joined
Aug 23, 2011
Messages
411
Location
Iowa
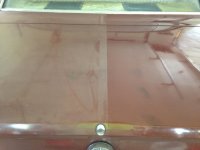
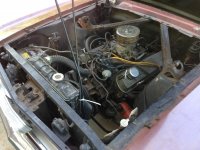
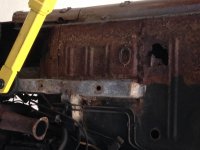
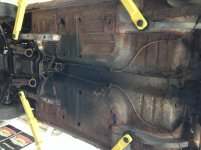
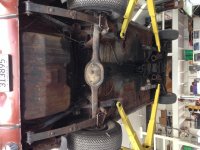
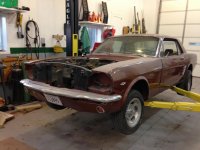
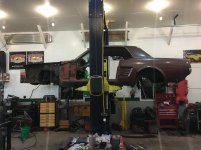
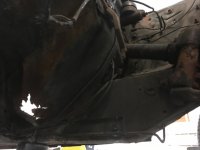
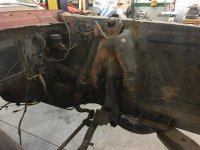
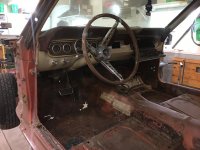
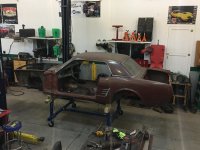
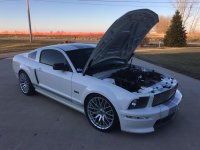
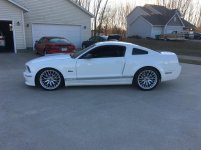
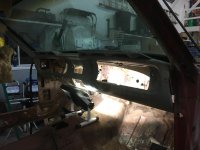
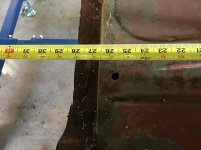
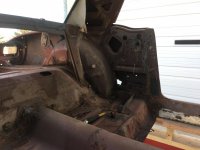
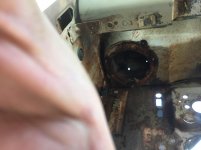
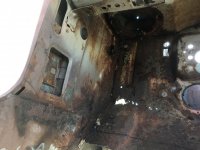
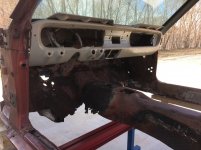
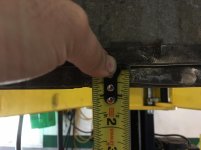
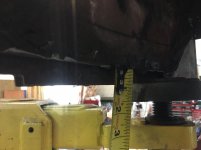
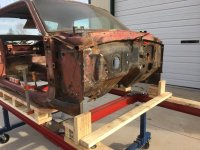
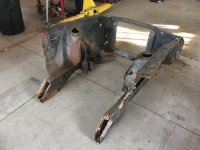
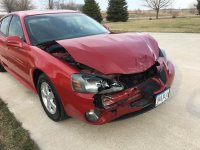
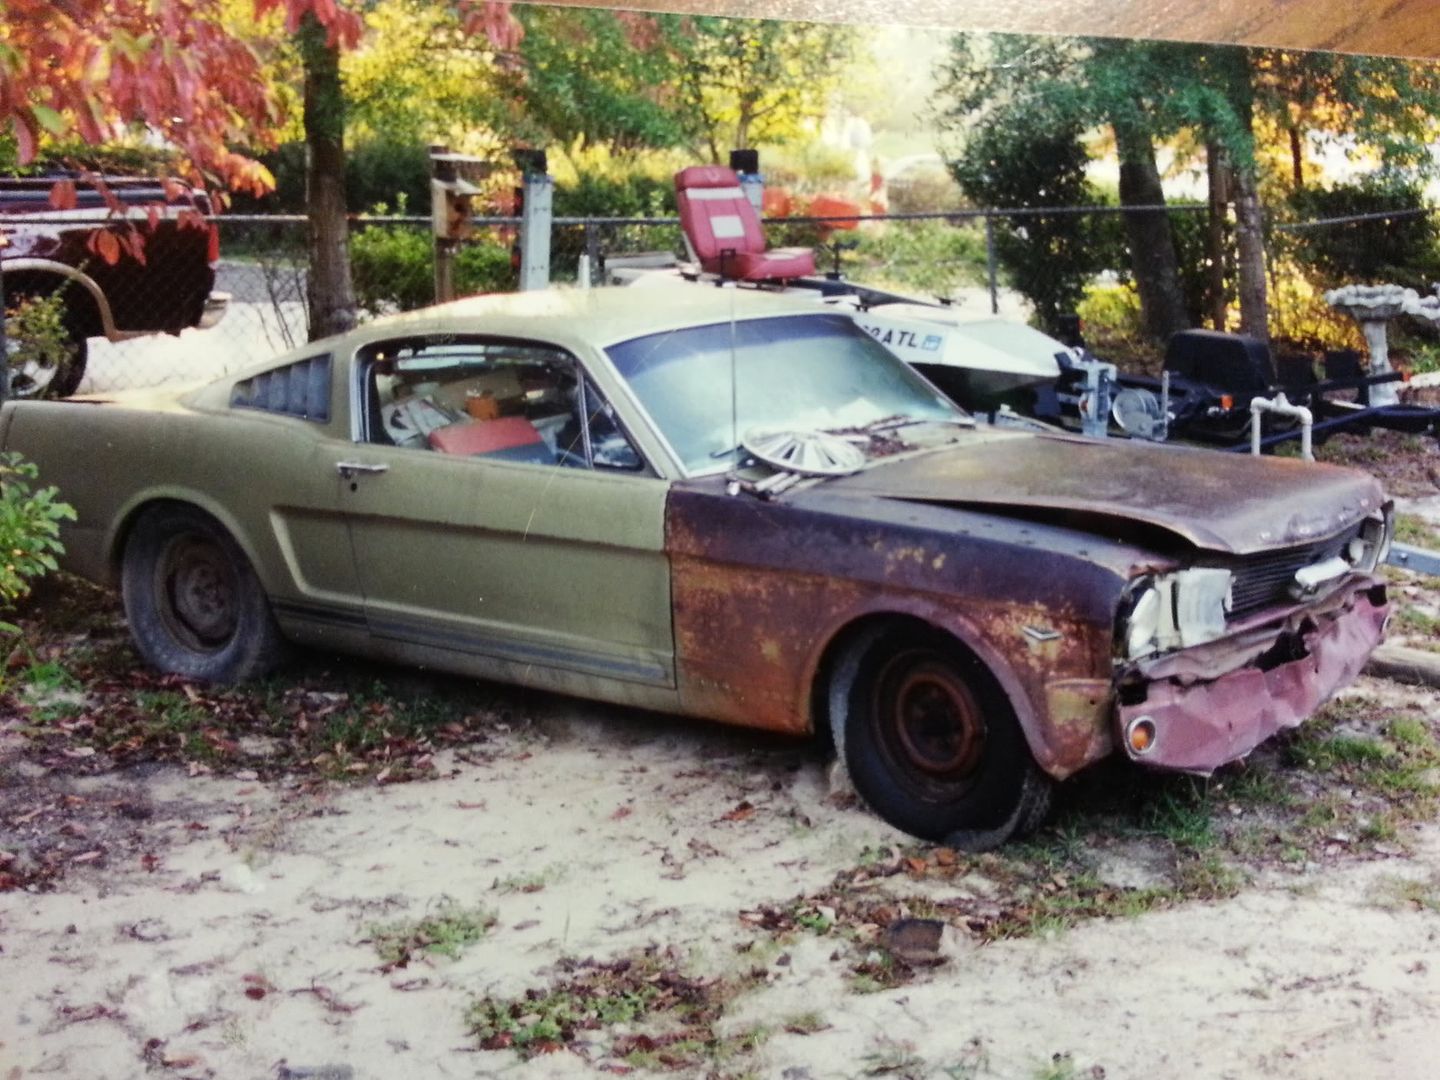
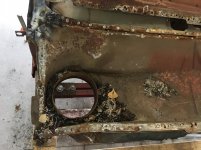
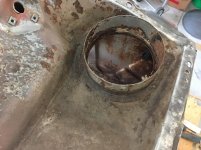
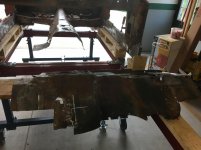
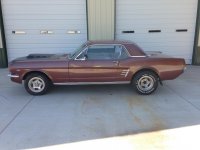
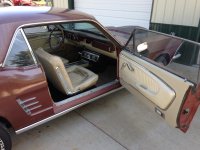
Project I have been working on for a while, decided to do a post for anyone interested. 1966 Mustang coupe, 289 2V with the C4 trans and was once a vinyl top car. I have affectionately named it the "Rustang" as it has a lot of it. Car is for my wife. Had the car for several years and am finally getting to it. This is just the start to many posts to come.

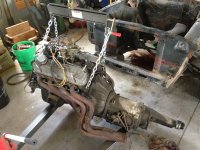
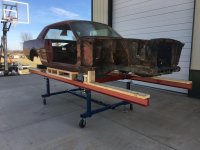
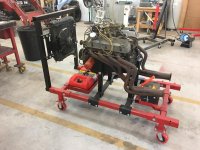
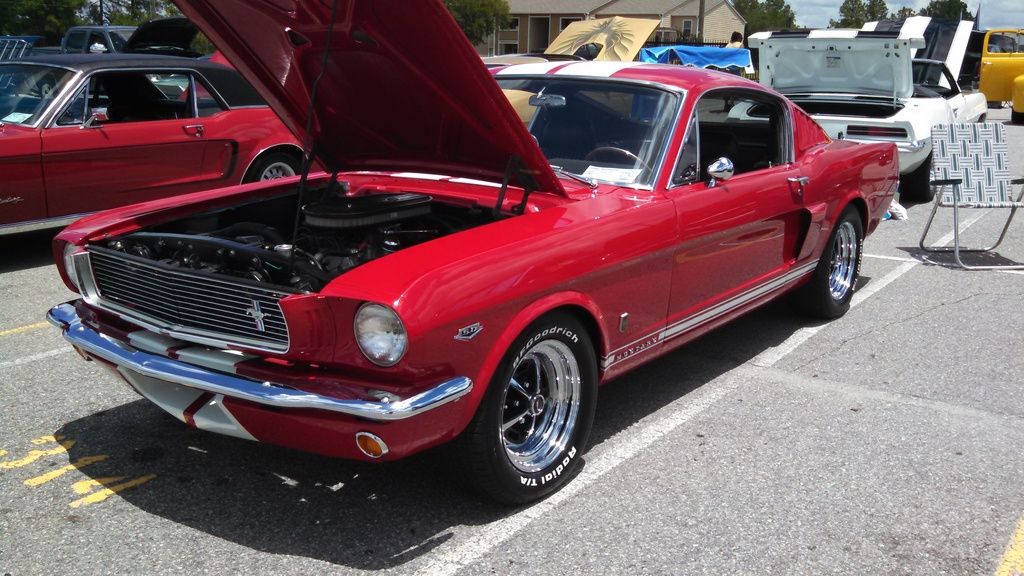
Thinking of either rebuilding the original 289 or may go with a newer Windsor based SBF with aluminum heads, cams, intake, carb, headers, gear drive and a 5-speed with an 8.8 rear out of a newer mustang. Planning on a mustang II front end so will have lots of room for engine options. Would like to get about 400 HP out of what ever I put in it. Might even put a mod motor in it, pretty fluid at this point.
 

Attachments

  • 1966 mustang 9-26-2015 (32).jpg
    1966 mustang 9-26-2015 (32).jpg
    138.9 KB · Views: 376
  • 1966 mustang 9-26-2015 (3).jpg
    1966 mustang 9-26-2015 (3).jpg
    141.4 KB · Views: 279
  • 1966 mustang 9-26-2015 (47).jpg
    1966 mustang 9-26-2015 (47).jpg
    139.7 KB · Views: 340
  • 1966 mustang 9-26-2015 (44).jpg
    1966 mustang 9-26-2015 (44).jpg
    143.6 KB · Views: 356
  • 1966 mustang 9-26-2015 (41).jpg
    1966 mustang 9-26-2015 (41).jpg
    142.3 KB · Views: 285
  • 1966 mustang 9-26-2015 (36).jpg
    1966 mustang 9-26-2015 (36).jpg
    139.1 KB · Views: 310
  • 1966 mustang 9-26-2015 (34).jpg
    1966 mustang 9-26-2015 (34).jpg
    140.2 KB · Views: 306
To avoid these ads, REGISTER NOW!
OP
B

bigguns69

Well-known member
Joined
Aug 23, 2011
Messages
411
Location
Iowa
A couple more pictures before start diving in. Got a new buffer so figured I would get a little practice with it. The old paint cleaned up pretty good after about 10 minutes of messing around. I've got this Dewalt large buffer and the smaller Porter Cable buffer and they are awesome. I will never do buff or polish by hand again.
 

Attachments

  • 1966 mustang 9-26-2015 (23).jpg
    1966 mustang 9-26-2015 (23).jpg
    152.7 KB · Views: 391
  • 1966 mustang 9-26-2015 (19).jpg
    1966 mustang 9-26-2015 (19).jpg
    137.3 KB · Views: 420
  • 1966 mustang 9-26-2015 (18).jpg
    1966 mustang 9-26-2015 (18).jpg
    139 KB · Views: 420
  • 1966 mustang 9-26-2015 (17).jpg
    1966 mustang 9-26-2015 (17).jpg
    136.8 KB · Views: 352
  • 1966 mustang 9-26-2015 (9).jpg
    1966 mustang 9-26-2015 (9).jpg
    141.7 KB · Views: 313
  • 1966 mustang 9-26-2015 (8).jpg
    1966 mustang 9-26-2015 (8).jpg
    141.6 KB · Views: 342

d.mcfarland

Well-known member
Joined
Jun 18, 2012
Messages
6,563
Location
Western PA
Honestly, even though its not as fun as other stuff, I'd get that body work done before I spend a dime on go fast parts.
 

Stooge

Well-known member
Joined
Mar 24, 2013
Messages
3,533
Location
South Shore, MA
Cool project! not much of a mustang guy but I have a soft spot for those first gen non fastbacks! Those ansen slots look great on there too!

Honestly, even though its not as fun as other stuff, I'd get that body work done before I spend a dime on go fast parts.

Agreed, unless you know your going to have to modify some aspect of the car to fit the new driveline, (firewall/ inner fender provisions, bigger trans tunnel) ...or come upon a great deal on something :lol:
 

SteveH-CO

Well-known member
Joined
Aug 29, 2014
Messages
283
Location
Southern Colorado
Neat project!

I had a convertible '66 but have toyed with resto-modding a hardtop and making a fairly high performance car out of it. I hope your inner rocker panels are solid. I have seen people put way too much money into their own rustbucket, instead of buying a more sound example to begin with.
 

whyNick?

Well-known member
Joined
Jul 10, 2013
Messages
1,016
Location
Midwest
Cool car but wow, Emberglo with a white vinyl top, snazzy. Still it's a better color combo than my first car, a 66 coupe that was Springtime Yellow (kind of a light yellow) with a black vinyl top. :pimpflash

My advice on the motor is to go with a stroker small block and standalone EFI. Simple, powerful, and doesn't necessitate cutting up the car to make it happen.
 

JamesW

Active member
Joined
Apr 8, 2013
Messages
42
Great project. I've has the same ongoing project for 18 years now

Lightposts.jpg
 

kabinenroller

Well-known member
Joined
Sep 14, 2013
Messages
895
Location
S.E. Wisconsin USA
Are you sure about using a Mustang II front suspension? The design of that system puts the vehicles weight on the frame rails instead of the shock towers.
( Where it was designed to be) Being that the frame rails are just stamped steel and are tied into the floor pan with spot welds and the torque boxes there is not that much strength unless you run down tubes from the cowl and install sub frame connectors. I researched this quite a bit and decided to use a strut style suspension from Gateway Performance Suspension. I can still use the factory lower control arms, steering, strut rods, and motor mounts. With the Mustang II you have to convert to a rack and pinion and use side mounted engine mounts.
With the strut suspension you can trim the shock towers back to fit just about any big block you desire.
Just my opinion.
Jim
 
OP
B

bigguns69

Well-known member
Joined
Aug 23, 2011
Messages
411
Location
Iowa
I am way deep into this project, just catching up with a posting to show progress for others that may be doing something like this or would like to try. When done this car will have about 40% new sheet metal and an incorporated rectangular tube frame, four wheel disc brakes. This car won't be close to factory. I am amazed, being an engineer working on construction and ag equipment for 20 plus years, as to how poorly these cars were built.
 

SteveH-CO

Well-known member
Joined
Aug 29, 2014
Messages
283
Location
Southern Colorado
I am amazed, being an engineer working on construction and ag equipment for 20 plus years, as to how poorly these cars were built.

I concluded they were the Dodge Omni of their day - designed to be traded in after a few years. My '66 convertible drained the water from the cloth roof into a gutter in the trunk that then drained into the back of the rocker panels. Built-in rust engineering!
 

jayz66ragtop

Well-known member
Joined
Sep 11, 2009
Messages
1,521
Location
SoCal
I can still use the factory lower control arms, steering, strut rods, and motor mounts. With the Mustang II you have to convert to a rack and pinion and use side mounted engine mounts.
With the strut suspension you can trim the shock towers back to fit just about any big block you desire.
Just my opinion.
Jim

Not trying to start a fight or anything but I've been researching this for well over 15 years and the bold part isn't that great either. The stock steering leaves a LOT to be desired in the feel and maintenance arena, the lower arms are mounted too high for anything performance related, and on and on. Unless you replace everything you are compromising somewhere and that's what the stock stuff is as well.

Keep in mind the stock suspension was designed around two things, a somewhat different vehicle in the first place (Falcon) and second the expectation was an IRS. There is a lot you can do with the stock or nearly stock parts to make them handle better, just ask some of the vintage racing guys.

For all out replacement GR350, if you don't know what that is Google it. Otherwise it's just a compromise somewhere.

For all of this above, other than lower springs and a few other little things all of mine have remained stock or near stock components.
 
OP
B

bigguns69

Well-known member
Joined
Aug 23, 2011
Messages
411
Location
Iowa
More pictures showing rust underneath. The car ran before I tore into it. Love the open headers. The floor pans are shot, the cowl is the leakage source for that rust. The rear part of the floor pan and frame rails seam fairly solid but has lots of surface rust so that is still to be determined.
 

Attachments

  • IMG_4424.jpg
    IMG_4424.jpg
    138.3 KB · Views: 332
  • IMG_4419.jpg
    IMG_4419.jpg
    146.1 KB · Views: 366
  • IMG_4418.jpg
    IMG_4418.jpg
    147.8 KB · Views: 390
  • IMG_4406.jpg
    IMG_4406.jpg
    133 KB · Views: 376
  • IMG_4402.jpg
    IMG_4402.jpg
    139 KB · Views: 401
  • IMG_4399.jpg
    IMG_4399.jpg
    141.4 KB · Views: 377
  • IMG_4386.jpg
    IMG_4386.jpg
    136.1 KB · Views: 356
OP
B

bigguns69

Well-known member
Joined
Aug 23, 2011
Messages
411
Location
Iowa
More pictures of interior view of floor pans showing rust. The shock towers also were broke from fatigue. Someone tried to fix them in the past and booger welded them with a stick welder, looks like. With the shock towers needing to be replaced, that was the turning point to going with and aftermarket Mustang II front end kit. Also, with all the suspension and drive train out, I determined that I needed a body cart to move the shell around and free up my lift for other things.
 

Attachments

  • IMG_5612.jpg
    IMG_5612.jpg
    138.1 KB · Views: 275
  • IMG_5603.jpg
    IMG_5603.jpg
    123.5 KB · Views: 270
  • IMG_5587.jpg
    IMG_5587.jpg
    128.2 KB · Views: 286
  • IMG_5576.jpg
    IMG_5576.jpg
    136.3 KB · Views: 281
  • IMG_4429.jpg
    IMG_4429.jpg
    147.3 KB · Views: 310
  • IMG_4428.jpg
    IMG_4428.jpg
    134.8 KB · Views: 301
  • IMG_4427.jpg
    IMG_4427.jpg
    132.3 KB · Views: 286

dontlifttoshift

Well-known member
Joined
Mar 19, 2015
Messages
185
Location
Beach Park, IL
The best part about early Mustangs is that you can buy _everything_ for them. It's weird that they removed the vinyl top but left the trim on.

I have a pair of coupes in various states of disrepair, I prefer them to the fastback.
 
OP
B

bigguns69

Well-known member
Joined
Aug 23, 2011
Messages
411
Location
Iowa
Decided to build a body cart to move the Rustang around. I like to put things on wheels so everything is mobile in my shop. Copied one that I found on the internet that I liked. Turned out pretty good. Did some quick calculations to size some steel, psi not lbs. in the notes, and got casters and stomp brakes from amazon. Have about $250 in it minus my labor.
 

Attachments

  • IMG_5652.jpg
    IMG_5652.jpg
    141.7 KB · Views: 199
  • IMG_5649.jpg
    IMG_5649.jpg
    137.6 KB · Views: 186
  • IMG_5648.jpg
    IMG_5648.jpg
    137.5 KB · Views: 210
  • IMG_5646.jpg
    IMG_5646.jpg
    135.7 KB · Views: 177
  • IMG_5645.jpg
    IMG_5645.jpg
    132.6 KB · Views: 189
  • IMG_5644.jpg
    IMG_5644.jpg
    135.6 KB · Views: 206
  • IMG_5647.jpg
    IMG_5647.jpg
    135.8 KB · Views: 266
OP
B

bigguns69

Well-known member
Joined
Aug 23, 2011
Messages
411
Location
Iowa
So realizing the whole front frame and firewall needed to come out, I need a frame jig of some nature cause this thing is coming apart, big time. Pinch welds on the rockers will be my reference point so I came up with a frame jig that mounts to the cart. Used 4" channel with a 3/4 spacer then built some new legs for the cart to mount the channel frame to it. When I move this around in the shop, I level it then start welding. In the tear down mode, I don't worry much about being level.

I build this frame jig at this stage because I needed to capture certain dimensions so that I could start figuring out how I was going to get a new front frame under this thing in the future. There are a lot of factory dimension drawings out there but none referenced the rockers which seemed to be the only good reference point.
 

Attachments

  • IMG_5849.jpg
    IMG_5849.jpg
    141.3 KB · Views: 233
  • IMG_5844.jpg
    IMG_5844.jpg
    141.6 KB · Views: 231
  • IMG_5845.jpg
    IMG_5845.jpg
    139.5 KB · Views: 253
  • IMG_5778.jpg
    IMG_5778.jpg
    129.2 KB · Views: 206
  • IMG_5777.jpg
    IMG_5777.jpg
    136.5 KB · Views: 213
  • IMG_5773.jpg
    IMG_5773.jpg
    138.8 KB · Views: 223
  • IMG_5772.jpg
    IMG_5772.jpg
    136.7 KB · Views: 239
To avoid these ads, REGISTER NOW!
OP
B

bigguns69

Well-known member
Joined
Aug 23, 2011
Messages
411
Location
Iowa
So in my quest for putting things on wheels no matter what state of operation, I thought it was time to build an engine run stand for the future. Once again, did a copy of one I found on the internet. Structure is mostly 2 x 2 square tubing with some 2.5 x 2.5 for the sliders. Used a Spall electric fan set up with the old Rustang radiator. Created a frame work for a john-boat fuel tank and a battery for starting. Still need to get a gage set, throttle level, few switches, and other things. Let the finish work go for later on the run stand. At least the engine is on wheels.
 

Attachments

  • IMG_5580.jpg
    IMG_5580.jpg
    141.9 KB · Views: 232
  • IMG_5579.jpg
    IMG_5579.jpg
    136.2 KB · Views: 210
  • IMG_5578.jpg
    IMG_5578.jpg
    142.3 KB · Views: 232
  • IMG_5577.jpg
    IMG_5577.jpg
    142.9 KB · Views: 281
OP
B

bigguns69

Well-known member
Joined
Aug 23, 2011
Messages
411
Location
Iowa
A whole other topic. Pictures of my former Mustang, now my sons, a 2004 sonic blue GT with a 4.6L 2V and 5 speed. I sold it to my son after me and my wife bought a 2015 Mustang GT a while back. My son put a Paxton super charger system together with used pieces from the internet. Took the car to the Rest-o-mod shop in Missouri to get it tuned. Car is stock block with exhaust manifolds, larger injectors, bigger flow rate fuel pump and magna-flo exhaust.

The first tune session ended up as a dud. The clutch was good for about 300 hp, 300 lb-ft. torque. Pulled it home and over several months of my son driving it easy around home he finally replaced the clutch and fixed a few other things. He drove it down for a final tune a month ago. Managed to get 400 hp, 400 lb-ft. of torque at the wheels at 5,500 rpm with 9 psi of boost. He took the cats out of the exhaust and put in a aftermarket X pipe. It is loud and sounds pretty sweet.

The car is a "Sandy" salvage, 2 owner car, had never been in an accident but had gotten wet. Bought it cheap, cleaned it up and it's been running great for the 4 plus years it's been in the family. Got 70K miles now. I can't drive it now, I'll loose my license with it. The exhaust note just screams at you. It's a blast....
 

Attachments

  • IMG_5436.jpg
    IMG_5436.jpg
    148.2 KB · Views: 141
  • IMG_5417.jpg
    IMG_5417.jpg
    137.7 KB · Views: 132
  • IMG_5420.jpg
    IMG_5420.jpg
    140.9 KB · Views: 147
  • IMG_4569.jpg
    IMG_4569.jpg
    142.1 KB · Views: 178

ambenz

Well-known member
Joined
Dec 12, 2010
Messages
4,236
Location
NW Chicago Suburbs
COOL Thread! Scribed!
You sure sound like you know what your doing.
I never wrenched too much on my rides to boost them up.
Ya see a lot of weekend warriors trash there Mustangs learning the hard way.
It nice to see someone at least been there, done that before and has the resources to make it happen.
In the end a happy wife has to be the goal....makes life a lot easier.
 
OP
B

bigguns69

Well-known member
Joined
Aug 23, 2011
Messages
411
Location
Iowa
One more side bar before get back to rust and mayhem. My son was working in the detail shop at the local Chevy dealer ship and he rolled home with this 2007 Shelby Mustang that got traded in a few months ago. It has a 4.6L 3V motor, supercharged, cams, with a 6 speed. Supposedly put out about 500hp to the wheels. Took for a quick ride around the country block. Quickest street car I have ever been in. Never been in a car that would blow the tires out from underneath it at 90 mph. Had to be very careful in second and third gear. This thing was mean as hell. If I didn't have the 2015 gt, I might own this. No way was he getting this.
 

Attachments

  • IMG_5657.jpg
    IMG_5657.jpg
    142.6 KB · Views: 121
  • IMG_5656.jpg
    IMG_5656.jpg
    142.4 KB · Views: 121
  • IMG_5654.jpg
    IMG_5654.jpg
    135.7 KB · Views: 141
  • IMG_5653.jpg
    IMG_5653.jpg
    145.6 KB · Views: 124
OP
B

bigguns69

Well-known member
Joined
Aug 23, 2011
Messages
411
Location
Iowa
Back to controlled deconstruction. Capturing dimensions for seat pan location before I cut them out. Floor is shot forward of the front leaf spring mounts. Trying to save the tunnel as it is mostly good, a little patch work will bring it back to life.

There is evidence this car has been in an accident. Left frame rail has some repair work done to it. Passenger side inner apron to fire wall has some odd bends and some brazing work done to it. Also noticed the crinkle in the tunnel right at the corner of the seat pan shown in the one picture.

Cut the seat pans out, they are about 14 ga. material and do add some structure to the car. Also, the factory never primed or painted the captured cavity, minus any over spray that might get in there via the seat mount access holes. This car was designed to rust. Truly a poor design.
 

Attachments

  • IMG_5713.jpg
    IMG_5713.jpg
    132.8 KB · Views: 184
  • IMG_5676.jpg
    IMG_5676.jpg
    140.4 KB · Views: 201
  • IMG_5675.jpg
    IMG_5675.jpg
    131.7 KB · Views: 178
  • IMG_5671.jpg
    IMG_5671.jpg
    145.4 KB · Views: 180
  • IMG_5669.jpg
    IMG_5669.jpg
    137.3 KB · Views: 185
  • IMG_5673.jpg
    IMG_5673.jpg
    138.4 KB · Views: 201
  • IMG_5666.jpg
    IMG_5666.jpg
    142.9 KB · Views: 220
OP
B

bigguns69

Well-known member
Joined
Aug 23, 2011
Messages
411
Location
Iowa
More general rust pictures. Showing main floors cut out, the underside looking up under the dash showing the rust on the inner cowl, inner rocker and the heavy rust scale in the rear. Mother nature has been kicking this cars **** for a while.
 

Attachments

  • IMG_5874.jpg
    IMG_5874.jpg
    141.4 KB · Views: 174
  • IMG_5871.jpg
    IMG_5871.jpg
    139 KB · Views: 190
  • IMG_5869.jpg
    IMG_5869.jpg
    137 KB · Views: 175
  • IMG_5867.jpg
    IMG_5867.jpg
    135.5 KB · Views: 171
  • IMG_5854.jpg
    IMG_5854.jpg
    125.4 KB · Views: 177
  • IMG_5855.jpg
    IMG_5855.jpg
    143.4 KB · Views: 185
  • IMG_5853.jpg
    IMG_5853.jpg
    141.7 KB · Views: 197

1949 caddyman

Well-known member
Joined
Oct 5, 2010
Messages
1,778
Location
Arizona
Subscribed, you are a brave man taking on this rebuild. I'm so glad I live is the dry SW desert area with little rust.
 

d.mcfarland

Well-known member
Joined
Jun 18, 2012
Messages
6,563
Location
Western PA
Is this really a current project or is this more of a picture thread of an already completed project.

The timeline just doesn't add up.

You're moving faster than the A team on Overhaulin'.
 
OP
B

bigguns69

Well-known member
Joined
Aug 23, 2011
Messages
411
Location
Iowa
Capturing dimensions for future reference for floor pan depth and apron panels to firewall. You can kind of see the bent sheet metal on the passenger side apron to fire wall attachment point. Sorry about a few of the pictures, they rotate when I upload them for some reason.
 

Attachments

  • IMG_5850.jpg
    IMG_5850.jpg
    143.3 KB · Views: 155
  • IMG_5848.jpg
    IMG_5848.jpg
    144.6 KB · Views: 148
  • IMG_5830.jpg
    IMG_5830.jpg
    127.9 KB · Views: 129
  • IMG_5828.jpg
    IMG_5828.jpg
    124.4 KB · Views: 124
  • IMG_5827.jpg
    IMG_5827.jpg
    129.6 KB · Views: 127
  • IMG_5826.jpg
    IMG_5826.jpg
    129.3 KB · Views: 131
  • IMG_5825.jpg
    IMG_5825.jpg
    128.6 KB · Views: 138
OP
B

bigguns69

Well-known member
Joined
Aug 23, 2011
Messages
411
Location
Iowa
Grabbed some more dimensions for the front end frame height from the rockers, length from front of rocker extensions, then cut it off.

The car had been in an accident, the repair work is obvious. What wasn't so obvious was that the front frame, passenger side was about 3/4" higher than the drive side and the front end tub was out of square by about 3/4" as well. The whole front sheet metal weighs about 120 lbs.

The open structure, spot welded frame members have about no torsional rigidity and the car did not have torque box sheet metal connecting the front frame to the rockers. I am amazed this car did not buckle in at the firewall. The brazing repair work was a ****** to get apart. Had to beat on it a while with chisel and hammer.
 

Attachments

  • IMG_5897.jpg
    IMG_5897.jpg
    132.8 KB · Views: 163
  • IMG_5899.jpg
    IMG_5899.jpg
    129.7 KB · Views: 168
  • IMG_5898.jpg
    IMG_5898.jpg
    130.5 KB · Views: 178
  • IMG_5881.jpg
    IMG_5881.jpg
    144.6 KB · Views: 181
  • IMG_5878.jpg
    IMG_5878.jpg
    143 KB · Views: 194
  • IMG_5831.jpg
    IMG_5831.jpg
    144.7 KB · Views: 177
  • IMG_5882.jpg
    IMG_5882.jpg
    142.1 KB · Views: 196
OP
B

bigguns69

Well-known member
Joined
Aug 23, 2011
Messages
411
Location
Iowa
Front end off. Saving for reference for later. I will build my own 2x3 tube frame with new apron panels and mustang II cross member.
 

Attachments

  • IMG_5886.jpg
    IMG_5886.jpg
    143.5 KB · Views: 115
  • IMG_5885.jpg
    IMG_5885.jpg
    141 KB · Views: 119
  • IMG_5891.jpg
    IMG_5891.jpg
    143.4 KB · Views: 126
  • IMG_5890.jpg
    IMG_5890.jpg
    140.6 KB · Views: 123
  • IMG_5889.jpg
    IMG_5889.jpg
    141.3 KB · Views: 126
  • IMG_5888.jpg
    IMG_5888.jpg
    141.7 KB · Views: 132
OP
B

bigguns69

Well-known member
Joined
Aug 23, 2011
Messages
411
Location
Iowa
My kids have been hard on vehicles this spring. Daughter backed into my sons beater truck, backing out of the driveway going to school. My son borrowed my Pontiac work car to go to classes at community college, since his Mustang was in pieces, and lost against a f350 receiver hitch. This is cutting into my Rustang time.......... We've had good luck up to this point. No injuries other than pride and insurance premiums.
 

Attachments

  • IMG_5915.jpg
    IMG_5915.jpg
    145.6 KB · Views: 129
  • IMG_5913.jpg
    IMG_5913.jpg
    145.9 KB · Views: 122
  • IMG_5796.jpg
    IMG_5796.jpg
    145.2 KB · Views: 126
  • IMG_5792.jpg
    IMG_5792.jpg
    146.6 KB · Views: 124

ScottsGT

Well-known member
Joined
Jan 1, 2014
Messages
4,883
Location
Lake Wateree, SC
Great project! I started one back in '99. Hence my screen name, it's a '66 GT Fastback. I too had to replace about 70% of the sheet metal to include the cowl panel, installed a Rod & Custom Motorsports MII coil over fromt and rear suspension, T-5z, 302 with 10:1 compression, Trick Flow heads, balanced, EZ-EFI fuel injection to name a few things. The previous owner used it as a truck. Took lots of work to fix the metal I did keep.
Did the interior myself with TMI Sport seats and Pony door panels.
At this time, I'm needing to tear into the rearend since it was the only used item I bought, and I was sold a POS at a swap meet. Converting the old Versailles discs over to SN95 Mustang discs and getting a new center section.
Another issue is the rear four link system. It's built with Heim joints on the top control arms that have zero vibration isolation. All axle noise transmits into the body and turns it into a tuning fork creating all kinds of harmonics inside the car. Working on that issue too.
I'd post photos, but photobucket doesn't like my iPad.

Well this took about ten minutes to copy from PB.
20130917_155112_zpsad57f071.jpg


Current condition....
IMG_20150530_131348_204_zps7yru2vxu.jpg
 
Last edited:
OP
B

bigguns69

Well-known member
Joined
Aug 23, 2011
Messages
411
Location
Iowa
ScottsGT

A lot of hard work, love, dedication brought that car together. Looks sweet.
 
OP
B

bigguns69

Well-known member
Joined
Aug 23, 2011
Messages
411
Location
Iowa
Have not posted in a while. Pictures showing the removal of the inner and outer cowl. One of the problem areas of the old mustangs. Found a few treasures from critters in between the cowl panels. 126 spot welds to drill out and tools of the trade to get it done. The vent ring to lower panel joint rusts out over time then water leaks into the passenger compartment then rusty floor pans and fire wall ensue.
 

Attachments

  • IMG_6034.jpg
    IMG_6034.jpg
    143.6 KB · Views: 166
  • IMG_6033.jpg
    IMG_6033.jpg
    144.2 KB · Views: 163
  • IMG_6004.jpg
    IMG_6004.jpg
    143.6 KB · Views: 165
  • IMG_6003.jpg
    IMG_6003.jpg
    144.7 KB · Views: 166
  • IMG_5985.jpg
    IMG_5985.jpg
    140.8 KB · Views: 168
  • IMG_5999.jpg
    IMG_5999.jpg
    143.2 KB · Views: 173
OP
B

bigguns69

Well-known member
Joined
Aug 23, 2011
Messages
411
Location
Iowa
Few more cowl pictures.
 

Attachments

  • IMG_6005.jpg
    IMG_6005.jpg
    142.4 KB · Views: 110
  • IMG_6006.jpg
    IMG_6006.jpg
    142.3 KB · Views: 100
  • IMG_6009.jpg
    IMG_6009.jpg
    142.9 KB · Views: 107
  • IMG_6010.jpg
    IMG_6010.jpg
    142.5 KB · Views: 96
OP
B

bigguns69

Well-known member
Joined
Aug 23, 2011
Messages
411
Location
Iowa
Pictures of firewall removal. Used a cutoff wheel on a grinder to remove.
 

Attachments

  • IMG_6301.jpg
    IMG_6301.jpg
    140.4 KB · Views: 112
  • IMG_6300.jpg
    IMG_6300.jpg
    135.9 KB · Views: 115
  • IMG_6299.jpg
    IMG_6299.jpg
    135.5 KB · Views: 112
  • IMG_6298.jpg
    IMG_6298.jpg
    139.9 KB · Views: 130
OP
B

bigguns69

Well-known member
Joined
Aug 23, 2011
Messages
411
Location
Iowa
Parts, lots of them from CJ Pony parts. One nice thing about Mustangs, most all the parts are readily available and reasonably priced. What you see is about $1,800 in new sheet metal.
 

Attachments

  • IMG_5225.jpg
    IMG_5225.jpg
    134 KB · Views: 112
  • IMG_5226.jpg
    IMG_5226.jpg
    134 KB · Views: 117
  • IMG_5229.jpg
    IMG_5229.jpg
    132.8 KB · Views: 113
  • IMG_5230.jpg
    IMG_5230.jpg
    139.8 KB · Views: 172
To avoid these ads, REGISTER NOW!
Top Bottom