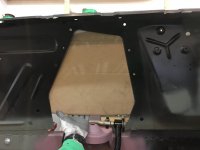
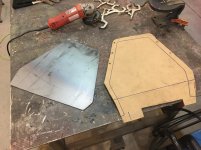
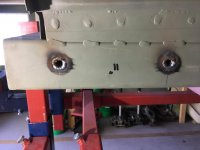
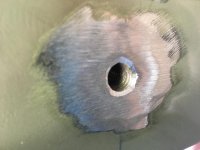
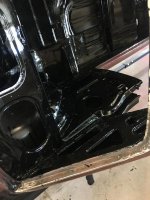
Been a while since I have posted anything. With the shock/spring towers gone and the Mustang II front suspension in place, I need to fill in where the space with some panels. Did a little "CAD" cardboard aided design and traced out a set. I used 11 gauge=.13" thick material cause that's what I had laying around. This is the result. The sides are symmetrical so just one pattern needed.

You are using an out of date browser. It may not display this or other websites correctly.
You should upgrade or use an alternative browser.
You should upgrade or use an alternative browser.
Project 66 Rustang
- Thread starter bigguns69
- Start date


MP&C
Well-known member
Nice!
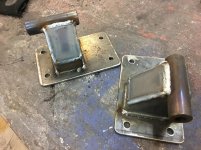
Made engine mounts for SBF engine that bolt onto the frame cross member. Welded in some round tubes for the front bumper side support brackets so that the rectangular tubing doesn't crush when the bolts are tightened with through bolts.
Attachments


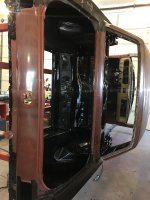
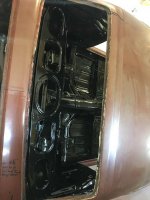
Finished off wire brushing the rust off the interior metal sub structure of the car and gave it a good coat of POR-15. Lots of cracks and crevices to get into.
With winter setting in, did a little clean up of the sheet metal that I had taken off the car. I laid things out and took a couple of pictures to showcase the amount of metal that has been replaced.
Might have been smarter to build the car 100% with new sheet metal and then just transfer the VIN tag. I guess I will know better for next time.
Attachments


C_F
ALLIANCE MEMBER
With all that POR-15 on there, the body of that car may last another 300 years! 
Looking good!
Looking good!
tlmartin84
Well-known member
Time for front suspension install. I purchased a generic Mustang II kit off e-bay for cheap. Went with a traditional coil spring/hat arrangement since its was the cheaper way to go. I think if I were to do it again I would probably go with the coil overs and pay the extra money. Seems like the install would be a little easier. The kit did not come with any instructions so went to the inter-web and looked at bunch of videos and instructions from other vendors to get an idea for placement of cross member and upper hat mount. Realized that this was going to become a big layout project.
Since I had cut the complete front end off the car off but kept it intact, I built a quick cart for it. I mounted the old suspension to it to get a reference for spindle placement in reference to the front rail. The front rail and the tops of the frame rails were what I used to create my new home built frame placement for this car. Most all kits with instructions use holes in the factory frame rails to guide placement of parts. Since I had non of that, I wanted to have the old components together for compare and contrast for layout.
24 1/4" is the distance that I need for the spindle centerline in the middle of the operating range of the suspension to the front rail. Started laying out the cross member then put the driver side hat and suspension together and did a visual. I did not like the geometry of how the coil spring sat in relation with the hat and the bottom "A" arm. The spring looked like it could possibly roll out through it's operation range Had extreme positive camber at the spindle so need to do some jockeying of parts to get a neutral to slight negative camber.
Caster was also lacking with the spring hat centered to the cross member. The kit is designed that way so need to modify the parts to get more caster too.
Goal is to get the suspension to have a range of 0-1 degree of negative camber, (bottom of tire tilted to outside of car) and 0-5 degrees of positive caster, (bottom of spindle pivot line pointed forward. Parts will get modified to make this happen.
Having a good layout method, digital levels, strings and some good ole high school trigonometry is important to get this right. Fortunately I have built several suspensions for combines and construction equipment, so this activity is comparable.
Are all of these kits the same, as in ball joints, control arm lengths and widths, etc? Can you go to napa and get a ball joint? Or are you stuck going back to the ebay retailer?
For all the basic Mustang II kits, most of the ball joint ends are the same. I see several options to replace, buying from Summit. Several options for control arm bushings too or can make my own with some UHMW plastic rod.
larry4406
Well-known member
Any update on this?
I haven't done **** with the ole rust bucket. It's ready to get all the doors, lids, fenders, axles and wheels on it for finish body work. Hopefully over Christmas I can get some progress made. The project is lingering. I don't know whether to rebuild the 289W that came in it with an Edelbrock top end kit or find a 351W and do the same. Wanting about 400 hp out of what ever engine I put in it
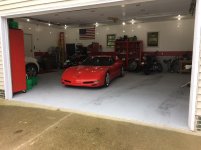
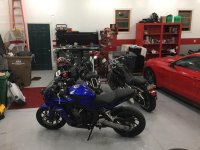
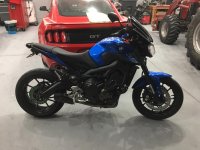
Life got in the way. Finally finished the garage this summer, built a few dog houses, a covering for over the walk out of the basement. Both kids in college, full time manager job, occasional farming with my dad. Hernia surgery in the spring. Fun times.
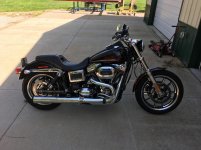
I also got back into motorcycles, like big time. I own four of them now. I discovered COPARTS and am now getting into rebuilding motorcycles for fun. I can make some decent side coin, but I have to sell them first. I so badly want to do a wrecked car, but I must wait.
Life got in the way. Finally finished the garage this summer, built a few dog houses, a covering for over the walk out of the basement. Both kids in college, full time manager job, occasional farming with my dad. Hernia surgery in the spring. Fun times.
I also got back into motorcycles, like big time. I own four of them now. I discovered COPARTS and am now getting into rebuilding motorcycles for fun. I can make some decent side coin, but I have to sell them first. I so badly want to do a wrecked car, but I must wait.
Attachments


larry4406
Well-known member
I haven't done **** with the ole rust bucket. It's ready to get all the doors, lids, fenders, axles and wheels on it for finish body work. Hopefully over Christmas I can get some progress made. The project is lingering. I don't know whether to rebuild the 289W that came in it with an Edelbrock top end kit or find a 351W and do the same. Wanting about 400 hp out of what ever engine I put in it
Life got in the way. Finally finished the garage this summer, built a few dog houses, a covering for over the walk out of the basement. Both kids in college, full time manager job, occasional farming with my dad. Hernia surgery in the spring. Fun times.
I also got back into motorcycles, like big time. I own four of them now. I discovered COPARTS and am now getting into rebuilding motorcycles for fun. I can make some decent side coin, but I have to sell them first. I so badly want to do a wrecked car, but I must wait.
I fully understand... Chased the link you posted regarding engine test stands and read back thru this thread.
Work interferes with my personnel life.